使用nodejs编写api接口并部署到服务器上
Posted 直争朝夕
tags:
篇首语:本文由小常识网(cha138.com)小编为大家整理,主要介绍了使用nodejs编写api接口并部署到服务器上相关的知识,希望对你有一定的参考价值。
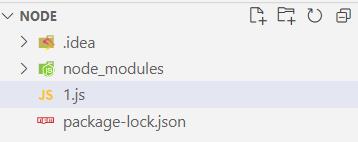
1、安装node环境,没有就去看上一篇文章 2、创建一个node项目, 新建一个目录文件,例node_proxy 3、在新建的node项目执行npm init, 文件会生成一个package.json的文件 目录:
1.js里编写
const express = require(\'express\');
const app = express();
const os = require(\'os\');
app.use(express.static("./"));
app.post(\'/ms/coupon/template/pageList\', function (req, res)
    res.setHeader(\'Content-Type\', \'text/plain;charset=utf8\');
    res.end(JSON.stringify(
        code: 0,
        data:
            list:[

                    couponTemplateId: 1,
                    couponName: \'小布丁代金券\',

            ],
            pageIndex: 1,
            pageSize: 10,
            total: 3
        ,
        msg: \'success\',
        success: true
    ))
)
// 添加链接保存
app.get(\'/ms/coupon/template/get\', function (req, res)
    res.setHeader(\'Content-Type\', \'text/plain;charset=utf8\');
    res.end(JSON.stringify(
        code: 0,
        data:
          brandName: \'品牌名称\',
          couponAvailableTime: \'2020-45-34\',
        ,
        msg: \'success\',
        success: true
    ))
)
const server = app.listen(8888, function (req, res, next)
    let host = server.address().address
    let port = server.address().port
    console.log("http://%s:%s", host, port)
)4、启动接口: node 1.js 6、在前端则使用http://localhost:8888/ms/coupon/template/get 去访问这个接口
二、把项目部署到服务器上
到目前node的环境是搭建好了的。 1、把 api 接口代码上传到服务器(不用上传node_modules,有package.json文件就行了),在服务器文件通过命令窗口npm install 安装依赖。 一般放到服务器的根路径下的 api 文件夹/api/
2、在服务器安全组中添加 api 监听的端口号不然访问不了接口,比如腾讯云云的安全防火墙
3、cd 到 api 接口目录下,输入node index.js启动接口就可以了。但是命令窗口关了接口连接也会断开, 可以使用screen、forever、pm2保护进程。
三、让nodejs接口一直在服务器运行
1、screen、forever、pm2都可以管理nodejs的接口,我这里用了pm2.
2、 建议使用 PM2 , 优点: ①可以多进程 ②可以将日志(分类)保存到指定的目的 ③可以自动重启 ④可以方便的查看进程基本信息
安装:
npm i -g pm2启动:
pm2 start app.js --watch   #实时监控app.js的方式启动,当app.js文件有变动时,pm2会自动reload
pm2 start app.js -i max  # 根据有效CPU数目启动最大进程数目
pm2 start app.js -n appname -i max -e err.log -o out.log # 以 appname 启动 app.js,错误当前目录 err.log 为 error log,out.log 为输出 log
pm2 start bb.sh  --interpreter bash # 用 bash 执行脚本
pm2 start test.py--interpreter python3 # 用 python 环境执行脚本启动类似 node xxx.js 的项目
pm2 start --name xxxsname xxx.js # 将运行的实例命名为 xxxsname启动类似 npm start 的项目
pm2 start --name appname npm -- start # 设置应用名为 appname启动类似 npm run serve 的项目
pm2 start --name servename npm -- run serve # 设置应用名为 servename--name xxx 或者 -n xxx 表示将应用命名为 xxx 以配置文件的形式启动
pm2 start pm2config.json查看 PM2 部署的应用
pm2 list               # 显示所有进程状态
pm2 ls                 # 显示所有进程状态
pm2 show 0			   # 显示某个应用的详细信息
pm2 monit              # 监视所有进程
pm2 logs               # 显示所有进程日志
pm2 log 0 	           # 查看 0 应用的日志
pm2 stop all           # 停止所有进程
pm2 restart all        # 重启所有进程
pm2 reload all         # 0秒停机重载进程
pm2 stop 0             # 停止指定的进程,0 是应用 id
pm2 restart 0          # 重启指定的进程,0 是应用 id
pm2 startup            # 产生 init 脚本 保持进程活着,startup 是指系统boot, 开机进程自启动
pm2 unstartup          # 禁用开机进程自启动
pm2 delete 0           # 杀死指定的进程,0 是应用 id,会删除该应用
pm2 delete all # 杀死全部进程,会删除所有应用npm
NPM 使用介绍
NPM是随同NodeJS一起安装的包管理工具,能解决NodeJS代码部署上的很多问题,常见的使用场景有以下几种:
允许用户从NPM服务器下载别人编写的第三方包到本地使用。
允许用户从NPM服务器下载并安装别人编写的命令行程序到本地使用。
允许用户将自己编写的包或命令行程序上传到NPM服务器供别人使用。
由于新版的nodejs已经集成了npm,所以之前npm也一并安装好了。同样可以通过输入 "npm -v" 来测试是否成功安装。命令如下,出现版本提示表示安装成功:
$ npm -v
2.3.0
如果你安装的是旧版本的 npm,可以很容易得通过 npm 命令来升级,命令如下:
$ sudo npm install npm -g
/usr/local/bin/npm -> /usr/local/lib/node_modules/npm/bin/npm-cli.js
[email protected] /usr/local/lib/node_modules/npm
如果是 Window 系统使用以下命令即可:
npm install npm -g
使用淘宝镜像的命令:
cnpm install npm -g
使用 npm 命令安装模块
npm 安装 Node.js 模块语法格式如下:
$ npm install <Module Name>
以下实例,我们使用 npm 命令安装常用的 Node.js web框架模块 express:
$ npm install express
安装好之后,express 包就放在了工程目录下的 node_modules 目录中,因此在代码中只需要通过 require(‘express‘) 的方式就好,无需指定第三方包路径。
var express = require(‘express‘);
全局安装与本地安装
npm 的包安装分为本地安装(local)、全局安装(global)两种,从敲的命令行来看,差别只是有没有-g而已,比如
npm install express          # 本地安装
npm install express -g   # 全局安装
如果出现以下错误:
npm err! Error: connect ECONNREFUSED 127.0.0.1:8087
解决办法为:
$ npm config set proxy null
本地安装
1. 将安装包放在 ./node_modules 下(运行 npm 命令时所在的目录),如果没有 node_modules 目录,会在当前执行 npm 命令的目录下生成 node_modules 目录。
2. 可以通过 require() 来引入本地安装的包。
全局安装
1. 将安装包放在 /usr/local 下或者你 node 的安装目录。
2. 可以直接在命令行里使用。
如果你希望具备两者功能,则需要在两个地方安装它或使用 npm link。
接下来我们使用全局方式安装 express
$ npm install express -g
安装过程输出如下内容,第一行输出了模块的版本号及安装位置。
[email protected] node_modules/express
├── [email protected]
├── [email protected]
├── [email protected]
├── [email protected]
├── [email protected]
├── [email protected]
├── [email protected]
├── [email protected]
├── [email protected]
├── [email protected]
├── [email protected]
├── [email protected]
├── [email protected]
├── [email protected]
├── [email protected]
├── [email protected]
├── [email protected]
├── [email protected]
├── [email protected] ([email protected])
├── [email protected] ([email protected])
├── [email protected] ([email protected], [email protected])
├── [email protected] ([email protected])
├── [email protected] ([email protected], [email protected])
├── [email protected] ([email protected], [email protected])
└── [email protected] ([email protected], [email protected], [email protected], [email protected], [email protected])
查看安装信息
你可以使用以下命令来查看所有全局安装的模块:
$ npm list -g

├─┬ [email protected]
│ ├── [email protected]
│ ├── [email protected]
│ ├── [email protected]
│ ├─┬ [email protected]
│ │ └── [email protected]
│ ├─┬ [email protected]
│ │ └── [email protected]
……
如果要查看某个模块的版本号,可以使用命令如下:
$ npm list grunt

[email protected] /path/to/project/folder
└── [email protected]
使用 package.json
package.json 位于模块的目录下,用于定义包的属性。接下来让我们来看下 express 包的 package.json 文件,位于 node_modules/express/package.json 内容:
{
  "name": "express",
  "description": "Fast, unopinionated, minimalist web framework",
  "version": "4.13.3",
  "author": {
    "name": "TJ Holowaychuk",
    "email": "[email protected]"
  },
  "contributors": [
    {
      "name": "Aaron Heckmann",
      "email": "[email protected]"
    },
    {
      "name": "Ciaran Jessup",
      "email": "[email protected]"
    },
    {
      "name": "Douglas Christopher Wilson",
      "email": "[email protected]"
    },
    {
      "name": "Guillermo Rauch",
      "email": "[email protected]"
    },
    {
      "name": "Jonathan Ong",
      "email": "[email protected]"
    },
    {
      "name": "Roman Shtylman",
      "email": "[email protected]"
    },
    {
      "name": "Young Jae Sim",
      "email": "[email protected]"
    }
  ],
  "license": "MIT",
  "repository": {
    "type": "git",
    "url": "git+https://github.com/strongloop/express.git"
  },
  "homepage": "http://expressjs.com/",
  "keywords": [
    "express",
    "framework",
    "sinatra",
    "web",
    "rest",
    "restful",
    "router",
    "app",
    "api"
  ],
  "dependencies": {
    "accepts": "~1.2.12",
    "array-flatten": "1.1.1",
    "content-disposition": "0.5.0",
    "content-type": "~1.0.1",
    "cookie": "0.1.3",
    "cookie-signature": "1.0.6",
    "debug": "~2.2.0",
    "depd": "~1.0.1",
    "escape-html": "1.0.2",
    "etag": "~1.7.0",
    "finalhandler": "0.4.0",
    "fresh": "0.3.0",
    "merge-descriptors": "1.0.0",
    "methods": "~1.1.1",
    "on-finished": "~2.3.0",
    "parseurl": "~1.3.0",
    "path-to-regexp": "0.1.7",
    "proxy-addr": "~1.0.8",
    "qs": "4.0.0",
    "range-parser": "~1.0.2",
    "send": "0.13.0",
    "serve-static": "~1.10.0",
    "type-is": "~1.6.6",
    "utils-merge": "1.0.0",
    "vary": "~1.0.1"
  },
  "devDependencies": {
    "after": "0.8.1",
    "ejs": "2.3.3",
    "istanbul": "0.3.17",
    "marked": "0.3.5",
    "mocha": "2.2.5",
    "should": "7.0.2",
    "supertest": "1.0.1",
    "body-parser": "~1.13.3",
    "connect-redis": "~2.4.1",
    "cookie-parser": "~1.3.5",
    "cookie-session": "~1.2.0",
    "express-session": "~1.11.3",
    "jade": "~1.11.0",
    "method-override": "~2.3.5",
    "morgan": "~1.6.1",
    "multiparty": "~4.1.2",
    "vhost": "~3.0.1"
  },
  "engines": {
    "node": ">= 0.10.0"
  },
  "files": [
    "LICENSE",
    "History.md",
    "Readme.md",
    "index.js",
    "lib/"
  ],
  "scripts": {
    "test": "mocha --require test/support/env --reporter spec --bail --check-leaks test/ test/acceptance/",
    "test-ci": "istanbul cover node_modules/mocha/bin/_mocha --report lcovonly -- --require test/support/env --reporter spec --check-leaks test/ test/acceptance/",
    "test-cov": "istanbul cover node_modules/mocha/bin/_mocha -- --require test/support/env --reporter dot --check-leaks test/ test/acceptance/",
    "test-tap": "mocha --require test/support/env --reporter tap --check-leaks test/ test/acceptance/"
  },
  "gitHead": "ef7ad681b245fba023843ce94f6bcb8e275bbb8e",
  "bugs": {
    "url": "https://github.com/strongloop/express/issues"
  },
  "_id": "[email protected]",
  "_shasum": "ddb2f1fb4502bf33598d2b032b037960ca6c80a3",
  "_from": "[email protected]*",
  "_npmVersion": "1.4.28",
  "_npmUser": {
    "name": "dougwilson",
    "email": "[email protected]"
  },
  "maintainers": [
    {
      "name": "tjholowaychuk",
      "email": "[email protected]"
    },
    {
      "name": "jongleberry",
      "email": "[email protected]"
    },
    {
      "name": "dougwilson",
      "email": "[email protected]"
    },
    {
      "name": "rfeng",
      "email": "[email protected]"
    },
    {
      "name": "aredridel",
      "email": "[email protected]"
    },
    {
      "name": "strongloop",
      "email": "[email protected]"
    },
    {
      "name": "defunctzombie",
      "email": "[email protected]"
    }
  ],
  "dist": {
    "shasum": "ddb2f1fb4502bf33598d2b032b037960ca6c80a3",
    "tarball": "http://registry.npmjs.org/express/-/express-4.13.3.tgz"
  },
  "directories": {},
  "_resolved": "https://registry.npmjs.org/express/-/express-4.13.3.tgz",
  "readme": "ERROR: No README data found!"
}
Package.json 属性说明
name - 包名。
version - 包的版本号。
description - 包的描述。
homepage - 包的官网 url 。
author - 包的作者姓名。
contributors - 包的其他贡献者姓名。
dependencies - 依赖包列表。如果依赖包没有安装,npm 会自动将依赖包安装在 node_module 目录下。
repository - 包代码存放的地方的类型,可以是 git 或 svn,git 可在 Github 上。
main - main 字段是一个模块ID,它是一个指向你程序的主要项目。就是说,如果你包的名字叫 express,然后用户安装它,然后require("express")。
keywords - 关键字
卸载模块
我们可以使用以下命令来卸载 Node.js 模块。
$ npm uninstall express
卸载后,你可以到 /node_modules/ 目录下查看包是否还存在,或者使用以下命令查看:
$ npm ls
更新模块
我们可以使用以下命令更新模块:
$ npm update express
搜索模块
使用以下来搜索模块:
$ npm search express
创建模块
创建模块,package.json 文件是必不可少的。我们可以使用 NPM 生成 package.json 文件,生成的文件包含了基本的结果。
$ npm init
This utility will walk you through creating a package.json file.
It only covers the most common items, and tries to guess sensible defaults.

See `npm help json` for definitive documentation on these fields
and exactly what they do.

Use `npm install <pkg> --save` afterwards to install a package and
save it as a dependency in the package.json file.

Press ^C at any time to quit.
name: (node_modules) runoob                   # 模块名
version: (1.0.0)
description: Node.js 测试模块(www.runoob.com)  # 描述
entry point: (index.js)
test command: make test
git repository: https://github.com/runoob/runoob.git  # Github 地址
keywords:
author:
license: (ISC)
About to write to ……/node_modules/package.json:      # 生成地址

{
  "name": "runoob",
  "version": "1.0.0",
  "description": "Node.js 测试模块(www.runoob.com)",
  ……
}


Is this ok? (yes) yes
以上的信息,你需要根据你自己的情况输入。在最后输入 "yes" 后会生成 package.json 文件。
接下来我们可以使用以下命令在 npm 资源库中注册用户(使用邮箱注册):
$ npm adduser
Username: mcmohd
Password:
Email: (this IS public) [email protected]
接下来我们就用以下命令来发布模块:
$ npm publish
如果你以上的步骤都操作正确,你就可以跟其他模块一样使用 npm 来安装。
版本号
使用NPM下载和发布代码时都会接触到版本号。NPM使用语义版本号来管理代码,这里简单介绍一下。
语义版本号分为X.Y.Z三位,分别代表主版本号、次版本号和补丁版本号。当代码变更时,版本号按以下原则更新。
如果只是修复bug,需要更新Z位。
如果是新增了功能,但是向下兼容,需要更新Y位。
如果有大变动,向下不兼容,需要更新X位。
版本号有了这个保证后,在申明第三方包依赖时,除了可依赖于一个固定版本号外,还可依赖于某个范围的版本号。例如"argv": "0.0.x"表示依赖于0.0.x系列的最新版argv。
NPM支持的所有版本号范围指定方式可以查看官方文档。
NPM 常用命令
除了本章介绍的部分外,NPM还提供了很多功能,package.json里也有很多其它有用的字段。
除了可以在npmjs.org/doc/查看官方文档外,这里再介绍一些NPM常用命令。
NPM提供了很多命令,例如install和publish,使用npm help可查看所有命令。
NPM提供了很多命令,例如install和publish,使用npm help可查看所有命令。
使用npm help <command>可查看某条命令的详细帮助,例如npm help install。
在package.json所在目录下使用npm install . -g可先在本地安装当前命令行程序,可用于发布前的本地测试。
使用npm update <package>可以把当前目录下node_modules子目录里边的对应模块更新至最新版本。
使用npm update <package> -g可以把全局安装的对应命令行程序更新至最新版。
使用npm cache clear可以清空NPM本地缓存,用于对付使用相同版本号发布新版本代码的人。
使用npm unpublish <package>@<version>可以撤销发布自己发布过的某个版本代码。
使用淘宝 NPM 镜像
大家都知道国内直接使用 npm 的官方镜像是非常慢的,这里推荐使用淘宝 NPM 镜像。
淘宝 NPM 镜像是一个完整 npmjs.org 镜像,你可以用此代替官方版本(只读),同步频率目前为 10分钟 一次以保证尽量与官方服务同步。
你可以使用淘宝定制的 cnpm (gzip 压缩支持) 命令行工具代替默认的 npm:
$ npm install -g cnpm --registry=https://registry.npm.taobao.org
这样就可以使用 cnpm 命令来安装模块了:
$ cnpm install [name]
更多信息可以查阅:http://npm.taobao.org/。
以上是关于使用nodejs编写api接口并部署到服务器上的主要内容,如果未能解决你的问题,请参考以下文章