Python爬虫下载whois server字典和whois自动化查询
Posted zhangmengqin
tags:
篇首语:本文由小常识网(cha138.com)小编为大家整理,主要介绍了Python爬虫下载whois server字典和whois自动化查询相关的知识,希望对你有一定的参考价值。
上篇文章主要介绍了python通过socket查询whois的方法,涉及Python基于socket模块进行查询的相关技巧,具有一定参考借鉴价值,需要的朋友可以参考下 http://www.cnblogs.com/zhangmengqin/p/9144022.html
敲黑板!!!
每个域名后缀 对应的 whois server都是不一样的!
那么 我怎么知道我要查询的域名后缀对应的whois server??
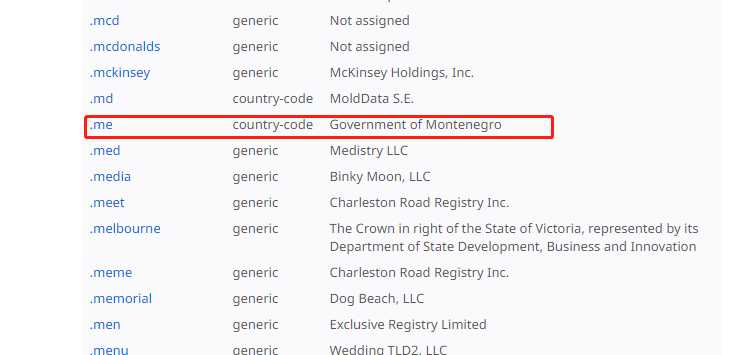
别急 这里有宝贝---- https://www.iana.org/domains/root/db ( 这里有全世界各种后缀的whois server ,随便找一个点进去)
例如我点击这个:


域名的后缀有几千个,我要手工获取所有后缀及其对应的whois server 那不是手都要废了……
然而我立马想到了Python爬虫,在本地做成字典 这样就很方便了。到时候匹配这个字典的key就可以自动获取对应的 whois server进行查询
1.首先我们获取 https://www.iana.org/domains/root/db 里全世界的域名后缀
 1 import requests
 2 from bs4 import BeautifulSoup
 3
 4 iurl = ‘https://www.iana.org/domains/root/db‘
 5 res = requests.get(iurl,timeout=600)
 6 res.encoding = ‘utf-8‘
 7 soup = BeautifulSoup(res.text,‘html.parser‘)
 8 list1=[]
 9 list2=[]
10 jsonStr={}
11 for tag in soup.find_all(‘span‘, class_=‘domain tld‘):
12    d_suffix = tag.get_text()
13    print(d_suffix)
用到的是BeautifulSoup,好处就是不用自己写正则,只要根据他的语法来写就好了,在多次的测试之后终于完成了数据的解析
 1 import requests
 2 from bs4 import BeautifulSoup
 3 import re
 4 import time
 5
 6 iurl = ‘https://www.iana.org/domains/root/db‘
 7 res = requests.get(iurl,timeout=600)
 8 res.encoding = ‘utf-8‘
 9 soup = BeautifulSoup(res.text,‘html.parser‘)
10 list1=[]
11 list2=[]
12 jsonStr={}
13 for tag in soup.find_all(‘span‘, class_=‘domain tld‘):
14    d_suffix = tag.get_text()
15    print(d_suffix)
16    list2.append(d_suffix)
17    n_suffix = d_suffix.split(‘.‘)[1]
18    new_url = iurl + ‘/‘ + n_suffix
19    server=‘‘
20    try:
21         res2=requests.get(new_url,timeout=600)
22         res2.encoding=‘utf-8‘
23         soup2= BeautifulSoup(res2.text,‘html.parser‘)
24
25         retxt = re.compile(r‘<b>WHOIS Server:</b> (.*?)
‘)
26         arr = retxt.findall(res2.text)
27         if len(arr) > 0:
28              server = arr[0]
29              list2.append(server)
30         print(server)
31         time.sleep(1)
32    except Exception as e:
33          print(‘超时‘)
34
35    with open(‘suffixList.txt‘, "a",encoding=‘utf-8‘) as my_file:
36        my_file.write(n_suffix + ":" + server+‘
‘)
37
38 print(‘抓取结束!!!‘)
上边这点代码下来,着实花费了我不少时间,边写边调试,边百度~~不过还好最终还是出来了。等数据都整理好之后,然后我把它保存到了txt文件里面。
因为获取到的是html页面样式,所以想到的是一层层去解析,没想到用正则这么简单!看来小白确实得扎实基础哦~
3.随机输入任何一个后缀或域名,能自动查询whois
 1 temp = input(‘请输入你要查询的域名:‘)
 2 result = temp.split(‘.‘)[0]
 3 result1=temp.split(‘.‘)[1]
 4 r_suf=‘.‘+result1
 5 print(type(r_suf))
 6 # print(result)
 7 print(r_suf)
 8
 9 # d = json.dumps(dictionary)
10 whois_server =dictionary.get(r_suf)
11 print(whois_server)
12 print(type(whois_server))
13
14 if whois_server is None:
15     print(r_suf + ‘此后缀出小差啦~‘)
16 else:
17
18     s = socket.socket(socket.AF_INET, socket.SOCK_STREAM)
19     s.connect((whois_server, 43))
20     temp=( temp +‘
‘).encode()
21     s.send(temp)
22     response = b‘‘
23     while True:
24         data = s.recv(4096)
25         response += data
26         if not data:
27             break
28     s.close()
29     print(response.decode())
纸上得来终觉浅,绝知此事要躬行。这句话一点没错,看和做真是两码事。这里百度一下,那里google一下,问题就解决了,程序也出来了,最主要是要动手动手动手!
https://whois.22.cn/ 你也可以直接进行查询的哦。
以上是关于Python爬虫下载whois server字典和whois自动化查询的主要内容,如果未能解决你的问题,请参考以下文章
dns信息收集——区域传输字典爆破(dnsdict6安装)whois注册信息
Python爬虫编程思想(78): JSON字符串与字典互相转换