mac下超简单的接口自动化-使用curl实现接口自动化并邮件发送结果
Posted
tags:
篇首语:本文由小常识网(cha138.com)小编为大家整理,主要介绍了mac下超简单的接口自动化-使用curl实现接口自动化并邮件发送结果相关的知识,希望对你有一定的参考价值。
参考技术A curl是一个你只需要从控制台copy as curl就可以操作的东东看下图,就是说你只要会从chrome里copy,就可以做接口自动化了。
1.安装 msmtp,这个是用来发送邮件的
brew install msmtp
配置~/.mailrc,使用命令vim ~/.mailrc ,将如下内容配置其中
set sendmail=/usr/local/bin/msmtp
配置~/. msmtprc,使用命令vim ~/.msmtprc ,将如下内容配置其中
defaults
####################################################################
# A sample configuration using mxhichina
####################################################################
# account name is "mxhichina".
# You can select this account by using "-a mxhichina" in your command line.
account mxhichina
host smtp.mxhichina.com
tls on
tls_certcheck off
port 25
auth login
from ceshi@*****.com
user ceshi@*****.com
password 这里写邮箱密码
# If you don't use any "-a" parameter in your command line,
# the default account "mxhichina" will be used.
account default: mxhichina
~/.msmtprc 需要设置正确的访问权限
chmod 600 ~/.msmtprc 如果权限不足使用sudo chmod 600 ~/.msmtprc
配置完成
2.编写curl相关脚本的相关内容,下面都是编写的脚本的内容和相关备注
#每次执行时,cookie过期了,需要更换对应的cookie,使用option+command+f 可以实现一键替换所有内容
3.新建一个sh文件用来执行脚本并发送邮件
#执行脚本并输出到文件中
huati.sh >> testresult.txt
#将结果内容发送到指定邮件中
mail -s "请查收测试结果" test@xxxx.com < testresult.txt
#发送给多个邮件接收用户
# mail -s "请查收测试结果" -c test@xxxx.com test1@xxxx.com < testresult.txt
#删除该文件,否则下次会累加结果
rm -rf testresult.txt
然后就可以从邮件中看到执行的结果了
最后的输出这里我只是把获取到的参数内容进行了输出,还可以加断言判断实际结果是否等于预期结果。这样输出的结果会更加直观
整体来说是一个非常简单的自动化的东西了,不需要学习单独的语言和工具就可以在工作中使用起来了
利用百度云接口实现车牌识别·python
一个小需求---实现车牌识别。
目前有两个想法
1. 调云在线的接口或者使用SDK做开发(配置环境和编译第三方库很麻烦,当然使用python可以避免这些问题)
2. 自己实现车牌识别算法(复杂)
一开始准备使用百度云文字识别C++ SDK来做,发现需要准备curl、jsoncpp和OpenCV,并且curl和jsoncpp需要自己编译,很麻烦,所以换用了python来做,真的是顺畅简单。
1. 安装python环境(我用python3.7)
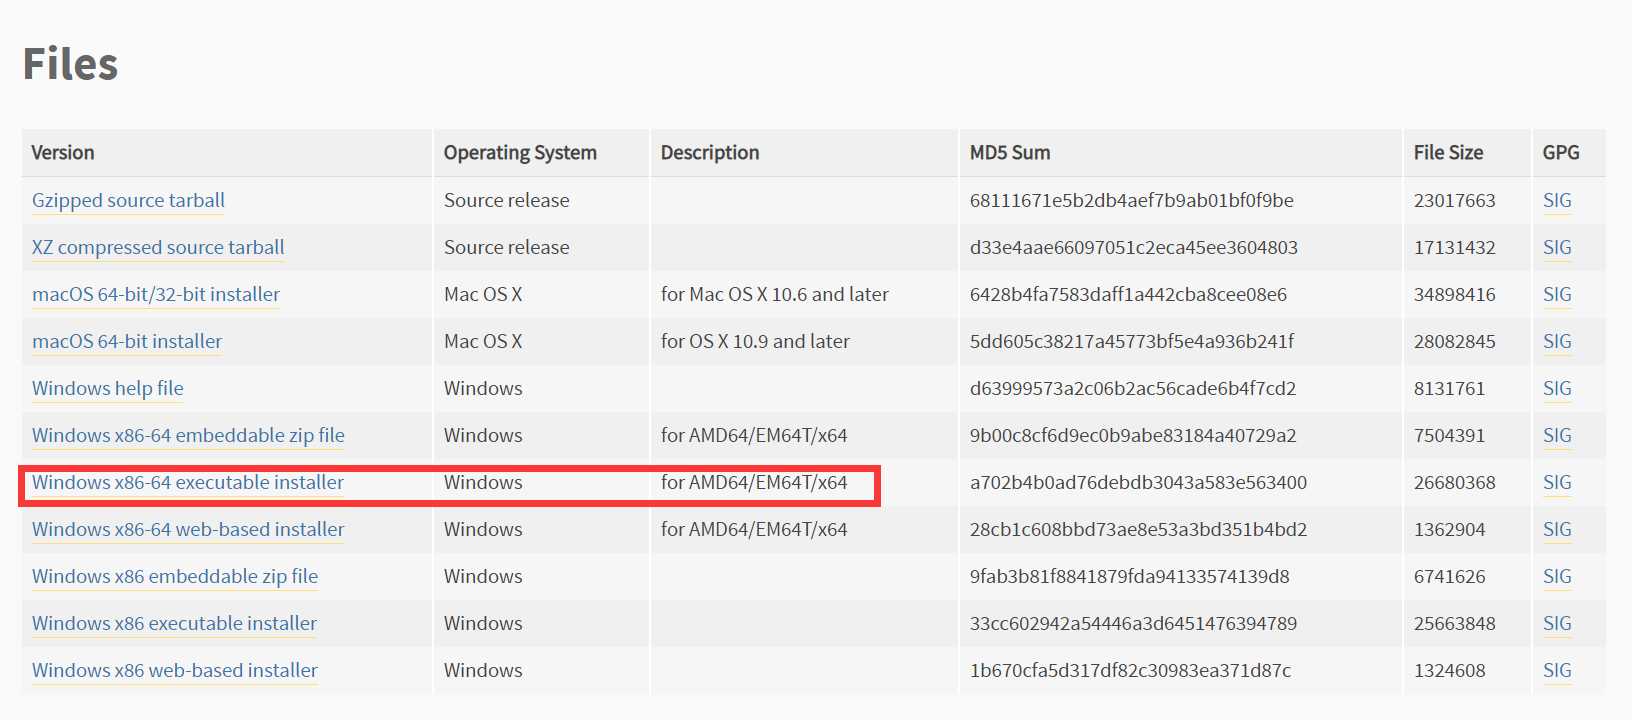
python官网下载地址:https://www.python.org/downloads/release/python-374/ 建议直接下载安装版installer(看对系统和位数)

打开安装包无脑安装即可。安装好之后,看一下是否安装成功。
cmd
python --version

2. 百度云SDK下载安装及创建应用
参考https://cloud.baidu.com/doc/OCR/s/pjwvxzmtc文档,安装python SDK
查看pip版本(python环境自带,但是要注意版本)
pip --version

如果版本不合适,那么自行升级pip
pip install -U pip
安装baidu-aip
pip install baidu-aip
 (安装成功的样子)
现在我们的百度云SDK就安装好了,下来创建应用
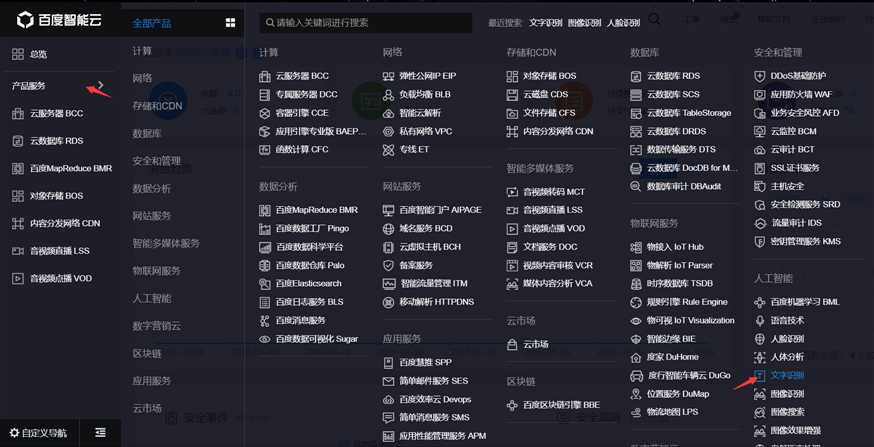
登录百度云(没账号注册一下)

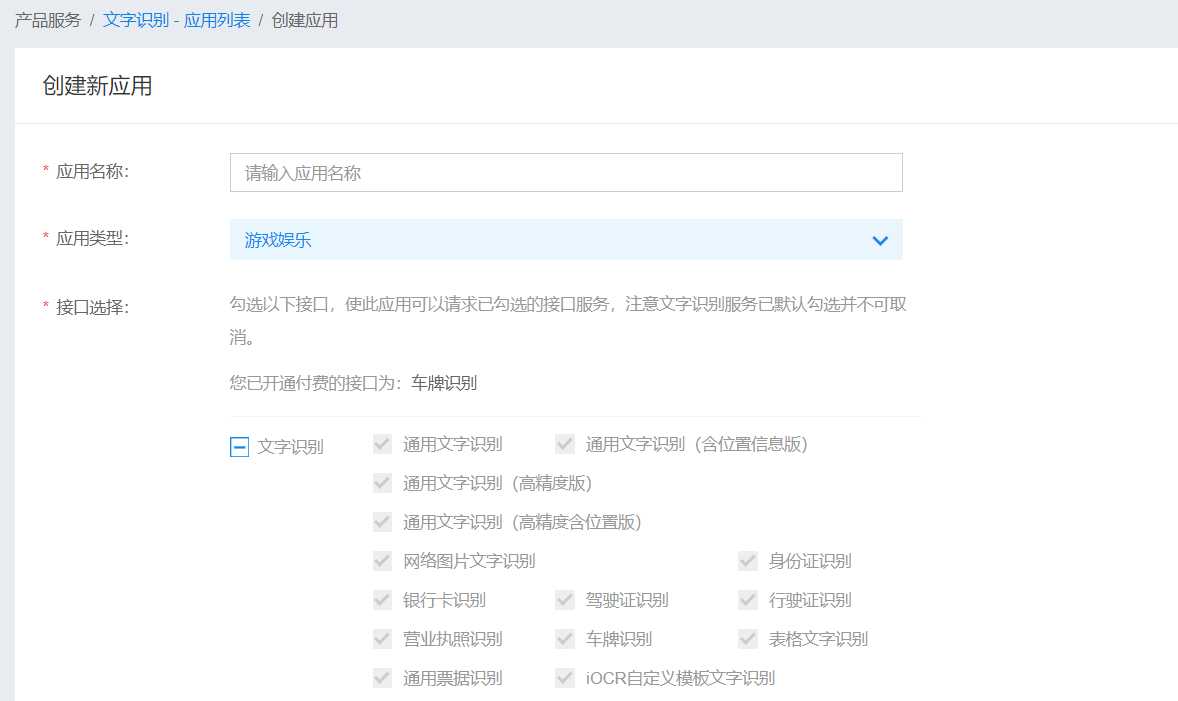
创建应用

自己填一下

现在我们就创建好了车牌识别的应用,点击应用列表可查看。

这里的APPID、API KEY、Secret Key要在代码中使用。(注意不要泄漏)
3. 编码调接口,实现需求
python代码实现
 1 ‘‘‘
 2 Statement
 3 1. using the file
 4 2. prepare a image path and call func "get_license_plate(filePath)"
 5 3. you can get a json object
 6 4. get the info from the pbject
 7 example :
 8
 9     "log_id": 3583925545,
10     "words_result":
11         "color": "blue",
12         "number": "苏HS7766"
13
14
15 ‘‘‘
16
17 from aip import AipOcr
18 import json
19
20 """get img"""
21 def get_file_content(filePath):
22     with open(filePath, ‘rb‘) as fp:
23         return fp.read()
24
25 """ get licsense plate """
26 def get_license_plate(filePath):
27     """ APPID AK SK """
28     APP_ID = ‘********‘
29     API_KEY = ‘**************‘
30     SECRET_KEY = ‘******************‘
31
32     """ create client """
33     client = AipOcr(APP_ID, API_KEY, SECRET_KEY)
34
35     image = get_file_content(filePath)
36
37     """ 调用车牌识别 """
38     res = client.licensePlate(image)
39     return res
40
41
42 """ call example """
43 str = ‘C:\\\\Users\\\\***\\\\Desktop\\\\big.jpg‘ """ 照片绝对地址 """
44 res = get_license_plate(str)
45 print(‘车牌号码:‘ + res[‘words_result‘][‘number‘])
46 print(‘车牌颜色:‘ + res[‘words_result‘][‘color‘])
代码分解
引入库
from aip import AipOcr """百度云SDK"""
import json """json库"""
创建客户端
""" APPID AK SK 自己创建的应用中的数据"""
APP_ID = ‘*******‘
API_KEY = ‘***************‘
SECRET_KEY = ‘******************‘

""" create client """
client = AipOcr(APP_ID, API_KEY, SECRET_KEY)
调用接口得到车牌识别结果
image = get_file_content(filePath)

""" 调用车牌识别 """
res = client.licensePlate(image)
这里的res是一个json对象/一个dict
例子
    "log_id": 3583925545,
    "words_result":
        "color": "blue",
        "number": "苏HS7766"
可以使用res[‘listname‘][‘listname‘]形式获取字典数据
print(‘车牌号码:‘ + res[‘words_result‘][‘number‘])
print(‘车牌颜色:‘ + res[‘words_result‘][‘color‘])
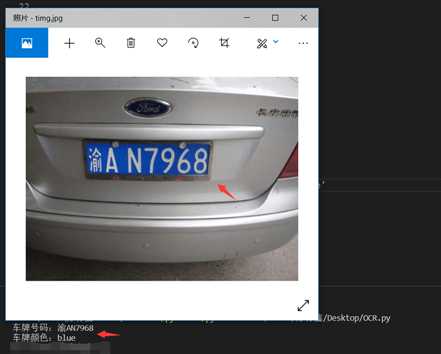
至此,我们就实现了使用百度云SDK,通过编写python代码调用接口的车牌识别需求。

参考文档
【1】百度云API文档:https://cloud.baidu.com/doc/OCR/s/pjwvxzmtc/
【2】python pip安装与使用:https://www.runoob.com/w3cnote/python-pip-install-usage.html
【3】python官网:https://www.python.org/downloads/release/python-374/
以上是关于mac下超简单的接口自动化-使用curl实现接口自动化并邮件发送结果的主要内容,如果未能解决你的问题,请参考以下文章