写第一个python程序,通过python读取excel
Posted a393060727-陈惟鲜的博客
tags:
篇首语:本文由小常识网(cha138.com)小编为大家整理,主要介绍了写第一个python程序,通过python读取excel相关的知识,希望对你有一定的参考价值。
通过已经安装的包,xlrd去读一个excel信息。
这里为了方便,将excel直接语py文件写在一起。
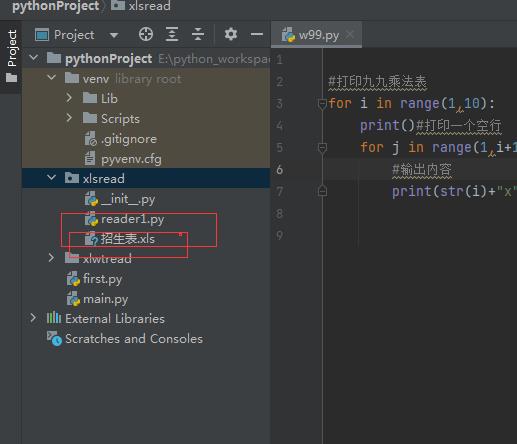
import xlrd;
wb = xlrd.open_workbook("招生表.xls");
ws = wb.sheets()
#所有sheet的名字
wnames = wb.sheet_names()
print(wnames)
#不同方式获取sheet#
sheet1 = wb.sheet_by_index(0)
print("sheet1="+sheet1.name)
sheet2=wb.sheet_by_name("中山分校")
print("sheet2="+sheet2.name)
sheet3=wb.sheets()[0]
print("sheet3="+sheet3.name)
#行
crow = sheet1.nrows
print(crow)
#列
cols = sheet1.ncols
print("列数="+str(cols))
#行内容
crow4=sheet1.row_values(3)
print(crow4)
#行内容
clos4=sheet1.col_slice(3)
print(clos4)
#指定单元格
cell_data_1=sheet1.cell(1,1)
print(cell_data_1)
输出内容如下:
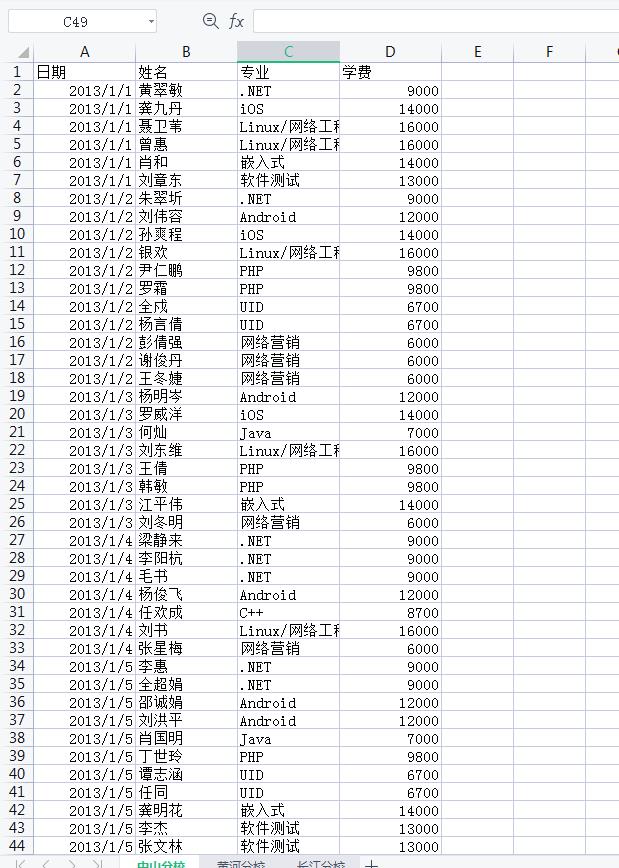
E:\\python_workspace\\pythonProject\\venv\\Scripts\\python.exe E:\\python_workspace\\pythonProject\\xlsread\\reader1.py
[\'中山分校\', \'黄河分校\', \'长江分校\']
sheet1=中山分校
sheet2=中山分校
sheet3=中山分校
44
列数=4
[41275.0, \'聂卫苇\', \'Linux/网络工程\', 16000.0]
[text:\'学费\', number:9000.0, number:14000.0, number:16000.0, number:16000.0, number:14000.0, number:13000.0, number:9000.0, number:12000.0, number:14000.0, number:16000.0, number:9800.0, number:9800.0, number:6700.0, number:6700.0, number:6000.0, number:6000.0, number:6000.0, number:12000.0, number:14000.0, number:7000.0, number:16000.0, number:9800.0, number:9800.0, number:14000.0, number:6000.0, number:9000.0, number:9000.0, number:9000.0, number:12000.0, number:8700.0, number:16000.0, number:6000.0, number:9000.0, number:9000.0, number:12000.0, number:12000.0, number:7000.0, number:9800.0, number:6700.0, number:6700.0, number:14000.0, number:13000.0, number:13000.0]
text:\'黄翠敏\'

Process finished with exit code 0
excel内容
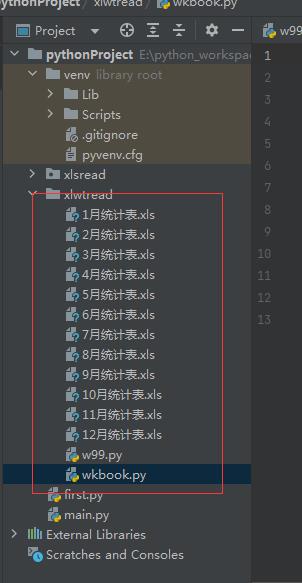
引入另一个excel写的包xlwt,批量创建xls文件
import xlwt as w
import xlrd as x


for a in range(1,13):
    wb = w.Workbook(encoding="utf-8")
    ns = wb.add_sheet("第一次")
    ret = wb.save(str(a)+"月统计表.xls")
    print(ret)
    print(a)
Spring写第一个应用程序
ref:http://www.importnew.com/13246.html
让我们用Spring来写第一个应用程序吧。
完成这一章要求:
- 熟悉Java语言
- 设置好Spring的环境
- 熟悉简单的Eclipse IDE的操作
如果你还没有设置好环境,请参考Spring开发环境的配置。
我们第一个程序是打印”Hello World”语句,这个语句通过Spring的配置文件来设置。
1 – 新建Java项目:
第一步用Eclipse IDE新建一个项目。 点击 > File > New > Java Project。然后在弹出的对话框中输入项目的名称,我们就叫HelloWorld吧。这会在你的workspace下新建一个HelloWorld的目录作为项目的根目录。

图片一 新建Java项目
点击Finish。你会在Project Explorer视图看到新建的项目。如果Project Explorer没有打开,请在> Window > Show View中找到。

图片二 Project Explorer视图
2 – 添加Spring库
接下来要加入必要的Spring库添加到CLASSPATH下,以便Eclipse编译和运行程序时能够找到所需要的class。
右键在Package Explorer中点击> Build Path > Configure Build Path...。然后点击Add External JARs...加入我们需要的Spring库。如果还没有下载Spring库,请先下载Spring库。
我们需要加入的Spring库有:
- org.springframework.aop-3.2.9
- org.springframework.aspects-3.2.9
- org.springframework.beans-3.2.9
- org.springframework.context-3.2.9
- org.springframework.context.support-3.2.9
- org.springframework.core-3.2.9
- org.springframework.expression-3.2.9
此外,为了打印信息,我们还需要一个Apache Commons Logging API,在这里下载commons-logging-1.2。本教程写作的时候,最新版是commons-logging-1.2。下载后解压缩到任意目录,我解压到~/commons-logging-1.2。
然后和添加Spring库一样添加commons-logging-1.2.jar到CLASSPATH中。

图片三 添加Spring库
3 – Java源代码
首先新建一个包“com.importnew”。右键点击src,然后> New > Package,新建com.importnew包。
然后我们需要在com.importnew包下新建两个Java源文件HelloWorld.java和MainApp.java。
HelloWorld.java:
|
1
2
3
4
5
6
7
8
9
10
11
12
13
14
15
16
17
18
|
package com.importnew;public class HelloWorld { private String message; public void setMessage(String message){ this.message = message; } public String getMessage(){ return this.message; } public void printMessage(){ System.out.println("Your Message : " + message); }} |
MainApp.java:
|
1
2
3
4
5
6
7
8
9
10
11
12
13
14
15
|
package com.importnew;import org.springframework.context.ApplicationContext;import org.springframework.context.support.ClassPathXmlApplicationContext;public class MainApp { public static void main(String[] args) { ApplicationContext context = new ClassPathXmlApplicationContext("Beans.xml"); HelloWorld obj = (HelloWorld) context.getBean("helloWorld"); obj.printMessage(); }} |
4 – 配置文件
接下来,我们需要新建一个XML文件来配置bean,这个XML的作用是集中在一个地方,配置和管理所有的bean。有关bean的概念,请看Bean的定义。
我们将这个XML文件也放在src下面,这样就保证Eclipse可以在CLASSPATH下读取到这个文件。
新建一个Beans.xml,当然这个文件名任意,不过要和MainApp.java中ApplicationContext context = new ClassPathXmlApplicationContext("Beans.xml")设置的一致。
Beans.xml
|
1
2
3
4
5
6
7
8
9
10
11
12
13
|
<?xml version="1.0" encoding="UTF-8"?> <beans xmlns="http://www.springframework.org/schema/beans" xmlns:xsi="http://www.w3.org/2001/XMLSchema-instance" xsi:schemaLocation="http://www.springframework.org/schema/beanshttp://www.springframework.org/schema/beans/spring-beans-3.0.xsd"> <bean id="helloWorld" class="com.importnew.HelloWorld"> <property name="message" value="Hello World!"/> </bean> </beans> |
这个Beans.xml文件中设置了bean,包含在<beans>和</beans>中。每个bean都有一个唯一的id。
这个语句为message变量赋值,这样就能打印出Hello World!了。要修改输出,只需要修改XML文件,而不需要修改MainApp.java和HelloWorld.java。
整个HelloWorld项目的目录如图:

图片四 HelloWorld项目结构目录
5 – 运行程序
当你完成了以上的步骤,我们便可以运行程序了。
右键MainApp.java,点击> Run As > Java Application。也可以在工具栏找到运行按钮。
如果一切正常,输出如下:
|
1
|
Your Message : Hello World! |
回顾运作流程
- 首先会运行main()语句,Spring框架使用
ClassPathXmlApplicationContext()首先创建一个容器。 - 这个容器从
Beans.xml中读取配置信息,并根据配置信息来创建bean(也就是对象),每个bean有唯一的id。 - 然后通过
context.getBean()找到这个id的bean,获取对象的引用。 - 通过对象的引用调用
printMessage()方法来打印信息。
好了,这是你的第一个Spring应用。你已经学会用Eclipse新建Java项目,导入Spring和commons-logging库,编写Java源代码和XML配置文件,并且成功运行了。如果要更改输出,只需要修改XML文件中的value值,而不需要更改Java源文件。
以上是关于写第一个python程序,通过python读取excel的主要内容,如果未能解决你的问题,请参考以下文章