如何通过Tesseract开源OCR引擎创建Android OCR应用
Posted
tags:
篇首语:本文由小常识网(cha138.com)小编为大家整理,主要介绍了如何通过Tesseract开源OCR引擎创建Android OCR应用相关的知识,希望对你有一定的参考价值。
Tesseract是遵守 Apache License 2.0协议的开源OCR引擎。
如何在Android平台编译Tesseract,以及如何快速创建一个简单的OCR应用。
Tesseract Android Tools
要编译Android平台的Tesseract,需要使用Google提供的tesseract-android-tools。
代码获取方式:
打开README,在命令行工具中执行下面的步骤:
cd <project-directory>
curl -O
curl -O
tar -zxvf tesseract-ocr-3.02.02.tar.gz
tar -zxvf leptonica-1.69.tar.gz
rm -f tesseract-ocr-3.02.02.tar.gz
rm -f leptonica-1.69.tar.gz
mv tesseract-3.02.02 jni/com_googlecode_tesseract_android/src
mv leptonica-1.69 jni/com_googlecode_leptonica_android/src
ndk-build -j8
android update project --target 1 --path .
ant debug (release)
注意:如果在使用NDK r9,编译的时候会出现错误:
format not a string literal and no format arguments [-Werror=format-security]
解决的方法就是在Application.mk中加入一行:
APP_CFLAGS += -Wno-error=format-security
编译之后会生成class.jar和一些*.so。
Android OCR Application
创建一个Android应用,把生成的jar和so导入进来。
创建TessOCR:
public class TessOCR
private TessBaseAPI mTess;
public TessOCR()
// TODO Auto-generated constructor stub
mTess = new TessBaseAPI();
String datapath = Environment.getExternalStorageDirectory() + "/tesseract/";
String language = "eng";
File dir = new File(datapath + "tessdata/");
if (!dir.exists())
dir.mkdirs();
mTess.init(datapath, language);
public String getOCRResult(Bitmap bitmap)
mTess.setImage(bitmap);
String result = mTess.getUTF8Text();
return result;
public void onDestroy()
if (mTess != null)
mTess.end();
构造函数中需要在存储卡上创建一个目录tessdata,如果不创建程序运行就会出错。因为源码中会检测这个目录,不存在就抛出异常:
public boolean init(String datapath, String language)
if (datapath == null)
throw new IllegalArgumentException("Data path must not be null!");
if (!datapath.endsWith(File.separator))
datapath += File.separator;
File tessdata = new File(datapath + "tessdata");
if (!tessdata.exists() || !tessdata.isDirectory())
throw new IllegalArgumentException("Data path must contain subfolder tessdata!");
return nativeInit(datapath, language);
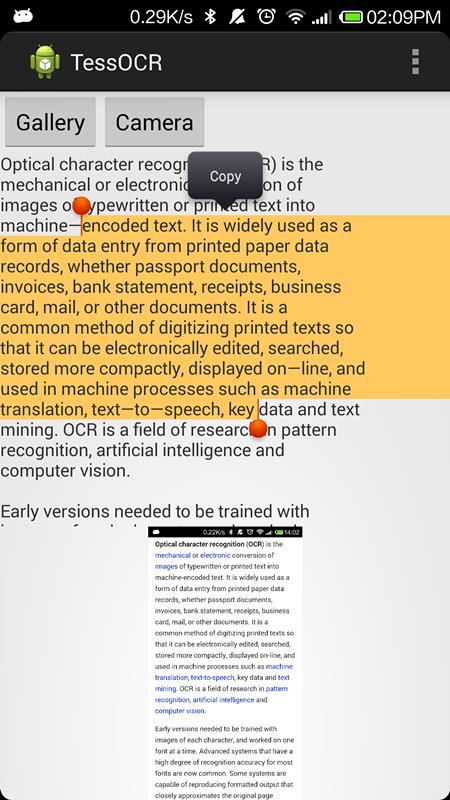
就这么简单。现在通过三种方式获取图片做OCR:
在图库中选取一张图,选择发送或者分享,选择OCR应用
在AndroidManifest.xml中加入IntentFilter,让OCR应用出现在图库的分享列表中:
<intent-filter>
<action android:name="android.intent.action.SEND" />
<category android:name="android.intent.category.DEFAULT" />
<data android:mimeType="text/plain" />
<data android:mimeType="image/*" />
</intent-filter>
获得URI之后,对URI解码,获取bitmap:
if (Intent.ACTION_SEND.equals(intent.getAction()))
Uri uri = (Uri) intent.getParcelableExtra(Intent.EXTRA_STREAM);
uriOCR(uri);
private void uriOCR(Uri uri)
if (uri != null)
InputStream is = null;
try
is = getContentResolver().openInputStream(uri);
Bitmap bitmap = BitmapFactory.decodeStream(is);
mImage.setImageBitmap(bitmap);
doOCR(bitmap);
catch (FileNotFoundException e)
// TODO Auto-generated catch block
e.printStackTrace();
finally
if (is != null)
try
is.close();
catch (IOException e)
// TODO Auto-generated catch block
e.printStackTrace();
启动OCR应用,从图库中选择一张图做OCR
发送Intent调用图库,在onActivityResult中获取返回的URI做OCR:
Intent intent = new Intent(Intent.ACTION_PICK, android.provider.MediaStore.Images.Media.EXTERNAL_CONTENT_URI);
startActivityForResult(intent, REQUEST_PICK_PHOTO);
启动OCR应用,拍照之后做OCR
为了获取高质量的图片,在Intent中加入图片路径。返回之后就可以直接使用这个图片路径解码:
private void dispatchTakePictureIntent()
Intent takePictureIntent = new Intent(MediaStore.ACTION_IMAGE_CAPTURE);
// Ensure that there's a camera activity to handle the intent
if (takePictureIntent.resolveActivity(getPackageManager()) != null)
// Create the File where the photo should go
File photoFile = null;
try
photoFile = createImageFile();
catch (IOException ex)
// Error occurred while creating the File
// Continue only if the File was successfully created
if (photoFile != null)
takePictureIntent.putExtra(MediaStore.EXTRA_OUTPUT,
Uri.fromFile(photoFile));
startActivityForResult(takePictureIntent, REQUEST_TAKE_PHOTO);
不要忘记下载语言包,并push到存储卡的tessdata目录下。
参考技术A 要编译Android平台的Tesseract,需要使用Google提供的tesseract-android-tools。代码获取方式:
git clone https //code google com/p/tesseract-android-tools/
打开README,在命令行工具中执行下面的步骤:
cd <project-directory>
curl -O https://tesseract-ocr.googlecode.com/files/tesseract-ocr-3.02.02.tar.gz
curl -O http://leptonica.googlecode.com/files/leptonica-1.69.tar.gz
tar -zxvf tesseract-ocr-3.02.02.tar.gz
tar -zxvf leptonica-1.69.tar.gz
rm -f tesseract-ocr-3.02.02.tar.gz
rm -f leptonica-1.69.tar.gz
mv tesseract-3.02.02 jni/com_googlecode_tesseract_android/src
mv leptonica-1.69 jni/com_googlecode_leptonica_android/src
ndk-build -j8
android update project --target 1 --path .
ant debug (release)
注意:如果在使用NDK r9,编译的时候会出现错误:
format not a string literal and no format arguments [-Werror=format-security]
解决的方法就是在Application.mk中加入一行:
APP_CFLAGS += -Wno-error=format-security
编译之后会生成class.jar和一些*.so。本回答被提问者采纳
通过Tesseract实现简单的OCR
Tesseract 简介
Tesseract 的 OCR 引擎最先由 HP 实验室于 1985 年开始研发,至 1995 年时已经成为 OCR 业内最准确的三款识别引擎之一。然而,HP 不久便决定放弃 OCR 业务,Tesseract 也从此尘封。
数年以后,HP 意识到,与其将 Tesseract 束之高阁,不如贡献给开源软件业,让其重焕新生。2005 年,Tesseract 由美国内华达州信息技术研究所获得,并求诸于 Google 对 Tesseract 进行改进、消除 Bug、优化工作。
目前 Tesseract 作为开源项目发布在 GitHub,其项目主页在这里查看,目前的新版本已经支持包括中文在内的超过 60 种语言的 OCR。
安装 Tesseract
注:因为众所周知的原因,Google 的相关网址需要FQ访问。
- Windows
- 访问下载页面,名称为 tesseract-ocr-setup-3.XX.exe 就是 Tesseract 安装程序,下载并安装。
- 下载需要的语言包,例如简体中文就是 tesseract-ocr-3.02.chi_sim.tar.gz ,将解压出的chi_sim.trainedata文件复制到tessdata目录下。程序运行必须包含英语语言包,若tessdata目录下没有eng.trainedata文件,请自行下载英语语言包。
- Linux
- 现在很多 Linux 软件仓库都已经包含 Tesseract 了,包名一般叫做 tesseract 或者 tesseract-ocr,搜索软件仓库并安装。
- 访问下载页面,下载需要的语言包,例如简体中文就是 tesseract-ocr-XXX.chi_sim.tar.gz,将解压出的文件chi_sim.trainedata复制到tessdata目录下(一般为 /usr/share/tesseract-ocr/tessdata or /usr/share/tessdata)。程序运行必须包含英语语言包,若tessdata目录下没有eng.trainedata文件,请自行下载英语语言包。
- Mac OS X
- 下载并安装 MacPorts。
- 使用命令sudo port install tesseract安装 tesseract。
- 使用命令sudo port install tesseract-<langcode>安装语言包,各语言的 langcode 可以访问 MacPorts tesseract page 查看。
- 当然也可以通过 Homebrew 安装tesseract:brew install tesseract。
使用 Tesseract
Tesseract 是一个命令行程序,命令格式为:
tesseract imagename outputbase [-l lang] [-psm pagesegmode] [configfile...]
参数说明
imagename 就是要识别的图片文件的名称,outputbase 就是识别结果输出文件的名称。
lang 就是要识别的语言代码,例如英语为 eng、简体中文为 chi_sim 等等。可以同时识别多种语言,使用 “+” 相连,例如eng+chi_sim。缺省时识别英语。
pagesegmode 为识别的具体模式,具体包含以下模式:
- 0 = Orientation and script detection (OSD) only.
- 1 = Automatic page segmentation with OSD.
- 2 = Automatic page segmentation, but no OSD, or OCR
- 3 = Fully automatic page segmentation, but no OSD. (Default)
- 4 = Assume a single column of text of variable sizes.
- 5 = Assume a single uniform block of vertically aligned text.
- 6 = Assume a single uniform block of text.
- 7 = Treat the image as a single text line.
- 8 = Treat the image as a single word.
- 9 = Treat the image as a single word in a circle.
- 10 = Treat the image as a single character.
如果想要简单地识别一张名为 test.png 的图片并将结果保存至 out.txt 中:
tesseract test.png out
或者采用简体中文语言包识别
tesseract test.png out -l chi_sim
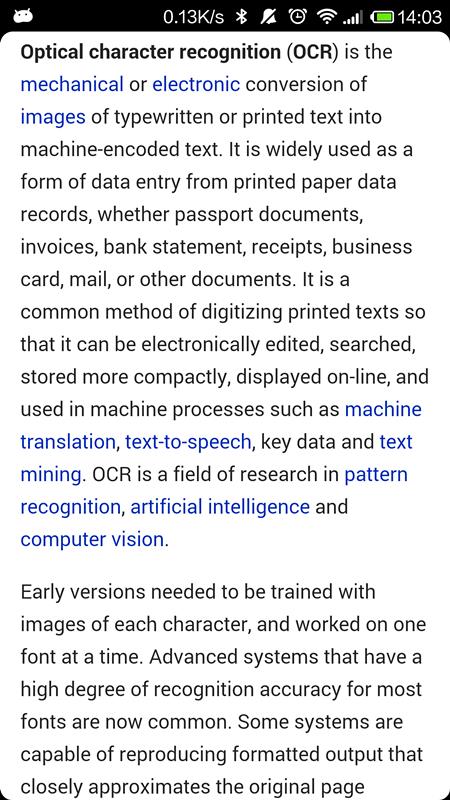
我尝试使用 Tesseract 识别下面这张图片:

使用 Tesseract 识别:

识别结果:

由此可见 Tesseract 对中文的识别很糟糕,毕竟它本来只是用来识别英语的,所以其他文字的识别率都比较差,特别是像汉字这种象形文字,必须要通过手动训练才能使用。可以参考另一篇文章《Tesseract训练》。
转载自http://xiaosheng.me/2015/12/18/article10/
以上是关于如何通过Tesseract开源OCR引擎创建Android OCR应用的主要内容,如果未能解决你的问题,请参考以下文章