SimpleAdmin手摸手教学之:插件管理

Posted 少林寺驻武当上办事处大神父王喇嘛的博客

tags:

篇首语:本文由小常识网(cha138.com)小编为大家整理,主要介绍了SimpleAdmin手摸手教学之:插件管理相关的知识,希望对你有一定的参考价值。

一、前言

在2.0的架构设计中,引入了插件的概念,目的就是为了解决代码臃肿问题,随着系统功能越来越多,System层的代码也越来越多,之前是以文件夹的方式区分功能模块,这样的话代码就过于集中,想找到某一个功能模块的代码就要翻好几个文件夹,不利于以后的开发和维护。所以在新的架构中,我将部分功能模块通过插件的方式提取出来,封装成类库形式的插件,这样System层如果需要哪个功能,就直接引用该功能模块的插件,我们调试代码中遇到问题也直接可以去对应功能模块的插件项目中查看代码并调试,非常方便。

二、插件说明

2.1核心插件

2.1.1 SimpleAdmin.Plugin.Core

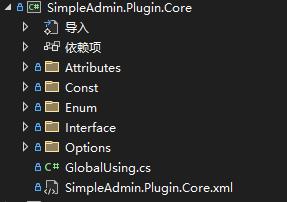
插件核心,被其他插件所引用,类似SimplAdmin.Core层,存放一些公共的特性,常量,枚举,接口等。

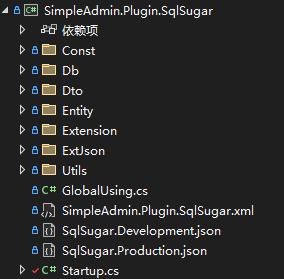
2.1.2 SimpleAdmin.Plugin.SqlSugar

SqlSugar插件,集成了SqlSugar的单例模式,数据库实体和一些常量我也移了过来,之前是放在核心层,但是我觉得提取出来的话后面找数据库相关的功能和配置就直接到SqlSugar插件找,非常方便。

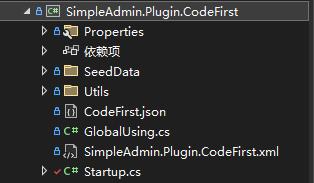
2.1.3 SimpleAdmin.Plugin.CodeFirst

CodeFirst数据迁移插件,如果需要数据库初始化和种子数据的生成,则引用该插件。

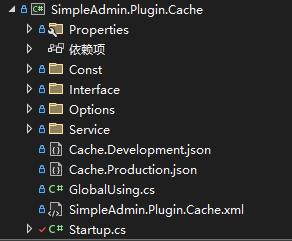
2.1.4 SimpleAdmin.Plugin.Cache

缓存插件,支持MemeryCache和Redis二选一,默认使用MemeryCache。

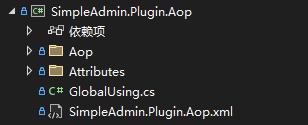
2.1.5 SimpleAdmin.Plugin.Aop

Aop插件,如果需要Aop功能,则可以使用该插件。

2.2系统模块

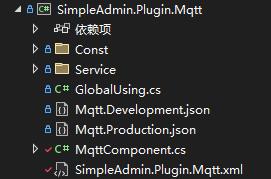
2.2.1 SimpleAdmin.Plugin.Mqtt

Mqtt插件,集成mqtt客户端功能,如果需要使用mqtt功能则可以引用该插件,支持和SignalR插件并存。

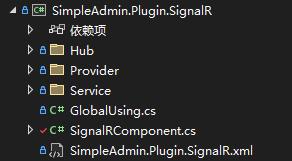
2.2.2 SimpleAdmin.Plugin.SignalR

SignalR插件,主要用于及时通讯和消息通知,系统默认消息通知使用的是Signalr,当然也可以切换成mqtt,可以和mqtt插件并存。

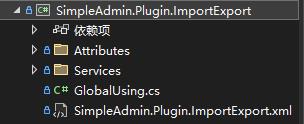
2.2.3 SimpleAdmin.Plugin.ImportExport  

导入导出插件,继承了数据导入导出功能,使用的Magicodes.IE.Excel实现的

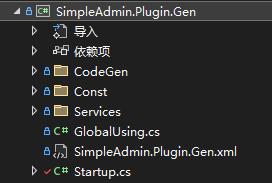
2.2.4 SimpleAdmin.Plugin.Gen

代码生成插件,集成了代码生成器功能,跟其他插件不同的是该插件引用System层而不是被System层引用。

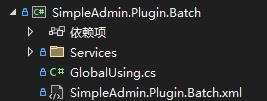
2.2.5 SimpleAdmin.Plugin.Batch

批量编辑插件,集成了批量编辑功能。

三、如何新建插件

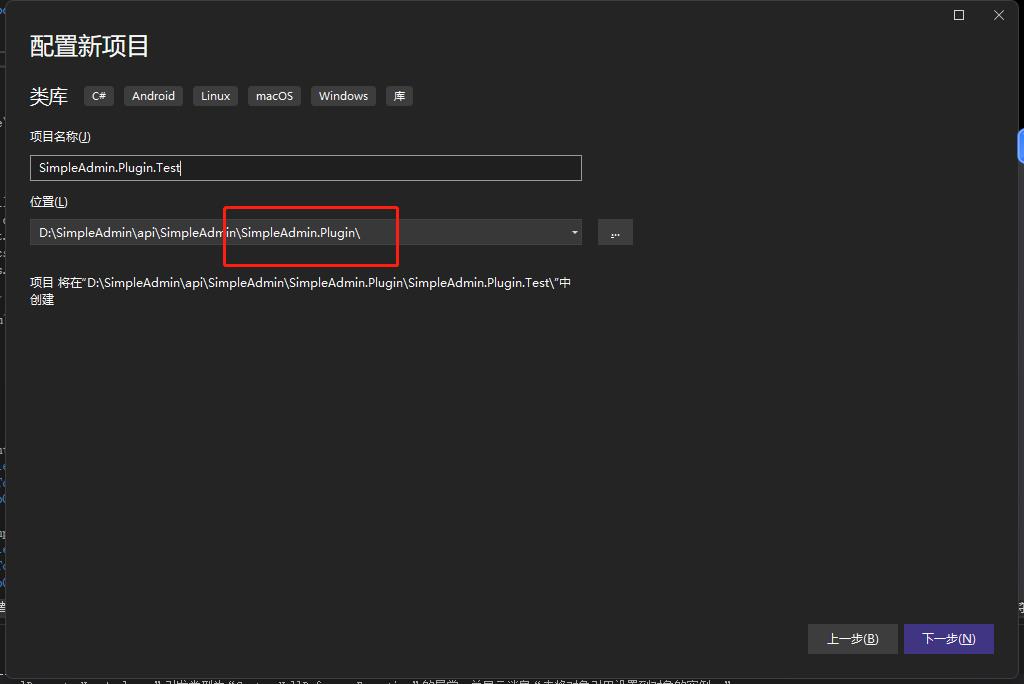
新建类库项目,输入项目名称和项目位置,命名规则为SimpleAdmin.Plugin.XXX,注意项目位置要在SimpleAdmin.Plugin文件夹。

双击新建的插件,修改PropertyGroup里得内容,这里的DocumentationFile改成自己的插件名称。

	<PropertyGroup>
		<TargetFrameworks>net7.0;net6.0</TargetFrameworks>
		<NoWarn>1701;1702;8616;1591;8618;8629;8602;8603;8604;8625;8765</NoWarn>
		<DocumentationFile>SimpleAdmin.Plugin.Test.xml</DocumentationFile>
		<ImplicitUsings>enable</ImplicitUsings>
		<Nullable>enable</Nullable>
	</PropertyGroup>

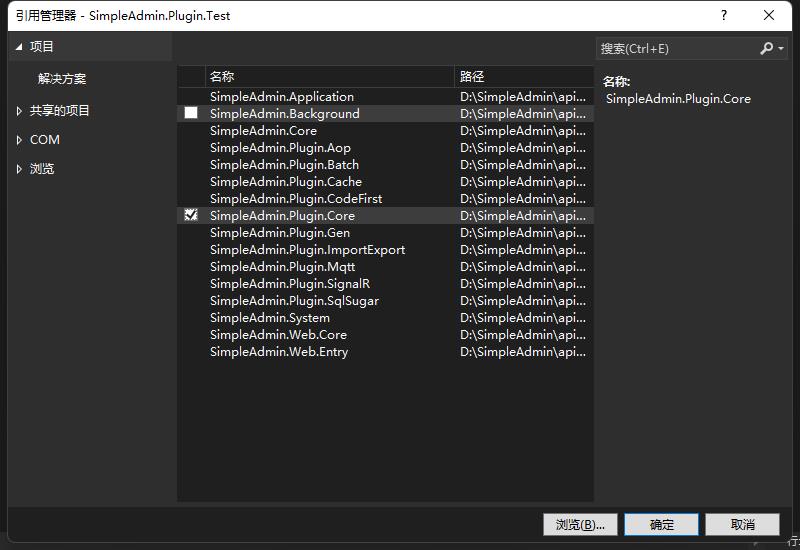
vs应该会提示重新加载项目,选择重新加载项目,并引用SimpleAdmin.Plugin.Core插件。

创建GlobalUsing.cs文件,用于全局引用。

global using Furion;
global using Microsoft.AspNetCore.Builder;
global using Microsoft.AspNetCore.Hosting;
global using Microsoft.Extensions.DependencyInjection;
global using SimpleAdmin.Plugin.Core;

新建startup.cs类,在 Furion 框架中,提供了更为灵活的 Startup 类配置方式,无需在 Web 启用层 中配置,可将配置放到任何项目层。详情可以查看Furion文档 https://furion.baiqian.ltd/docs/appstartup

/// <summary>
/// AppStartup启动类
/// </summary>
public class Startup : AppStartup

    /// <summary>
    /// ConfigureServices中不能解析服务,比如App.GetService(),尤其是不能在ConfigureServices中获取诸如缓存等数据进行初始化,应该在Configure中进行
    /// 服务都还没初始化完成,会导致内存中存在多份 IOC 容器!!
    /// 正确应该在 Configure 中,这个时候服务(IServiceCollection 已经完成 BuildServiceProvider() 操作了
    /// </summary>
    /// <param name="services"></param>
    public void ConfigureServices(IServiceCollection services)
    
         Console.WriteLine("注册Test插件");
         //serviec.AddXXX();
    
    public void Configure(IApplicationBuilder app, IWebHostEnvironment env)


 通过startup的方式,你只要引用了插件,则系统启动之后会自动调用里面的ConfigureServicesConfigure。如果你想你的插件可以通过配置文件选择启用或者不启用,那么你应该创建一个Component类,可以参考MQTT组件和Furion文档https://furion.baiqian.ltd/docs/component

namespace SimpleAdmin.Plugin.Test;

/// <summary>
///  Test组件
/// </summary>
public sealed class TestComponent : IServiceComponent


    /// <summary>
    /// ConfigureServices中不能解析服务,比如App.GetService(),尤其是不能在ConfigureServices中获取诸如缓存等数据进行初始化,应该在Configure中进行
    /// 服务都还没初始化完成,会导致内存中存在多份 IOC 容器!!
    /// 正确应该在 Configure 中,这个时候服务(IServiceCollection 已经完成 BuildServiceProvider() 操作了
    /// </summary>
    /// <param name="services"></param>
    public void Load(IServiceCollection services, ComponentContext componentContext)
    
        Console.WriteLine("注册Test插件");


/// <summary>
/// Test组件
/// 模拟 Configure
/// </summary>
public sealed class TestApplicationComponent : IApplicationComponent

    public void Load(IApplicationBuilder app, IWebHostEnvironment env, ComponentContext componentContext)


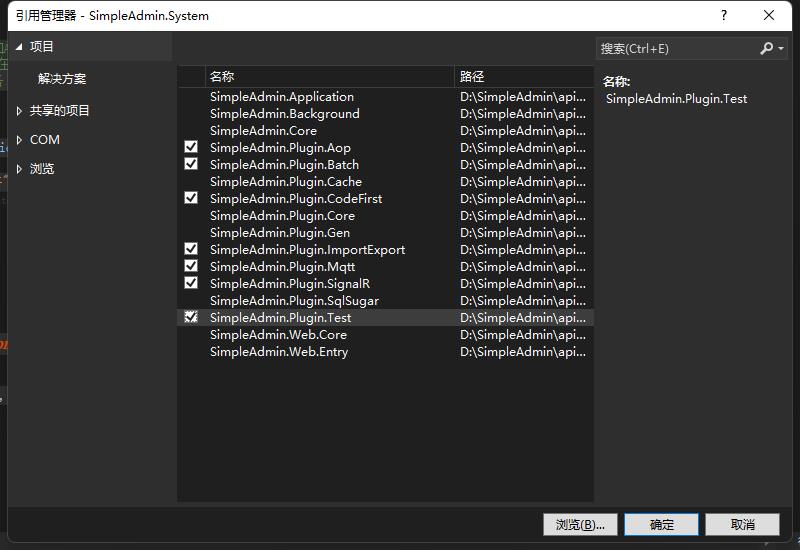
System层引用新建的插件,如果你的插件是像代码生成插件一样引用了System层,则要Web.Core层引用才行。

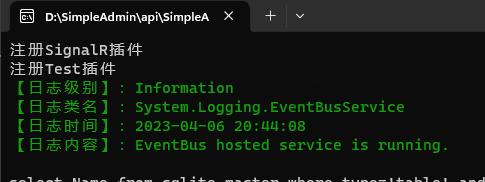
启动项目,可以看到插件启动了,剩下的就是自己写插件功能了。

手摸手教你微信小程序开发之自定义组件

前言

  相信大家在开发小程序时会遇到某个功能多次使用的情况,比如弹出框。这个时候大家首先想到的是组件化开发,就是把弹出框封装成一个组件,然后哪里使用哪里就调用,对,看来大家都是有思路的人,但是要怎样实现呢。可能你会去看官方文档,但是微信的官方文档也是说的不太清楚,所以写起来也是非常痛苦。今天就带大家手摸手开发微信组件,坐稳了,马路杀手要开车了。

具体实现

  我们先实现个简单的弹窗组件,详情图如下:

技术分享图片

1.新建component文件夹存放我们的组件,里边存放的就是我们所用的组件,我们今天要做的事弹出框,新建文件夹popup存放我们的组件模板,点击右键选择新建component,就会自动生成组件的模板wxss、wxml、json、js,如图

技术分享图片

2.我们可以写一些组件样式和布局,更页面写法类似,我就不多说了,直接把代码贴出 :

popup.wxml

<view class="wx-popup" hidden="{{flag}}">
  <view class=‘popup-container‘>
    <view class="wx-popup-title">{{title}}</view>
    <view class="wx-popup-con">{{content}}</view>
    <view class="wx-popup-btn">
      <text class="btn-no" bindtap=‘_error‘>{{btn_no}}</text>
      <text class="btn-ok" bindtap=‘_success‘>{{btn_ok}}</text>
    </view>
  </view>
</view>

popup.wxss

/* component/popup.wxss */
.wx-popup {
  position: absolute;
  left: 0;
  top: 0;

  width: 100%;
  height: 100%;
  background: rgba(0, 0, 0, .5);
}

.popup-container {
  position: absolute;
  left: 50%;
  top: 50%;

  width: 80%;
  max-width: 600rpx;
  border: 2rpx solid #ccc;
  border-radius: 10rpx;
  box-sizing: bordre-box;
  transform: translate(-50%, -50%); 
  overflow: hidden;
  background: #fff;
}

.wx-popup-title {
  width: 100%;
  padding: 20rpx;
  text-align: center;
  font-size: 40rpx;
  border-bottom: 2rpx solid red;
}

.wx-popup-con {
  margin: 60rpx 10rpx;
  text-align: center;
}

.wx-popup-btn {
  display: flex;
  justify-content: space-around;
  margin-bottom: 40rpx;
}

.wx-popup-btn text {
  display: flex;
  align-items: center;
  justify-content: center;
  width: 30%;
  height: 88rpx;
  border: 2rpx solid #ccc;
  border-radius: 88rpx;
}

popup.js:

Component({
  options: {
    multipleSlots: true // 在组件定义时的选项中启用多slot支持
  },
  /**
   * 组件的属性列表
   */
  properties: {
    title: {            // 属性名
      type: String,     // 类型(必填),目前接受的类型包括:String, Number, Boolean, Object, Array, null(表示任意类型)
      value: ‘标题‘     // 属性初始值(可选),如果未指定则会根据类型选择一个
    },
    // 弹窗内容
    content: {
      type: String,
      value: ‘内容‘
    },
    // 弹窗取消按钮文字
    btn_no: {
      type: String,
      value: ‘取消‘
    },
    // 弹窗确认按钮文字
    btn_ok: {
      type: String,
      value: ‘确定‘
    } 
  },

  /**
   * 组件的初始数据
   */
  data: {
    flag: true,
  },

  /**
   * 组件的方法列表
   */
  methods: {
    //隐藏弹框
    hidePopup: function () {
      this.setData({
        flag: !this.data.flag
      })
    },
    //展示弹框
    showPopup () {
      this.setData({
        flag: !this.data.flag
      })
    },
    /*
    * 内部私有方法建议以下划线开头
    * triggerEvent 用于触发事件
    */
    _error () {
      //触发取消回调
      this.triggerEvent("error")
    },
    _success () {
      //触发成功回调
      this.triggerEvent("success");
    }
  }
})

Component这个可以自己看微信官方文档锻炼一下自学能力^_^

3.模板文件也建好了,在首页用这个组件需要配置一下,首先建一个名为index.json的文件,里边配置"usingComponents",就是需要引入到首页,直接上代码:

{
  "usingComponents": {
    "popup": "/component/popup/popup"
  }
}

4.完成这些基本上大功告成了,还有最重要的一步也是最后一步,引入到首页,看代码

<!--index.wxml-->
<view class="container">
  <view class="userinfo">
    <button bindtap="showPopup"> 点我 </button>
  </view>
  <popup id=‘popup‘ 
      title=‘小组件‘ 
      content=‘学会了吗‘ 
      btn_no=‘没有‘ 
      btn_ok=‘学会了‘
      bind:error="_error"  
      bind:success="_success">
  </popup>
</view>

5.配置index.js操作点击事件,这个更简单,上代码

//index.js
//获取应用实例
const app = getApp()

Page({
  onReady: function () {
    //获得popup组件
    this.popup = this.selectComponent("#popup");
  },

  showPopup() {
    this.popup.showPopup();
  },

  //取消事件
  _error() {
    console.log(‘你点击了取消‘);
    this.popup.hidePopup();
  },
  //确认事件
  _success() {
    console.log(‘你点击了确定‘);
    this.popup.hidePopup();
  }
})

到此就结束,一个简单的小插件封装好了

技术分享图片

这个小组件我放到了git上https://github.com/Mr-MengBo/MiniApp-module,喜欢的话点个star,谢谢。

另外请大家多多提出意见,一起进步。
以上是关于SimpleAdmin手摸手教学之:插件管理的主要内容,如果未能解决你的问题,请参考以下文章

手摸手,和你一起学习 UiPath Studio

手摸手,带你用vue撸后台 系列三(实战篇)

关于vue项目管理项目的架构管理平台

手摸手教你 HTTPS 的原理(通俗易懂!)

手摸手教你玩转 vue render 函数

手摸手,带你用vue撸后台 系列四(vueAdmin 一个极简的后台基础模板)