Spring链接数据库
Posted (。・∀・)ノ゙嗨,小鼻涕孩
tags:
篇首语:本文由小常识网(cha138.com)小编为大家整理,主要介绍了Spring链接数据库相关的知识,希望对你有一定的参考价值。
     <!--spring-jdbc包-->
        <dependency>
            <groupId>org.springframework</groupId>
            <artifactId>spring-jdbc</artifactId>
            <version>5.2.10.RELEASE</version>
        </dependency>
        <!--spring-tx-->
        <dependency>
            <groupId>org.springframework</groupId>
            <artifactId>spring-tx</artifactId>
            <version>5.2.10.RELEASE</version>
        </dependency>
        <!--mysql驱动-->
        <dependency>
            <groupId>mysql</groupId>
            <artifactId>mysql-connector-java</artifactId>
            <version>8.0.11</version>
        </dependency>
applicationContext.xml
<?xml version="1.0" encoding="UTF-8"?> <beans xmlns="http://www.springframework.org/schema/beans" xmlns:xsi="http://www.w3.org/2001/XMLSchema-instance" xmlns:aop="http://www.springframework.org/schema/aop" xmlns:context="http://www.springframework.org/schema/context" xsi:schemaLocation="http://www.springframework.org/schema/beans http://www.springframework.org/schema/beans/spring-beans.xsd http://www.springframework.org/schema/context http://www.springframework.org/schema/context/spring-context.xsd http://www.springframework.org/schema/aop http://www.springframework.org/schema/aop/spring-aop.xsd"> <!-- 配置数据源 --> <bean id="dataSource" class="org.springframework.jdbc.datasource.DriverManagerDataSource"> <!-- 数据库驱动 --> <property name="driverClassName" value="com.mysql.cj.jdbc.Driver"/> <!-- 连接数据库url --> <property name="url" value="jdbc:mysql://localhost/spring?useUnicode=true&characterEncoding=utf-8&serverTimezone=Asia/Shanghai" /> <property name="username" value="root"/><!-- 连接数据库用户名 --> <property name="password" value="1234"/><!-- 连接数据库密码 --> </bean> <!-- 配置jdbc模板 --> <bean id="jdbcTemplate" class="org.springframework.jdbc.core.JdbcTemplate"> <!-- 默认必须使用数据源 --> <property name="dataSource" ref="dataSource"/> </bean> <!--使用context命名空间,开启注解处理器--> <context:component-scan base-package="com.niuzhuang"/> <bean id="userDao" class="com.niuzhuang.dao.impl.UserDaoImpl"/> <bean id="xmlAdvice" class="com.niuzhuang.demo.XmlAdvice"/> <bean id="accountDao" class="com.niuzhuang.dao.impl.AccountDaoImpl"> <property name="jdbcTemplate" ref="jdbcTemplate"/> </bean> <!--开启自动代理支持--> <aop:aspectj-autoproxy/> </beans>
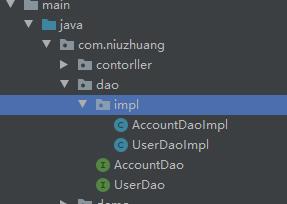
AccountDao.java
package com.niuzhuang.dao;

import com.niuzhuang.entity.Account;

public interface AccountDao
    public int addAccount(Account account);
    public int updateAccount(Account account);
    public int deleteAccount(Account account);
AccountDaoImpl.java
package com.niuzhuang.dao.impl;

import com.niuzhuang.dao.AccountDao;
import com.niuzhuang.entity.Account;
import org.springframework.jdbc.core.JdbcTemplate;

public class AccountDaoImpl implements AccountDao
    private JdbcTemplate jdbcTemplate;

    public void setJdbcTemplate(JdbcTemplate jdbcTemplate)
        this.jdbcTemplate = jdbcTemplate;


    public int addAccount(Account account)
        String sql = "insert into account(name,balance) values(?,?)";
        Object[] args = account.getName(),account.getBalance();
        int number = jdbcTemplate.update(sql,args);
        return number;


    public int updateAccount(Account account)
        String sql = "update account set name=?,balance=? where id=?";
        int number = jdbcTemplate.update(sql,account.getName(),account.getBalance(),account.getId());
        return number;


    public int deleteAccount(Account account)
        return 0;
Account实体类: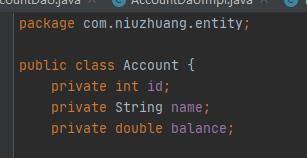
测试运行代码:
package com.niuzhuang;

import com.niuzhuang.dao.AccountDao;
import com.niuzhuang.entity.Account;
import org.junit.Test;
import org.springframework.context.ApplicationContext;
import org.springframework.context.support.ClassPathXmlApplicationContext;

import java.util.List;


public class TestJdbcTemplate
    //添加
    @Test
    public void add()
        ApplicationContext ap = new ClassPathXmlApplicationContext("applicationContext.xml");
        AccountDao accountDao = ap.getBean("accountDao", AccountDao.class);
        Account account = new Account();
        account.setName("张三");
        account.setBalance(10000.0);
        int num = accountDao.addAccount(account);
        System.out.println("添加了" + num + "条记录");

    //修改
    @Test
    public void update()
        ApplicationContext ap = new ClassPathXmlApplicationContext("applicationContext.xml");
        AccountDao accountDao = ap.getBean("accountDao", AccountDao.class);
        Account account = new Account();
        account.setId(1);
        account.setName("重岳");
        account.setBalance(10000.0);
        int num = accountDao.updateAccount(account);
        System.out.println("修改了" + num + "条记录");

    //删除
    @Test
    public void delete()
        ApplicationContext ap = new ClassPathXmlApplicationContext("applicationContext.xml");
        AccountDao accountDao = ap.getBean("accountDao", AccountDao.class);
        Account account = new Account();
        account.setId(1);
        int num = accountDao.deleteAccount(account);
        System.out.println("删除了" + num + "条记录");

    //查询----通过id和name查询
    @Test
    public void findByIdAndName()
        ApplicationContext ap = new ClassPathXmlApplicationContext("applicationContext.xml");
        AccountDao accountDao = ap.getBean("accountDao", AccountDao.class);
        Account account = accountDao.findByIdAndName(1,"张三");
        System.out.println(account);

    //查询所有
    @Test
    public void findAll()
        ApplicationContext ap = new ClassPathXmlApplicationContext("applicationContext.xml");
        AccountDao accountDao = ap.getBean("accountDao", AccountDao.class);
        List<Account> accountList = accountDao.findAll();
        if (accountList.size()>0)
            for (Account account:accountList)
                System.out.println(account);

        else
            System.out.println("查询不到数据");
Spring 链接数据库
一、前言
Spring 现在是我们在做 JavaWeb 开发中,用的最主流的框架。以后是不是我们暂时不知道,但现在是。废话不多我就介绍 Spring 中。链接数据库的三种方式: git源码地址 需要的自行下载。
二、Spring 默认链接数据库方式(java 代码)
导入的 JAR 有如下:
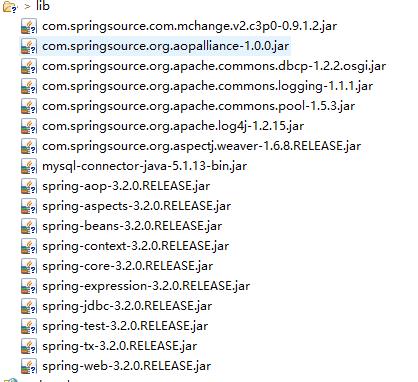
Spring 默认的链接数据库代码:

package com.springjdbc.service;

import org.junit.Test;
import org.springframework.jdbc.core.JdbcTemplate;
import org.springframework.jdbc.datasource.DriverManagerDataSource;

/**
 * 默认 spring 链接数据库的方式
 * @author TongZhou
 *
 */
public class SpringJDBCService {

    /**
     * 使用 Spring 默认的数据库方式
     */
    @Test
    public void JDBCTest(){

        //创建数据库链接的数据源
        DriverManagerDataSource dataSource=new DriverManagerDataSource();

        //设置数据库的链接信息
        dataSource.setDriverClassName("com.mysql.jdbc.Driver");
        dataSource.setUrl("jdbc:mysql:///adminmanger");
        dataSource.setUsername("root");
        dataSource.setPassword("123456");

        JdbcTemplate jdbcTemplate=new JdbcTemplate(dataSource);
        jdbcTemplate.execute("create table user(id int primary key auto_increment,name varchar(20))");
    }
}
Test效果:
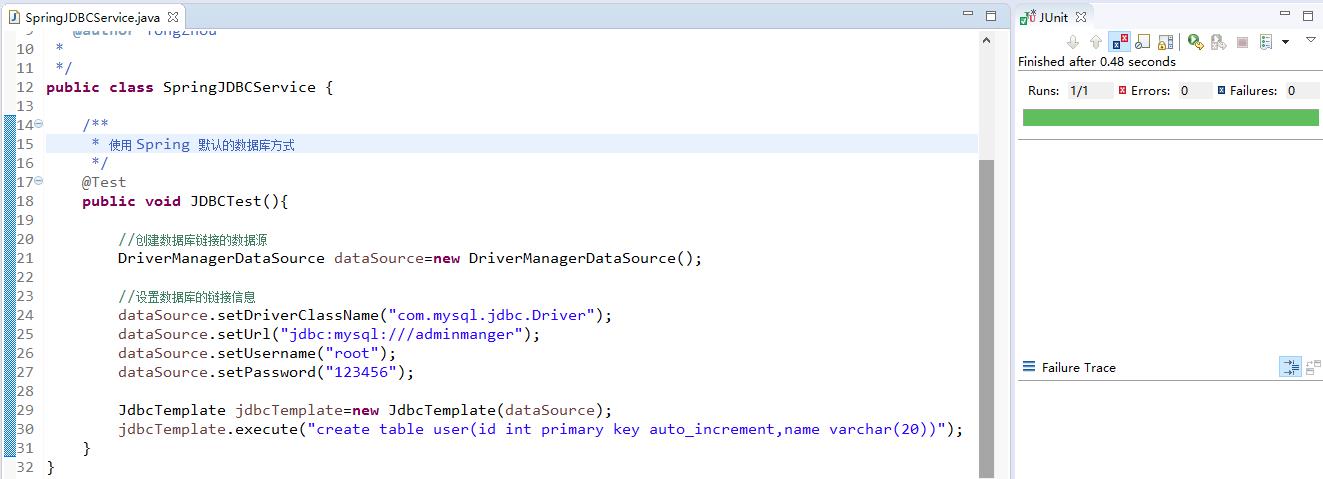
在数据库中,生成了表:
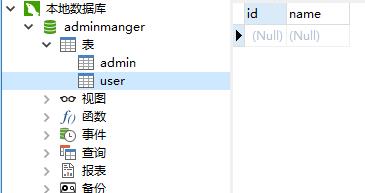
这是 Spring 在内部集成的 所以它应用的 dataSource 的包名是 import org.springframework.jdbc.datasource.DriverManagerDataSource。我们使用了 Spring 。就不用去在 实例化有关类了,配置就好。那么我们用 Spring 的方式去解决问题。
三、Spring 默认链接数据库方式(配置文件)
配置文件如下: 在项目中 src -->applicationContext.xml 内部代码如下:
<?xml version="1.0" encoding="UTF-8"?>
<beans xmlns="http://www.springframework.org/schema/beans"
       xmlns:xsi="http://www.w3.org/2001/XMLSchema-instance"
       xmlns:aop="http://www.springframework.org/schema/aop"
       xmlns:tx="http://www.springframework.org/schema/tx"
       xsi:schemaLocation="
http://www.springframework.org/schema/beans http://www.springframework.org/schema/beans/spring-beans-4.3.xsd
http://www.springframework.org/schema/tx http://www.springframework.org/schema/tx/spring-tx.xsd
http://www.springframework.org/schema/aop http://www.springframework.org/schema/aop/spring-aop.xsd">

    <!-- 事物的配置 -->
    <!-- spring 中的数据持久层的代码 -->
    <!-- spring 创建dataSource spring内置的连接池-->
    <bean id="dataSource" class="org.springframework.jdbc.datasource.DriverManagerDataSource">
        <property name="driverClassName" value="com.mysql.jdbc.Driver"/>
        <property name="url" value="jdbc:mysql:///adminmanger"/>
        <property name="username" value="root"/>
        <property name="password" value="123456"/>
    </bean>

    <bean id="jdbcTemplate" class="org.springframework.jdbc.core.JdbcTemplate">
        <property name="dataSource" ref="dataSource"/>
    </bean>

</beans>
测试代码如下:

package com.springjdbc.service;

import org.junit.Test;
import org.junit.runner.RunWith;
import org.springframework.beans.factory.annotation.Autowired;
import org.springframework.beans.factory.annotation.Qualifier;
import org.springframework.jdbc.core.JdbcTemplate;
import org.springframework.test.context.ContextConfiguration;
import org.springframework.test.context.junit4.SpringJUnit4ClassRunner;

/**
 * 通过配置文件链接数据库
 * @author TongZhou
 *
 */
// 使用 Spring 的 JUnit 的测试
//通过 ContextConfiguration 读取配置文件
@RunWith(SpringJUnit4ClassRunner.class)
@ContextConfiguration(locations="classpath:applicationContext.xml")
public class SpringJDBCService1 {

    @Autowired
    //注入 从数据库中配置 id="jdbcTemplate"
    @Qualifier("jdbcTemplate")
    //数据库链接对象
    private JdbcTemplate jdbcTemplate;

    /**
     * 创建数据库
     */
    @Test
    public void dome(){

        //执行 SQL
        jdbcTemplate.execute("create table dashuju (id int primary key auto_increment,name varchar(20))");
    }
}
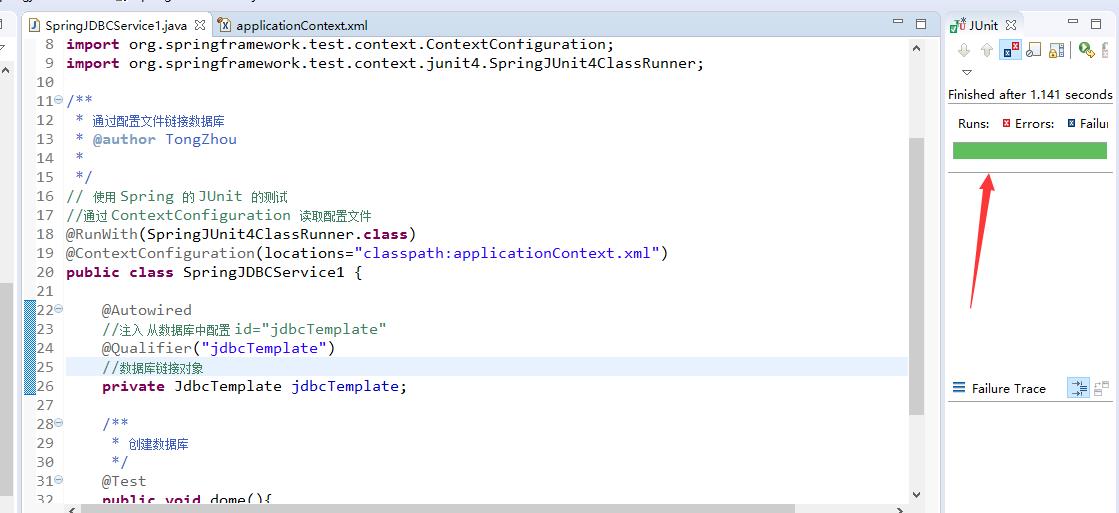
结果如下:
四、Spring 链接数据库(dbcp连接池)
Spring 除了自己可以链接数据库以外,他还引入了第三方的插件如 dbcp 、c3p0 连接池。同时这个连接池也借助了 Spring 这个平台在被广泛使用。
dbcp 需要引入的 JAR 有:
1. com.springsource.org.apache.commons.dbcp-1.2.2.osgi.jar
2. com.springsource.org.apache.commons.pool-1.5.3.jar
在 XML 中的配置如下:
<!-- dbcp连接池 -->
    <bean id="dataSource" class="org.apache.commons.dbcp.BasicDataSource">
        <property name="driverClassName" value="com.mysql.jdbc.Driver"/>
        <property name="url" value="jdbc:mysql:///adminmanger"/>
        <property name="username" value="root"/>
        <property name="password" value="123456"/>
    </bean>
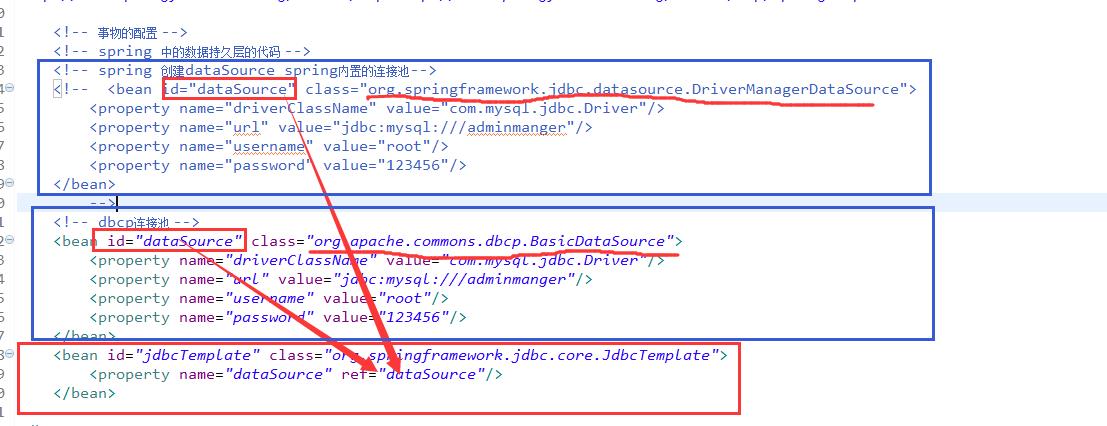
dbcp 和默认的 配置的比较如下:
五、Spring 链接数据库 (C3P0 连接池)
配置如下:
<!-- c3p0连接池的使用 -->
    <bean id="dataSource" class="com.mchange.v2.c3p0.ComboPooledDataSource">
        <property name="driverClass" value="com.mysql.jdbc.Driver"/>
        <property name="jdbcUrl" value="jdbc:mysql:///adminmanger"/>
        <property name="user" value="root"/>
        <property name="password" value="root"/>
    </bean>
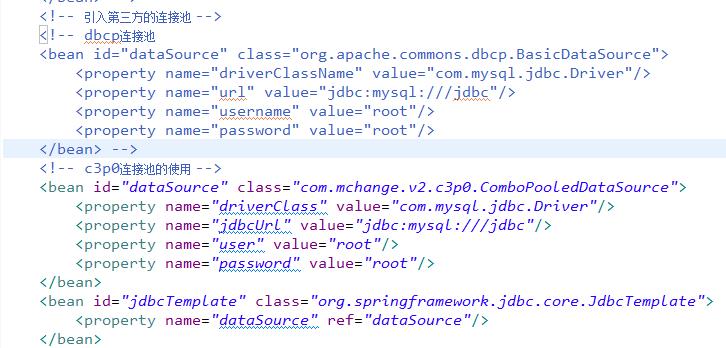
效果截图:
六、总结
通过学习 Spring 这四种链接数据库做法,感觉受益匪浅。通过 Spring 的管理,我们可以省略了许多的代码。一个字就是 “爽”。 git源码地址
以上是关于Spring链接数据库的主要内容,如果未能解决你的问题,请参考以下文章
