day02 微信小程序
Posted 贰号猿
tags:
篇首语:本文由小常识网(cha138.com)小编为大家整理,主要介绍了day02 微信小程序相关的知识,希望对你有一定的参考价值。
内容回顾
-
搭建环境
-
全局配置
-
pages
-
window
-
tabbar
-
-
页面
-
json
-
js
-
wxml
-
wxss
-
-
flex布局
-
display: flex
-
flex-direction: row/column
-
justify-content:...
-
align-item:...
-
-
小程序开发
-
组件(标签)
-
text
-
view
-
image
-
-
样式
-
rpx
-
-
今日概要
-
指令
-
api
-
页面
今日内容
1. 跳转
1.1 对标签绑定点击事件(bindtap)
index.wxml:
data-变量="123" # 传参数
<view bindtap="clickMe" data-nid="123" data-name="SD" >点我跳转</view>
index.js:
Page(
  ...
  /**
   *  点击绑定的事件
   * console.log(nid); 调试
   * var nid = e.currentTarget.dataset.nid; 获取参数
  */
  clickMe:function(e)
    var nid = e.currentTarget.dataset.nid;
    console.log(nid);

)
1.2 页面跳转(通过js的方式)
index.js:(跳转的url)
自己拼接传参:?id=\'+nid
注意:只能跳转到非tabbar页面
wx.navigateTo(
    url: \'/pages/redirect/redirect?id=\'+nid
)
跳转到的页面如果想要接受参数,可以在onLoad方法中接受。
redirect.js
Page(
/**
   * 生命周期函数--监听页面加载
   */
  onLoad: function (options)
    console.log(options);

)
1.3 通过标签跳转(另一种方式跳转)
index.wxml:
<navigator url="/pages/redirect/redirect?id=666">跳转到新页面</navigator>
2.数据绑定
html:(以往的方式 效率低)
<html>
    ...

    <div id="content"></div>

    <script>
        var name = "李业迟到";
        $(\'#content\').val(name);
    </script>

</html>
-
vue.js (双向数据绑定)
<html> <div id="app"> <div>message</div> </div> <script> new Vue( el: \'#app\', data: message: \'老男孩教育Python\' ) </script> </html>
2.1 基本显示
-
bind.wxml:
<view>数据1:message</view>
-
展示数据(data里传参数)
bind.js:(message做了数据绑定)
// pages/bind/bind.js Page( /** * 页面的初始数据 */ data: message:"沙雕李业", )
2.2 数据更新
-
wxml:
<view>数据2:message</view> <button bindtap="changeData">点击修改数据</button>
-
修改数据setData()
js:
Page(
  data:
    message:"沙雕李业",
  ,
  changeData:function()
    // 修改数据 这个this指的是changeData
    this.setData( message: "大沙雕李业");

)
3.获取用户信息
方式一
-
wxml(官方不推荐用这个)
<view bindtap="getUserName">获取当前用户名</view>
-
js
getUserName:function()
    // vx. 调用微信提供的接口 获取用户信息
    // success:调用成功 fail:调用失败
    wx.getUserInfo(
      success: function (res)
        // 调用成功后触发
        console.log(\'success\',res)
      ,
      fail:function(res)
        // 调用失败后触发
        console.log(\'fail\', res)

    )
  ,
方式二(推荐用这个中获取用户信息)
-
wxml(官方推荐用button按钮)
这是写死的button open-type="getUserInfo"
<button open-type="getUserInfo" bindgetuserinfo="xxxx">授权登录</button>
-
js
xxxx:function()
    wx.getUserInfo(
      success: function (res)
        // 调用成功后触发
        console.log(\'success\', res)
      ,
      fail: function (res)
        // 调用失败后触发
        console.log(\'fail\', res)

    )
示例
-
wxml
<!--pages/login/login.wxml--> <view>当前用户名:name</view> <view> 当前头像:<image src="path" style="height:200rpx;width:200rpx;"></image> </view> <button open-type="getUserInfo" bindgetuserinfo="fetchInfo">获取信息button</button>
-
js:(注意这里有this问题)
// pages/login/login.js Page( /** * 页面的初始数据 */ data: name:"", path: "/static/default.png" , fetchInfo:function() // 打开配置,手动授权。 // wx.openSetting() // 这个this指的是fetchInfo 这个函数可以绑定了data可以操作data var that = this; wx.getUserInfo( success:function(res) console.log(res); // 这个函数里如果有this指的是success函数 这个函数里没有绑定data无法操作data // 这个that指的是函数fetchInfo 可以操作data that.setData( name:res.userInfo.nickName, path:res.userInfo.avatarUrl ) ) , /** * 生命周期函数--监听页面加载 */ onLoad: function (options) , /** * 生命周期函数--监听页面初次渲染完成 */ onReady: function () , /** * 生命周期函数--监听页面显示 */ onShow: function () , /** * 生命周期函数--监听页面隐藏 */ onHide: function () , /** * 生命周期函数--监听页面卸载 */ onUnload: function () , /** * 页面相关事件处理函数--监听用户下拉动作 */ onPullDownRefresh: function () , /** * 页面上拉触底事件的处理函数 */ onReachBottom: function () , /** * 用户点击右上角分享 */ onShareAppMessage: function () )
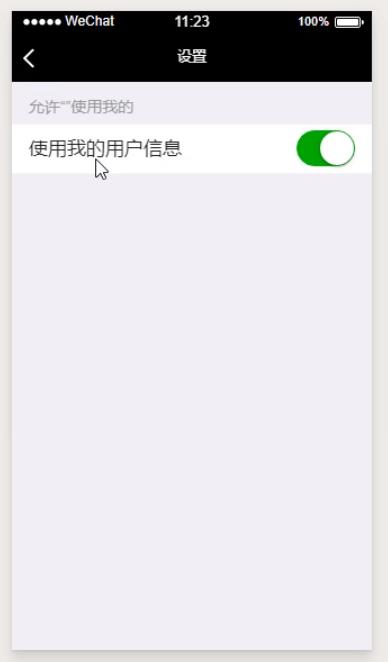
注意事项:
-
想要获取用户信息,必须经过用户授权(button)会弹出一个按钮让用户选择。
-
用户选择已授权
-
用户不授权,可以通过调用wx.openSetting方法来重新弹出按钮让用户授权
// 打开配置,手动授权。
wx.openSetting()
-
4.获取用户位置信息
-
wxml (绑定事件bindtap="getLocalPath")
<view bindtap="getLocalPath">localPath</view>
-
js
 data:
      localPath:"请选择位置",
  ,
  getLocalPath:function()
    var that = this;
    // 获取用户位置信息
    wx.chooseLocation(
      success: function(res)
      // res.address 拿到地址
        that.setData(localPath:res.address);
      ,
    )
  ,
5. for指令
-
goods.wxml
循环列表
默认item定死的就是循环每个元素index代指索引
<view wx:for="dataList" >index - item</view>自定义索引index和元素item
<view wx:for="dataList" wx:for-index="idx" wx:for-item="x">idx - x
循环展示字典
<view wx:for="userInfo">index - item</view><!--pages/goods/goods.wxml--> <text>商品列表</text> <view> <view wx:for="dataList" >index - item</view> <view wx:for="dataList" wx:for-index="idx" wx:for-item="x">idx - x</view> </view> <view> userInfo.name userInfo.age </view> <view> <view wx:for="userInfo">index - item</view> </view>
-
goods.js
 data:
    dataList:["白浩为","海狗","常鑫"],
    userInfo:
      name:"alex",
      age:18

  ,
6.获取图片(案例)
-
publish:wxml
<!--pages/publish/publish.wxml--> <view bindtap="uploadImage">请上传图片</view> <view class="container"> <image wx:for="imageList" src="item"></image> </view> -
js
data: //默认展示两张图 imageList: ["/static/hg.jpg", "/static/hg.jpg"] , uploadImage:function() var that = this; //微信提供的apichooseImage wx.chooseImage( count:9,//最多选几张图 sizeType: [\'original\', \'compressed\'],//图片尺寸 sourceType: [\'album\', \'camera\'],//图片来源 success:function(res)//接口掉用成功的回调函数 // 设置data :imageList,页面上图片自动修改(选择的图片覆盖掉默认图片)。 // that.setData( // imageList: res.tempFilePaths // ); // 保存着默认图片imageLis 再添加选择的图片tempFilePaths 用concat做列表拼接 that.setData( //两个列表拼接用concat imageList: that.data.imageList.concat(res.tempFilePaths) ); ); ,
注意:图片目前只是上传到了内存。
总结
-
标签(组件)
-
text
-
view
-
image
-
navigator,跳转到其他页面(默认只能跳转到非tabbar页面)相当于<a>标签
-
button,按钮(特殊:建议获取用户信息时)
-
-
事件
-
bindtap 点击事件 传参:data-xx="123" 获取参数 :e.currentTarget.dataset
<view bindtap="func"></view>
<view bindtap="func" data-xx="123"></view>func:function(e)
e.currentTarget.dataset
-
-
api(微信自带api)
-
navigateTo 页面跳转
wx.navigateTo(
    url: \'/pages/redirect/redirect?id=\'+nid,
) -
openSetting 手动设置授权信息
wx.openSetting() -
getUserInfo 获取用户信息
wx.getUserInfo(
success:function(res)
console.log(res);
)
注意:结合button按钮实现 -
chooseLocation 获取用户定位信息
wx.chooseLocation(
      success: function(res)

      ,
) -
chooseImage 上传图片
wx.chooseImage(
      count:9,
      sizeType: [\'original\', \'compressed\'],
      sourceType: [\'album\', \'camera\'],
      success:function(res)


    );
-
-
数据绑定 (后端修改数据前端自动修改)
-
for指令 (帮助循环展示列表或字典展示 后端修改数据必须调用setData) 注意:setData + this/that
作业
-
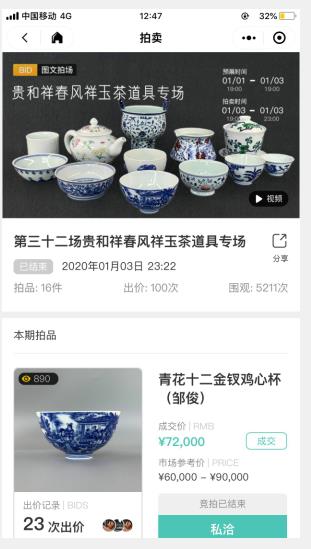
拍卖详细页面
-
发布消息的页面
<textarea></textarea>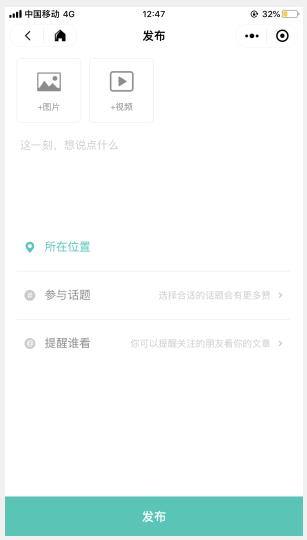
-
功能点:
-
拍卖列表页面通过for循环+后端数据展示信息。
-
点击拍卖列表中的某项拍卖时,需要将自己的ID传递给 拍卖详细页面。
-
上传图片
-
选择位置
-
-
以上是关于day02 微信小程序的主要内容,如果未能解决你的问题,请参考以下文章