SpringBoot
Posted jiaxing-java
tags:
篇首语:本文由小常识网(cha138.com)小编为大家整理,主要介绍了SpringBoot相关的知识,希望对你有一定的参考价值。
整合JDBC
1、新建项目
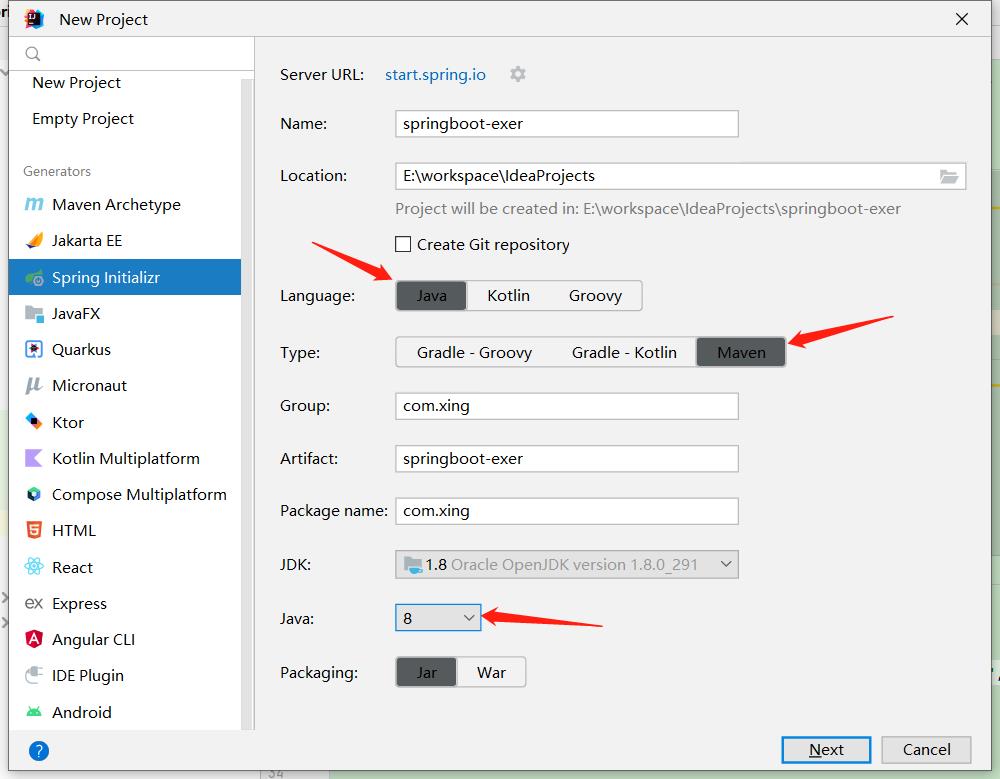
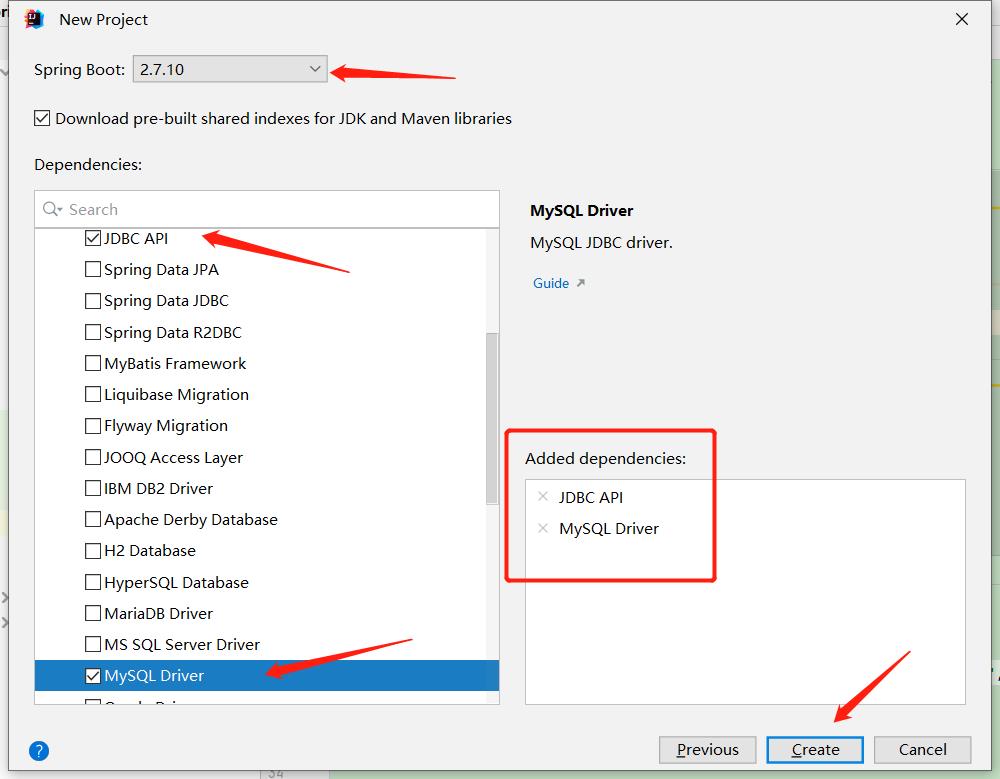
单击Create之后等待加载(自动导入)完成
2、新建application.yaml配置文件
-
创建文件
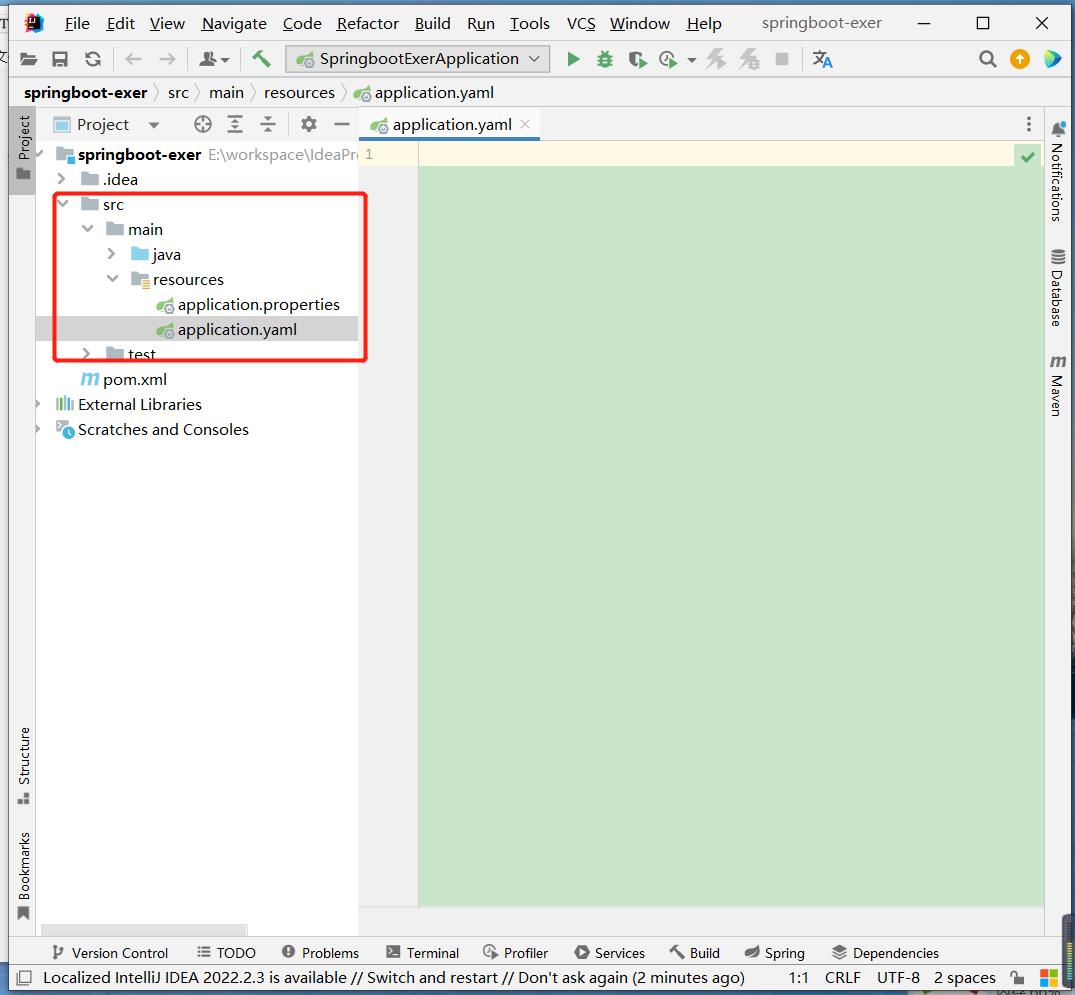
-
编写配置文件
spring:
  datasource:
    username: root
    password: 123456
    url: mysql:jdbc://localhost:3306/mybatis?useSSL=false&useUnicode=true&characterEncoding=utf-8
    driver-class-name: com.mysql.cj.jdbc.Driver
3、连接数据库
4、编写测试类运行查看数据源
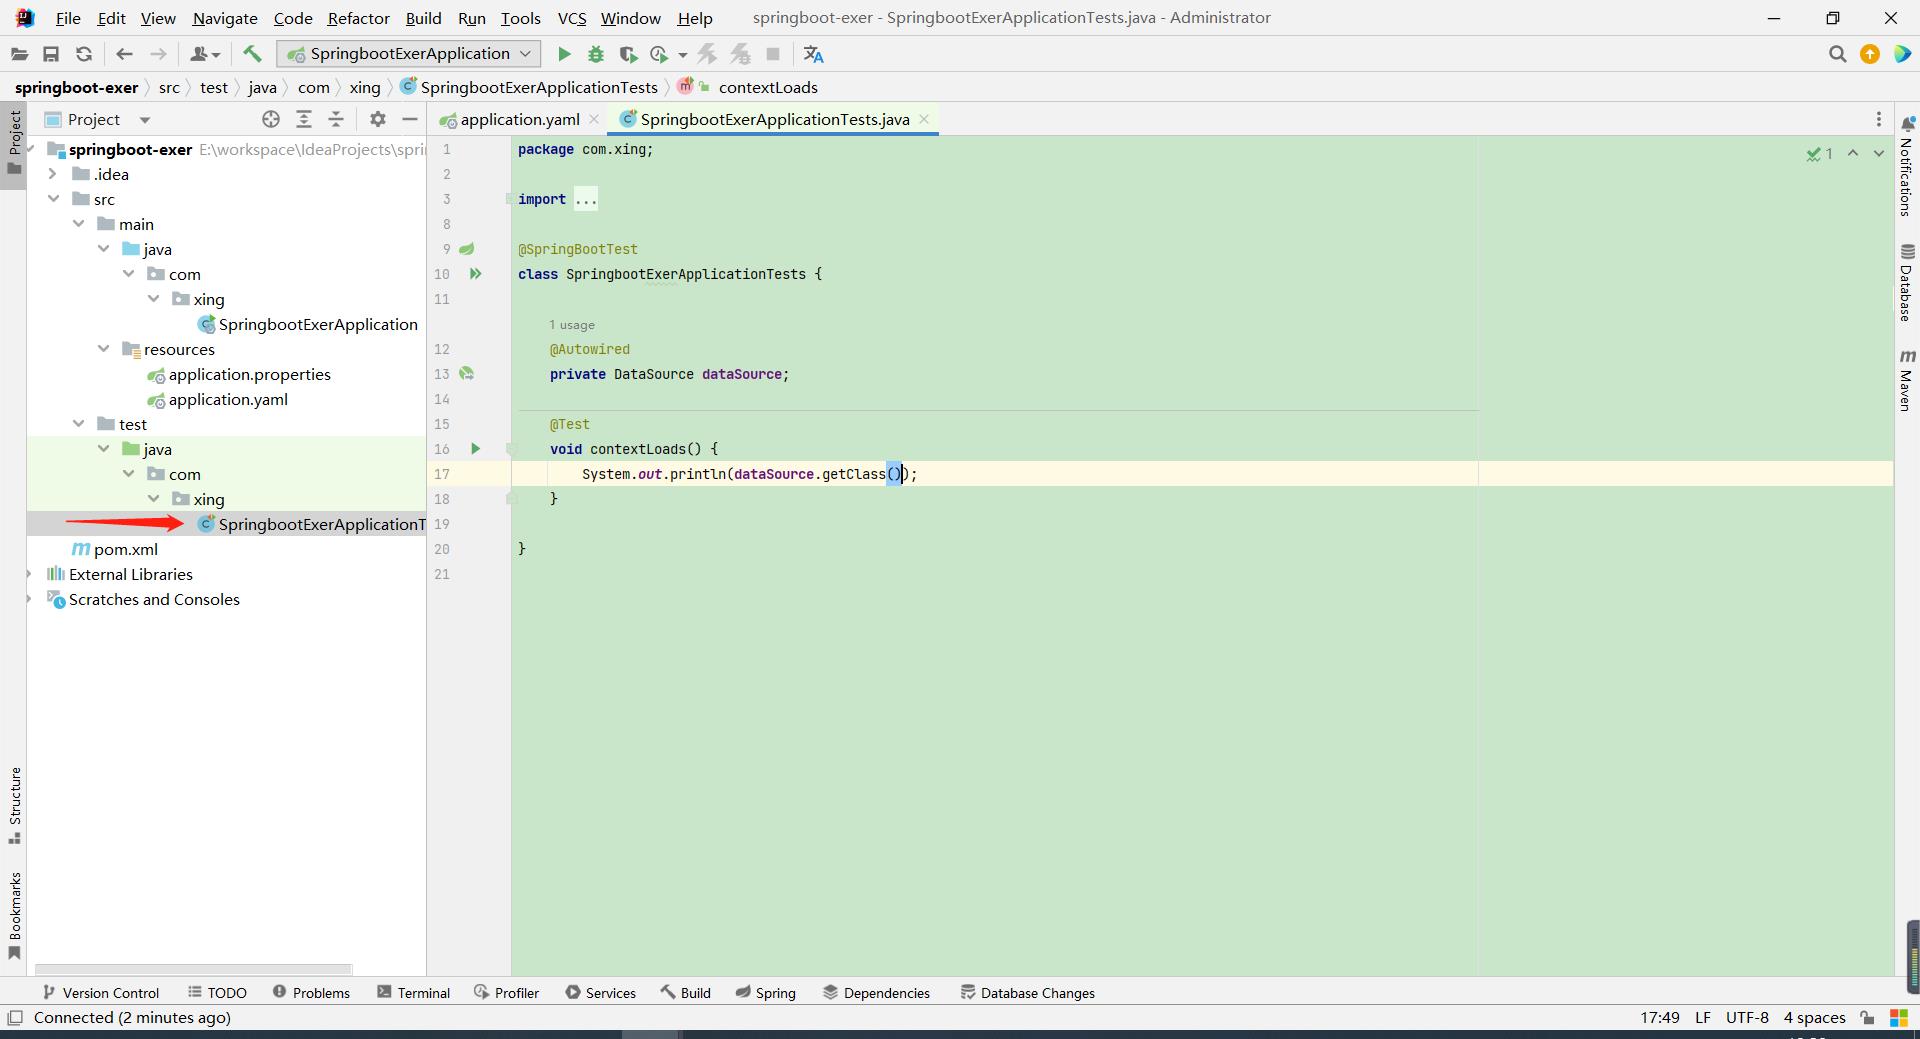
测试类代码
@SpringBootTest
class SpringbootExerApplicationTests

    @Autowired
    private DataSource dataSource;

    @Test
    void contextLoads()
        System.out.println(dataSource.getClass());
5、新建Controller包下相应类编写代码测试增删改查
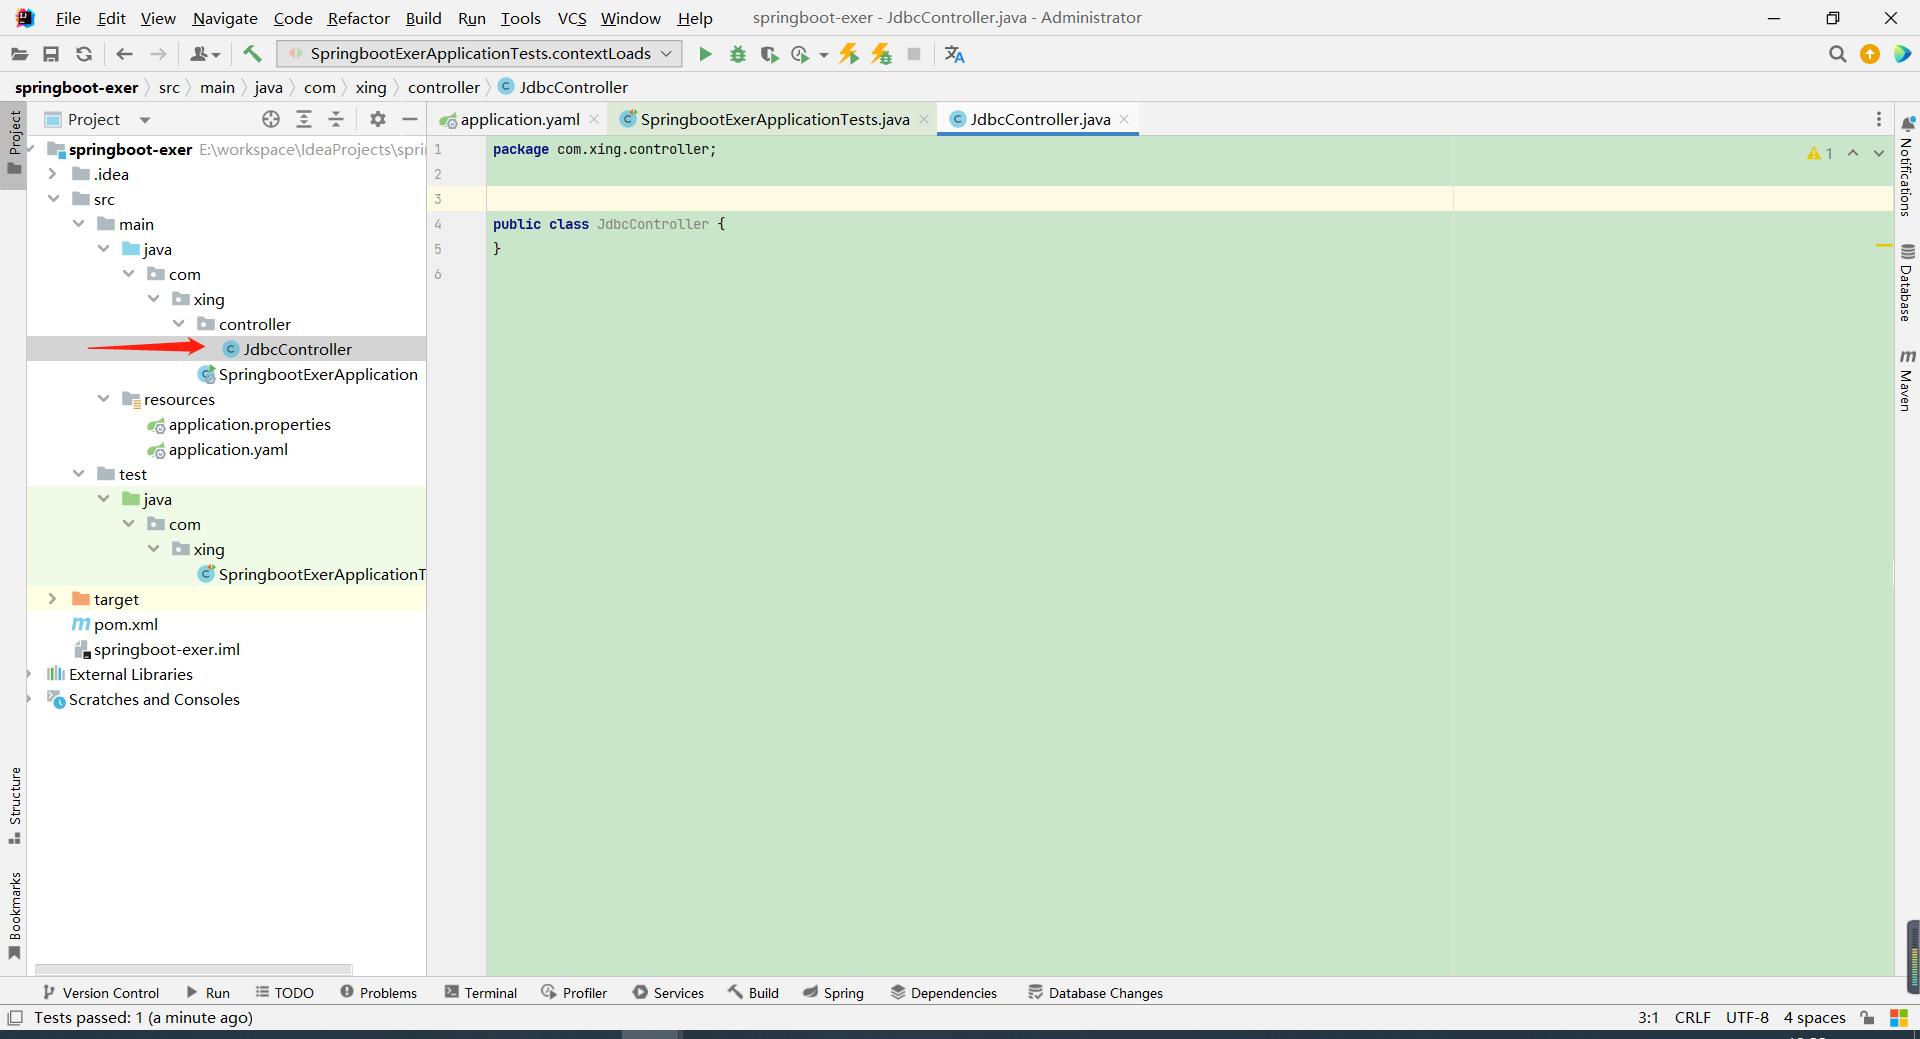
Controller类代码
// 若要使用这个注解需要在依赖中添加web依赖
// 使用这个注解后,页面直接返回字符串,不走视图解析器
@RestController
public class JdbcController

    @Autowired
    private JdbcTemplate jdbcTemplate; // 导入jdbc模板,增删改查全部功能都在这里封装好了

    @GetMapping("allUsers")
    public List<Map<String, Object>> userList()

        // 编写SQL语句
        String sql = "select * from mybatis.user";
        List<Map<String,Object>> userList = jdbcTemplate.queryForList(sql);
        return userList;


    // 添加用户
    @GetMapping("addUser")
    public String addUser()
        // sql语句
        String sql = "insert into mybatis.user (id, name, pwd) VALUES (5,\'蓝蓝\',\'popkart\')";
        jdbcTemplate.update(sql);
        return "addUser_ok";


    // 修改用户
    @GetMapping("updateUser")
    public String updateUser()
        // SQL语句
        String sql = "update mybatis.user set name = \'皮蛋\',pwd = \'speed\' where id = 5";
        jdbcTemplate.update(sql);
        return "updateUser_ok";


    // 删除用户
    @GetMapping("deleteUser")
    public String deleteUser()
        String sql = "delete from mybatis.user where id = 5";
        jdbcTemplate.update(sql);
        return "deleteUser_ok";
web依赖
<dependency>
    <groupId>org.springframework.boot</groupId>
    <artifactId>spring-boot-starter-web</artifactId>
</dependency>
整合Druid
1、导入依赖
<!-- https://mvnrepository.com/artifact/com.alibaba/druid -->
<dependency>
    <groupId>com.alibaba</groupId>
    <artifactId>druid</artifactId>
    <version>1.1.21</version>
</dependency>
2、在application.yaml文件中使用Druid
spring:
  datasource:
    username: root
    password: 123456
    url: jdbc:mysql://localhost:3306/mybatis?useSSL=false&useUnicode=true&characterEncoding=utf-8
    driver-class-name: com.mysql.cj.jdbc.Driver
    type: com.alibaba.druid.pool.DruidDataSource
3、运行测试类查看数据源
Druid数据源配置
#SpringBoot 默认是不注入这些属性值的,需要自己绑定
#Druid数据源专有配置
initialSize: 5
minIdle: 5
maxActive: 60000
timeBetweenEvictionRunsMillis: 60000
validationQuery: SELECT 1 FROM DUAL
testWhileIdle: true
testOnBorrow: false
testOnReturn: false
poolPreparedStatements: true

#配置监控统计拦截的filters.stat:监控统计、Log4j:日志记录、wall:防御sql注入
#如果运行时报错 java.lang.ClassNotFoundException: org.apache.log4j.Priority
#则导入 log4j 依赖即可
filters: stat,wall,log4j
maxPoolPreparedStatementPerConnectionSize: 20
useGlobalDataSourceStat: true
connectionProperties: druid.stat.mergeSql=true;druid.stat.slowSqlMillis=500
配置完后编写Config类
配置DruidConfig
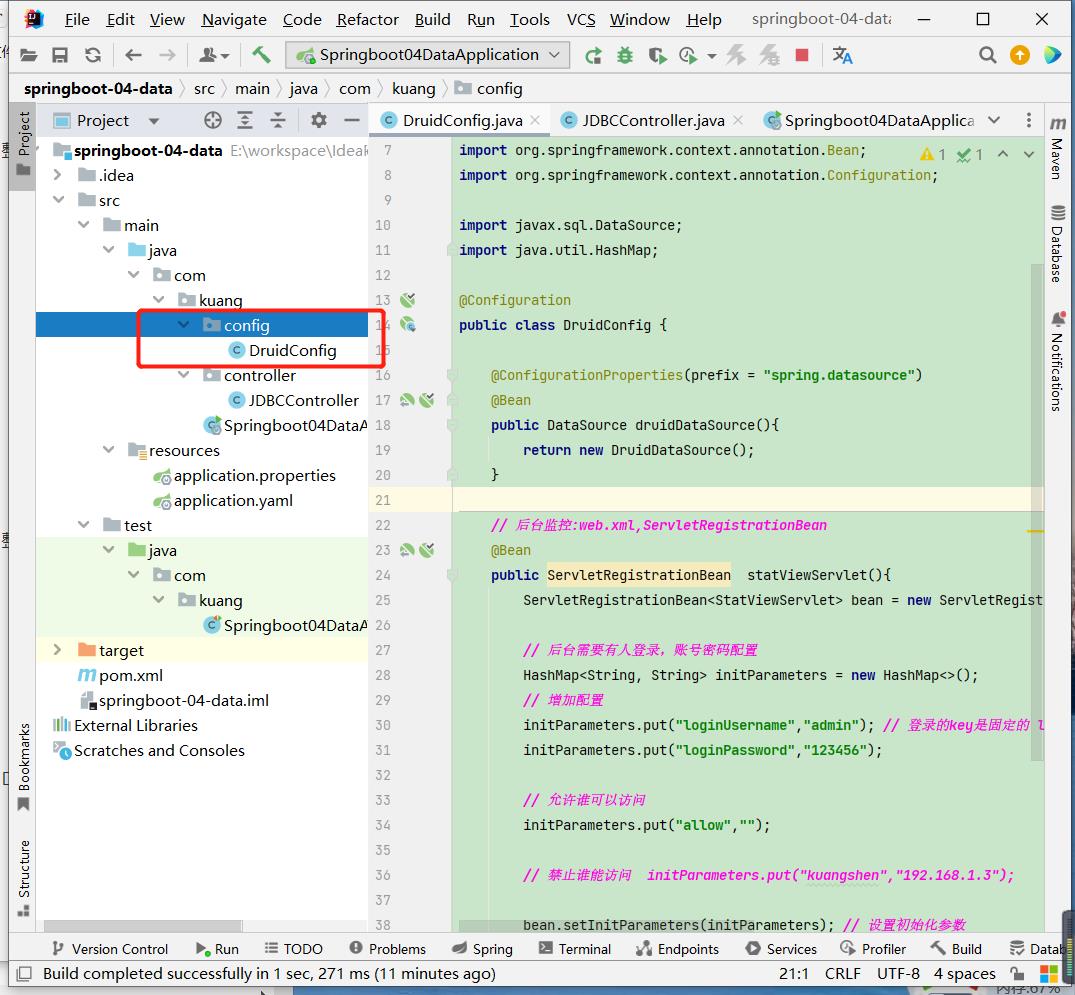
config类代码
@Configuration
public class DruidConfig

    @ConfigurationProperties(prefix = "spring.datasource")
    @Bean
    public DataSource druidDataSource()
        return new DruidDataSource();


    // 后台监控:web.xml,ServletRegistrationBean
    @Bean
    public ServletRegistrationBean  statViewServlet()
        ServletRegistrationBean<StatViewServlet> bean = new ServletRegistrationBean<>(new StatViewServlet(), "/druid/*");

        // 后台需要有人登录,账号密码配置
        HashMap<String, String> initParameters = new HashMap<>();
        // 增加配置
        initParameters.put("loginUsername","admin"); // 登录的key是固定的 loginUsername loginPassword
        initParameters.put("loginPassword","123456");

        // 允许谁可以访问
        initParameters.put("allow","");

        // 禁止谁能访问  initParameters.put("kuangshen","192.168.1.3");

        bean.setInitParameters(initParameters); // 设置初始化参数
        return bean;
写完代码后启动主程序,在网页输入URL:http://localhost:8080/druid
注意:登录名及密码要用在Config类中设定好的,不然无法登陆成功
配置过滤器(在同一个类中编写 )
// filter
@Bean
public FilterRegistrationBean webStatFilter()
    FilterRegistrationBean bean = new FilterRegistrationBean();

    bean.setFilter(new WebStatFilter());

    // 可以过滤那些请求呢?

    Map<String,String> initParameters = new HashMap<>();
    initParameters.put("exclusions","*.js,*.css,/druid/*");

    bean.setInitParameters(initParameters);

    return bean;
以上是关于SpringBoot的主要内容,如果未能解决你的问题,请参考以下文章