ubuntu14.04怎么测试cuda是不是安装成功
Posted
tags:
篇首语:本文由小常识网(cha138.com)小编为大家整理,主要介绍了ubuntu14.04怎么测试cuda是不是安装成功相关的知识,希望对你有一定的参考价值。
测试cuda是否安装成功的办法:
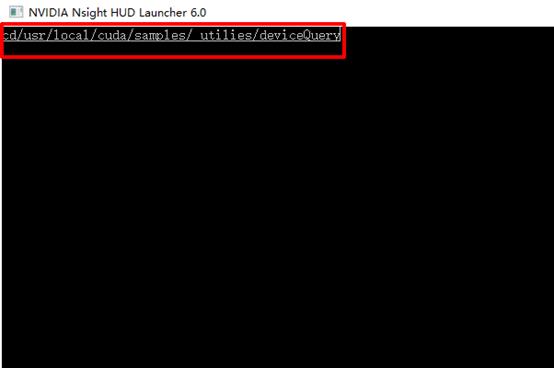
1、打开CUDA,在命令框中输入 cd /usr/local/cuda/samples/1_Utilities/deviceQuery #默认位置。
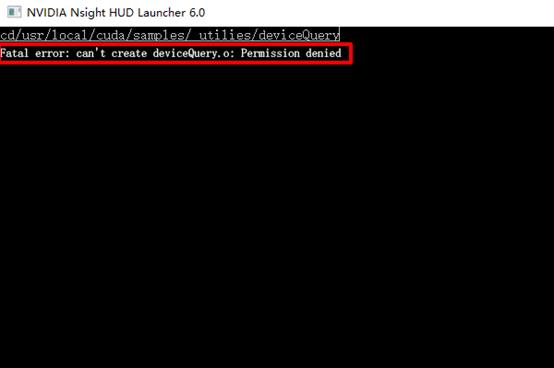
2、make #如果出现”Fatal error: can't create deviceQuery.o: Permission denied“此错误,在make前面加上sudo。
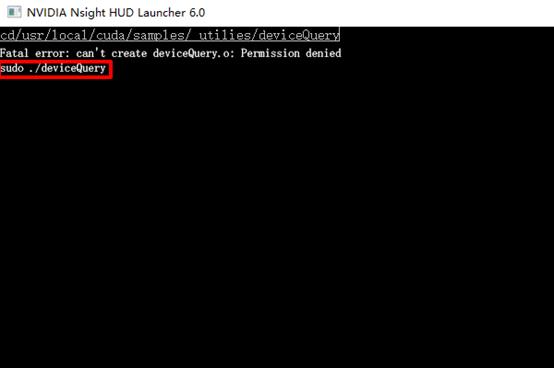
3、输入,“sudo ./deviceQuery”。
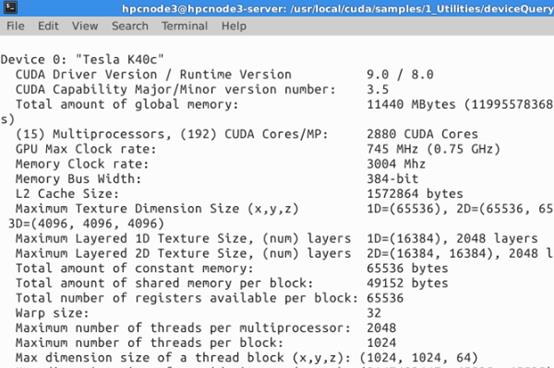
4、如果弹出下面这个图,就说明CUDA安装成功。
1. 预检查
按照参考链接1中所示,检查系统。
执行命令:
:~$ lspci | grep -i nvidia
03:00.0 3D controller: NVIDIA Corporation GK110GL [Tesla K20c] (rev a1)
04:00.0 VGA compatible controller: NVIDIA Corporation GK106GL [Quadro K4000] (rev a1)
04:00.1 Audio device: NVIDIA Corporation GK106 HDMI Audio Controller (rev a1)
发现有K20和K4000两块GPU,还有一块Audio的应该是声卡。
然后,执行命令检查系统版本:
~$ uname -m && cat /etc/*release
x86_64
DISTRIB_ID=Ubuntu
DISTRIB_RELEASE=14.04
DISTRIB_CODENAME=trusty
DISTRIB_DESCRIPTION="Ubuntu 14.04.1 LTS"
NAME="Ubuntu"
VERSION="14.04.1 LTS, Trusty Tahr"
ID=ubuntu
ID_LIKE=debian
PRETTY_NAME="Ubuntu 14.04.1 LTS"
VERSION_ID="14.04"
HOME_URL="http://www.ubuntu.com/"
SUPPORT_URL="http://help.ubuntu.com/"
BUG_REPORT_URL="http://bugs.launchpad.net/ubuntu/"
可以看到,机器是ubuntu14.04的版本。
然后,使用gcc --version检查gcc版本是否符合链接1中的要求:
~$ gcc --version
gcc (Ubuntu 4.8.2-19ubuntu1) 4.8.2
Copyright (C) 2013 Free Software Foundation, Inc.
This is free software; see the source for copying conditions. There is NO
warranty; not even for MERCHANTABILITY or FITNESS FOR A PARTICULAR PURPOSE.
检查完毕,就去nvidia的官网(参考链接3)上下载驱动,为下载的是ubuntu14.04的deb包。
2. 安装
Deb包安装较为简单,但是安装过程中提示不稳定,不过用着也没啥出错的地方。
先按照参考链接2安装必要的库。
sudo apt-get install freeglut3-dev build-essential libx11-dev libxmu-dev libxi-dev libgl1-mesa-glx libglu1-mesa libglu1-mesa-dev
还是按照官网上的流程来。
$ sudo dpkg -i cuda-repo-<distro>_<version>_<architecture>.deb
$ sudo apt-get update
$ sudo apt-get install cuda
可能需要下载较长时间,但是没关系,放在那等着就是。
没啥问题就算安装好了。
安装过程中提示:
*** Please reboot your computer and verify that the nvidia graphics driver is loaded. ***
*** If the driver fails to load, please use the NVIDIA graphics driver .run installer ***
*** to get into a stable state.
我没管,提示使用.run安装比较稳定,但我现在用着没问题。
3. 配置环境
我的系统是64位的,因此配置环境时在.bashrc中加入
$ export PATH=/usr/local/cuda-6.5/bin:$PATH
$ export LD_LIBRARY_PATH=/usr/local/cuda-6.5/lib64:$LD_LIBRARY_PATH
配置完环境后,执行命令
~$ source .bashrc
使其立刻生效。
4. 安装sample
配置好环境后,可以执行如下命令:
$ cuda-install-samples-6.5.sh <dir>
这样,就将cuda的sample拷贝到dir文件夹下了。该命令只是一个拷贝操作。
然后进入该文件夹,执行make命令进行编译,编译时间较长,需要等待。
5. 验证安装是否成功
5.1. 驱动验证
首先,验证nvidia的驱动是否安装成功。
~$ cat /proc/driver/nvidia/version
NVRM version: NVIDIA UNIX x86_64 Kernel Module 340.29 Thu Jul 31 20:23:19 PDT 2014
GCC version: gcc version 4.8.2 (Ubuntu 4.8.2-19ubuntu1)
5.2. Toolkit验证
验证cuda toolkit是否成功。
~$ nvcc -V
nvcc: NVIDIA (R) Cuda compiler driver
Copyright (c) 2005-2014 NVIDIA Corporation
Built on Thu_Jul_17_21:41:27_CDT_2014
Cuda compilation tools, release 6.5, V6.5.12
5.3. 设备识别
使用cuda sample已经编译好的deviceQuery来验证。deviceQuery在<cuda_sample_install_path>/bin/x_86_64/linux/release目录下。我的结果如下,检测出了两块GPU来。
~/install/NVIDIA_CUDA-6.5_Samples/bin/x86_64/linux/release$ ./deviceQuery
./deviceQuery Starting...
CUDA Device Query (Runtime API) version (CUDART static linking)
Detected 2 CUDA Capable device(s)
Device 0: "Tesla K20c"
CUDA Driver Version / Runtime Version 6.5 / 6.5
CUDA Capability Major/Minor version number: 3.5
Total amount of global memory: 4800 MBytes (5032706048 bytes)
(13) Multiprocessors, (192) CUDA Cores/MP: 2496 CUDA Cores
GPU Clock rate: 706 MHz (0.71 GHz)
Memory Clock rate: 2600 Mhz
Memory Bus Width: 320-bit
L2 Cache Size: 1310720 bytes
Maximum Texture Dimension Size (x,y,z) 1D=(65536), 2D=(65536, 65536), 3D=(4096, 4096, 4096)
Maximum Layered 1D Texture Size, (num) layers 1D=(16384), 2048 layers
Maximum Layered 2D Texture Size, (num) layers 2D=(16384, 16384), 2048 layers
Total amount of constant memory: 65536 bytes
Total amount of shared memory per block: 49152 bytes
Total number of registers available per block: 65536
Warp size: 32
Maximum number of threads per multiprocessor: 2048
Maximum number of threads per block: 1024
Max dimension size of a thread block (x,y,z): (1024, 1024, 64)
Max dimension size of a grid size (x,y,z): (2147483647, 65535, 65535)
Maximum memory pitch: 2147483647 bytes
Texture alignment: 512 bytes
Concurrent copy and kernel execution: Yes with 2 copy engine(s)
Run time limit on kernels: No
Integrated GPU sharing Host Memory: No
Support host page-locked memory mapping: Yes
Alignment requirement for Surfaces: Yes
Device has ECC support: Enabled
Device supports Unified Addressing (UVA): Yes
Device PCI Bus ID / PCI location ID: 3 / 0
Compute Mode:
< Default (multiple host threads can use ::cudaSetDevice() with device simultaneously) >
Device 1: "Quadro K4000"
CUDA Driver Version / Runtime Version 6.5 / 6.5
CUDA Capability Major/Minor version number: 3.0
Total amount of global memory: 3071 MBytes (3220504576 bytes)
( 4) Multiprocessors, (192) CUDA Cores/MP: 768 CUDA Cores
GPU Clock rate: 811 MHz (0.81 GHz)
Memory Clock rate: 2808 Mhz
Memory Bus Width: 192-bit
L2 Cache Size: 393216 bytes
Maximum Texture Dimension Size (x,y,z) 1D=(65536), 2D=(65536, 65536), 3D=(4096, 4096, 4096)
Maximum Layered 1D Texture Size, (num) layers 1D=(16384), 2048 layers
Maximum Layered 2D Texture Size, (num) layers 2D=(16384, 16384), 2048 layers
Total amount of constant memory: 65536 bytes
Total amount of shared memory per block: 49152 bytes
Total number of registers available per block: 65536
Warp size: 32
Maximum number of threads per multiprocessor: 2048
Maximum number of threads per block: 1024
Max dimension size of a thread block (x,y,z): (1024, 1024, 64)
Max dimension size of a grid size (x,y,z): (2147483647, 65535, 65535)
Maximum memory pitch: 2147483647 bytes
Texture alignment: 512 bytes
Concurrent copy and kernel execution: Yes with 1 copy engine(s)
Run time limit on kernels: Yes
Integrated GPU sharing Host Memory: No
Support host page-locked memory mapping: Yes
Alignment requirement for Surfaces: Yes
Device has ECC support: Disabled
Device supports Unified Addressing (UVA): Yes
Device PCI Bus ID / PCI location ID: 4 / 0
Compute Mode:
< Default (multiple host threads can use ::cudaSetDevice() with device simultaneously) >
> Peer access from Tesla K20c (GPU0) -> Quadro K4000 (GPU1) : No
> Peer access from Quadro K4000 (GPU1) -> Tesla K20c (GPU0) : No
deviceQuery, CUDA Driver = CUDART, CUDA Driver Version = 6.5, CUDA Runtime Version = 6.5, NumDevs = 2, Device0 = Tesla K20c, Device1 = Quadro K4000
Result = PASS
这样,cuda就安装成功了。本回答被提问者采纳
cuda8.0怎么安装
参考技术A 步骤如下:1.下载安装CUDA:
1.1 下载。请到 cuda官网,选择合适的版本。如果版本不合适,安装的时候会提示的,但还是下载最新的比较好;
1.2 安装。双击cuda_7.5.18_win10.exe,一步步来就好。
2.VS2013配置和测试
2.1 重启计算机。关于是否添加环境变量,笔者安装的时候系统已自动添加好对应的环境变量,如果没有,请查看上文链接的博文;
2.2 配置VS。也请参考上述博文,不再赘述。
3.测试
上两个测试文件。
3.1
1 #include< stdio.h>
2 #include "cuda_runtime.h"
3 #include "device_launch_parameters.h"
4 bool InitCUDA()
5
6 int count;
7 cudaGetDeviceCount(&count);
8 if(count == 0)
9
10 fprintf(stderr, "There is no device.\n");
11 return false;
12
13 int i;
14 for(i = 0; i < count; i++)
15
16 cudaDeviceProp prop;
17 if(cudaGetDeviceProperties(&prop, i) == cudaSuccess)
18
19 if(prop.major >= 1)
20
21 break;
22
23
24
25 if(i == count)
26
27 fprintf(stderr, "There is no device supporting CUDA 1.x.\n");
28 return false;
29
30 cudaSetDevice(i);
31 return true;
32
33
34 int main()
35
36 if(!InitCUDA())
37
38 return 0;
39
40 printf("HelloWorld, CUDA has been initialized.\n");
41 return 0;
42
3.2
1 // CUDA runtime 库 + CUBLAS 库
2 #include "cuda_runtime.h"
3 #include "cublas_v2.h"
4
5 #include <time.h>
6 #include <iostream>
7
8 using namespace std;
9
10 // 定义测试矩阵的维度
11 int const M = 5;
12 int const N = 10;
13
14 int main()
15
16 // 定义状态变量
17 cublasStatus_t status;
18
19 // 在 内存 中为将要计算的矩阵开辟空间
20 float *h_A = (float*)malloc (N*M*sizeof(float));
21 float *h_B = (float*)malloc (N*M*sizeof(float));
22
23 // 在 内存 中为将要存放运算结果的矩阵开辟空间
24 float *h_C = (float*)malloc (M*M*sizeof(float));
25
26 // 为待运算矩阵的元素赋予 0-10 范围内的随机数
27 for (int i=0; i<N*M; i++)
28 h_A[i] = (float)(rand()%10+1);
29 h_B[i] = (float)(rand()%10+1);
30
31
32
33 // 打印待测试的矩阵
34 cout << "矩阵 A :" << endl;
35 for (int i=0; i<N*M; i++)
36 cout << h_A[i] << " ";
37 if ((i+1)%N == 0) cout << endl;
38
39 cout << endl;
40 cout << "矩阵 B :" << endl;
41 for (int i=0; i<N*M; i++)
42 cout << h_B[i] << " ";
43 if ((i+1)%M == 0) cout << endl;
44
45 cout << endl;
46
47 /*
48 ** GPU 计算矩阵相乘
49 */
50
51 // 创建并初始化 CUBLAS 库对象
52 cublasHandle_t handle;
53 status = cublasCreate(&handle);
54
55 if (status != CUBLAS_STATUS_SUCCESS)
56
57 if (status == CUBLAS_STATUS_NOT_INITIALIZED)
58 cout << "CUBLAS 对象实例化出错" << endl;
59
60 getchar ();
61 return EXIT_FAILURE;
62
63
64 float *d_A, *d_B, *d_C;
65 // 在 显存 中为将要计算的矩阵开辟空间
66 cudaMalloc (
67 (void**)&d_A, // 指向开辟的空间的指针
68 N*M * sizeof(float) // 需要开辟空间的字节数
69 );
70 cudaMalloc (
71 (void**)&d_B,
72 N*M * sizeof(float)
73 );
74
75 // 在 显存 中为将要存放运算结果的矩阵开辟空间
76 cudaMalloc (
77 (void**)&d_C,
78 M*M * sizeof(float)
79 );
80
81 // 将矩阵数据传递进 显存 中已经开辟好了的空间
82 cublasSetVector (
83 N*M, // 要存入显存的元素个数
84 sizeof(float), // 每个元素大小
85 h_A, // 主机端起始地址
86 1, // 连续元素之间的存储间隔
87 d_A, // GPU 端起始地址
88 1 // 连续元素之间的存储间隔
89 );
90 cublasSetVector (
91 N*M,
92 sizeof(float),
93 h_B,
94 1,
95 d_B,
96 1
97 );
98
99 // 同步函数
100 cudaThreadSynchronize();
101
102 // 传递进矩阵相乘函数中的参数,具体含义请参考函数手册。
103 float a=1; float b=0;
104 // 矩阵相乘。该函数必然将数组解析成列优先数组
105 cublasSgemm (
106 handle, // blas 库对象
107 CUBLAS_OP_T, // 矩阵 A 属性参数
108 CUBLAS_OP_T, // 矩阵 B 属性参数
109 M, // A, C 的行数
110 M, // B, C 的列数
111 N, // A 的列数和 B 的行数
112 &a, // 运算式的 α 值
113 d_A, // A 在显存中的地址
114 N, // lda
115 d_B, // B 在显存中的地址
116 M, // ldb
117 &b, // 运算式的 β 值
118 d_C, // C 在显存中的地址(结果矩阵)
119 M // ldc
120 );
121
122 // 同步函数
123 cudaThreadSynchronize();
124
125 // 从 显存 中取出运算结果至 内存中去
126 cublasGetVector (
127 M*M, // 要取出元素的个数
128 sizeof(float), // 每个元素大小
129 d_C, // GPU 端起始地址
130 1, // 连续元素之间的存储间隔
131 h_C, // 主机端起始地址
132 1 // 连续元素之间的存储间隔
133 );
134
135 // 打印运算结果
136 cout << "计算结果的转置 ( (A*B)的转置 ):" << endl;
137
138 for (int i=0;i<M*M; i++)
139 cout << h_C[i] << " ";
140 if ((i+1)%M == 0) cout << endl;
141
142
143 // 清理掉使用过的内存
144 free (h_A);
145 free (h_B);
146 free (h_C);
147 cudaFree (d_A);
148 cudaFree (d_B);
149 cudaFree (d_C);
150
151 // 释放 CUBLAS 库对象
152 cublasDestroy (handle);
153
154 getchar();
155
156 return 0;
157
以上是关于ubuntu14.04怎么测试cuda是不是安装成功的主要内容,如果未能解决你的问题,请参考以下文章