UI-视图-方法打印-基础控件
Posted
tags:
篇首语:本文由小常识网(cha138.com)小编为大家整理,主要介绍了UI-视图-方法打印-基础控件相关的知识,希望对你有一定的参考价值。
参考技术A UIView *view = [[UIView alloc]initWithFrame:CGRectMake(0,0,0,)] //初始化Viewview.clipsToBounds = yes//剪切视图超出得部分
View.layer.cornerRadius = 10;//设置圆角
[self.window bringSubViewToFront:view];//将子视图放到最上层
[self.window sendSubviewToBack:view];//将子视图放到最下层去
View.hidden = no//隐藏视图,默认为no
NSLog(@"%@",NSStringFromSelector(_cmd));//方法打印
[button setBackGroundImage:[UIImage imageNamed:@"信息"]forState:UIControlStateNormal];//按钮添加图片,但是要设置为custom状态
[button setImage:[UIImage imageNamed:@""] forState:UIControlStateNormal];//指定状态对应的显示图片
[button setTitleColor:[UIColor whiteColor]]//设置按钮字体的颜色
NSLog(@"%@",button.nextResponder);//打印上一个响应者
NSLog(@"%@",button.nextResponder.nextResponder);//打印uiview上一个响应者
textField.borderStyle = UITextBorderStyleRoundedRect;//设置textfield的style
textField.PlaceHolder = @"";//显示提醒字体
textField.delegate = self;//textfield代理
//协议
- (bool)texeFieldShouldReturn:(UITextFidl*)textField
[textField resignFirstResponder];//注销textile的第一响应者,回收键盘
- (bool)textFieldShouleBeginEditing:(uitextField*)textField
return YES;//输入时候调用
- (bool)textFieldShouldEndEditing:(UITextField*)textfield
return yes; //结束的时候开始调用
- (bool)textField:(uitextField *)textField shouldChangeCharactersInRange:(NSRange)range replacementString:(nesting *)//range输入的长度。replacementString限制输入数值或者英文
if(string.length > 0)
if(range.location > 0 || [string characterAtIndex:0] > '9')
return no;//限制输入数字和长度
return yes;
- (void)toucherBegan:(asset*)touches withEvent:(UIEvent *)event
[self.view endEditing:yes];//点击空白地方回收键盘
//滑条
UISlider *slidere = [[UISlider alloc]initWithFrame:CGRectMake(80, 500, 200, 10)];
slidere.minimumTrackTintColor = [UIColor redColor];
slidere.maximumTrackTintColor = [UIColor blueColor];
slidere.minimumValue = 0.2;//最小
slidere.maximumValue = 1;//最大
slidere.value = 1;//一开始就是最大值
slidere.minimumTrackTintColor = [UIColor redColor];
[slidere setValue:0.3 animated:YES];//用滑条设置透明度 ,一开始设置是0.3
[slidere addTarget:self action:@selector(sliderChange:) forControlEvents:UIControlEventValueChanged];
[self.view addSubview:slidere];
- (void)sliderChange:(UISlider *)sender
NSLog(@"%f",sender.value);
self.view.alpha = sender.value;
//分段控件
UISegmentedControl *segmented = [[UISegmentedControl alloc]initWithItems:@[@"1",@"2",@"3",@"4"]];
segmented.frame = CGRectMake(30, 450, 300, 37);
// segmented.alpha = 0;
segmented.tintColor = [UIColor redColor];
[segmented addTarget:self action:@selector(segmentedChange:) forControlEvents:UIControlEventValueChanged];
[self.view addSubview:segmented];
//进度指示器
_indicatorView = [[UIActivityIndicatorView alloc]initWithFrame:CGRectMake(30, 550, 300, 37)];
// indicatorView.center = self.view.center;
_indicatorView.bounds = CGRectMake(0, 0, 50, 50);
// _indicatorView.hidesWhenStopped = NO;//停止后不消失
_indicatorView.activityIndicatorViewStyle = UIActivityIndicatorViewStyleWhiteLarge;
[self.view addSubview:_indicatorView];
[_indicatorView startAnimating];//进度圈开始转动
UIStepper *stepper = [[UIStepper alloc]initWithFrame:CGRectMake(100, 160, 50, 30)];
[self.view addSubview:stepper];
UI基础入门——UI基础控件2
一、基础控件(View)
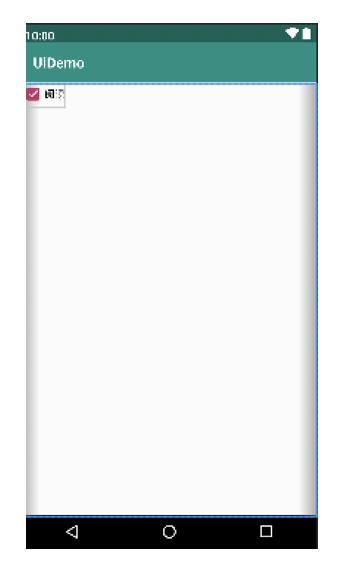
1、CheckBox 复选控件
2、RadioButton 单选控件
3、ToggleButton 开关触发器
4、SeekBar 进度条
二、CheckBox 复选控件
系统封装的复选控件,继承于Button
1、常用方法
- setChecked() 设置状态 选中、未选中
- isChecked() 获取状态
- setOnCheckedChangeListener 监听状态
2、案例
package com.example.testapplication;

import androidx.appcompat.app.AppCompatActivity;

import android.os.Bundle;
import android.util.Log;
import android.widget.CheckBox;
import android.widget.CompoundButton;

public class MainActivity extends AppCompatActivity {

    private static final String TAG = "TestMain";

    @Override
    protected void onCreate(Bundle savedInstanceState) {
        super.onCreate(savedInstanceState);
         setContentView(R.layout.activity_checkbox);

        CheckBox checkBox = findViewById(R.id.checkbox);

        checkBox.setChecked(false);

        boolean isCheckBox = checkBox.isChecked();

        Log.i(TAG, "onCreate: checked is " + isCheckBox);

        checkBox.setOnCheckedChangeListener(new CompoundButton.OnCheckedChangeListener() {
            @Override
            public void onCheckedChanged(CompoundButton compoundButton, boolean b) {
                Log.i(TAG, "onCheckedChanged: " + b);
            }
        });

    }
}
<?xml version="1.0" encoding="utf-8"?>
<LinearLayout xmlns:android="http://schemas.android.com/apk/res/android"
android:layout_width="match_parent"
android:layout_height="match_parent">
<CheckBox
android:id="@+id/checkbox"
android:layout_width="wrap_content"
android:layout_height="wrap_content"
android:text="阅读"
android:checked="true"/>
</LinearLayout>
三、RadioButton 单选控件
单选控件,可以和RadioGroup一起使用,只能选择一个
1、RadioButton 和 CheckBox区别
- 通过点击无法变为未选中
- 一组RadioButton, 只能同时选中一个
- 在大部分UI框架中默认都以圆形表示
2、案例
<RadioGroup
    android:layout_width="wrap_content"
    android:layout_height="wrap_content">

    <RadioButton
        android:id="@+id/radio_1"
        android:layout_width="wrap_content"
        android:layout_height="wrap_content"
        android:text="视频"/>

    <RadioButton
        android:id="@+id/radio_2"
        android:layout_width="wrap_content"
        android:layout_height="wrap_content"
        android:text="文本"/>

</RadioGroup>
四、ToggleButton 开关
切换程序中的状态, 继承于Button
1、常用属性
- android:textOn 开文字
- android:textOff 关文字
- setChecked(boolean) 设置状态
- setOnCheckedChangeListener
2、案例
<?xml version="1.0" encoding="utf-8"?>
<LinearLayout xmlns:android="http://schemas.android.com/apk/res/android"
    android:layout_width="match_parent"
    android:layout_height="match_parent"
    android:orientation="vertical">

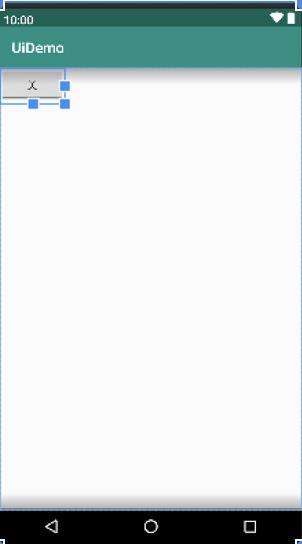
    <ToggleButton
        android:id="@+id/toggle"
        android:layout_width="wrap_content"
        android:layout_height="wrap_content"
        android:textOn="开"
        android:textOff="关"
        android:checked="false"
        />


</LinearLayout>
package com.example.testapplication;
import androidx.appcompat.app.AppCompatActivity;
import android.os.Bundle;
import android.util.Log;
import android.widget.CheckBox;
import android.widget.CompoundButton;
import android.widget.ToggleButton;
public class MainActivity extends AppCompatActivity {
private static final String TAG = "TestMain";
@Override
protected void onCreate(Bundle savedInstanceState) {
super.onCreate(savedInstanceState);
setContentView(R.layout.activity_checkbox);
ToggleButton toggleButton = findViewById(R.id.toggle);
toggleButton.setChecked(true);
boolean isCheckBox = toggleButton.isChecked();
Log.i(TAG, "onCreate: checked is " + isCheckBox);
toggleButton.setOnCheckedChangeListener(new CompoundButton.OnCheckedChangeListener() {
@Override
public void onCheckedChanged(CompoundButton compoundButton, boolean b) {
Log.i(TAG, "onCheckedChanged: " + b);
}
});
}
}
五、SeekBar 进度条
常用语播放器, 进度条
1、常用属性
- setProgress
- setOnSeekBarChangeListener
2、注意事项
- 耗时的任务容易把UI卡死
3、案例
package com.example.testapplication;

import androidx.appcompat.app.AppCompatActivity;

import android.os.Bundle;
import android.util.Log;
import android.widget.CheckBox;
import android.widget.CompoundButton;
import android.widget.SeekBar;
import android.widget.ToggleButton;

public class MainActivity extends AppCompatActivity {

    private static final String TAG = "TestMain";

    @Override
    protected void onCreate(Bundle savedInstanceState) {
        super.onCreate(savedInstanceState);
         setContentView(R.layout.activity_checkbox);

        SeekBar seekBar = findViewById(R.id.seekbar);

        seekBar.setProgress(30);
        seekBar.setMax(100);

        seekBar.setOnSeekBarChangeListener(new SeekBar.OnSeekBarChangeListener() {
            @Override
            public void onProgressChanged(SeekBar seekBar, int i, boolean b) {
                Log.i(TAG, "onProgressChanged: " + i);
            }

            @Override
            public void onStartTrackingTouch(SeekBar seekBar) {
                Log.i(TAG, "onStartTrackingTouch: " + seekBar.getProgress());
            }

            @Override
            public void onStopTrackingTouch(SeekBar seekBar) {
                Log.i(TAG, "onStopTrackingTouch: " + seekBar.getProgress());
            }
        });

    }
}
<?xml version="1.0" encoding="utf-8"?>
<LinearLayout xmlns:android="http://schemas.android.com/apk/res/android"
android:layout_width="match_parent"
android:layout_height="match_parent"
android:orientation="vertical">
<TextView
android:layout_width="match_parent"
android:layout_height="wrap_content"
android:text="进度条"
android:textSize="30sp"
android:padding="15dp"/>
<SeekBar
android:id="@+id/seekbar"
android:layout_width="match_parent"
android:layout_height="wrap_content"
android:max="100"
android:progress="30"/>
</LinearLayout>
以上是关于UI-视图-方法打印-基础控件的主要内容,如果未能解决你的问题,请参考以下文章