ubuntu中安装tippecanoe并切片
Posted 牛老师讲GIS
tags:
篇首语:本文由小常识网(cha138.com)小编为大家整理,主要介绍了ubuntu中安装tippecanoe并切片相关的知识,希望对你有一定的参考价值。
概述
本文是一片”水文”,记录一下如何在ubuntu中用tippecanoe制作矢量切片。
实现操作
本示例中ubuntu是在VMware虚拟机中,安装的是18.04.6的版本,你可通过我兰的镜像下载,速度杠杠的。
1.安装git
sudo apt install git
2.clone代码
git clone https://gitee.com/lzugis15/tippecanoe.git
3. make
sudo apt install make
sudo apt install make-guile
4. g++
sudo apt install g++
5. 其他
// 解决fatal error:sqlite3.h错误
sudo apt-get install libsqlite3-dev

// 解决fatal error:zlib.h错误
sudo apt-get install zlib1g-dev
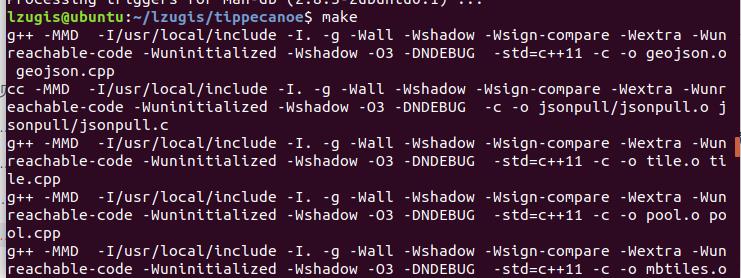
6. make & install
make
sudo make install


7. 切片
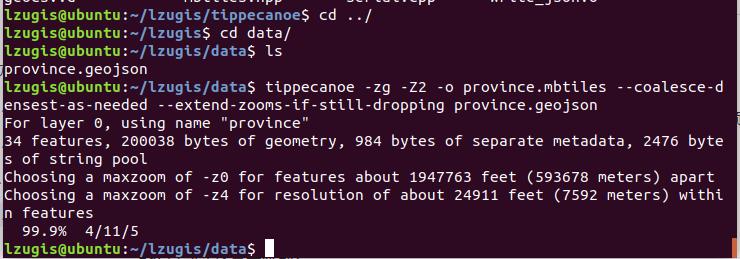
经过上面的步骤,安装工作完成了,下面通过一个简单的示例做个切片并验证一下。
tippecanoe -zg -Z2 -o province.mbtiles --coalesce-densest-as-needed --extend-zooms-if-still-dropping province.geojson

说明:
- -zg,最大级别,如果为
g,则表示自动计算; - -Z2,最小级别;
- -o,指定输出文件名;
- 更多详细配置请参阅源代码说明。
8.验证
用node写一个mbtile服务器加以验证。
// 初始化工程
npm init -y
// 添加依赖
npm i @mapbox/mbtiles express -S
新建一个service.js,代码如下:
const express = require("express"), MBTiles = require('@mapbox/mbtiles');

const app = express()

// 自定义跨域中间件
const allowCors = function (req, res, next)
  res.header('Access-Control-Allow-Origin', req.headers.origin);
  res.header('Access-Control-Allow-Methods', 'GET,PUT,POST,DELETE,OPTIONS');
  res.header('Access-Control-Allow-Headers', 'Content-Type');
  res.header('Access-Control-Allow-Credentials', 'true');
  next();
;
app.use(allowCors);//使用跨域中间件

const port = 13000;
const mbtilesLocation = 'D:\\\\tile\\\\vector\\\\province.mbtiles';

/* Set return header*/
function getContentType(t)
  let header = ;
  /* Cache*/
  if (t === "json")
    header["Content-Type"] = "application/json";
    header["Cache-Control"] = "public, max-age=3600";

  /* request specific headers*/
  if (t === "png")
    header["Content-Type"] = "image/png";
    header["Cache-Control"] = "public, max-age=604800";

  if (t === "jpg")
    header["Content-Type"] = "image/jpeg";
    header["Cache-Control"] = "public, max-age=604800";

  if (t === "pbf")
    header["Content-Type"] = "application/octet-stream";
    header["Content-Encoding"] = "gzip";
    header["Cache-Control"] = "public, max-age=604800";


  return header;


new MBTiles(mbtilesLocation, function (err, mbtiles)
  if (err) throw err;
  app.get('/:z/:x/:y.*', function (req, res)
    const  params  = req
    const  x, y, z  = params
    const extension = params['0']
    res.set(getContentType(extension))
    mbtiles.getTile(z, x, y, function (err, tile, headers)
      if (err)
        res.status(404).send('Tile rendering error: ' + err + '\\n')
       else
        res.send(tile);

    );
  );
);

// actually create the server
app.listen(port, () =>
  console.log(`server started, visit http://localhost:$[port]`)
);
新建一个map.html,代码如下:
<!DOCTYPE html>
<html>
<head>
    <title>Mapbox GL</title>
    <meta charset='utf-8'>
    <meta name="viewport" content="width=device-width, initial-scale=1.0, user-scalable=no">
    <link rel="stylesheet" href="lib/mapbox-gl.css" type="text/css">
    <style>
        body  margin: 0; padding: 0;
        html, body, #map  height: 100%; overflow: hidden
    </style>
</head>

<body>
<div id='map'></div>
<script src="./lib/mapbox-gl.js"></script>
<script>
    const style =
        "version": 8,
        "name": "Mapbox Streets",
        "sources":
            "amap-tile":
                "type": "raster",
                "scheme": "xyz",
                "tiles": [
                    'http://webrd01.is.autonavi.com/appmaptile?x=x&y=y&z=z&lang=zh_cn&size=1&scale=1&style=8',
                    'http://webrd02.is.autonavi.com/appmaptile?x=x&y=y&z=z&lang=zh_cn&size=1&scale=1&style=8',
                    'http://webrd03.is.autonavi.com/appmaptile?x=x&y=y&z=z&lang=zh_cn&size=1&scale=1&style=8',
                    'http://webrd04.is.autonavi.com/appmaptile?x=x&y=y&z=z&lang=zh_cn&size=1&scale=1&style=8',
                ],
                "tileSize": 256

        ,
        "layers": [

                "id": "amap-tile",
                "type": "raster",
                "source": "amap-tile",
                "minzoom": 0,
                "maxzoom": 17

        ]

    var map = new mapboxgl.Map(
        container: 'map',
        style: style,
        center: [107.11040599933166, 34.26271532332011],
        zoom: 3
    );

    map.on('load', () =>
        map.addSource('geoserver-tile',
            "type": "vector",
            "scheme": "xyz",
            "tiles": [
                'http://localhost:13000/z/x/y.pbf'
                // 'http://localhost:63344/sfmap/tile/china/z/x/y.pbf'
            ]
        )
        map.addLayer(
            id: 'geoserver-tile-line',
            type: 'line',
            source: 'geoserver-tile',
            // 'source-layer': 'layer_province',
            'source-layer': 'province',
            paint:
                'line-color': '#f00',
                'line-width': 1,
                'line-opacity': 1

        )
        map.addLayer(
            id: 'geoserver-tile-line1',
            type: 'fill',
            source: 'geoserver-tile',
            // 'source-layer': 'layer_province',
            'source-layer': 'city_gd',
            paint:
                'fill-color': '#3c80f6',
                'fill-opacity': 0.2

        )
    )
</script>
</body>
</html>
预览效果如下:

代码请移步:https://gitee.com/lzugis15/mbtiles-server.git
以上是关于ubuntu中安装tippecanoe并切片的主要内容,如果未能解决你的问题,请参考以下文章