Shi-Tomasi角点检测及光流法追踪——复现VINS前端视觉数据处理
Posted 猛龙过江ing
tags:
篇首语:本文由小常识网(cha138.com)小编为大家整理,主要介绍了Shi-Tomasi角点检测及光流法追踪——复现VINS前端视觉数据处理相关的知识,希望对你有一定的参考价值。
“万顷湖天碧,一星飞鹭白。”——(唐)皮日休《秋江晓望》
最近自己写代码复现了一下VINS的前端视觉数据处理的过程,主要是对图像检测Shi-Tomasi特征点,之后使用光流法进行追踪,再使用RANSAC算法计算基础矩阵将匹配的异常值剔除。闲言少叙,直接进入代码环节。
实验基础
首先是图像数据的读取,为了适应之后的特征点提取的函数,这里直接读入灰度图像。而彩色图像只用于匹配结果的可视化。
    img1 = cv::imread(first_img_path, cv::IMREAD_GRAYSCALE);//读入灰度图像
    img2 = cv::imread(second_img_path, cv::IMREAD_GRAYSCALE);
    img1_ = cv::imread(first_img_path);//读入彩色图像
    img2_ = cv::imread(second_img_path);
之后便是Shi-Tomasi角点的提取了,使用cv::goodFeaturesToTrack()函数。具体的调用形式如下:
	void cv::goodFeaturesToTrack(
		cv::InputArray image, // 输入图像(CV_8UC1 CV_32FC1)
		cv::OutputArray corners, // 输出角点vector
		int maxCorners, // 最大角点数目
		double qualityLevel, // 质量水平系数(小于1.0的正数,一般在0.01-0.1之间)
		double minDistance, // 最小距离,小于此距离的点忽略
		cv::InputArray mask = noArray(), // mask=0的点忽略
		int blockSize = 3, // 使用的邻域数
		bool useHarrisDetector = false, // false ='Shi Tomasi metric'
		double k = 0.04 // Harris角点检测时使用
	);
第一个参数是输入图像(8位或32位单通道图)。第二个参数是检测到的所有角点,类型为vector或数组,由实际给定的参数类型而定。如果是vector,那么它应该是一个包含cv::Point2f的vector对象;如果类型是cv::Mat,那么它的每一行对应一个角点,点的x、y位置分别是两列。第三个参数用于限定检测到的点数的最大值。第四个参数表示检测到的角点的质量水平(通常是0.10到0.01之间的数值,不能大于1.0)。第五个参数用于区分相邻两个角点的最小距离(小于这个距离得点将进行合并)。第六个参数是mask,如果指定,它的维度必须和输入图像一致,且在mask值为0处不进行角点检测。第七个参数是blockSize,表示在计算角点时参与运算的区域大小,常用值为3,但是如果图像的分辨率较高则可以考虑使用较大一点的值。第八个参数用于指定角点检测的方法,如果是true则使用Harris角点检测,false则使用Shi Tomasi算法。第九个参数是在使用Harris算法时使用,最好使用默认值0.04。
特征点提取完毕之后就可以对特征点进行光流法追踪了,使用cv::calcOpticalFlowPyrLK()函数。具体的调用形式如下:
void cv::calcOpticalFlowPyrLK( InputArray prevImg,
                           InputArray nextImg,
                           InputArray prevPts,
                           InputOutputArray nextPts,
                           OutputArray status,
                           OutputArray err,
                           Size winSize = Size(21,21),
                           int maxLevel = 3,
                           TermCriteria criteria = TermCriteria(TermCriteria::COUNT+TermCriteria::EPS, 30, 0.01),
                           int flags = 0,
                           double minEigThreshold = 1e-4
);
第一个参数输入第一张图片,8bit,单通道或3通道。第二个参数为第二张图片,类型和大小需要和第一张相同。第三个参数是需要被追踪的2D特征点矢量,坐标必须为单精度。第四个参数是输出的单精度特征点坐标矢量。第五个参数为输出的状态矢量,追踪成功为1,反之为0。第六个参数是误差向量。第七个参数为每一级金字塔的搜索窗。第八个参数代表金字塔建造级别,0-不使用(仅适用原始图像),1-原始图像加1级金字塔。最后的几个参数我也不太懂,一般默认即可。
使用RANSAC算法计算基础矩阵,剔除异常值。使用cv::findFundamentalMat()函数。具体调用形式如下:
cv::Mat cv::findFundamentalMat( InputArray points1,
                                InputArray points2,
                                int method = FM_RANSAC,
                                double param1 = 3.,
                                double param2 = 0.99,
                                OutputArray mask = noArray()
);
第一个参数为第一张图片中的特征点,需要为单精度。第二个参数为第二张图片的特征点大小和格式需要与第一个参数相同。第三个参数共有四个选项:CV_FM_7POINT(七点算法)、CV_FM_8POINT(八点算法)、CV_FM_RANSAC(RANSAC算法)以及CV_FM_LMEDS(LMedS算法)。 第四个参数param1专用于RANSAC算法,它是从点到对极线的最大距离(以像素为单位),超过该距离,该点被视为离群值,并且不用于计算最终的基本矩阵。 根据点定位的精度,图像分辨率和图像噪声,可以将其设置为1到3。第五个参数仅用于RANSAC或LMedS方法的参数。 它指定了估计矩阵正确的期望置信度(概率)。最后一个参数为状态向量,输出特征点的状态,0代表离群点,1代表正常点。
另外,提供两个工具函数。一个是用来计算时间的,可以根据实际应用自己来进一步封装。具体如下,
std::chrono::time_point<std::chrono::system_clock> start, end;
std::chrono::duration<double> elapsed_seconds;
start = std::chrono::system_clock::now();
//do something
end1 = std::chrono::system_clock::now();
elapsed_seconds = end - start;
printf("用时 %f secs\\n", elapsed_seconds.count());
第二个函数是用来绘制匹配结果的,OpenCV自带了一个cv::drawMatches()函数,具体调用形式如下:
void cv::drawMatches( InputArray img1,
                  const std::vector<KeyPoint>& keypoints1,
                  InputArray img2,
                  const std::vector<KeyPoint>& keypoints2,
                  const std::vector<DMatch>& matches1to2,
                  InputOutputArray outImg,
                  const Scalar& matchColor=Scalar::all(-1),
                  const Scalar& singlePointColor=Scalar::all(-1),
                  const std::vector<char>& matchesMask=std::vector<char>(),
                  int flags=DrawMatchesFlags::DEFAULT
);
但是封装得比较厉害,有时无法满足需要,因此,这里再给出一个。具体如下:
void drawMatches(const std::vector<cv::Point2f> &points_1, const std::vector<cv::Point2f> &points_2,
                 const cv::Mat &image_src_,
                 const cv::Mat &image_dst_, cv::Mat &out_image_, int circle_radius_)
    // Final image
    out_image_.create(image_src_.rows, // Height
                      2 * image_src_.cols, // Width
                      image_src_.type()); // Type

    cv::Mat roi_img_result_left =
            out_image_(cv::Rect(0, 0, image_src_.cols, image_src_.rows)); // Img1 will be on the left part
    cv::Mat roi_img_result_right =
            out_image_(cv::Rect(image_src_.cols, 0, image_dst_.cols,
                                image_dst_.rows)); // Img2 will be on the right part, we shift the roi of img1.cols on the right

    cv::Mat roi_image_src = image_src_(cv::Rect(0, 0, image_src_.cols, image_src_.rows));
    cv::Mat roi_image_dst = image_dst_(cv::Rect(0, 0, image_dst_.cols, image_dst_.rows));

    roi_image_src.copyTo(roi_img_result_left); //Img1 will be on the left of imgResult
    roi_image_dst.copyTo(roi_img_result_right); //Img2 will be on the right of imgResult

    for (int i = 0; i < points_1.size(); ++i)
        cv::Point2d pt1(points_1.at(i).x,
                        points_1.at(i).y);
        cv::Point2d pt2(image_dst_.cols + points_2.at(i).x,
                        points_2.at(i).y);

        cv::Scalar color(255 * static_cast<double>(rand()) / RAND_MAX,
                         255 * static_cast<double>(rand()) / RAND_MAX,
                         255 * static_cast<double>(rand()) / RAND_MAX);

        cv::circle(out_image_, pt1, circle_radius_, color, static_cast<int>(circle_radius_ * 0.4));
        cv::circle(out_image_, pt2, circle_radius_, color, static_cast<int>(circle_radius_ * 0.4));
        cv::line(out_image_, pt1, pt2, color, 2);
具体调用形式如下:
void drawMatches(const std::vector<cv::Point2f> &points_1,
                 const std::vector<cv::Point2f> &points_2,
                 const cv::Mat &image_src_,
                 const cv::Mat &image_dst_,
                 cv::Mat &out_image_,
                 int circle_radius_
);
五个参数依次为:第一张图片的特征点、第二张图片的特征点、第一张图片、第二张图片、输出图片以及画圆的半径。其中两组特征点需要一一对应。
实验环节
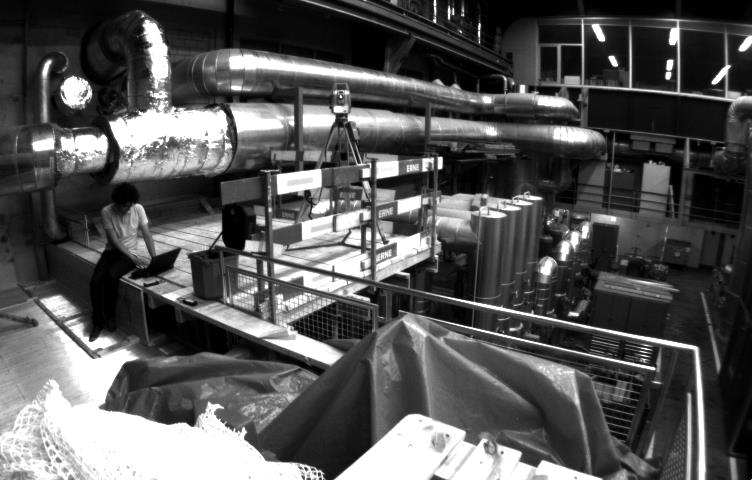
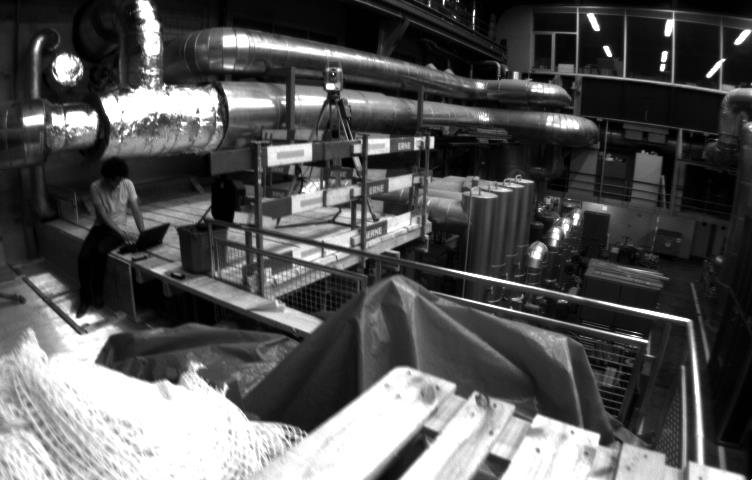
接下来就是实验环节了。选取公开数据集EuRoC中的两张图片。注意选取图片的视差一定要适当,视差稍大的话光流法误差会非常大。


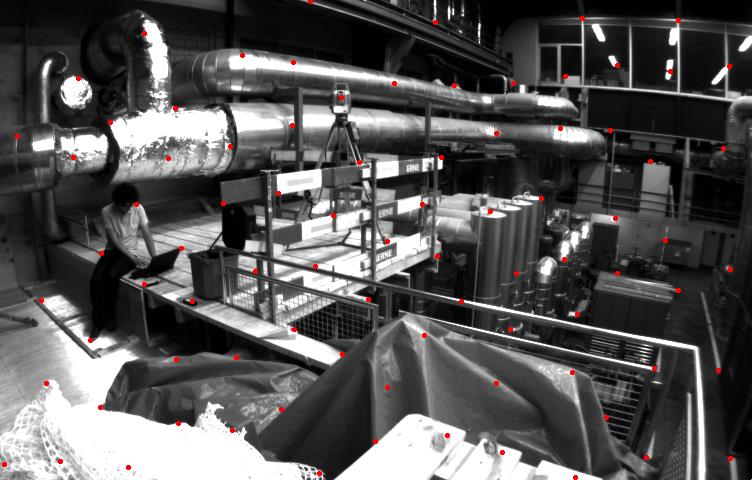
进行特征点提取, 参数选择最多150个特征点,最小间距为50,结果总共得到了84个特征点。

使用光流追踪得到81个特征点。

进行特征点匹配,发现错误甚多。

使用RANSAC算法剔除异常值之后效果好了不少。

全部代码
编程从来都是说起来容易做起来难,所以最后附上全部代码。由于本人还是C++的新手所以代码难免有不妥之处,欢迎大家批评指正。
#include <iostream>
#include <cv.hpp>
#include <chrono>
#include <vector>
#include <opencv2/core.hpp>

void reduceVector(std::vector<cv::Point2f> v, std::vector<uchar> status, std::vector<cv::Point2f> &v1);

void drawMatches(const std::vector<cv::Point2f> &points_1, const std::vector<cv::Point2f> &points_2,
                 const cv::Mat &image_src_,
                 const cv::Mat &image_dst_, cv::Mat &out_image_, int circle_radius_);

void timeCost(const std::chrono::time_point<std::chrono::system_clock>,
              const std::chrono::time_point<std::chrono::system_clock>,
              const std::chrono::time_point<std::chrono::system_clock>, std::string);

int main()
    std::chrono::time_point<std::chrono::system_clock> start, end1, end2;
    start = std::chrono::system_clock::now();
    std::string first_img_path = "/home/dong/Pictures/3.png", second_img_path = "/home/dong/Pictures/4.png";
    cv::Mat img1, img2, img1_, img2_, match, ransac;
    int MAX_CNT = 150;
    double MIN_DIST = 50;
    std::vector<cv::Point2f> n_pts_1, n_pts_2, match_pts_1, match_pts_2, ran_pts_1, ran_pts_2;
    std::vector<uchar> status;
    std::vector<float> err;
    end1 = std::chrono::system_clock::now();
    timeCost(start, start, end1, "prepare");

    img1 = cv::imread(first_img_path, cv::IMREAD_GRAYSCALE);
    img2 = cv::imread(second_img_path, cv::IMREAD_GRAYSCALE);
    img1_ = cv::imread(first_img_path);
    img2_ = cv::imread(second_img_path);
    end2 = std::chrono::system_clock::now();
    timeCost(start, end1, end2, "read image");

    cv::goodFeaturesToTrack(img1, n_pts_1, MAX_CNT, 0.01, MIN_DIST, cv::Mat());
    end1 = std::chrono::system_clock::now();
    timeCost(start, end2, end1, "detect features");

    cv::calcOpticalFlowPyrLK(img1, img2, n_pts_1, n_pts_2, status, err);
    end2 = std::chrono::system_clock::now();
    timeCost(start, end1, end2, "KLT");

    reduceVector(n_pts_1, status, match_pts_1);
    reduceVector(n_pts_2, status, match_pts_2);
    drawMatches(match_pts_1, match_pts_2, img1_, img2_, match, 4);

    //调用cv::findFundamentalMat对un_cur_pts和un_forw_pts计算F矩阵
    std::vector<uchar> status_;
    cv::findFundamentalMat(n_pts_1, n_pts_2, cv::FM_RANSAC, 1, 0.99, status_);
    reduceVector(match_pts_1, status_, ran_pts_1);
    reduceVector(match_pts_2, status_, ran_pts_2);
    drawMatches(ran_pts_1, ran_pts_2, img1_, img2_, ransac, 4);
    end1 = std::chrono::system_clock::now();
    timeCost(start, end2, end1, "ransac");

    printf("提取得到的特征点个数为: %zu \\n", n_pts_1.size());
    for (int i = 0; i < n_pts_1.size(); i++)
        cv::circle(img1_, n_pts_1[i], 1, cv::Scalar(0, 0, 255), 2, 8, 0);

    cv::imshow("提取到的特征点", img1_);
    cv::imwrite("/home/dong/Pictures/my1.png",img1_);
    cv::waitKey(0);

    printf("跟踪得到的特征点个数为: %zu  \\n", n_pts_2.size());
    for (int i = 0; i < n_pts_2.size(); i++)
        cv::circle(img2_, n_pts_2[i], 1, cv::Scalar(0, 0, 255), 2, 8, 0);

    cv::imshow("追踪到的特征点", img2_);
    cv::imwrite("/home/dong/Pictures/my2.png",img2_);
    cv::waitKey(0);

    printf("匹配得到的特征点个数为: %zu  \\n", match_pts_1.size());
    cv::imshow("匹配结果", match);
    cv::imwrite("/home/dong/Pictures/my3.png",match);
    cv::waitKey(0);

    printf("RANSAC之后的特征点个数为: %zu  \\n", ran_pts_1.size());
    cv::imshow("匹配结果", ransac);
    cv::imwrite("/home/dong/Pictures/my4.png",ransac);
    cv::waitKey(0);

    return 0;


void drawMatches(const std::vector<cv::Point2f> &points_1, const std::vector<cv::Point2f> &points_2,
                 const cv::Mat &image_src_,
                 const cv::Mat &image_dst_, cv::Mat &out_image_, int circle_radius_)
    // Final image
    out_image_.create(image_src_.rows, // Height
                      2 * image_src_.cols, // Width
                      image_src_.type()); // Type

    cv::Mat roi_img_result_left =
            out_image_(cv::Rect(0, 0, image_src_.cols, image_src_.rows)); // Img1 will be on the left part
    cv::Mat roi_img_result_right =
            out_image_(cv::Rect(image_src_.cols, 0, image_dst_.cols,
                                image_dst_.rows)); // Img2 will be on the right part, we shift the roi of img1.cols on the right

    cv::Mat roi_image_src = image_src_(cv::Rect(0, 0, image_src_.cols, image_src_.rows));
    cv::Mat roi_image_dst = image_dst_(cv::Rect(0, 0, image_dst_.cols, image_dst_.rows));

    roi_image_src.copyTo(roi_img_result_left); //Img1 will be on the left of imgResult
    roi_image_dst.copyTo(roi_img_result_right); //Img2 will be on the right of imgResult

    for (int i = 0; i < points_1.size(); ++i)
        cv::Point2d pt1(points_1.at(i).x,
                        points_1.at(i).y);
        cv::Point2d pt2(image_dst_.cols + points_2.at(i).x,
                        points_2.at(i).y);

        cv::Scalar color(255 * static_cast<double>(rand()) / RAND_MAX,
                         255 * static_cast<double>(rand()) / RAND_MAX,
                         255 * static_cast<double>(rand()) / RAND_MAX);

        cv::circle(out_image_, pt1, circle_radius_, color, static_cast<int>(circle_radius_ * 0.4));
        cv::circle(out_image_, pt2, circle_radius_, color, static_cast<int>(circle_radius_ * 0.4));
        cv::line(out_image_, pt1, pt2, color, 2);


void timeCost(const std::chrono::time_point<std::chrono::system_clock> start,
              const std::chrono::time_point<std::chrono::system_clock> end1,
              const std::chrono::time_point<std::chrono::system_clock> end2, std::string name)
    std::chrono::duration<double> elapsed_seconds;
    elapsed_seconds = end2 - end1;
    printf("%s %f secs\\n", name, elapsed_seconds.count());
    elapsed_seconds = end2 - start;
    printf("累计用时 = %f secs\\n", elapsed_seconds.count());


void reduceVector(std::vector<cv::Point2f> v, std::vector<uchar> status, std::vector<cv::Point2f> &v1)
    for (int i = 0; i < int(v.size()); i++)
        if (status[i])
            v1.push_back(v.at(i));
参考
1、【OpenCV3】角点检测——cv::goodFeaturesToTrack()与cv::cornerSubPix()详解
3、Motion Analysis and Object Tracking
4、Camera Calibration and 3D Reconstruction
以上是关于Shi-Tomasi角点检测及光流法追踪——复现VINS前端视觉数据处理的主要内容,如果未能解决你的问题,请参考以下文章