angular 路由传参的方式
Posted 头名字W
tags:
篇首语:本文由小常识网(cha138.com)小编为大家整理,主要介绍了angular 路由传参的方式相关的知识,希望对你有一定的参考价值。
1. 路由文件引入
// 第一步:引入Router对象
import ActivatedRoute, Router from '@angular/router';
 // 第二步:在构造函数中注入
constructor(private activateRoute: ActivatedRoute,
private router: Router)
传参的类型
- get跳转和动态路由两种方式来实现(主要是两类,主动传参和被动传参)
实现传参前,我们需要先在app-routing.module.ts(或者子模块的路由文件中配置路由)
eg: path: ‘details/:id’, component: DetailsComponent, data: title: 详情’
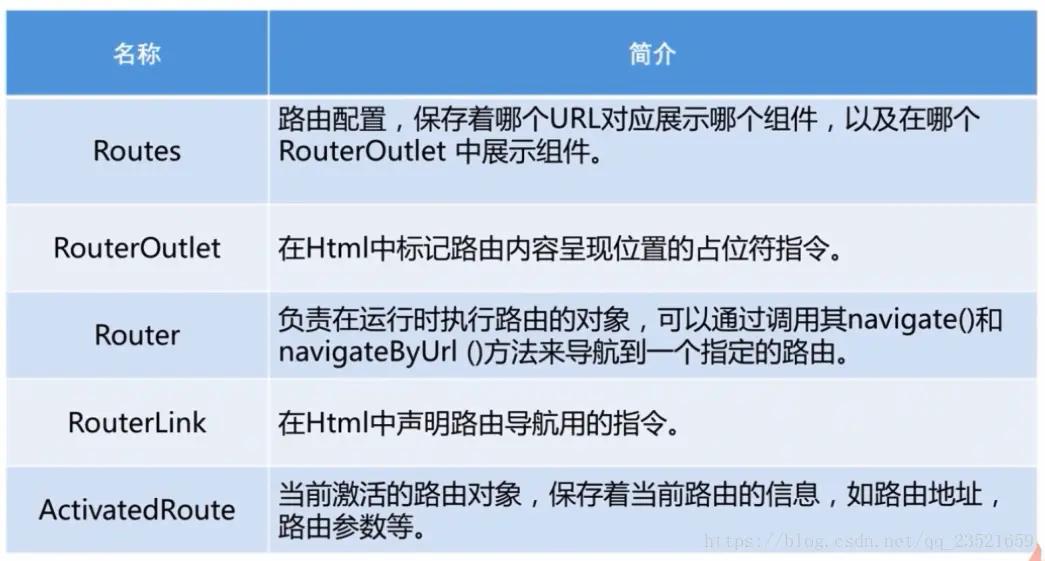
先了解下路由的相关模块和指令

get传值方式
- 页面传值
<a [routerLink]="['/detail']" [queryParams]="id: 1">股票详情</a>
- 代码主动传值
this.router.navigate(['/detail'],queryParams: id: 1);
订阅
// 一次订阅
const id = this.activateRoute.snapshot.queryParams['id']
// 动态
this.activateRoute.queryParams.subscribe(
(params: any) => this.id= params.id);
// 链接展示 http://localhost:4200/detail?id=1
动态传参
- 页面传值
<a [routerLink]="['/detail' , id]">item.title</a>
- 代码主动传值
this.router.navigate(['/detail', id]);
订阅
// 一次订阅
const id = this.activateRoute.snapshot.params['id']
// 动态
this.activateRoute.params.subscribe(
(params: any) => this.id= params.id);
// 链接展示 http://localhost:4200/detail/1
以上是关于angular 路由传参的方式的主要内容,如果未能解决你的问题,请参考以下文章