SSD: Signle Shot Detector 用于自然场景文字检测
Posted chenxp2311
tags:
篇首语:本文由小常识网(cha138.com)小编为大家整理,主要介绍了SSD: Signle Shot Detector 用于自然场景文字检测相关的知识,希望对你有一定的参考价值。
前言
之前我在 论文阅读:SSD: Single Shot MultiBox Detector 中,讲了这个最新的 Object Detection 算法。
既然 SSD 是用来检测物体的,那么可不可以将 SSD 用来检测自然场景图像中的文字呢?答案肯定是可以的~
同时,受到浙大 solace_hyh 同学的 ssd-plate_detection 工作,这篇文章记录我自己将 SSD 用于文字检测的过程。
全部的代码上传到 Github 了:https://github.com/chenxinpeng/SSD_scene-text-detection,代码质量不太高,还请高手指点 。^_^
准备与转换数据集
ICDAR 2011 数据集训练集共有 229 张图像,我将其分为 159 张、70张图像两部分。前者用作训练,后者用于训练时进行测试。
下面就是要将这些图像,转换成 lmdb 格式,用于 caffe 训练;将文字区域的标签,转换为 Pascal VOC 的 XML 格式。
将 ground truth 转换为 Pascal VOC XML 文件
先将 ICDAR 2011 给定的 gt_**.txt 标签文件转换为 Pascal VOC XML 格式。
先看下原来的 gt_**.txt 格式,如下图,有一张原始图像:

下面是其 ground truth 文件:
158,128,412,182,"Footpath"
442,128,501,170,"To"
393,198,488,240,"and"
63,200,363,242,"Colchester"
71,271,383,313,"Greenstead"
ground truth 文件格式为:
xmin, ymin, xmax, ymax, label
。同时,要注意,这里的坐标系是如下摆放:
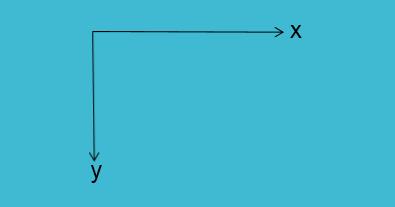
将 ground truth 的 txt 文件转换为 Pascal VOC 的 XML 格式的代码如下:
#! /usr/bin/python

import os, sys
import glob
from PIL import Image

# ICDAR 图像存储位置
src_img_dir = "/media/chenxp/Datadisk/ocr_dataset/ICDAR2011/train-textloc"
# ICDAR 图像的 ground truth 的 txt 文件存放位置
src_txt_dir = "/media/chenxp/Datadisk/ocr_dataset/ICDAR2011/train-textloc"

img_Lists = glob.glob(src_img_dir + '/*.jpg')

img_basenames = [] # e.g. 100.jpg
for item in img_Lists:
    img_basenames.append(os.path.basename(item))

img_names = [] # e.g. 100
for item in img_basenames:
    temp1, temp2 = os.path.splitext(item)
    img_names.append(temp1)

for img in img_names:
    im = Image.open((src_img_dir + '/' + img + '.jpg'))
    width, height = im.size

    # open the crospronding txt file
    gt = open(src_txt_dir + '/gt_' + img + '.txt').read().splitlines()

    # write in xml file
    os.mknod(src_txt_dir + '/' + img + '.xml')
    xml_file = open((src_txt_dir + '/' + img + '.xml'), 'w')
    xml_file.write('<annotation>\\n')
    xml_file.write('    <folder>VOC2007</folder>\\n')
    xml_file.write('    <filename>' + str(img) + '.jpg' + '</filename>\\n')
    xml_file.write('    <size>\\n')
    xml_file.write('        <width>' + str(width) + '</width>\\n')
    xml_file.write('        <height>' + str(height) + '</height>\\n')
    xml_file.write('        <depth>3</depth>\\n')
    xml_file.write('    </size>\\n')

    # write the region of text on xml file
    for img_each_label in gt:
        spt = img_each_label.split(',')
        xml_file.write('    <object>\\n')
        xml_file.write('        <name>text</name>\\n')
        xml_file.write('        <pose>Unspecified</pose>\\n')
        xml_file.write('        <truncated>0</truncated>\\n')
        xml_file.write('        <difficult>0</difficult>\\n')
        xml_file.write('        <bndbox>\\n')
        xml_file.write('            <xmin>' + str(spt[0]) + '</xmin>\\n')
        xml_file.write('            <ymin>' + str(spt[1]) + '</ymin>\\n')
        xml_file.write('            <xmax>' + str(spt[2]) + '</xmax>\\n')
        xml_file.write('            <ymax>' + str(spt[3]) + '</ymax>\\n')
        xml_file.write('        </bndbox>\\n')
        xml_file.write('    </object>\\n')

    xml_file.write('</annotation>')
x上面代码运行结果是得到如下的 XML 文件,同样用上面的 100.jpg 图像示例,其转换结果如下:
<annotation>
    <folder>VOC2007</folder>
    <filename>100.jpg</filename>
    <size>
        <width>640</width>
        <height>480</height>
        <depth>3</depth>
    </size>
    <object>
    ......
</annotation>
上面代码生成的 XML 文件,与图像文件存储在一个地方。
生成训练图像与 XML 标签的位置文件
这一步,按照 SSD 训练的需求,将图像位置,及其对应的 XML 文件位置写入一个 txt 文件,供训练时读取,一个文件名称叫做:trainval.txt 文件,另一个叫做:test.txt 文件。形式如下:
scenetext/JPEGImages/106.jpg scenetext/Annotations/106.xml
scenetext/JPEGImages/203.jpg scenetext/Annotations/203.xml
scenetext/JPEGImages/258.jpg scenetext/Annotations/258.xml
scenetext/JPEGImages/122.jpg scenetext/Annotations/122.xml
scenetext/JPEGImages/103.jpg scenetext/Annotations/103.xml
scenetext/JPEGImages/213.jpg scenetext/Annotations/213.xml
scenetext/JPEGImages/149.jpg scenetext/Annotations/149.xml
......
生成的代码如下:
#! /usr/bin/python

import os, sys
import glob

trainval_dir = "/home/chenxp/data/VOCdevkit/scenetext/trainval"
test_dir = "/home/chenxp/data/VOCdevkit/scenetext/test"

trainval_img_lists = glob.glob(trainval_dir + '/*.jpg')
trainval_img_names = []
for item in trainval_img_lists:
    temp1, temp2 = os.path.splitext(os.path.basename(item))
    trainval_img_names.append(temp1)

test_img_lists = glob.glob(test_dir + '/*.jpg')
test_img_names = []
for item in test_img_lists:
    temp1, temp2 = os.path.splitext(os.path.basename(item))
    test_img_names.append(temp1)

dist_img_dir = "scenetext/JPEGImages"
dist_anno_dir = "scenetext/Annotations"

trainval_fd = open("/home/chenxp/caffe/data/scenetext/trainval.txt", 'w')
test_fd = open("/home/chenxp/caffe/data/scenetext/test.txt", 'w')

for item in trainval_img_names:
    trainval_fd.write(dist_img_dir + '/' + str(item) + '.jpg' + ' ' + dist_anno_dir + '/' + str(item) + '.xml\\n')

for item in test_img_names:
    test_fd.write(dist_img_dir + '/' + str(item) + '.jpg' + ' ' + dist_anno_dir + '/' + str(item) + '.xml\\n')
生成 test name size 文本文件
这一步,SSD 还需要一个名叫:test_name_size.txt 的文件,里面记录训练图像、测试图像的图像名称、height、width。内容形式如下:
106 480 640
203 480 640
258 480 640
318 480 640
122 480 640
103 480 640
320 640 480
......
生成这个文本文件的代码如下:
#! /usr/bin/python

import os, sys
import glob
from PIL import Image

img_dir = "/home/chenxp/data/VOCdevkit/scenetext/JPEGImages"

img_lists = glob.glob(img_dir + '/*.jpg')

test_name_size = open('/home/chenxp/caffe/data/scenetext/test_name_size.txt', 'w')

for item in img_lists:
    img = Image.open(item)
    width, height = img.size
    temp1, temp2 = os.path.splitext(os.path.basename(item))
    test_name_size.write(temp1 + ' ' + str(height) + ' ' + str(width) + '\\n')
准备标签映射文件 labelmap
这个 prototxt 文件是记录 label 与 name 之间的对应关系的,内容如下:
item
  name: "none_of_the_above"
  label: 0
  display_name: "background"

item
  name: "object"
  label: 1
  display_name: "text"
我的 prototxt 文件名称,被我重命名为:labelmap_voc.prototxt
生成 lmdb 数据库
准备好上述的几个文本文件,将其放置在如下位置:
/home/chenxp/caffe/data/scenetext这时候,需要修改调用 SSD 源码中提供的 create_data.sh 脚本文件(我将文件重命名为:create_data_scenetext.sh):
cur_dir=$(cd $( dirname $BASH_SOURCE[0] ) && pwd )
root_dir=$cur_dir/../..

cd $root_dir

redo=1
data_root_dir="$HOME/data/VOCdevkit"
dataset_name="scenetext"
mapfile="$root_dir/data/$dataset_name/labelmap_voc_scenetext.prototxt"
anno_type="detection"
db="lmdb"
min_dim=0
max_dim=0
width=0
height=0

extra_cmd="--encode-type=jpg --encoded"
if [ $redo ]
then
  extra_cmd="$extra_cmd --redo"
fi
for subset in test trainval
do
  python $root_dir/scripts/create_annoset.py --anno-type=$anno_type --label-map-file=$mapfile \\
  --min-dim=$min_dim --max-dim=$max_dim --resize-width=$width --resize-height=$height \\
  --check-label $extra_cmd $data_root_dir $root_dir/data/$dataset_name/$subset.txt \\
  $data_root_dir/$dataset_name/$db/$dataset_name"_"$subset"_"$db examples/$dataset_name
done
上面的 bash 脚本会自动将训练的 ICDAR 2011 的图像文件与对应 label 转换为 lmdb 文件。转换后的文件位置可参见上面脚本的内容,我的位置为:
/home/chenxp/caffe/examples/scenetext_trainval_lmdb
/home/chenxp/caffe/examples/scenetext_test_lmdb
训练模型
将 SSD 用于自己的检测任务,是需要 Fine-tuning a pretrained network 的。
具体的,需要加载 SSD 作者提供的 VGG_ILSVRC_16_layers_fc_reduced.caffemodel,在这个预训练的模型上,继续用我们的数据训练。
下载下来后,放在如下位置下面:
/home/chenxp/caffe/models/VGGNet之后,修改作者提供的训练 Python 代码:ssd_pascal.py,这份代码会自动创建训练所需要的如下几个文件:
- deploy.prototxt
- solver.prototxt
- trainval.prototxt
- test.prototxt
我们需要按照自己的情况,修改如下几处地方:
# Modify the job name if you want.
job_name = "SSD_".format(resize)
# The name of the model. Modify it if you want.
model_name = "VGG_VOC0712_".format(job_name)

# Directory which stores the model .prototxt file.
save_dir = "models/VGGNet/VOC0712/".format(job_name)
# Directory which stores the snapshot of models.
snapshot_dir = "models/VGGNet/VOC0712/".format(job_name)
# Directory which stores the job script and log file.
job_dir = "jobs/VGGNet/VOC0712/".format(job_name)
# Directory which stores the detection results.
output_result_dir = "/data/VOCdevkit/results/VOC2007//Main".format(os.environ['HOME'], job_name)

# model definition files.
train_net_file = "/train.prototxt".format(save_dir)
test_net_file = "/test.prototxt".format(save_dir)
deploy_net_file = "/deploy.prototxt".format(save_dir)
solver_file = "/solver.prototxt".format(save_dir)
# snapshot prefix.
snapshot_prefix = "/".format(snapshot_dir, model_name)
# job script path.
job_file = "/.sh".format(job_dir, model_name)

# Stores the test image names and sizes. Created by data/VOC0712/create_list.sh
name_size_file = "data/VOC0712/test_name_size.txt"
# The pretrained model. We use the Fully convolutional reduced (atrous) VGGNet.
pretrain_model = "models/VGGNet/VGG_ILSVRC_16_layers_fc_reduced.caffemodel"
# Stores LabelMapItem.
label_map_file = "data/VOC0712/labelmap_voc.prototxt"

num_classes = 21

num_test_image = 4952
我的训练参数
其实还需要修改一些,如训练时的参数。因为一开始若直接用作者 ssd_pascal.py 文件中的默认的 solver.prototxt 参数,会出现如下情况:

跑着跑着,loss 就变成 nan 了,发散了,不收敛。
我调试了一段时间,我的 solver.prototxt 参数设置如下,可保证收敛:
base_lr: 0.0001其余参数可看自己设置。学习率一定要小,原先的 0.001 就会发散。
训练结束:

可以看见,最后的测试精度为 0.776573,感觉 SSD 效果还可以。
我自己训练好的模型,上传到云端了:链接:http://share.weiyun.com/1c544de66be06ea04774fd11e820a780 (密码:ERid5Y)
这个需要在下一阶段的测试中用到。
用训练好的 model 进行 predict
SSD 的作者也给我们写好了 predict 的代码,我们只需要该参数就可以了。
用 jupyter notebook 打开 ~/caffe/examples/ssd_detect.ipynb 文件,这是作者为我们写好的将训练好的 caffemodel 用于检测的文件。
指定好 caffemodel,deploy.txt,详细的看我上传的代码吧。
测试几张图像,结果如下:

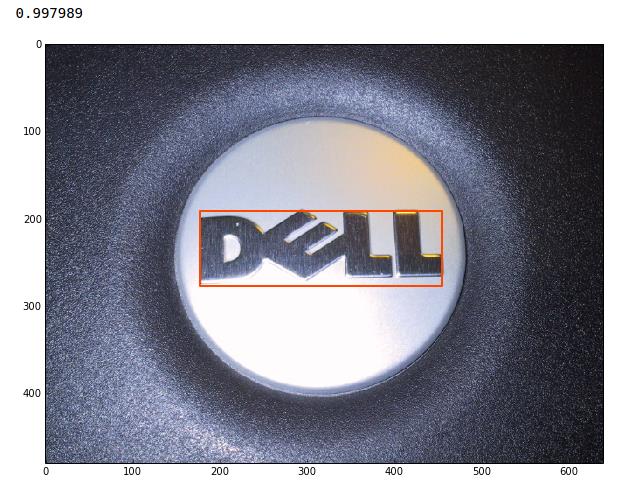

参考
- ECCV2016 Paper: 《SSD: Single Shot MultiBox Detector》
- SSD 源代码
- SSD-plate_detection from solace_hyh
- SSD框架训练自己的数据集
以上是关于SSD: Signle Shot Detector 用于自然场景文字检测的主要内容,如果未能解决你的问题,请参考以下文章