为你的MacOS App添加开机自启动(Swift)
Posted Cocos2der
tags:
篇首语:本文由小常识网(cha138.com)小编为大家整理,主要介绍了为你的MacOS App添加开机自启动(Swift)相关的知识,希望对你有一定的参考价值。
猴子原创,欢迎转载。转载请注明: 转载自Cocos2Der-CSDN,谢谢!
原文地址: http://blog.csdn.net/cocos2der/article/details/52104828
关于Mac下如何给自己App添加开机自启动功能,你可以了解下Mac Developer Library中的说明。
There are two ways to add a login item: using the Service Management framework, and using a shared file list
Login items installed using the Service Management framework are not visible in System Preferences and can only be removed by the application that installed them.
Login items installed using a shared file list are visible in System Preferences; users have direct control over them. If you use this API, your login item can be disabled by the user, so any other application that communicates with it it should have reasonable fallback behavior in case the login item is disabled.
可以看出,Apple推荐了两种方式:Service Management framework 和 shared file list。
这两种方式有差别:
使用Service Management framework 在系统的登录项中是不可见的。只有卸载App才能移除登录项
使用 shared file list 在系统的登录项中是可见的。用户可以直接在面板上控制他们。(If you use this API, your login item can be disabled by the user, so any other application that communicates with it it should have reasonable fallback behavior in case the login item is disabled.) 原文还有一句大意是指这个API有隐患,所以在OS X 10.10系统上 API被大量Deprecated
下面我主要介绍的是使用Service Management framework 的方式添加开机自启动。
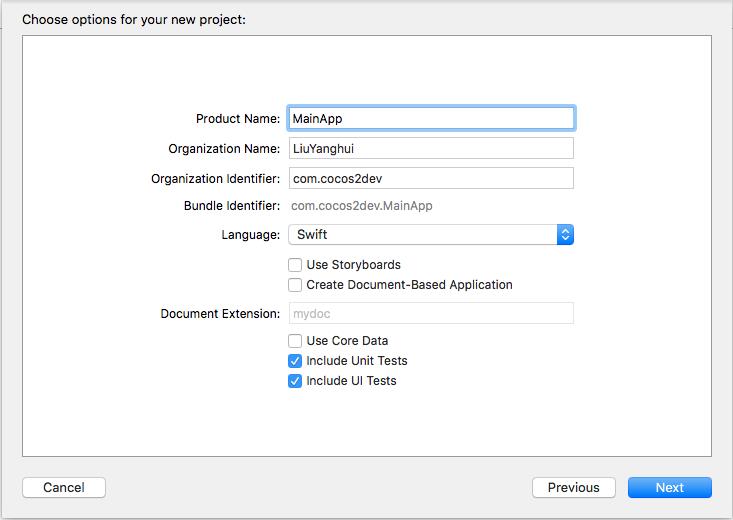
一、创建主工程
新建一个MainApp的osx工程App
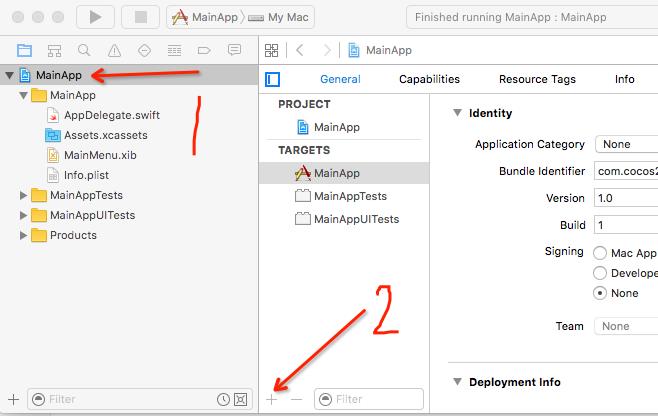
二、添加自动启动Target
我们需要注册一个Helper Target App用来作为开机自启动我们的MainApp,点击Targets下面的加号.
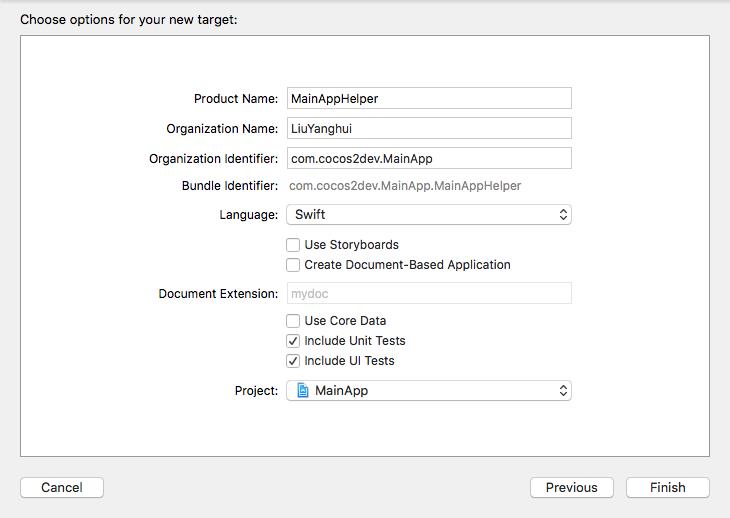
添加一个新的OS X application。取名为MainAppHelper
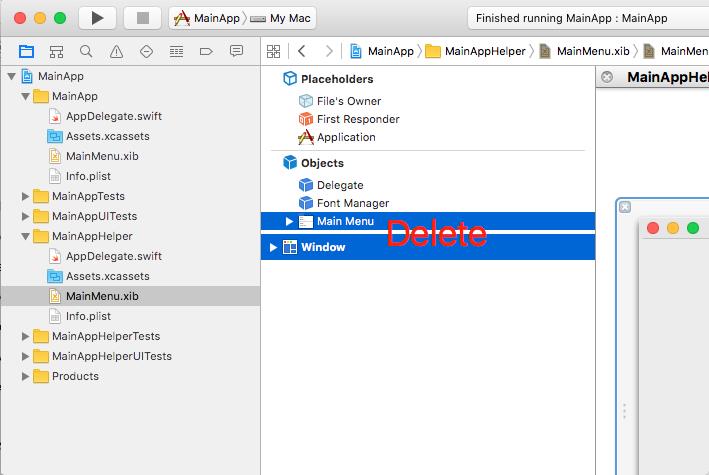
三、设置配置属性
删除MainAppHelper中的windows,让它没有可展示的Window。
设置MainAppHelper的Info中Application is background only为YES
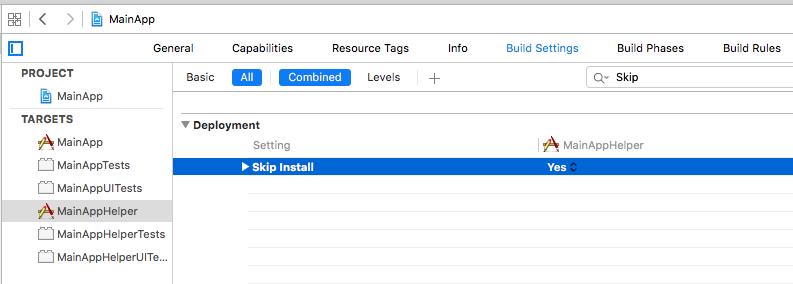
设置MainAppHelper中Build Setting下skip install为YES
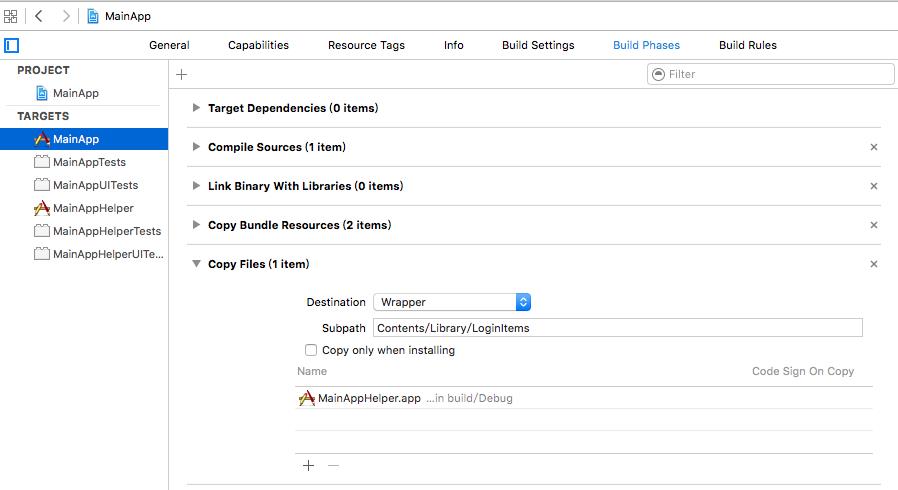
在MainApp中添加CopyFile到Contents/Library/LoginItems
在MainApp中设置Build Setting 下Strip Debug Symbols During Copy为NO, 这个是默认的为No
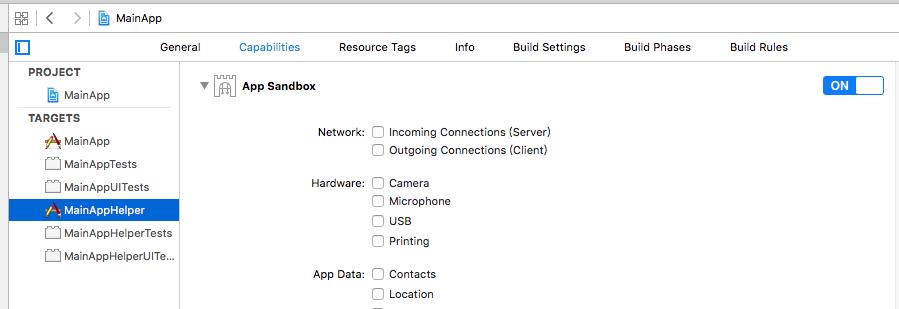
分别开启MainApp和MainAppHelper的App Sandbox
四、添加启动代码
- 请根据你自己的实际情况添加startupAppWhenLogin函数到你MainApp主工程中,程序运行后根据情况调用开启或者关闭自启动, 注意其中的BundleID改为你自己的,以及主App的名称。如果不确定名称是否是自己的工程名,可以直接右键自己的ipa,显示包内容,看下里面的文件夹你就明白了。
func startupAppWhenLogin(startup: Bool)
        // 这里请填写你自己的Heler BundleID
        let launcherAppIdentifier = "com.cocos2dev.MainApp.MainAppHelper"

        // 开始注册/取消启动项
        SMLoginItemSetEnabled(launcherAppIdentifier, startup)

        var startedAtLogin = false
        for app in NSWorkspace.sharedWorkspace().runningApplications
            if app.bundleIdentifier == launcherAppIdentifier
                startedAtLogin = true


        if startedAtLogin             NSDistributedNotificationCenter.defaultCenter().postNotificationName("killhelper", object: NSBundle.mainBundle().bundleIdentifier!)
- 在MainAppHelper中,修改AppDelegate为如下代码:
import Cocoa

@NSApplicationMain
class AppDelegate: NSObject, NSApplicationDelegate
    func applicationDidFinishLaunching(aNotification: NSNotification)
        // Insert code here to initialize your application

        let mainAppIdentifier = "com.cocos2dev.MainApp"
        let running           = NSWorkspace.sharedWorkspace().runningApplications
        var alreadyRunning    = false

        for app in running
            if app.bundleIdentifier == mainAppIdentifier
                alreadyRunning = true
                break


        if !alreadyRunning
            NSDistributedNotificationCenter.defaultCenter().addObserver(self, selector: "terminate", name: "killhelper", object: mainAppIdentifier)

            let path = NSBundle.mainBundle().bundlePath as NSString
            var components = path.pathComponents
            components.removeLast()
            components.removeLast()
            components.removeLast()
            components.append("MacOS")
            components.append("MainApp") //main app name

            let newPath = NSString.pathWithComponents(components)
            NSWorkspace.sharedWorkspace().launchApplication(newPath)
         else
            self.terminate()


    func applicationWillTerminate(aNotification: NSNotification)
        // Insert code here to tear down your application


    func terminate()
        //      NSLog("I'll be back!")
        NSApp.terminate(nil)
以上就是一个自启动App的做法。当然如果你上架Mac Store,建议你不要默认就开启自启动,放到设置中,让用户自己选择开启/关闭。
2016-8-4 更新
- 解决开启Sandbox后,请求网络数据出现
"The connection to service named com.apple.nsurlstorage-cache was invalidated."错误。勾选App Sandbox中Outgoing Connections(Client)

参考博客
Mac Developer Library
First OS X tutorial: How to launch an OS X app at login?
在SandBox沙盒下实现程序的开机启动
以上是关于为你的MacOS App添加开机自启动(Swift)的主要内容,如果未能解决你的问题,请参考以下文章