flume安装
Posted 海绵不老
tags:
篇首语:本文由小常识网(cha138.com)小编为大家整理,主要介绍了flume安装相关的知识,希望对你有一定的参考价值。
flume安装
安装及配置环境变量
1.保证有JAVA_HOME;
2.直接解压即可;
将 apache-flume-1.7.0-bin.tar.gz包放到/opt/soft下,加压到/opt/module下
[atguigu@hadoop1 flume-1.7]$ ls
bin  CHANGELOG  conf  DEVNOTES  doap_Flume.rdf  docs  lib  LICENSE  NOTICE  README.md  RELEASE-NOTES  tools
验证是否安装成功:
[atguigu@hadoop1 flume-1.7]$  bin/flume-ng version
Flume 1.7.0
Source code repository: https://git-wip-us.apache.org/repos/asf/flume.git
Revision: 511d868555dd4d16e6ce4fedc72c2d1454546707
Compiled by bessbd on Wed Oct 12 20:51:10 CEST 2016
From source with checksum 0d21b3ffdc55a07e1d08875872c00523
为了使用方便,在/etc/profile配置FLUME_HOME:
export JAVA_HOME=/usr/java/jdk1.8.0_131
export JRE_HOME=$JAVA_HOME/jre
export CLASSPATH=.:$JAVA_HOME/lib:$JRE_HOME/lib:$CLASSPATH
export JAVA_PATH=$JAVA_HOME/bin:$JRE_HOME/bin
export HADOOP_HOME=/opt/module/hadoop-2.7.2
export HIVE_HOME=/opt/module/hive-1.2.1
export FLUME_HOME=/opt/module/flume-1.7
export HADOOP_PATH=$HADOOP_HOME/bin:$HADOOP_HOME/sbin:$FLUME_HOME/bin
export PATH=$PATH:$JAVA_PATH:$HADOOP_PATH:$HIVE_HOME/bin
修改完成保存后,重新加载文件:
source /etc/profile
使用
1.编写agent的配置文件
agent的配置文件的本质是一个Properties文件!格式为 属性名=属性值
	在配置文件中需要编写:
	①定义当前配置文件中agent的名称,再定义source,sink,channel它们的别名
	②指定source和channel和sink等组件的类型
	③指定source和channel和sink等组件的配置,配置参数名和值都需要参考flume到官方用户手册
	④指定source和channel的对应关系,以及sink和channel的对应关系。连接组件!

 案例1:(创建一个agent监听44444端口,如果该端口有数据则输出到控制台):
 配置文件:

        #a1是agent别名,a1中定义了一个r1的source,如果有多个,使用空格隔开
        a1.sources=r1
		a1.sinks=k1
		a1.channels=c1

		#组名.属性名=属性值
		a1.sources.r1.type=netcat
		a1.sources.r1.bind=hadoop1
		a1.sources.r1.port=44444

		#定义sink
		a1.sinks.k1.type=logger
		a1.sinks.k1.maxBytesToLog=100

		#定义chanel
		a1.channels.c1.type=memory
		a1.channels.c1.capacity=1000

		#连接组件 同一个source可以对接多个channel,一个sink只能从一个channel拿数据!
		a1.sources.r1.channels=c1
		a1.sinks.k1.channel=c1
在/opt/module/flume-1.7下创建文件夹(自定义):myagents
在myagents下创建文件(自定义)netcat-demo1.conf,将上面配置复制进去
启动该agent:
flume-ng agent -c /conf -n a1 -f myagents/netcat-demo1.conf -Dflume.root.logger=DEBUG,console
启动后: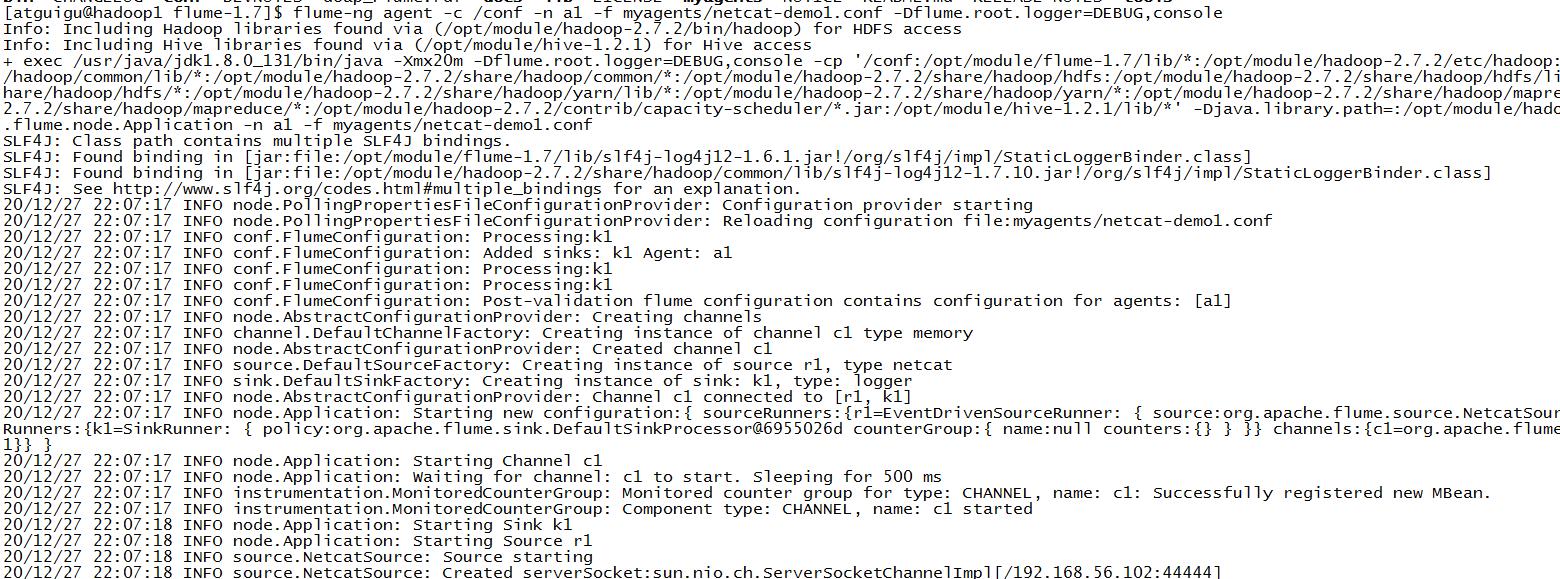
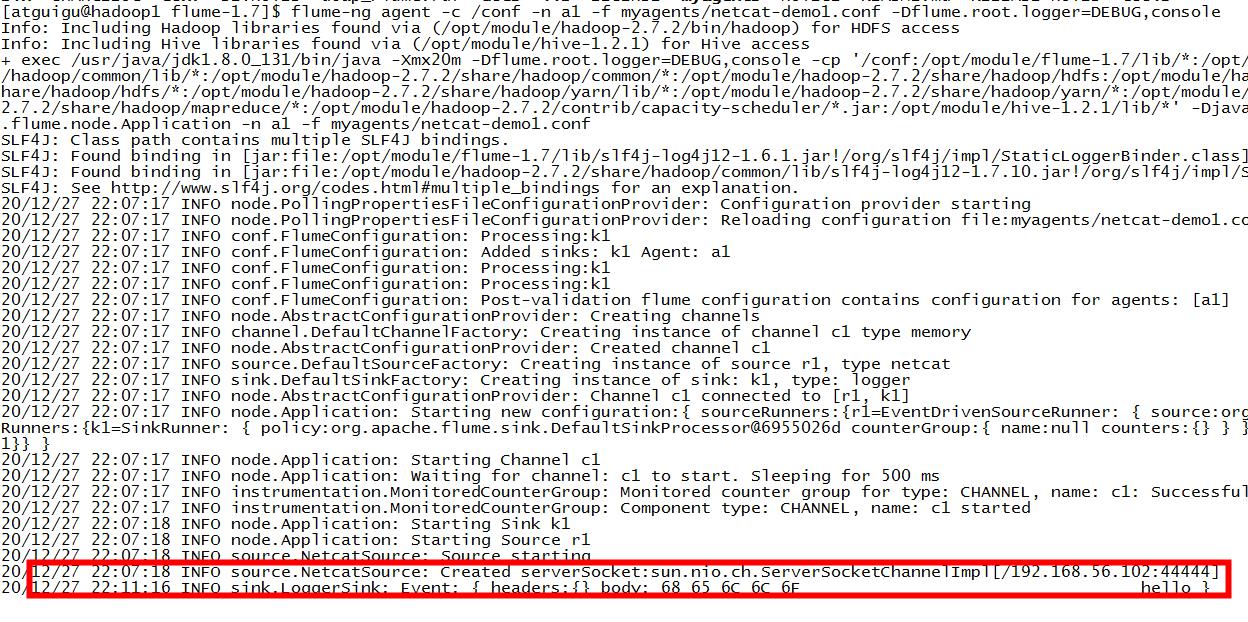
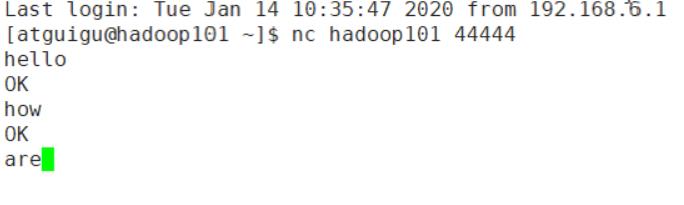
向44444端口发送数据:
	[atguigu@hadoop1 root]$ nc hadoop1 44444
	hello
	OK
在控制台可以看到打印出来了:
案列2:(创建一个agent实时读取hive的日志,并将读取的信息写入hdfs中):
配置:
#a1是agent别名,a1中定义了一个r1的source,如果有多个,使用空格隔开
a1.sources=r1
a1.sinks=k1
a1.channels=c1
#组名.属性名=属性值
a1.sources.r1.type=exec
a1.sources.r1.command=tail -f /tmp/atguigu/hive.log
#定义sink
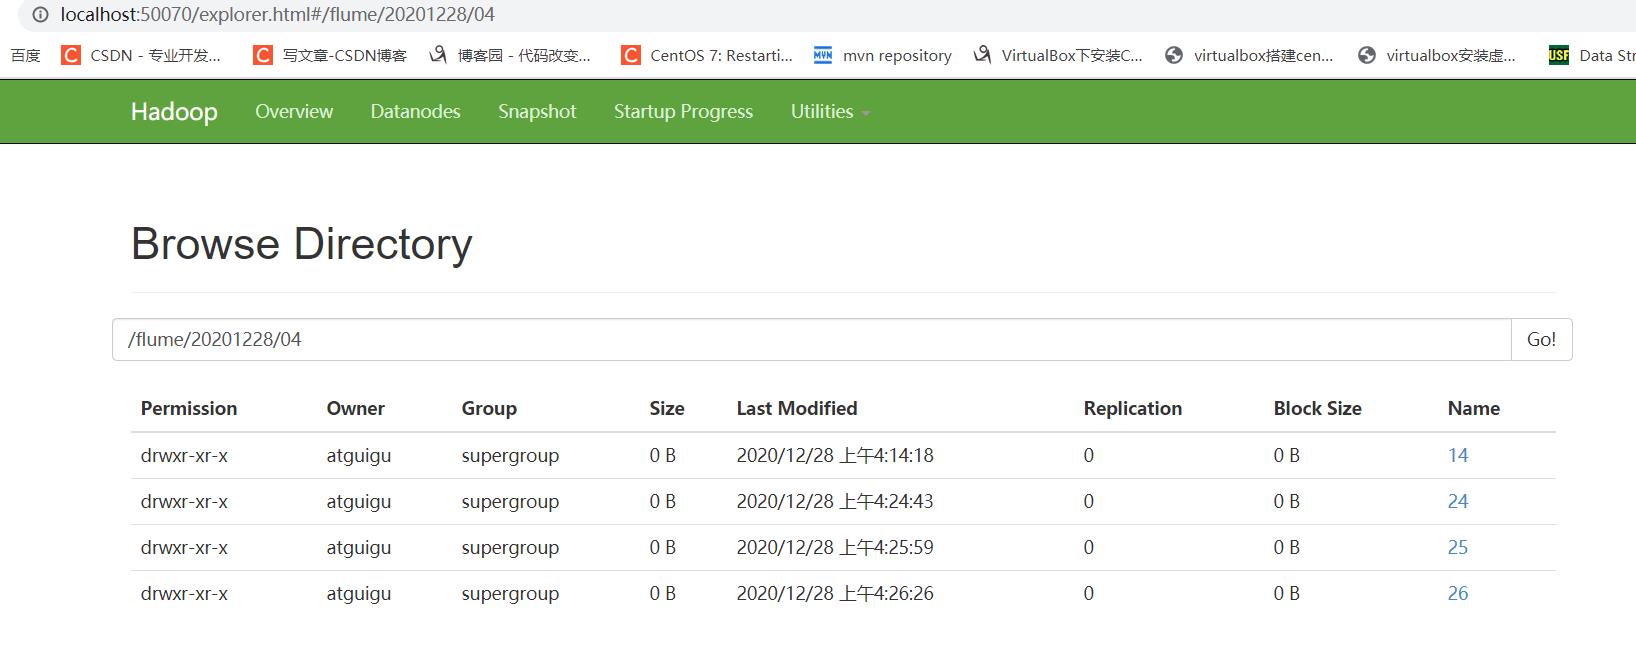
a1.sinks.k1.type=hdfs
a1.sinks.k1.hdfs.path=hdfs://hadoop1:9000/flume/%Y%m%d/%H/%M
#上传文件的前缀
a1.sinks.k1.hdfs.filePrefix=logs-
#是否按照时间滚动文件夹
a1.sinks.k1.hdfs.round=true
#多少时间单位来创建一个新的文件夹
a1.sinks.k1.hdfs.roundValue=1
#定义时间单位
a1.sinks.k1.hdfs.roundUnit=minute
#是否使用本地时间戳
a1.sinks.k1.hdfs.useLocalTimeStamp=true
#积攒多少个event才flush到hdfs
a1.sinks.k1.hdfs.batchSize=100
#以下三个和文件滚动有关,以下三个参数是或的关系,以下三个参数如果值为0都代表为禁用
#每60s生成一个新的文件
a1.sinks.k1.hdfs.rollInterval=10
#设置每个文件到128M滚动
a1.sinks.k1.hdfs.rollSize=134217700
#每写多少event滚动一次
a1.sinks.k1.hdfs.rollCount=0
#定义chanel
a1.channels.c1.type=memory
a1.channels.c1.capacity=1000
#连接组件 同一个source可以对接多个channel,一个sink只能从一个channel拿数据!
a1.sources.r1.channels=c1
a1.sinks.k1.channel=c1
在myagents下创建文件(自定义)hdfs-sink.conf,将上面配置复制进去
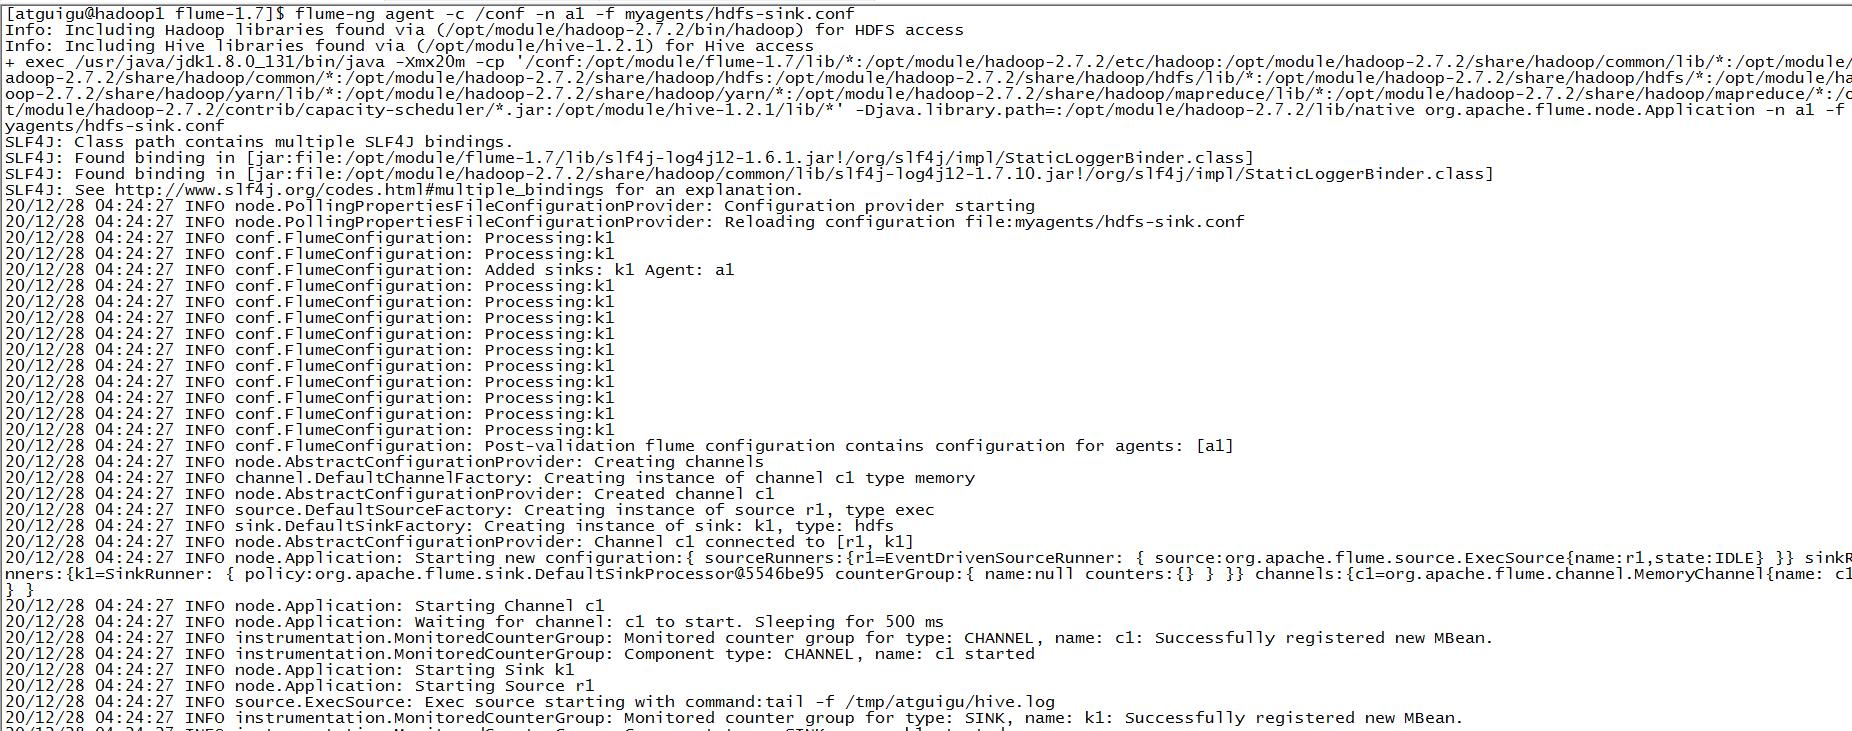
启动该agent:
flume-ng agent -c /conf -n a1 -f myagents/hdfs-sink.conf
启动后:
 ###Execsouce的缺点
execsource和异步的source一样,无法在source向channel中放入event故障时,及时通知客户端,暂停生成数据!
容易造成数据丢失!
	解决方案: 需要在发生故障时,及时通知客户端!
				如果客户端无法暂停,必须有一个数据的缓存机制!

	如果希望数据有强的可靠性保证,可以考虑使用SpoolingDirSource或TailDirSource或自己写Source自己控制!
常用的source
1.SpoolingDirSource
简介:
SpoolingDirSource指定本地磁盘的一个目录为"Spooling(自动收集)"的目录!这个source可以读取目录中
新增的文件,将文件的内容封装为event!
	SpoolingDirSource在读取一整个文件到channel之后,它会采取策略,要么删除文件(是否可以删除取决于配置),要么对文件
	进程一个完成状态的重命名,这样可以保证source持续监控新的文件!

	SpoolingDirSource和execsource不同,SpoolingDirSource是可靠的!即使flume被杀死或重启,依然不丢数据!但是为了保证
	这个特性,付出的代价是,一旦flume发现以下情况,flume就会报错,停止!
			①一个文件已经被放入目录,在采集文件时,不能被修改
			②文件的名在放入目录后又被重新使用(出现了重名的文件)

	要求: 必须已经封闭的文件才能放入到SpoolingDirSource,在同一个SpoolingDirSource中都不能出现重名的文件!
使用:
	必需配置:
	type	–	The component type name, needs to be spooldir.
	spoolDir	–	The directory from which to read files from.

	#a1是agent的名称,a1中定义了一个叫r1的source,如果有多个,使用空格间隔
	a1.sources = r1
	a1.sinks = k1
	a1.channels = c1
	#组名名.属性名=属性值
	a1.sources.r1.type=spooldir
	a1.sources.r1.spoolDir=/home/atguigu/flume

	#定义chanel
	a1.channels.c1.type=memory
	a1.channels.c1.capacity=1000

	#定义sink
	a1.sinks.k1.type = hdfs
	#一旦路径中含有基于时间的转义序列,要求event的header中必须有timestamp=时间戳,如果没有需要将useLocalTimeStamp = true
	a1.sinks.k1.hdfs.path = hdfs://hadoop101:9000/flume/%Y%m%d/%H/%M
	#上传文件的前缀
	a1.sinks.k1.hdfs.filePrefix = logs-

	#以下三个和目录的滚动相关,目录一旦设置了时间转义序列,基于时间戳滚动
	#是否将时间戳向下舍
	a1.sinks.k1.hdfs.round = true
	#多少时间单位创建一个新的文件夹
	a1.sinks.k1.hdfs.roundValue = 1
	#重新定义时间单位
	a1.sinks.k1.hdfs.roundUnit = minute

	#是否使用本地时间戳
	a1.sinks.k1.hdfs.useLocalTimeStamp = true
	#积攒多少个Event才flush到HDFS一次
	a1.sinks.k1.hdfs.batchSize = 100

	#以下三个和文件的滚动相关,以下三个参数是或的关系!以下三个参数如果值为0都代表禁用!
	#60秒滚动生成一个新的文件
	a1.sinks.k1.hdfs.rollInterval = 30
	#设置每个文件到128M时滚动
	a1.sinks.k1.hdfs.rollSize = 134217700
	#每写多少个event滚动一次
	a1.sinks.k1.hdfs.rollCount = 0
	#以不压缩的文本形式保存数据
	a1.sinks.k1.hdfs.fileType=DataStream


	#连接组件 同一个source可以对接多个channel,一个sink只能从一个channel拿数据!
	a1.sources.r1.channels=c1
	a1.sinks.k1.channel=c1
2.TailDirSource
	 flume ng 1.7版本后提供!

	常见问题: TailDirSource采集的文件,不能随意重命名!如果日志在正在写入时,名称为 xxxx.tmp,写入完成后,滚动,
				改名为xxx.log,此时一旦匹配规则可以匹配上述名称,就会发生数据的重复采集!
  简介:
	Taildir Source 可以读取多个文件最新追加写入的内容!
	Taildir Source是可靠的,即使flume出现了故障或挂掉。Taildir Source在工作时,会将读取文件的最后的位置记录在一个
	json文件中,一旦agent重启,会从之前已经记录的位置,继续执行tail操作!

	Json文件中,位置是可以修改,修改后,Taildir Source会从修改的位置进行tail操作!如果JSON文件丢失了,此时会重新从
	每个文件的第一行,重新读取,这会造成数据的重复!

	Taildir Source目前只能读文本文件!

  必需配置:
	channels	–
	type	–	The component type name, needs to be TAILDIR.
	filegroups	–	Space-separated list of file groups. Each file group indicates a set of files to be tailed.
	filegroups.<filegroupName>	–	Absolute path of the file group. Regular expression (and not file system patterns) can be used for filename  only.
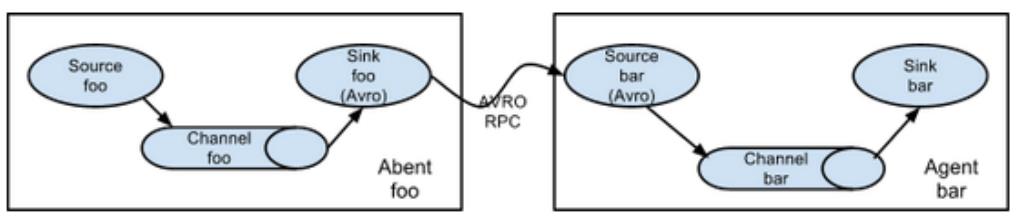
简单串联
-
如果AgentA需要将Event对象发送到其他的agent进程中!
AgentA的sink,必须为AvroSink,其他的agent在接收时,必须选择AvroSource! -
常用组件
①avrosource: 监听一个avro的端口,从另一个avro客户端接受event!必须配置:
type – The component type name, needs to be avro
bind – hostname or IP address to listen on
port – Port # to bind to
②avrosink: 将event转为avro格式的event,发送给指定的主机和端口
必须配置:
type – The component type name, needs to be avro.
hostname – The hostname or IP address to bind to.
port – The port # to listen on.
案例一: 在hadoop101,agent1: netcatsource—memorychannel–arvosink
hadoop101,agent2: avrosource----memorychannel–loggersink
#agent1
#a1是agent的名称,a1中定义了一个叫r1的source,如果有多个,使用空格间隔
a1.sources = r1
a1.sinks = k1
a1.channels = c1
#组名名.属性名=属性值
a1.sources.r1.type=netcat
a1.sources.r1.bind=hadoop101
a1.sources.r1.port=44444
#定义sink
a1.sinks.k1.type=avro
a1.sinks.k1.hostname=hadoop102
a1.sinks.k1.port=33333
#定义chanel
a1.channels.c1.type=memory
a1.channels.c1.capacity=1000
#连接组件 同一个source可以对接多个channel,一个sink只能从一个channel拿数据!
a1.sources.r1.channels=c1
a1.sinks.k1.channel=c1
#agent2
#a1是agent的名称,a1中定义了一个叫r1的source,如果有多个,使用空格间隔
a1.sources = r1
a1.sinks = k1
a1.channels = c1
#组名名.属性名=属性值
a1.sources.r1.type=avro
a1.sources.r1.bind=hadoop102
a1.sources.r1.port=33333
#定义sink
a1.sinks.k1.type=logger
#定义chanel
a1.channels.c1.type=memory
a1.channels.c1.capacity=1000
#连接组件 同一个source可以对接多个channel,一个sink只能从一个channel拿数据!
a1.sources.r1.channels=c1
a1.sinks.k1.channel=c1
Channel Selector
1.Replicating Channel Selector
	复制的channel选择器,也是默认的选择器!当一个source使用此选择器选择多个channel时,
	source会将event在每个channel都复制一份!

	可选的channel: 向可选的channel写入event时,即便发生异常,也会忽略!
-
File Roll Sink
存储event到本地文件系统! 必需配置: type – The component type name, needs to be file_roll. sink.directory – The directory where files will be stored -
案例解析
(execsource----memory channel1----avrosink1)------(arvosource----memory channel----loggersink)
----memory channel2----avrosink2)------(arvosource----memory channel----filerollsink)agent1: 在hadoop102 #a1是agent的名称,a1中定义了一个叫r1的source,如果有多个,使用空格间隔 a1.sources = r1 a1.sinks = k1 k2 a1.channels = c1 c2 #组名名.属性名=属性值 a1.sources.r1.type=exec a1.sources.r1.command=tail -f /home/atguigu/test #声明r1的channel选择器 a1.sources.r1.selector.type = replicating #定义chanel a1.channels.c1.type=memory a1.channels.c1.capacity=1000 a1.channels.c2.type=memory a1.channels.c2.capacity=1000 ##定义sink a1.sinks.k1.type=avro a1.sinks.k1.hostname=hadoop101 a1.sinks.k1.port=33333 a1.sinks.k2.type=avro a1.sinks.k2.hostname=hadoop103 a1.sinks.k2.port=33333 #连接组件 同一个source可以对接多个channel,一个sink只能从一个channel拿数据! a1.sources.r1.channels=c1 c2 a1.sinks.k1.channel=c1 a1.sinks.k2.channel=c2 ------------------------------------------------------- a1.sources = r1 a1.sinks = k1 a1.channels = c1 #组名名.属性名=属性值 a1.sources.r1.type=avro a1.sources.r1.bind=hadoop101 a1.sources.r1.port=33333 #定义sink a1.sinks.k1.type=logger #定义chanel a1.channels.c1.type=memory a1.channels.c1.capacity=1000 #连接组件 同一个source可以对接多个channel,一个sink只能从一个channel拿数据! a1.sources.r1.channels=c1 a1.sinks.k1.channel=c1 ------------------------------------------------------- a1.sources = r1 a1.sinks = k1 a1.channels = c1 #组名名.属性名=属性值 a1.sources.r1.type=avro a1.sources.r1.bind=hadoop103 a1.sources.r1.port=33333 #定义sink a1.sinks.k1.type=file_roll a1.sinks.k1.sink.directory=/home/atguigu/flume #定义chanel a1.channels.c1.type=memory a1.channels.c1.capacity=1000 a1.sources.r1.channels=c1 a1.sinks.k1.channel=c1
Multiplexing Channel Selector
-
Multiplexing Channel Selector根据evnet header中属性,参考用户自己配置的映射信息,将event发送到指定的channel!
 a1.sources = r1
 a1.channels = c1 c2 c3 c4
 a1.sources.r1.selector.type = multiplexing
 a1.sources.r1.selector.header = state
 a1.sources.r1.selector.mapping.CZ = c1
 a1.sources.r1.selector.mapping.US = c2 c3
 a1.sources.r1.selector.default = c4

 r1中每个event根据header中key为state的值,进行选择,如果state=CZ,这类event发送到c1,
 如果state=US,这类event发送到c2,c3,state=其他,发送到c4
2、案例
	agent1:  在hadoop102
	#a1是agent的名称,a1中定义了一个叫r1的source,如果有多个,使用空格间隔
	a1.sources = r1
	a1.sinks = k1 k2
	a1.channels = c1 c2
	#组名名.属性名=属性值
	a1.sources.r1.type=exec
	a1.sources.r1.command=tail -f /home/atguigu/test
	#声明r1的channel选择器
	a1.sources.r1.selector.type = multiplexing
	a1.sources.r1.selector.header = state
	a1.sources.r1.selector.mapping.CZ = c1
	a1.sources.r1.selector.mapping.US = c2

	#使用拦截器为event加上某个header
	a1.sources.r1.interceptors = i1
	a1.sources.r1.interceptors.i1.type = static
	a1.sources.r1.interceptors.i1.key = state
	a1.sources.r1.interceptors.i1.value = CZ


	#定义chanel
	a1.channels.c1.type=memory
	a1.channels.c1.capacity=1000

	a1.channels.c2.type=memory
	a1.channels.c2.capacity=1000

	##定义sink
	a1.sinks.k1.type=avro
	a1.sinks.k1.hostname=hadoop101
	a1.sinks.k1.port=33333

	a1.sinks.k2.type=avro
	a1.sinks.k2.hostname=hadoop103
	a1.sinks.k2.port=33333

	#连接组件 同一个source可以对接多个channel,一个sink只能从一个channel拿数据!
	a1.sources.r1.channels=c1 c2
	a1.sinks.k1.channel=c1
	a1.sinks.k2.channel=c2

	-------------------------------------------------------
	a1.sources = r1
	a1.sinks = k1
	a1.channels = c1
	#组名名.属性名=属性值
	a1.sources.r1.type=avro
	a1.sources.r1.bind=hadoop101
	a1.sources.r1.port=33333


	#定义sink
	a1.sinks.k1.type=logger

	#定义chanel
	a1.channels.c1.type=memory
	a1.channels.c1.capacity=1000

	#连接组件 同一个source可以对接多个channel,一个sink只能从一个channel拿数据!
	a1.sources.r1.channels=c1
	a1.sinks.k1.channel=c1

	-------------------------------------------------------
	a1.sources = r1
	a1.sinks = k1
	a1.channels = c1
	#组名名.属性名=属性值
	a1.sources.r1.type=avro
	a1.sources.r1.bind=hadoop103
	a1.sources.r1.port=33333

	#定义sink
	a1.sinks.k1.type=logger


	#定义chanel
	a1.channels.c1.type=memory
	a1.channels.c1.capacity=1000

	a1.sources.r1.channels=c1
	a1.sinks.k1.channel=c1
SinkProcessor
1.Default Sink Processor
	如果agent中,只有一个sink,默认就使用Default Sink Processor,这个sink processor是不强制用户,
	将sink组成一个组!

	如果有多个sink,多个sink对接一个channel,不能选择Default Sink Processor
2.Failover Sink Processor
	Failover Sink Processor维护了一个多个sink的有优先级的列表,按照优先级保证,至少有一个sink是可以干活的!
	如果根据优先级发现,优先级高的sink故障了,故障的sink会被转移到一个故障的池中冷却!
	在冷却时,故障的sink也会不管尝试发送event,一旦发送成功,此时会将故障的sink再移动到存活的池中!

	必需配置:
	sinks – Space-separated list of sinks that are participating in the group
	processor.type default The component type name, needs to be failover
	processor.priority.<sinkName> – Priority value. <sinkName> must be one of the sink instances associated with the current sink group A higher priority value Sink gets activated earlier. A larger absolute value indicates higher priority
案例:
agent1: execsource–memorychannel----avrosink1--------agent2: avroSource—memorychannel----loggersink
-----avrosink2--------agent3: avroSource—memorychannel----loggersink
			avrosink1的优先级高,优先被Failover Sink Processor选中,此时只有agent2可以输出event!
			一旦 agent2挂掉,此时avrosink1故障,由Failover Sink Processor选择剩下的avrosink2干活!
配置:
	-----------------------hadoop102--agent1------------------
	#a1是agent的名称,a1中定义了一个叫r1的source,如果有多个,使用空格间隔
	a1.sources = r1
	a1.sinks = k1 k2
	a1.channels = c1

	a1.sinkgroups = g1
	a1.sinkgroups.g1.sinks = k1 k2
	#a1.sinkgroups.g1.processor.type = failover
	#a1.sinkgroups.g1.processor.priority.k1=100
	#a1.sinkgroups.g1.processor.priority.k2=90
	a1.sinkgroups.g1.processor.sinks=k1 k2
	a1.sinkgroups.g1.processor.type = load_balance
	#组名名.属性名=属性值
	a1.sources.r1.type=exec
	a1.sources.r1.command=tail -f /home/atguigu/test
	#声明r1的channel选择器
	a1.sources.r1.selector.type = replicating

	#定义chanel
	a1.channels.c1.type=memory
	a1.channels.c1.capacity=1000

	##定义sink
	a1.sinks.k1.type=avro
	a1.sinks.k1.hostname=hadoop101
	a1.sinks.k1.port=33333

	a1.sinks.k2.type=avro
	a1.sinks.k2.hostname=hadoop103
	a1.sinks.k2.port=33333

	#连接组件 同一个source可以对接多个channel,一个sink只能从一个channel拿数据!
	a1.sources.r1.channels=c1
	a1.sinks.k1.channel=c1
	a1.sinks.k2.channel=c1

	----------------------hadoop101----agent2------------------
	a1.sources = r1
	a1.sinks = k1
	a1.channels = c1
	#组名名.属性名=属性值
	a1.sources.r1.type=avro
	a1.sources.r1.bind=hadoop101
	a1.sources.r1.port=33333


	#定义sink
	a1.sinks.k1.type=logger

	#定义chanel
	a1.channels.c1.type=memory
	a1.channels.c1.capacity=1000

	#连接组件 同一个source可以对接多个channel,一个sink只能从一个channel拿数据!
	a1.sources.r1.channels=c1
	a1.sinks.k1.channel=c1

	----------------------hadoop103----agent3------------------
	a1.sources = r1
	a1.sinks = k1
	a1.channels = c1
	#组名名.属性名=属性值
	a1.sources.r1.type=avro
	a1.sources.r1.bind=hadoop103
	a1.sources.r1.port=33333


	#定义sink
	a1.sinks.k1.type=logger

	#定义chanel
	a1.channels.c1.type=memory
	a1.channels.c1.capacity=1000

	#连接组件 同一个source可以对接多个channel,一个sink只能从一个channel拿数据!
	a1.sources.r1.channels=c1
	a1.sinks.k1.channel=c1

	3.Load balancing Sink Processor
			负载均衡的sink processor! Load balancing Sink Processor维持了sink组中active状态的sink!
			使用round_robin 或 random 算法,来分散sink组中存活的sink之间的负载!

			必需配置:
			processor.sinks – Space-separated list of sinks that are participating in the group
			processor.type default The component type name, needs to be load_balance
事务
-
数量关系
batchSize: 每个Source和Sink都可以配置一个batchSize的参数。 这个参数代表一次性到channel中put|take 多少个event! batchSize <= transactionCapacity transactionCapacity: putList和takeList的初始值! capacity: channel中存储event的容量大小! transactionCapacity <= capacity -
概念
  putList:  source在向channel放入数据时的缓冲区!
 			putList在初始化时,需要根据一个固定的size初始化,这个size在channel中设置!
 			在channel中,这个size由参数transactionCapacity决定!


  put事务流程:source将封装好的event,先放入到putList中,放入完成后,
 			一次性commit(),这批event就可以写入到channel!
 			写入完成后,清空putList,开始下一批数据的写入!

 			假如一批event中的某些event在放入putList时,发生了异常,此时
 			要执行rollback(),rollback()直接清空putList。

  takeList: sink在向channel拉取数据时的缓冲区!


  take事务流程:  sink不断从channel中拉取event,没拉取一个event,这个event会先放入takeList中!
 				当一个batchSize的event全部拉取到takeList中之后,此时由sink执行写出处理!
 				假如在写出过程中,发送了异常,此时执行回滚!将takeList中所有的event全部回滚到channel!
 				反之,如果写出没有异常,执行commit(),清空takeList!
自定义组件
自定义source:
1.实现Configurable, PollableSource接口
	package com.atguigu.flume.custom;

	import java.util.ArrayList;
	import java.util.List;

	import org.apache.flume.Context;
	import org.apache.flume.Event;
	import org.apache.flume.EventDeliveryException;
	import org.apache.flume.PollableSource;
	import org.apache.flume.channel.ChannelProcessor;
	import org.apache.flume.conf.Configurable;
	import org.apache.flume.event.SimpleEvent;
	import org.apache.flume.source.AbstractSource;

	/*
	 * 使用flume接收数据,并给每条数据添加前缀,输出到控制台。前缀可从flume配置文件中配置
	 */
	public class MySource  extends AbstractSource implements Configurable, PollableSource

		private String prefix;
		// 最核心方法,在process()中,创建Event,将event放入channel
		// Status READY, BACKOFF
		// READY: source成功第封装了event,存入到channel,返回READY
		// BACKOFF: source无法封装了event,无法存入到channel,返回BACKOFF
		// process()方法会被Source所在的线程循环调用!
		@Override
		public Status process() throws EventDeliveryException

			Status status=Status.READY;

			//封装event
			List<Event> datas=new ArrayList<>();

			for (int i = 0; i < 10; i++)

				SimpleEvent e = new SimpleEvent();

				//向body中封装数据
				e.setBody((prefix+"hello"+i).getBytes());

				datas.add(e);


			//将数据放入channel
			// 获取当前source对象对应的channelprocessor
			try

				Thread.sleep(5000);

				ChannelProcessor cp = getChannelProcessor();

				cp.processEventBatch(datas);

			 catch (Exception e)

				status=Status.BACKOFF;

				e.printStackTrace();


			return status;


		// 当source没有数据可封装时,会让source所在的线程先休息一会,休息的时间,由以下值*计数器系数
		@Override
		public long getBackOffSleepIncrement()
			return 2000;


		@Override
		public long getMaxBackOffSleepInterval()
			return 5000;


		// 从配置中来读取信息
		@Override
		public void configure(Context context)

			//从配置文件中读取key为prefix的属性值,如果没有配置,提供默认值atguigu:
			prefix=context.getString("prefix", "atguigu:");
2.将自定义代码打成ar包,放到flume的lib下;
3.配置:
	a1.sources = r1
	a1.sinks = k1
	a1.channels = c1
	#组名名.属性名=属性值
	a1.sources.r1.type=com.atguigu.flume.custom.MySource
	a1.sources.r1.prefix=atguigu:

	#定义sink
	a1.sinks.k1.type=logger

	#定义chanel
	a1.channels.c1.type=memory
	a1.channels.c1.capacity=1000

	#连接组件 同一个source可以对接多个channel,一个sink只能从一个channel拿数据!
	a1.sources.r1.channels=c1
	a1.sinks.k1.channel=c1
自定义拦截器
	package com.atguigu.flume.custom;

	import java.util.List;
	import java.util.Map;

	import org.apache.flume.Context;
	import org.apache.flume.Event;
	import org.apache.flume.interceptor.Interceptor;

	// 为每个event的header中添加key-value:  time=时间戳
	public class MyInterceptor implements Interceptor

		//初始化
		@Override
		public void initialize()


		//拦截处理方法
		// 为每个event的header中添加key-value:  time=时间戳
		@Override
		public Event intercept(Event event)

			Map<String, String> headers = event.getHeaders();

			headers.put("time", System.currentTimeMillis()+"");

			return event;


		//拦截处理方法
		@Override
		public List<Event> intercept(List<Event> events)

			for (Event event : events)
				intercept(event);


			return events;


		// 结合时调用的方法
		@Override
		public void close()


		//额外提供一个内部的Builder,因为Flume在创建拦截器对象时,固定调用Builder来获取
		public static class Builder implements Interceptor.Builder

			// 读取配置文件中的参数
			@Override
			public void configure(Context context)


			//返回一个当前的拦截器对象
			@Override
			public Interceptor build()
				return new MyInterceptor();
自定义sink
   package com.atguigu.flume.custom;

	import org.apache.flume.Channel;
	import org.apache.flume.ChannelException;
	import org.apache.flume.Context;
	import org.apache.flume.Event;
	import org.apache.flume.EventDeliveryException;
	import org.apache.flume.Transaction;
	import org.apache.flume.conf.Configurable;
	import org.apache.flume.sink.AbstractSink;
	import org.slf4j.Logger;
	import org.slf4j.LoggerFactory;

	// 从配置文件中读取一个后缀,将event的内容读取后,拼接后缀进行输出
	public class MySink extends AbstractSink implements Configurable

		private String suffix;

		private Logger logger=LoggerFactory.getLogger(MySink.class);

		//核心方法:处理sink逻辑
		// Status.ready:  成功传输了一个或多个event
		// Status.backoff:  从channel中无法获取数据
		@Override
		public Status process() throws EventDeliveryException

			Status status=Status.READY;

			//获取当前sink对接的channel
			Channel c = getChannel();

			//声明Event,用来接收chanel中的event
			Event e=null;

			Transaction transaction = c.getTransaction();
			try
				//获取take事务对象

				//开启事务
				transaction.begin();

				//如果channel中,没有可用的event,此时e会是null
				e=c.take();

				if (e==null)

					status=Status.BACKOFF;

				else

					//取到数据后,执行拼接后缀进行输出
					logger.info(new String(e.getBody())+suffix);

				//提交事务
				transaction.commit();

			 catch (ChannelException e1)

				//回滚事务
				transaction.rollback();

				status=Status.BACKOFF;

				e1.printStackTrace();
			finally

				//关闭事务对象
				transaction.close();


			return status;


		//从配置中读取配置的参数
		@Override
		public void configure(Context context)

			suffix=context.getString("suffix", ":hi");
额外
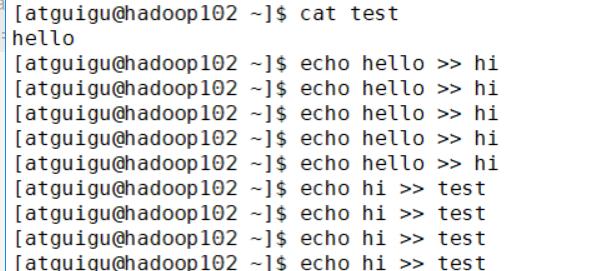
nc 向某端口发送数据
echo 字符 >> 文件 向文件追加一行字符串
以上是关于flume安装的主要内容,如果未能解决你的问题,请参考以下文章