SpringCloud微服务技术栈的注册中心Eureka
Posted 青山师
tags:
篇首语:本文由小常识网(cha138.com)小编为大家整理,主要介绍了SpringCloud微服务技术栈的注册中心Eureka相关的知识,希望对你有一定的参考价值。
文章目录
SpringCloud微服务技术栈的注册中心Eureka
简介
在微服务架构中,服务的数量庞大,而且每个服务可能会有多个实例。此时,需要一个中心化的地方来管理和维护各个服务的相关信息,这就是微服务治理中很重要的一环:服务注册与发现。其中,服务注册是指将提供服务的应用实例注册到注册中心,而服务发现则是指从注册中心中获取服务实例列表并调用服务。本文将介绍SpringCloud微服务技术栈中的注册中心Eureka。
Eureka特点
Eureka是Netflix开源的一个基于REST的服务治理解决方案,主要包括服务注册与发现机制。Eureka的特点如下:
- 高可用:Eureka采用了Peer-to-Peer的复制方式,所有节点均可作为服务注册中心,这样就不会出现单点故障;同时,Eureka还支持使用Zookeeper、Consul等作为注册中心。
- 服务注册:服务提供方(Provider)通过HTTP方式向Eureka注册中心注册自己的服务实例,包括应用名、主机名、IP地址和端口等元数据。
- 服务发现:服务消费方(Consumer)通过Eureka注册中心获取对应服务的实例列表,并通过负载均衡算法选取其中一台实例进行调用。
- 心跳机制:Eureka利用心跳机制保证服务实例的可用性,即每隔30秒向注册中心发送一次心跳信号;同时,注册中心会定期清理没有心跳的服务实例。
操作步骤
环境准备
- JDK 1.8
- Spring Boot 2.0.3.RELEASE
- Spring Cloud Finchley.RELEASE
创建Eureka Server
-
在Maven项目中添加以下依赖:
<dependency> <groupId>org.springframework.cloud</groupId> <artifactId>spring-cloud-starter-netflix-eureka-server</artifactId> </dependency> -
在启动类上添加
@EnableEurekaServer注解:@SpringBootApplication @EnableEurekaServer public class EurekaApplication public static void main(String[] args) SpringApplication.run(EurekaApplication.class, args); -
在配置文件中添加如下配置:
server: port: 8761 eureka: instance: hostname: localhost client: register-with-eureka: false fetch-registry: false server: enable-self-preservation: falseserver.port:Eureka Server的端口号,默认为8761。eureka.instance.hostname:当前Eureka Server的地址。eureka.client.register-with-eureka:是否将当前应用注册到Eureka Server,默认为true。eureka.client.fetch-registry:是否从Eureka Server获取服务注册信息,默认为true。eureka.server.enable-self-preservation:是否启用自我保护机制,默认为true。
-
启动项目,访问
http://localhost:8761/,即可看到Eureka Server的控制台界面。
注册服务提供方
-
在Maven项目中添加以下依赖:
<dependency> <groupId>org.springframework.cloud</groupId> <artifactId>spring-cloud-starter-netflix-eureka-client</artifactId> </dependency> -
在配置文件中添加如下配置:
spring: application: name: demo-service server: port: 8080 eureka: client: service-url: defaultZone: http://localhost:8761/eureka/spring.application.name:当前应用的名称,用于注册到Eureka Server中。server.port:当前应用的端口号。eureka.client.service-url.defaultZone:Eureka Server的地址。
-
在启动类上添加
@EnableDiscoveryClient注解:@SpringBootApplication @EnableDiscoveryClient public class DemoApplication public static void main(String[] args) SpringApplication.run(DemoApplication.class, args); -
编写一个RESTful服务接口作为演示:
@RestController public class DemoController @GetMapping("/hello") public String hello() return "Hello, World!"; -
启动项目,可以看到服务已成功注册到Eureka Server中。
调用服务消费方
-
在Maven项目中添加以下依赖:
<dependency> <groupId>org.springframework.cloud</groupId> <artifactId>spring-cloud-starter-netflix-eureka-client</artifactId> </dependency> -
在配置文件中添加如下配置:
spring: application: name: demo-consumer eureka: client: service-url: defaultZone: http://localhost:8761/eureka/spring.application.name:当前应用的名称。eureka.client.service-url.defaultZone:Eureka Server的地址。
-
在启动类上添加
@EnableDiscoveryClient注解:@SpringBootApplication @EnableDiscoveryClient public class DemoConsumerApplication public static void main(String[] args) SpringApplication.run(DemoConsumerApplication.class, args); -
编写一个RESTful服务接口作为演示:
@RestController public class DemoController @Autowired private RestTemplate restTemplate; @GetMapping("/hello") public String hello() String url = "http://demo-service/hello"; return restTemplate.getForObject(url, String.class); -
启动项目,访问
http://localhost:8080/hello,会看到返回结果Hello, World!。
总结
本文介绍了SpringCloud微服务技术栈的注册中心Eureka,并以实际操作的方式进行了详细的说明。在实际使用中,Eureka的高可用、服务注册与发现、心跳机制等功能都能够有效地提升微服务架构的可用性和稳定性。
微服务-springcloud-注册中心
创建服务注册中心(eureka-server)
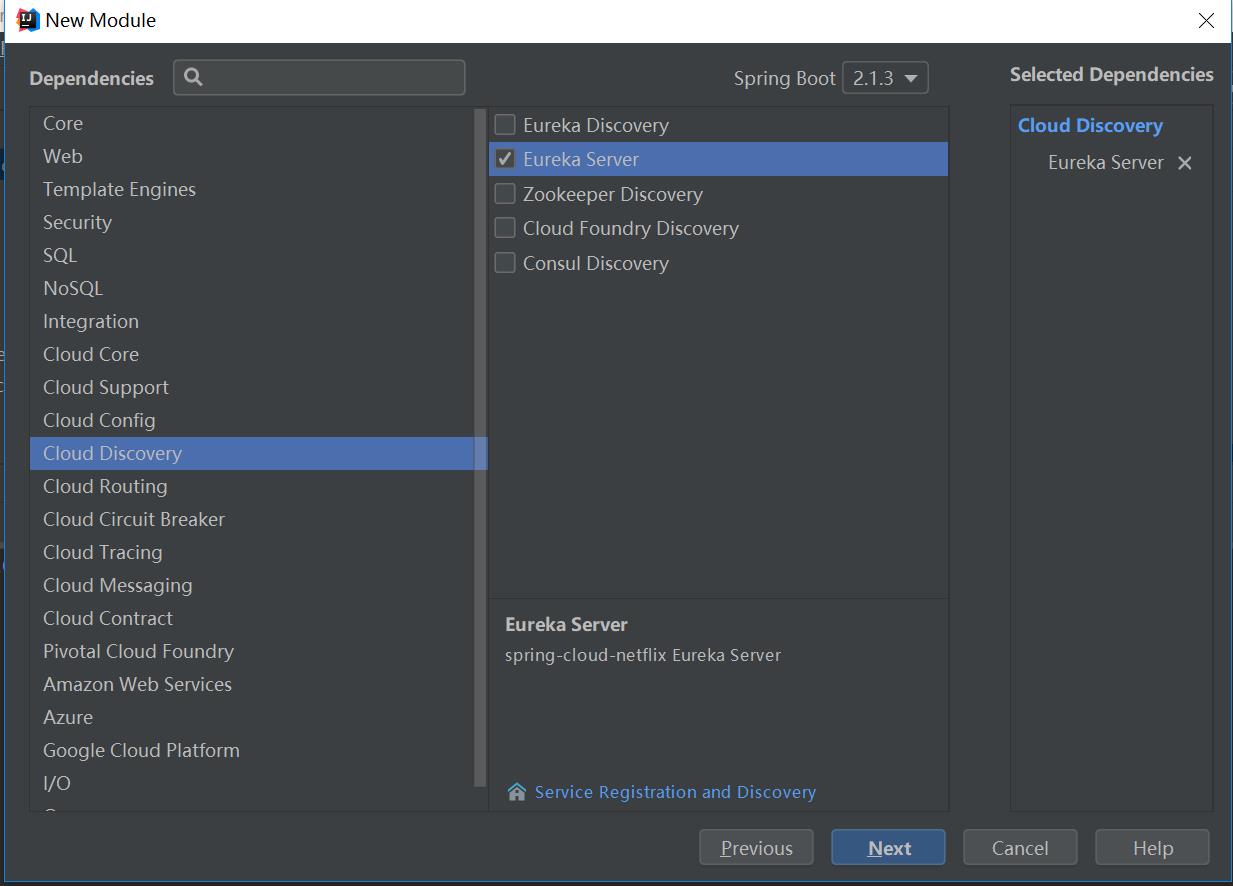
1.创建项目,选择 Eureka Server 别的都不要选择,next-finish
2.application.yml中写入如下信息:通过eureka.client.registerWithEureka:false和fetchRegistry:false来表明自己是一个eureka server.
server:
  port: 8761

eureka:
  instance:
    hostname: localhost
  client:
    registerWithEureka: false
    fetchRegistry: false
    serviceUrl:
      defaultZone: http://${eureka.instance.hostname}:${server.port}/eureka/
3.EurekaServerApplication加入注解 @EnableEurekaServer
import org.springframework.boot.SpringApplication;
import org.springframework.boot.autoconfigure.SpringBootApplication;
import org.springframework.cloud.netflix.eureka.server.EnableEurekaServer;

@SpringBootApplication
@EnableEurekaServer
public class EurekaServerApplication {

    public static void main(String[] args) {
        SpringApplication.run(EurekaServerApplication.class, args);
    }

}
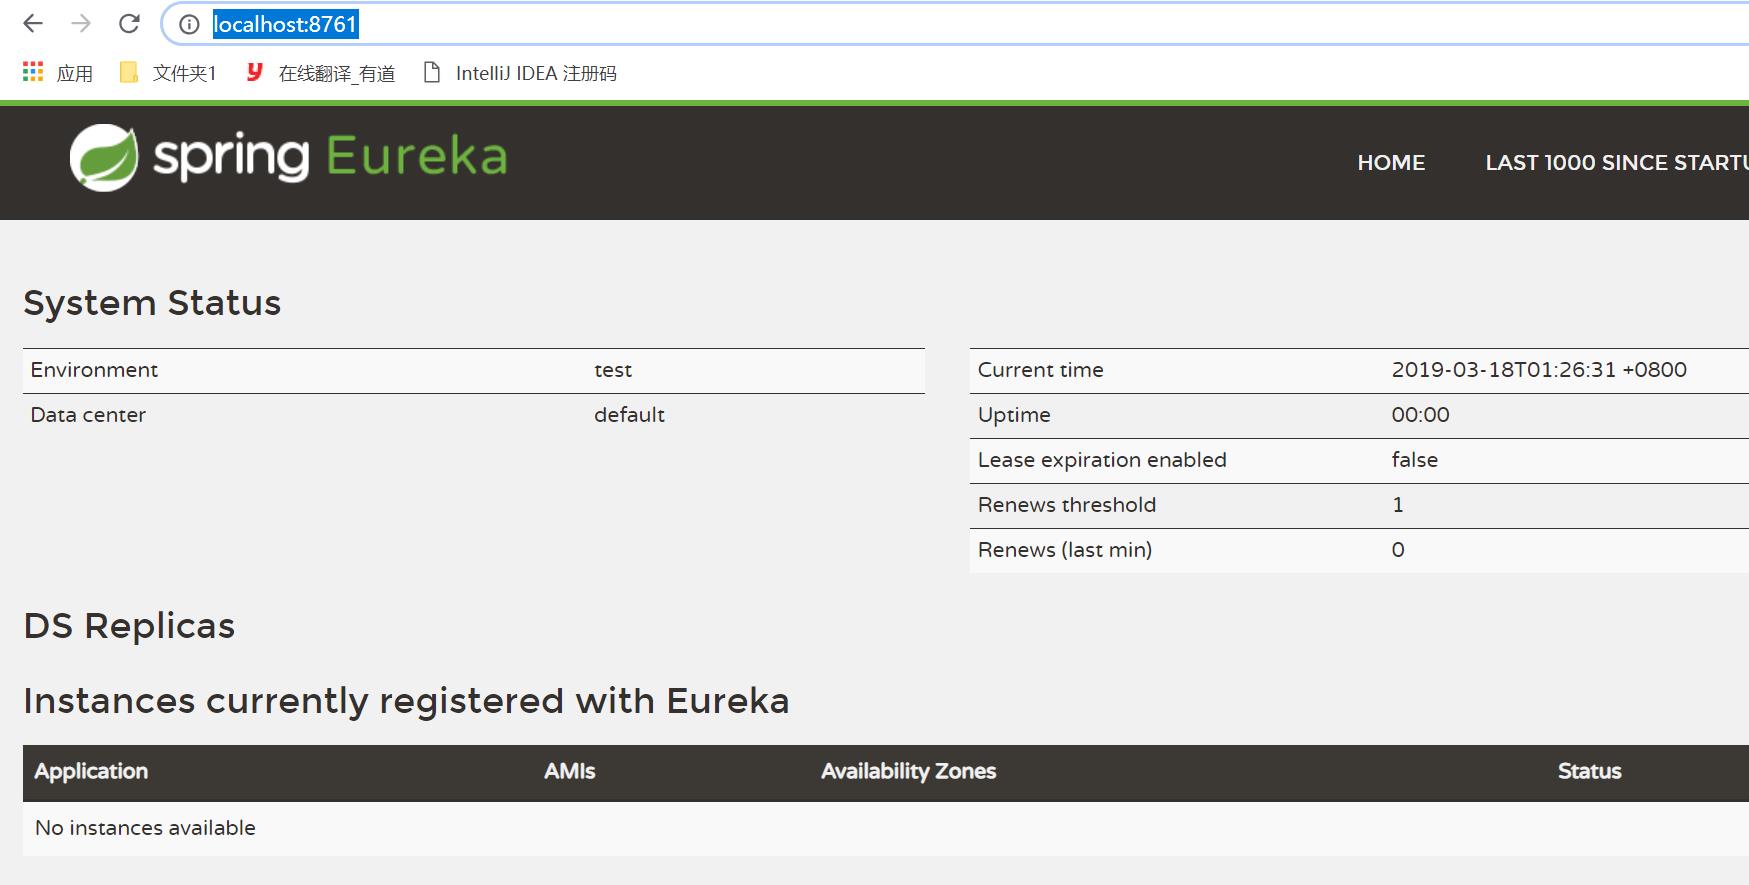
4.启动项目,打开浏览器,输入http://localhost:8761/

No instances available 没有服务被发现 ……^_^
因为没有注册服务当然不可能有服务被发现了。
创建服务client(server-user)
当client向server注册时,它会提供一些元数据,例如主机和端口,URL,主页等。Eureka server 从每个client实例接收心跳消息。 如果心跳超时,则通常将该实例从注册server中删除。
创建过程同创建注册中心类似
1.通过注解@EnableEurekaClient 表明自己是一个eurekaclient.
import org.springframework.boot.SpringApplication;
import org.springframework.boot.autoconfigure.SpringBootApplication;
import org.springframework.cloud.netflix.eureka.EnableEurekaClient;

@SpringBootApplication
@EnableEurekaClient
public class ServerUserApplication {

    public static void main(String[] args) {
        SpringApplication.run(ServerUserApplication.class, args);
    }

}
2.配置文件中注明自己的服务注册中心的地址,application.yml配置文件如下:
eureka:
  client:
    serviceUrl:
      defaultZone: http://localhost:8761/eureka/
server:
  port: 8762
spring:
  application:
    name: server-user
3.启动项目
打开http://localhost:8761 ,即eureka server 的网址

以上是关于SpringCloud微服务技术栈的注册中心Eureka的主要内容,如果未能解决你的问题,请参考以下文章