MyBatis-Plus
Posted 364.99°
tags:
篇首语:本文由小常识网(cha138.com)小编为大家整理,主要介绍了MyBatis-Plus相关的知识,希望对你有一定的参考价值。


目录
1.入门案例
1.建库&建表&添加数据
-- ----------------------------
-- Table structure for user
-- ----------------------------
DROP TABLE IF EXISTS `user`;
CREATE TABLE `user`  (
  `id` bigint(0) NOT NULL AUTO_INCREMENT COMMENT '主键id',
  `name` varchar(20) CHARACTER SET utf8 COLLATE utf8_general_ci NOT NULL COMMENT '姓名',
  `age` int(0) NULL DEFAULT NULL COMMENT '年龄',
  `email` varchar(20) CHARACTER SET utf8 COLLATE utf8_general_ci NULL DEFAULT NULL COMMENT '邮箱',
  PRIMARY KEY (`id`) USING BTREE
) ENGINE = InnoDB CHARACTER SET = utf8 COLLATE = utf8_general_ci ROW_FORMAT = Dynamic;

-- ----------------------------
-- Records of user
-- ----------------------------
INSERT INTO `user` VALUES (1, '张三', 17, NULL);
INSERT INTO `user` VALUES (2, '李四', 16, '123456@163.net');
INSERT INTO `user` VALUES (3, '王五', 15, '352641@qq.com');
INSERT INTO `user` VALUES (4, '赵六', 14, NULL);
INSERT INTO `user` VALUES (5, '陈七', 13, '951463@263.net');

SET FOREIGN_KEY_CHECKS = 1;
2.新建springboot项目
-
依赖
<!--mybatis-plus--> <dependency> <groupId>com.baomidou</groupId> <artifactId>mybatis-plus-boot-starter</artifactId> <version>3.4.1</version> </dependency> <!--mysql驱动--> <dependency> <groupId>mysql</groupId> <artifactId>mysql-connector-java</artifactId> <scope>runtime</scope> </dependency> <!--druid数据源--> <dependency> <groupId>com.alibaba</groupId> <artifactId>druid</artifactId> <version>1.2.8</version> </dependency> <!--lombok--> <dependency> <groupId>org.projectlombok</groupId> <artifactId>lombok</artifactId> </dependency> -
application.yml
spring: # 配置数据源信息 datasource: # 配置数据源类型 type: com.alibaba.druid.pool.DruidDataSource # 配置连接数据库的信息 driver-class-name: com.mysql.cj.jdbc.Driver url: jdbc:mysql://localhost:3306/mybatis_plus?serverTimezone=GMT&characterEncoding=utf-8&useSSL=false username: root password: admin- 注意:
- spring boot 2.0(内置jdbc5驱动),spring boot 2.1及以上(内置jdbc8驱动)
- jdbc5驱动:driver-class-name:
com.mysql.jdbc.Driver - jdbc8驱动:driver-class-name:
com.mysql.cj.jdbc.Driver
- jdbc5驱动:driver-class-name:
- mysql连接地址url
- mysql5.7:
jdbc:mysql://localhost:3306/mybatis_plus?characterEncoding=utf-8&useSSL=false - mysql8.0:
jdbc:mysql://localhost:3306/mybatis_plus? serverTimezone=UTC&characterEncoding=utf-8&useSSL=false
- mysql5.7:
- spring boot 2.0(内置jdbc5驱动),spring boot 2.1及以上(内置jdbc8驱动)
- 注意:
3.新建实体类
@Data
public class User
    private Long id;
    private String name;
    private Integer age;
    private String email;
@Data lombok注解,内容如下:
 无参构造 + setter + getter + equals( hashCode ) + toString
4.创建mapper接口并扫描
UserMapper 接口:
@Repository
public interface UserMapper extends BaseMapper<User>
- UserMapper继承BaseMapper接口

@Repository
将类或接口标识为持久层组件
启动类扫描 UserMapper 接口:
@SpringBootApplication
@MapperScan("com.chenjy.mp_demo.mapper")
public class MpDemoApplication

    public static void main(String[] args)
        SpringApplication.run(MpDemoApplication.class, args);
@MapperScan
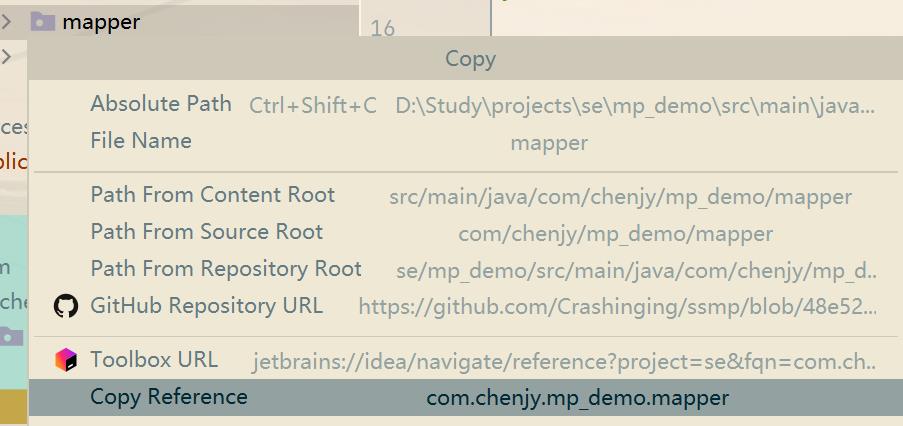
扫描mapper所在包或接口- 右键——copy path/xxx

5.测试类测试
@SpringBootTest
class MpDemoApplicationTests
    @Resource
    private UserMapper userMapper;

    /**
     * @Description 查询一个list集合,如果没有条件,就直接传参 null
    */
    @Test
    public void testGetAll()
        List<User> users = userMapper.selectList(null);
        users.forEach(System.out::println);
6.添加日志,显示查询语句
配置文件:
  mybatis-plus:
    configuration:
      log-impl: org.apache.ibatis.logging.stdout.StdOutImpl
重新启动测试类,可以在控制台打印SQL语句:

7.测试增删改查
1.插入单条数据
    @Test
    public void testInsert()
        User user = new User();
        user.setName("李华");
        System.out.println("flag: " + userMapper.insert(user));
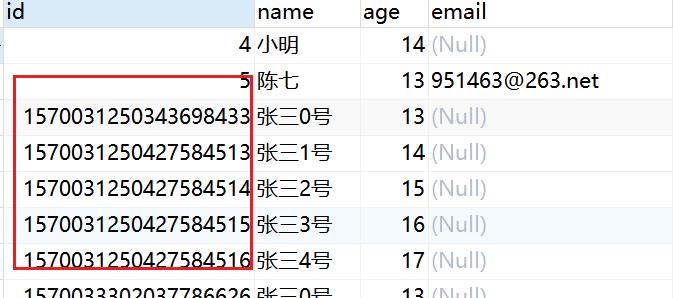
注意: mybatisplus默认使用雪花算法生成主键,如下图,这就是为啥要把id设为bigint类型并用Long接收。

2.删除
-
deleteById@Test public void testDelete() userMapper.deleteById(1569870313976463362L); -
deleteByMap@Test public void testDeleteByMap() Map<String, Object> map = new HashMap<>(); map.put("name", "张三"); map.put("id", 1); userMapper.deleteByMap(map);
-
testDeleteBatchIds@Test public void testDeleteBatchIds() List<Long> list = Arrays.asList(2L, 3L); userMapper.deleteBatchIds(list);
3.修改
updateById@Test public void testUpdate() User user = new User(); user.setId(4L); user.setName("小明"); userMapper.updateById(user);
4.查询
-
selectById@Test public void testSelect() userMapper.selectById(4L); -
selectList@Test public void testSelectList() userMapper.selectList(null);
-
selectBatchIds@Test public void testSelectBatch() List<Long> list = Arrays.asList(4L, 5L); userMapper.selectBatchIds(list);
-
selectByMap@Test public void testSelectByMap() Map<String, Object> map = new HashMap<>(); map.put("id", 4); map.put("name", "小明"); userMapper.selectByMap(map);
8.测试自定义功能
mybatis-plus.mapper-locations的默认路径是: classpath*:/mapper/**/*.xml,所以需要配置一下:
  mybatis-plus:
    configuration:
      log-impl: org.apache.ibatis.logging.stdout.StdOutImpl
    mapper-locations: classpath:/mapper/*.xml

-
在 resources.mapper 下创建一个映射文件 UserMapper
<?xml version="1.0" encoding="utf-8" ?> <!DOCTYPE mapper PUBLIC "-//mybatis.org//DTD Mapper 3.0//EN" "http://mybatis.org/dtd/mybatis-3-mapper.dtd" > <mapper namespace="com.chenjy.mp_demo.mapper.UserMapper"> </mapper> -
在 UserMapper 接口中自定义方法
Map<String, Object> selectMapById(Long id); -
在 UserMapper 中写SQL语句
<select id="selectMapById" resultType="map"> select id, name, age, email from user where id = #id </select> -
测试方法
    @Test
    public void testSelectMapById()
        Map<String, Object> map = userMapper.selectMapById(4L);
        System.out.println(map);
9.通用Service
1.Service
- 新建 UserService接口继承 IService<T> 接口
public interface UserService extends IService<User>- IService 接口:封装了常见的业务层逻辑,其实现类为 ServiceImpl
- 新建 UserServiceImpl 实现 UserService接口
@Service public class UserServiceImpl extends ServiceImpl<UserMapper, User> implements UserService- 继承 ServiceImpl 是因为,UserService 继承了 IService 接口,如果不继承 ServiceImpl,则必须去实现 IService 接口的方法
- 这时候, UserServiceImpl 既可以直接使用通用Service的功能,也能自定义新功能
2.测试
-
count@SpringBootTest public class MPServiceTest @Resource private UserService userService; @Test public void testGetCount() userService.count();
-
saveBatch@Test public void testInsertBatch() ArrayList<User> users = new ArrayList<>(); for (int i = 0; i < 5; i++) User user = new User(); user.setName("张三" + i + "号"); user.setAge(13 + i); users.add(user); userService.saveBatch(users);
2.Mybatis-plus常用注解
1.@TableName
@TableName 当数据库表名与实体类名不一致的时候使用
-
场景演示,将数据库的表名更改为 mp_user,实体类名依然保持为 User,执行测试代码,报错如下:

-
如何使用
@TableName来解决上述报错:直接在实体类上添加@TableName("mp_user")@Data @TableName("mp_user") public class User private Long id; private String name; private Integer age; private String email;
2.全局配置表名前缀
当数据库所有的表的表名都有一个统一前缀的时候,如果使用@TableName就会显得繁琐,那么就需要用到 mybatis-plus全局配置 了。
配置如下:
  mybatis-plus:
    # 设置mybatis-plus全局配置
    global-config:
      db-config:
      	# 设置表名统一前缀
        table-prefix: mp_
3.@TableId
@TableId 将某个成员变量指定为数据表主键
- 当实体类的主键字段名(id)与表中主键字段名(uid)不同时,使用
@TableId("uid") private Long id; value- 仅传入一个参数的时候的默认属性
- 设置对应的数据库表的字段名
type- 设置id自增生成策略,默认使用雪花算法
IdType type() default IdType.NONE;
- 如何设置为id自动递增算法?
- 首先设置主键字段递增
- 将
type设置为递增策略@TableId(value = "uid", type = IdType.AUTO) private Long id;
- 测试一下自动递增算法
- 注意:先使用Navicat截断一下表(右键表名—截断表,即
truncate清除数据,保留结构,不写日志)

- 注意:先使用Navicat截断一下表(右键表名—截断表,即
- 设置id自增生成策略,默认使用雪花算法
注意: 当表中字段名为小驼峰写法时,mybatis-plus中会将其识别为_格式,如:userId(表名)→ user_id(mybatis-plus识别出来的名字)。
4.全局配置主键生成策略
  mybatis-plus:
    global-config:
      db-config:
        # 配置主键生成策略
        id-type: auto
5.雪花算法概述
雪花算法:
- 概念:
分布式环境下的一ID生成算法,能够保证不同表的主键的不重复性,以及相同表的主键的有序性 - 应对场景:
数据量和访问压力较大的场景 - 核心思想
- 长度共64bit(一个long型)
- 首先是一个符号位,1bit标识,由于long基本类型在Java中是带符号的,最高位是符号位,正数是0,负数是1,所以id一般是正数,最高位是0
- 41bit时间截(毫秒级),存储的是时间截的差值(当前时间截 - 开始时间截),结果约等于69.73年
- 10bit作为机器的ID(5个bit是数据中心,5个bit的机器ID,可以部署在1024个节点)
- 12bit作为毫秒内的流水号(意味着每个节点在每毫秒可以产生 4096 个 ID)

- 优点:整体上按照时间自增排序,并且整个分布式系统内不会产生ID碰撞,并且效率较高
数据库的扩展方式
- 业务分库
- 主从复制
- 数据库分表
单表数据拆分有两种方式:垂直分表和水平分表

- 垂直分表: 拆分 不常用且占了大量空间 的字段到其他表
- 水平分表: 将 表行数据量特别大 的进行分表存储数据
- 主键自增: 以最常见的用户 ID 为例,可以按照 1000000 的范围大小进行分段,1 ~ 999999 放到表 1中,1000000 ~ 1999999 放到表2中,以此类推
- 复杂点:分段大小的选取
- 优点:可以随着数据的增加平滑地扩充新的表
- 缺点:分布不均匀
- 取模: 同样以用户 ID 为例,假如我们一开始就规划了 10 个数据库表,可以简单地用 user_id % 10 的值来表示数据所属的数据库表编号,ID 为 985 的用户放到编号为 5 的子表中,ID 为 10086 的用户放到编号为 6 的子表中
- 复杂点:初始表数量的确定
- 优点:表分布比较均匀
- 缺点:扩充新的表很麻烦,所有数据都要重分布
- 主键自增: 以最常见的用户 ID 为例,可以按照 1000000 的范围大小进行分段,1 ~ 999999 放到表 1中,1000000 ~ 1999999 放到表2中,以此类推
6.@TableFiled
@TableFIled 解决实体类属性名与表的字段名不一致的问题。

@Data
public class User
    @TableId(value = "uid")
    private Long id;
    @TableField("user_name")
    private String name;
    private Integer age;
    private String email;
7.@TargetLogic
逻辑删除:
- 假删除,将对应数据中代表是否被删除字段的状态修改为“被删除状态”,之后在数据库中仍旧能看到此条数据记录
- 可以进行数据恢复
代码演示:
-
逻辑删除:


@TableLogic(value = "1", delval = "0") private Integer status; -
测试代码:
    @Test
    public void testDelete()
        userMapper.deleteById(1);
@Test public void testGetAll() List<User> users = userMapper.selectList(null);<以上是关于MyBatis-Plus的主要内容,如果未能解决你的问题,请参考以下文章