Three.js-设置环境纹理及加载hdr环境贴图
Posted HM-hhxx!
tags:
篇首语:本文由小常识网(cha138.com)小编为大家整理,主要介绍了Three.js-设置环境纹理及加载hdr环境贴图相关的知识,希望对你有一定的参考价值。
目录
1.hdr
HDR全称High-Dynamic Range(高动态光照渲染),通过HDR,显示器或相机可以很好的表现超出其亮度范围的图像,也可以简单理解为HDR能大幅提高画面细节的明暗对比度。直白点讲,HDR是指一个图像中最亮处和最暗处之间的比值,能够让图像明亮的地方更亮,而黑色的地方更黑暗深邃。
HDR由两部分组成,动态曝光控制和光晕效果。先说动态曝光控制,通常,显示器能够显示R、G、B分量在[0,255]之间的像素值。而256个不同的亮度级别显然不能表示自然界中光线的亮度情况。举个例子,太阳的亮度是白炽灯亮度的几千倍或者被漫反射照亮的室内亮度的几万倍,这远远超出了显示器的亮度表示能力。HDR技术所要解决的问题就是在有限的亮度范围内表示出宽广的亮度范围。原理类似于照相机的曝光功能,通过算法调整光线亮度,将光线从高动态范围映射到低动态范围,从而得到得到令人信服的光照效果。
HDR的另一部分是光晕效果。人从暗处走到光亮的地方,瞳孔由于来不及收缩,眼睛会自己眯起来,以保护视网膜上的感光细胞。HDR通过对原始图像进行调整,可以模拟这种人眼自动适应光线变化的生理反应,产生类似于光晕的效果。
图像经HDR处理后的理想结果是亮处足够耀眼,暗处能够分辨物体的轮廓与深度,而非原图的一团漆黑。
2.环境纹理(全景)
在Three中,环境纹理的实现一方面借助hdr材质的加载,另一方面借助于环境纹理实现的算法,其主要包括两种模式,一种是球面环境纹理,另一种是立方体环境纹理模式。两种实现方式原理上与地图学中的投影相似。
1)球形全景是将球形的经度和纬度坐标,直接到水平和垂直坐标的一格,这个网格的高度大约宽的两倍。因此从赤道到两极,横向拉伸不断加剧,南北两个极点被拉伸成了扁平的网格在整个上部和下部边缘。球形全景可以现实整个水平和竖直的360全景。
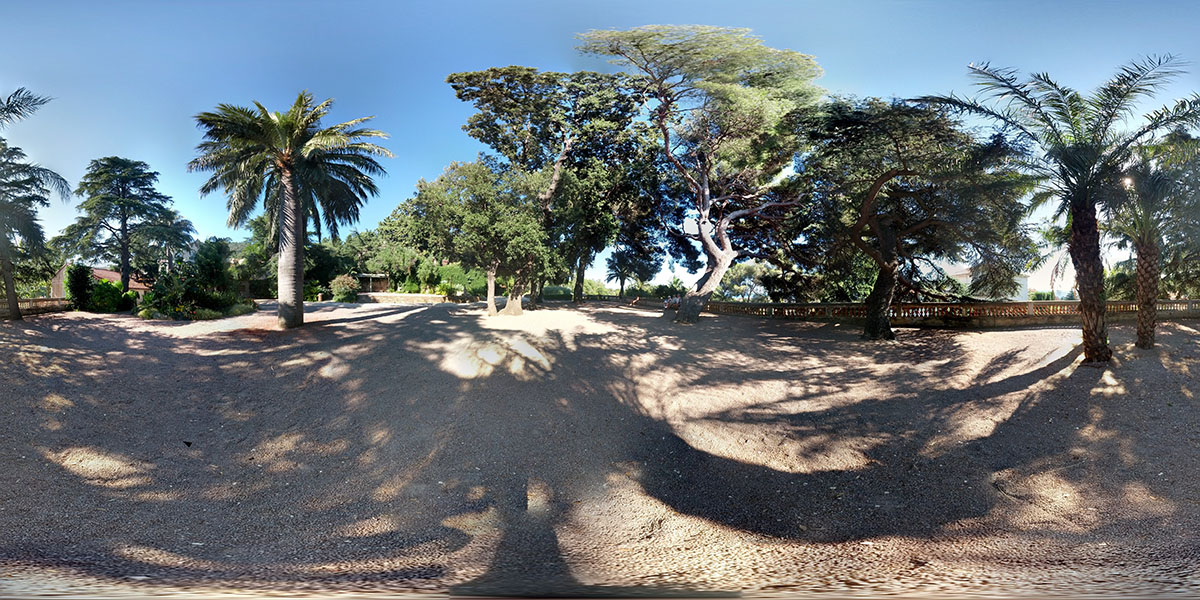
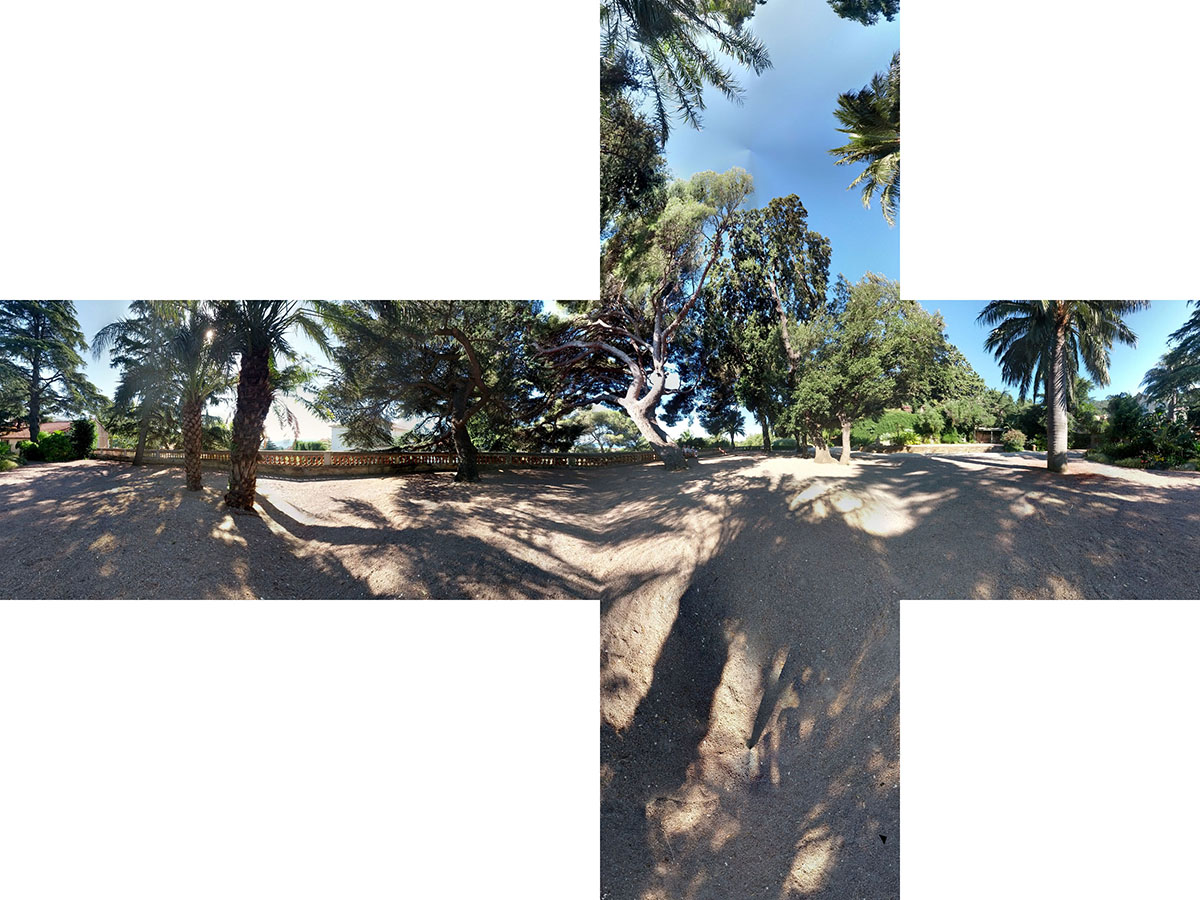
2)立方体全景是将全景图分成了前后左右上下六个面,浏览的时候将六个面结合成一个密闭空间来现实整个水平和竖直的360全景。
 https://zhuanlan.zhihu.com/p/30601155
3.CubeTextureLoader加载立方体环境纹理
加载CubeTexture的一个类。 内部使用ImageLoader来加载文件。px/nx/py/ny/pz/nz:该六个配置项分别表示盒模型六个贴面在坐标系中不同方向的贴图地址,如下图所示。手动输入贴图的URL地址,可设置盒模型样式。

示例:
import * as THREE from "three";
// 导入轨道控制器
import  OrbitControls  from "three/examples/jsm/controls/OrbitControls";

// 1、创建场景
const scene = new THREE.Scene();
// 2、创建相机
const camera = new THREE.PerspectiveCamera(
  75,
  window.innerWidth / window.innerHeight,
  0.1,
  1000
);
// 设置相机位置
camera.position.set(0, 0, 10);
scene.add(camera);
// 设置cube纹理加载器
const cubeTextureLoader = new THREE.CubeTextureLoader();
const envMapTexture = cubeTextureLoader.load([
  "textures/environmentMaps/1/px.jpg",
  "textures/environmentMaps/1/nx.jpg",
  "textures/environmentMaps/1/py.jpg",
  "textures/environmentMaps/1/ny.jpg",
  "textures/environmentMaps/1/pz.jpg",
  "textures/environmentMaps/1/nz.jpg",
]);
// 给场景添加背景
scene.background = envMapTexture;
// 给场景所有的物体添加默认的环境贴图
scene.environment = envMapTexture;
// 灯光
// 环境光
const light = new THREE.AmbientLight(0xffffff, 0.5); // soft white light
scene.add(light);
//直线光源
const directionalLight = new THREE.DirectionalLight(0xffffff, 0.5);
directionalLight.position.set(10, 10, 10);
scene.add(directionalLight);
// 初始化渲染器
const renderer = new THREE.WebGLRenderer();
// 设置渲染的尺寸大小
renderer.setSize(window.innerWidth, window.innerHeight);
// console.log(renderer);
// 将webgl渲染的canvas内容添加到body
document.body.appendChild(renderer.domElement);
// // 使用渲染器,通过相机将场景渲染进来
// renderer.render(scene, camera);
// 创建轨道控制器
const controls = new OrbitControls(camera, renderer.domElement);
// 设置控制器阻尼,让控制器更有真实效果,必须在动画循环里调用.update()。
controls.enableDamping = true;
// 添加坐标轴辅助器
const axesHelper = new THREE.AxesHelper(5);
scene.add(axesHelper);
// 设置时钟
const clock = new THREE.Clock();
function render()
  controls.update();
  renderer.render(scene, camera);
  //   渲染下一帧的时候就会调用render函数
  requestAnimationFrame(render);

render();
// 监听画面变化,更新渲染画面
window.addEventListener("resize", () =>
  //   console.log("画面变化了");
  // 更新摄像头
  camera.aspect = window.innerWidth / window.innerHeight;
  //   更新摄像机的投影矩阵
  camera.updateProjectionMatrix();

  //   更新渲染器
  renderer.setSize(window.innerWidth, window.innerHeight);
  //   设置渲染器的像素比
  renderer.setPixelRatio(window.devicePixelRatio);
);
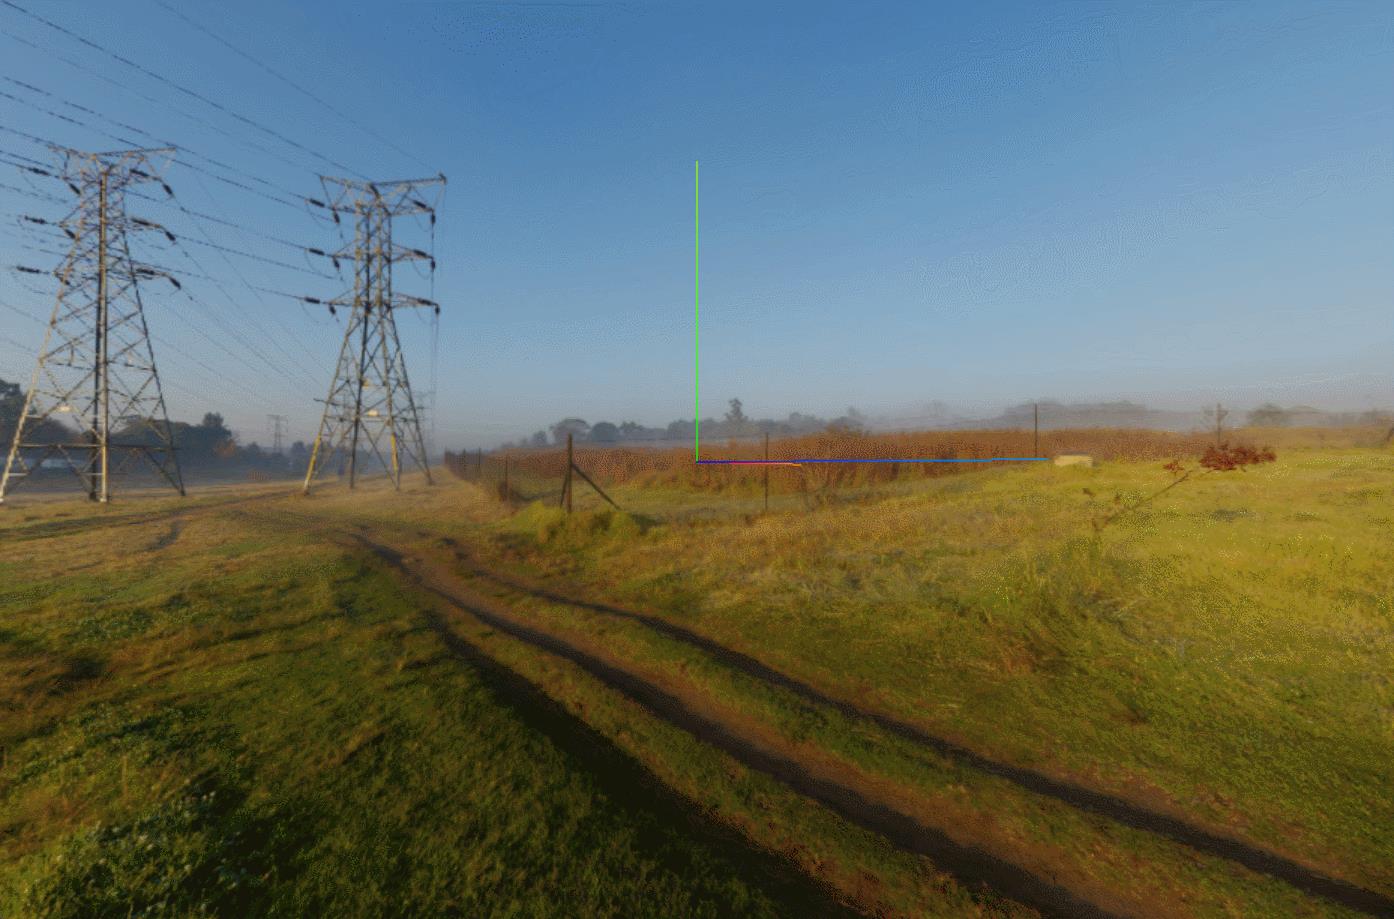
实现效果:
4.RGBELoader环境纹理加载
通过threejs扩展库RGBELoader.js可以加载.hdr格式图像,hdr图像加载器RGBELoader.js。
1)导入hdr图像加载器
//导入hdr图像加载器
import  RGBELoader  from "three/examples/jsm/loaders/RGBELoader";//rebe加载器
2)加载hdr环境贴图
// 加载hdr环境图
const rgbeLoader = new RGBELoader();
//资源较大,使用异步加载
rgbeLoader.loadAsync("textures/hdr/002.hdr").then((texture) =>
  texture.mapping = THREE.EquirectangularReflectionMapping;
//将加载的材质texture设置给背景和环境
  scene.background = texture;
  scene.environment = texture;
);
实现效果:

使用vue学习three.js之加载和使用纹理-设置material.bumpMap属性使用凹凸贴图创建皱纹
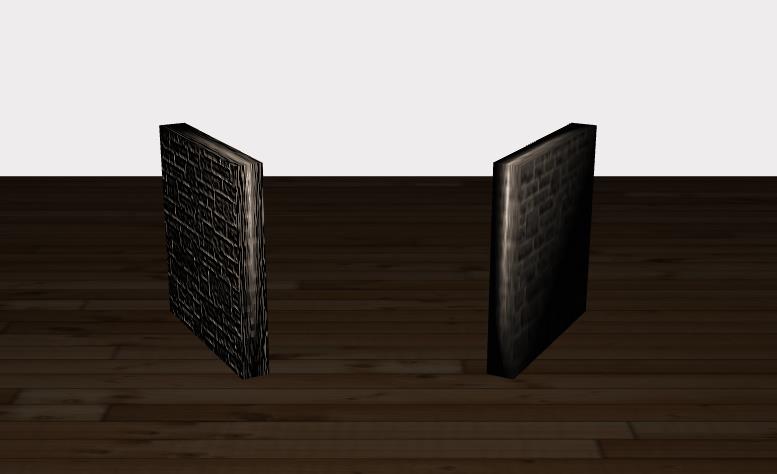
1.demo效果
2. 实现要点
2.1 创建地板
createFloor() {
  const publicPath = process.env.BASE_URL
  const floorTex = new THREE.TextureLoader().load(
    `${publicPath}textures/general/floor-wood.jpg`
  )
  const plane = new THREE.Mesh(
    new THREE.BoxGeometry(200, 100, 0.1, 30),
    new THREE.MeshPhongMaterial({
      color: 0x3c3c3c,
      map: floorTex
    })
  )
  plane.position.y = -7.5
  plane.rotation.x = -0.5 * Math.PI
  this.scene.add(plane)
}
2.2 创建凹凸贴图的物体
通过凹凸贴图可以实现材质表面不同深度的凹凸,使物体更有真实感,实现过程很简单
需要准备两个纹理贴图
一个用来设置material.map 属性,用作材质的普通贴图
一个用来设置material.bumpmap属性,用作材质的凹凸贴图
除此之外要想审查凹凸纹理效果material还有一个bumpScale属性要设置
createMesh(geom, imageFile, bump) {
  const publicPath = process.env.BASE_URL
  const texture = new THREE.TextureLoader().load(`${publicPath}textures/general/` + imageFile)
  geom.computeVertexNormals()
  const mat = new THREE.MeshPhongMaterial()
  mat.map = texture

  if (bump) {
    const bump = new THREE.TextureLoader().load(`${publicPath}textures/general/` + bump)
    mat.bumpMap = bump
    mat.bumpScale = 0.2
  }

  const mesh = new THREE.Mesh(geom, mat)
  return mesh
}
//创建带凹凸贴图的物体
this.cube2 = this.createMesh(
  new THREE.BoxGeometry(15, 15, 2),
  'stone.jpg',
  'stone-bump.jpg'
)
this.cube2.rotation.y = 0.5
this.cube2.position.x = -12
this.scene.add(this.cube2)
2.3 创建普通贴图的物体
//创建没有凹凸贴图的物体
this.cube1 = this.createMesh(
  new THREE.BoxGeometry(15, 15, 2),
  'stone.jpg'
)
this.cube1.rotation.y = -0.5
this.cube1.position.x = 12
this.scene.add(this.cube1)
3. demo代码
<template>
  <div>
    <div id="container" />
    <div class="controls-box">
      <section>
        <el-row>
          <el-checkbox v-model="properties.rotate">
            rotate
          </el-checkbox>
        </el-row>
        <el-row>
          <div v-for="(item,key) in properties" :key="key">
            <div v-if="item&&item.name!=undefined">
              <el-col :span="8">
                <span class="vertice-span">{{ item.name }}</span>
              </el-col>
              <el-col :span="13">
                <el-slider v-model="item.value" :min="item.min" :max="item.max" :step="item.step" :format-tooltip="formatTooltip" @change="propertiesChange" />
              </el-col>
              <el-col :span="3">
                <span class="vertice-span">{{ item.value }}</span>
              </el-col>
            </div>
          </div>
        </el-row>
        <el-row>
          <el-col :span="8" class="label-col">
            <label>texture</label>
          </el-col>
          <el-col :span="16">
            <el-select v-model="properties.textureType" placeholder="请选择" @change="propertiesChange">
              <el-option v-for="item in texturesOptions" :key="item.value" :label="item.label" :value="item.value" />
            </el-select>
          </el-col>
        </el-row>
      </section>
    </div>
  </div>
</template>

<script>
import * as THREE from 'three'
import { OrbitControls } from 'three/examples/jsm/controls/OrbitControls.js'
export default {
  data() {
    return {
      texturesOptions: [
        {
          value: 'stone',
          label: 'stone'
        },
        {
          value: 'weave',
          label: 'weave'
        }
      ],
      properties: {
        bumpScale: {
          name: 'bumpScale',
          value: 0.2,
          min: -2,
          max: 2,
          step: 0.1
        },
        textureType: 'stone',
        rotate: false
      },
      cube1: null,
      cube2: null,
      camera: null,
      scene: null,
      renderer: null,
      controls: null
    }
  },
  mounted() {
    this.init()
  },
  methods: {
    formatTooltip(val) {
      return val
    },

    // 初始化
    init() {
      this.createScene() // 创建场景
      this.createModels() // 创建模型
      this.createLight() // 创建光源
      this.createCamera() // 创建相机
      this.createRender() // 创建渲染器
      this.createControls() // 创建控件对象
      this.render() // 渲染
    },
    // 创建场景
    createScene() {
      this.scene = new THREE.Scene()
    },
    // 创建模型
    createModels() {
      //创建没有凹凸贴图的物体
      this.cube1 = this.createMesh(
        new THREE.BoxGeometry(15, 15, 2),
        'stone.jpg'
      )
      this.cube1.rotation.y = -0.5
      this.cube1.position.x = 12
      this.scene.add(this.cube1)

      //创建带凹凸贴图的物体
      this.cube2 = this.createMesh(
        new THREE.BoxGeometry(15, 15, 2),
        'stone.jpg',
        'stone-bump.jpg'
      )
      this.cube2.rotation.y = 0.5
      this.cube2.position.x = -12
      this.scene.add(this.cube2)
      // console.log(this.cube2.geometry.faceVertexUvs)

      this.createFloor()
    },
    createMesh(geom, imageFile, bump) {
      const publicPath = process.env.BASE_URL
      const texture = new THREE.TextureLoader().load(
        `${publicPath}textures/general/` + imageFile
      )
      geom.computeVertexNormals()
      const mat = new THREE.MeshPhongMaterial()
      mat.map = texture

      if (bump) {
        const bump = new THREE.TextureLoader().load(
          `${publicPath}textures/general/` + bump
        )
        mat.bumpMap = bump
        mat.bumpScale = 0.2
      }

      const mesh = new THREE.Mesh(geom, mat)
      return mesh
    },
    createFloor() {
      const publicPath = process.env.BASE_URL
      const floorTex = new THREE.TextureLoader().load(
        `${publicPath}textures/general/floor-wood.jpg`
      )
      const plane = new THREE.Mesh(
        new THREE.BoxGeometry(200, 100, 0.1, 30),
        new THREE.MeshPhongMaterial({
          color: 0x3c3c3c,
          map: floorTex
        })
      )
      plane.position.y = -7.5
      plane.rotation.x = -0.5 * Math.PI
      this.scene.add(plane)
    },
    // 创建光源
    createLight() {
      // 环境光
      const ambientLight = new THREE.AmbientLight(0x242424, 0.1) // 创建环境光
      this.scene.add(ambientLight) // 将环境光添加到场景

      const spotLight = new THREE.SpotLight(0xffffff) // 创建聚光灯
      spotLight.position.set(0, 30, 30)
      spotLight.intensity = 1.2
      this.scene.add(spotLight)
    },
    // 创建相机
    createCamera() {
      const element = document.getElementById('container')
      const width = element.clientWidth // 窗口宽度
      const height = element.clientHeight // 窗口高度
      const k = width / height // 窗口宽高比
      // PerspectiveCamera( fov, aspect, near, far )
      this.camera = new THREE.PerspectiveCamera(45, k, 0.1, 1000)
      this.camera.position.set(0, 12, 38) // 设置相机位置

      this.camera.lookAt(new THREE.Vector3(0, 0, 0)) // 设置相机方向
      this.scene.add(this.camera)
    },
    // 创建渲染器
    createRender() {
      const element = document.getElementById('container')
      this.renderer = new THREE.WebGLRenderer({ antialias: true, alpha: true })
      this.renderer.setSize(element.clientWidth, element.clientHeight) // 设置渲染区域尺寸
      // this.renderer.shadowMap.enabled = true // 显示阴影
      // this.renderer.shadowMap.type = THREE.PCFSoftShadowMap
      this.renderer.setClearColor(0xeeeeee, 1) // 设置背景颜色
      element.appendChild(this.renderer.domElement)
    },

    propertiesChange() {
      const publicPath = process.env.BASE_URL
      const texture = new THREE.TextureLoader().load(
        `${publicPath}textures/general/` + this.properties.textureType + '.jpg'
      )
      this.cube1.material.map = texture
      this.cube2.material.map = texture

      const bump = new THREE.TextureLoader().load(
        `${publicPath}textures/general/` +
          this.properties.textureType +
          '-bump.jpg'
      )
      this.cube2.material.bumpMap = bump

      this.cube2.material.bumpScale = this.properties.bumpScale.value
    },

    updateRotation() {
      if (this.properties.rotate) {
        this.cube1.rotation.y += 0.01
        this.cube2.rotation.y -= 0.01
      }
    },

    render() {
      this.updateRotation()
      this.renderer.render(this.scene, this.camera)
      requestAnimationFrame(this.render)
    },
    // 创建控件对象
    createControls() {
      this.controls = new OrbitControls(this.camera, this.renderer.domElement)
    }
  }
}
</script>

<style>
#container {
  position: absolute;
  width: 100%;
  height: 100%;
}
.controls-box {
  position: absolute;
  right: 5px;
  top: 5px;
  width: 300px;
  padding: 10px;
  background-color: #fff;
  border: 1px solid #c3c3c3;
}
.label-col {
  padding: 8px 5px;
}

.vertice-span {
  line-height: 38px;
  padding: 0 2px 0 10px;
}
</style>
以上是关于Three.js-设置环境纹理及加载hdr环境贴图的主要内容,如果未能解决你的问题,请参考以下文章