在Windows 64位下为PHP5.6.14安装memcache扩展
Posted
tags:
篇首语:本文由小常识网(cha138.com)小编为大家整理,主要介绍了在Windows 64位下为PHP5.6.14安装memcache扩展相关的知识,希望对你有一定的参考价值。
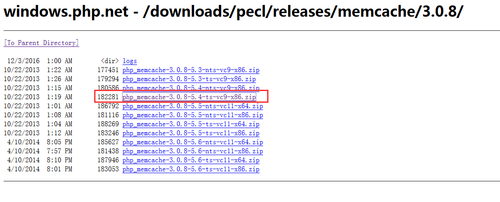
1.现在要使用php连接memcached服务器,则需要引入对应的php-memcache.dll扩展,需要注意的是在windows下找对应的dll扩展要非常谨慎,一般要考虑以下几点:(查看phpinfo即可)
1、php版本
2、TS还是NTS(线程安全or不安全)
3、compile是vc6还是vc9
我选择的是此版本:
http://windows.php.net/downloads/pecl/releases/memcache/3.0.8/
然后将里面的php_memcache.dll放入php/ext,并在对应的服务器php.ini配置中(F:\wamp\bin\apache\Apache2.4.4\bin\php.ini)加入extension=php_memcache.dll。重启服务器。
2.下载memcache服务
http://vdisk.weibo.com/s/dwoxtoBQDYzjm
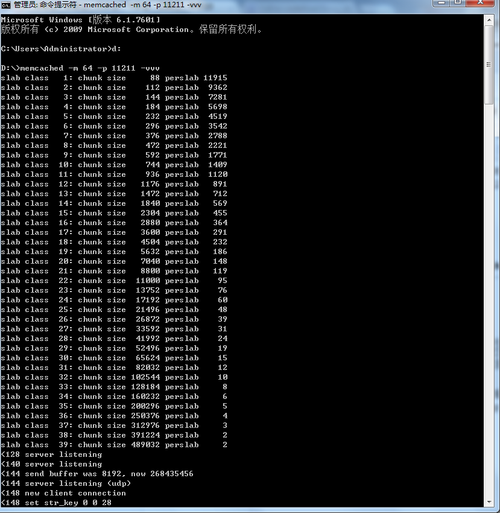
在cmd中memcache.exe所在路径中执行它,我放在D盘了
memcached -m 64 -p 11211 -vvv
3.测试memcache
http://windows.php.net/downloads/pecl/releases/memcache/3.0.8/
这个地址中下载的文件还有例子,可供测试
<?php
/**
* @file test11.php
* @author LinLin
* @date 2017年3月14日 下午2:56:21
* @brief
*/
/* echo phpinfo();exit; */
$memcache = memcache_connect(‘localhost‘, 11211);
if ($memcache) {
$memcache->set("str_key", "String to store in memcached");
$memcache->set("num_key", 123);
$object = new StdClass;
$object->attribute = ‘test‘;
$memcache->set("obj_key", $object);
$array = Array(‘assoc‘=>123, 345, 567);
$memcache->set("arr_key", $array);
var_dump($memcache->get(‘str_key‘));
var_dump($memcache->get(‘num_key‘));
var_dump($memcache->get(‘obj_key‘));
var_dump($memcache->get(‘arr_key‘));
}
else {
echo "Connection to memcached failed";
}
最终测试成功
本文出自 “程序媛的必经之路” 博客,请务必保留此出处http://linlin2017.blog.51cto.com/8346821/1906780
以上是关于在Windows 64位下为PHP5.6.14安装memcache扩展的主要内容,如果未能解决你的问题,请参考以下文章

