Latex:入门教程
Posted -柚子皮-
tags:
篇首语:本文由小常识网(cha138.com)小编为大家整理,主要介绍了Latex:入门教程相关的知识,希望对你有一定的参考价值。
http://blog.csdn.net/pipisorry/article/details/54571521
总的来说,LaTex是一套排版系统,与word那种所见即所得对排版方式不太,用LaTex排版更像是写程序一样,将想要的排版效果用指令写出来,再通过LaTex编译成文档。简单来说,你只要按照要求撰写tex文件,就能够通过LaTex生成排版好的pdf文件。
有些人可能听到写程序就头大了,其实使用命令来排版的好处正是我们可以将各种版式做成模板文件,使用者只要调用模板即可,完全不用去处理字体样大小、位置,目录生成,图片公式序号等诸多细节,使我们专注于内容。更多关于LaTex和word的比较这篇文章有很详细的论述。
LaTex也是可以用来做简历,PPT等文档的。
入门教程
LaTeX文件的通常语法如下:
\\documentstylearticle
\\begindocument
This is a first example of a simple inputfile.
\\enddocument
如果是中文,将\\documentstylearticle改为\\documentstylecarticle
简单的规则
(1)空格:Latex中空格不起作用。
(2)换行:用控制命令“\\\\”,或“ \\newline”.
(3)分段:用控制命令“\\par” 或空出一行。
(4)换页:用控制命令“\\newpage”或“\\clearpage”
(5)特殊控制字符:#,$, %, &, - ,, , ^, ~
西文字符转换表
\\rm 罗马字体 \\it 意大利字体
\\bf 黑体 \\sl 倾斜体
\\sf 等线体 \\sc 小体大写字母
\\tt 打字机字体 \\mit 数学斜体
纵向固定间距控制命令
\\smallskip \\medskip \\bigskip
页面控制命令
\\textwidth=14.5cm
\\textheight=21.5cm
系统默认:字号10pt= 五号字;西文字体为罗马字体;textwidth=12.2cm,textheight=18.6cm。相当于美国标准信纸大小。
中英文LaTeX模板
(1)下面给出的是中文LaTeX2e模板,此时文件的扩展名为.ctx。模板中%后面的中文是中文注解,读者可以阅读这些模板中的中文注解,以理解所涉及的LaTeX2e命令的含义。
\\documentclass[11pt]ccart%文件类说明
%还可以选择的类是cctbook
\\setlength\\parindent12pt%自然段第一行的缩进量为12pt
\\setlength\\parskip10pt plus1ptminus1pt
%自然段之间的距离为10pt,并可在8pt到11pt之间变化
\\setlength\\baselineskip8pt plus2ptminus1pt
%行间距为8pt,并可在7pt到10pt之间变化
\\setlength\\textheight21truecm%版面高为21厘米
\\setlength\\textwidth14.5truecm%版面宽为14.5厘米
\\begindocument%正文开始
\\titleThesis%文章标题,双反斜杠\\\\表示换行
\\authorauthor\\\\Dept. of Math.
%作者名,单位,通信地址等,双反斜杠\\\\表示换行
\\date2003/8/5
%文章写作日期,如果省略此行,计算机日期作为写作日期
\\maketitle%建立标题部分
%文章的正文输入
\\begincenter%参考文献的书写
\\heiti 参考文献
\\endcenter
\\vskip 0.1cm
\\def\\hang\\hangindent\\parindent
\\def\\textindent#1\\indent\\llap#1\\enspace\\ignorespaces
\\def\\re\\par\\hang\\textindent
\\re[1] Nordhaus E,Stewart B,WhiteA.On theMaximum Genus of a Graph.\\it J.combinatorial TheoryB,1971,11:258-267
\\re[2] Skoviera M.The Maximum Genus of Graphsof Diameter Two.\\it Discrete Math.1991, 87:175-180
\\enddocument%源文件的结束
英文LaTeX2e模板
\\documentclass[11pt]article%文件类说明
%还可以选择的类是book,report
\\setlength\\parindent12pt%自然段第一行的缩进量为12pt
\\setlength\\parskip10pt plus1ptminus1pt
%自然段之间的距离为10pt,并可在8pt到11pt之间变化
\\setlength\\baselineskip8pt plus2ptminus1pt
%行间距为8pt,并可在7pt到10pt之间变化
\\setlength\\textheight21truecm%版面高为21厘米
\\setlength\\textwidth14.5truecm%版面宽为14.5厘米
\\begindocument%正文开始
\\titleThesis%文章标题,双反斜杠\\\\表示换行
\\authorauthor\\\\Dept. of Math.
%作者名,单位,通信地址等,双反斜杠\\\\表示换行
\\date2003/8/5
%文章写作日期,如果省略此行,计算机日期作为写作日期
\\maketitle%建立标题部分
%文章的正文输入
\\sectionIntroduction%第一节引言(机器自动编号)
\\bf Theorem 1. \\it For any fixed $\\rho>0$,we have
$$||R(u,\\rho)||\\leq ||R_1(u,\\rho)||\\leq2||R(u,\\rho)||,~~~\\forall u\\in H.
\\eqno(10)$$ Hence, (2) and (3) are equivalent forany fixed$\\rho>0$.
%一般定理的写法
\\bf Proof.
\\beginthebibliography99
\\bibitemKind D. Kinderlehrer and G.Stampacchia, \\it An Introduction to
Variational Inequalities and Their Applications,Academic Press,New York, (1980).
\\endthebibliography%参考文献
\\enddocument%源文件的结束
入门示例
helloworld.tex
\\documentclassarticle
%这里是导言区
\\begindocument
Hello, world!
\\enddocument
1
\\documentclassarticle 中包含了一个控制序列(或称命令/标记)。所谓控制序列,是以反斜杠\\开头,以第一个空格或非字母 的字符结束的一串文字,他们并不被输出,但是他们会影响输出文档的效果。这里的控制序列是 documentclass,它后面紧跟着的 article 代表这个控制序列有一个必要的参数,该参数的值为 article。这个控制序列的作用,是调用名为 “article” 的文档类。
Note: TeX 对控制序列的大小写是敏感的
部分控制序列还有被方括号[]包括的可选参数。
所谓文档类,即是 TeX 系统预设的(或是用户自定的)一些格式的集合。不同的文档类在输出效果上会有差别。
\\documentclass[options]class
article 排版科技期刊、短报告、程序文档、邀请函等。
report 排版多章节的长报告、短篇的书籍、博士论文等。
book 排版书籍。
slides 排版幻灯片。其中使用了较大的sans serif 字体。也可以考虑使用FoilTEX 来得到相同的效果。
2
TeX 风格的文档中,从 “%” 开始,到该行末尾的所有字符,都会被 TeX 系统无视,只作为供人类阅读的注释。除非在 “%” 前加上反斜杠来取消这一特性。
3
控制序列 begin,这个控制序列总是与 end 成对出现。这两个控制序列以及他们中间的内容被称为「环境」;他们之后的第一个必要参数总是一致的,被称为环境名。
只有在 “document” 环境中的内容,才会被正常输出到文档中去或是作为控制序列对文档产生影响。也就是说,在 \\enddocument 之后插入任何内容都是无效的。
\\begindocument 与 \\documentclassarticle 之间的部分被称为导言区。导言区中的控制序列,通常会影响到整个输出文档。比如,我们通常在导言区设置页面大小、页眉页脚样式、章节标题样式等等。
latex目录下产生的文件说明
.tex LATEX 或TEX 源文件。可以用latex 处理。
.sty LATEX 宏包文件。可使用命令\\usepackage 将其加载到你的LATEX 文件中。
.dtx 文档化TEX 文件。这也是LATEX 宏包发布的主要格式。通过处理一个
.dtx 文件就可以得到该LATEX 宏包中所包括的宏代码文档。
.ins 为相应的.dtx 文件的安装文件。如果你在网络上下载了一LATEX 宏包,你通常会发现会有一个.dtx 和一个.ins 文件。使用LATEX 对.ins文件进行处理,可以从.dtx 文件中提取出宏包。
当你运行LATEX 处理你的源文件时,会得到下列文件:
.dvi 与设备无关文件。这是LATEX 编译运行的主要结果。你可以使用DVI预览器浏览其内容,或者使用像dvips 这样的应用程序输出到打印机。
.log 记录了上次编译运行时的详细信息。
.toc 存储了所有章节标题。该文件将在下次编译运行时被读入并生成目录。
.lof 类似.toc 文件,可生成图形目录。
.lot 类似.toc 文件,可生成表格目录。
.aux 另一个用来向下次编译运行传递信息的辅助文件。除了其它信息外,.aux 文件通常包含交叉引用信息。
.idx 如果你的文件中包含有索引,LATEX 使用此文件存储所有的索引词条。此文件需要使用makeindex 处理。
.ind 经过处理后的.idx 文件。可在下次编译运行时加入到你的文档中。
.ilg 运行makeindex 时生成的记录文件。
latex类文件.cls文件
示例awesome-cv.cls
awesome-cv的class file,可以在其他latex file中引用,例如在 ./example/resume.tex中:
\\documentclass[11pt, a4paper]awesome-cv
每個class file中都會以以下兩行指令做開頭
\\NeedsTeXFormatLaTeX2e %告訴Compiler此class是用哪一版
\\ProvidesClassmy_cv[2011/03/26 My custom CV class]
Note: Latex中.cls文件和.sty文件的区别和联系:.cls和.sty文件是用来提高LaTeX的排版效果的补充文件。它们分别用命令\\documentclass...和命令\\usepackage...来装载到LaTeX文件。.cls文件通常被称为“classes”(也就是“类”),而.sty文件被称为“style files”(样式文件),或者就简单地称其为“packages”(包)。通过命令\\documentclass...来装载一个类是强制性的,而且在LaTeX文件里可能只出现一次;通常它是第一个命令。不同的是,包是可选的,而且它们可以在需要时随时被装载(不过一定是在正文开头之前)。总而言之,.cls和.sty文件被LaTeX文件装载以提供或改善产生文档的方法。一般而言,类文件实现文档的特定结构,而包包既可以用于提供从属于文档的功能,又可以改变特定的类文件提供的方法的风格。[.cls和.sty文件的作用和区别]
LaTeX 允许你在自己编写的宏包(e.g. .cls文件中)中调用其它宏包,命令为RequirePackage
宏包
所谓宏包,就是一系列控制序列的合集。这些控制序列太常用,以至于人们会觉得每次将他们写在导言区太过繁琐,于是将他们打包放在同一个文件中,成为所谓的宏包(台湾方面称之为「巨集套件」)。\\usepackage·可以用来调用宏包。
在引言中调用。
指定字体\\usepackagetimes
package latexsym, which defines all symbols known from the old LaTeX version.
组织你的文章
\\documentclass[UTF8]ctexart
\\title你好,world!
\\authorLiam
\\date\\today
\\begindocument
\\maketitle
你好,world!
\\enddocument
Note: 这里是用的ctex,改成article也可以,但是不能显示中文了,lz目前不写中文的,所以先不管了。
定义了标题、作者、日期
maketitle这个控制序列能将在导言区中定义的标题、作者、日期 按照预定的格式展现出来。
\\documentclass[UTF8]ctexart
\\title你好,world!
\\authorLiam
\\date\\today
\\begindocument
\\maketitle
\\section你好中国
中国在East Asia.
\\subsectionHello Beijing
北京是capital of China.
\\subsubsectionHello Dongcheng District
\\paragraphTian'anmen Square
is in the center of Beijing
\\subparagraphChairman Mao
is in the center of 天安门广场。
\\subsectionHello 山东
\\paragraph山东大学 is one of the best university in 山东。
\\enddocument
插入目录
在上一节的文档中,找到 \\maketitle,在它的下面插入控制序列 \\tableofcontents
版面设置
页边距
设置页边距,推荐使用 geometry 宏包。可以在这里查看它的说明文档。
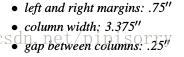
比如我希望,将纸张的长度设置为 20cm、宽度设置为 15cm、左边距 1cm、右边距 2cm、上边距 3cm、下边距 4cm,可以在导言区加上这样几行:
\\usepackagegeometry
\\geometrypapersize=20cm,15cm
\\geometryleft=1cm,right=2cm,top=3cm,bottom=4cm
页眉页脚
设置页眉页脚,推荐使用 fancyhdr 宏包。可以在这里查看它的说明文档。
比如我希望,在页眉左边写上我的名字,中间写上今天的日期,右边写上我的电话;页脚的正中写上页码;页眉和正文之间有一道宽为 0.4pt 的横线分割,可以在导言区加上如下几行:
\\usepackagefancyhdr
\\pagestylefancy
\\lhead\\author
\\chead\\date
\\rhead152xxxxxxxx
\\lfoot
\\cfoot\\thepage
\\rfoot
\\renewcommand\\headrulewidth0.4pt
\\renewcommand\\headwidth\\textwidth
\\renewcommand\\footrulewidth0pt
首行缩进
CTeX 宏集已经处理好了首行缩进的问题(自然段前空两格汉字宽度)。
不使用
CTeX宏集(使用xeCJK宏包)的话,请遵照以下提示操作。中国人写文章,习惯每一段的段首都空出两个中文汉字的长度。美国人没有这个习惯,他们每一小节的段首都顶格。为了解决这个问题,我们可以在导言区调用
\\usepackageindentfirst.就算是这样,首行缩进的长度,仍然不符合中国人的习惯。我们可以在导言区添加这样的控制序列
\\setlength\\parindent\\ccwd来调整首行缩进的大小。这里的\\ccwd是当前字号下一个中文汉字的宽度。
行间距
我们可以通过 setspace宏包提供的命令来调整行间距。比如在导言区添加如下内容,可以将行距设置为字号的 1.5 倍:
\\usepackagesetspace
\\onehalfspacing
具体可以查看该宏包的文档。
请注意用词的差别:
- 行距是字号的 1.5 倍;
- 1.5 倍行距。
事实上,这不是设置 1.5 倍行距的正确方法,请参考:http://liam0205.me/2013/10/17/LaTeX-Linespace/
段间距
我们可以通过修改长度 \\parskip 的值来调整段间距。例如在导言区添加以下内容
\\addtolength\\parskip.4em
则可以在原有的基础上,增加段间距 0.4em。如果需要减小段间距,只需将该数值改为负值即可。
Latex进阶分述
4 字体Fonts
somewords \\it somewords somewords
\\bf 黑体字;粗体铅字
\\it Italics
\\tt Typewriter (monospace, fixed-width).打字型印刷铅字
\\emph Although it also changes fonts, the \\emphtext commandis semantic, for text to be emphasized, and should not be used as asubstitute for \\textit. For example, \\emphstarttext \\emphmiddle text end text will result in thestart text and end text in italics, but middle textwill be in roman.
The \\em command is the unconditional version of \\emph.
。。。
字体颜色
(如用于批改)
\\colorred[??]
数学字体
The following commands are for use in math mode. They are not cumulative, so \\mathbf\\mathitsymbol does not create a boldface and italic symbol; instead, it will just be in italics. This is because typically math symbols need consistent typographic treatment, regardless of the surrounding environment.
\\mathrm
Roman, for use in math mode.
\\mathbf
Boldface, for use in math mode.
\\mathsf
Sans serif, for use in math mode.
\\mathtt
Typewriter, for use in math mode.
\\mathit
(\\mit)
Italics, for use in math mode.
\\mathnormal
For use in math mode, e.g., inside another type style declaration.
\\mathcal 书法字体
Calligraphic letters, for use in math mode. Note: 大写字母才有书法字体,小写的是无效的。
字母大小写转换(pipi add)
\\MakeUppercaseabc ABC
\\MakeLowercase
首字母大写(只能对第一个有效)
\\usepackagestringstrings
\\capitalizeabc abc Abc abc
整个字符串所有单词首字母大写
。。。有点复杂没写
google: latex uppercase the first letter of each word in a sentence
字体大小设置(正文和图表通用)
The standard classes, article, report and book support 3 different font sizes, 10pt, 11pt, 12pt (by default 10pt). The font size is set through the optional argument, e.g.:
\\documentclass[12pt]report
use the extsizes package. It allows for the following font sizes: 8pt, 9pt, 10pt, 11pt, 12pt, 14pt, 17pt, 20pt.
%Article
\\documentclass[9pt]extarticle
%Report
\\documentclass[14pt]extreport
[Changing the font size in LaTeX]
局部改变字号
\\fontsize字体尺寸行距,只有使用\\selectfont命令之后,\\fontzize的设置才能生效。
\\fontsize10pt12pt\\selectfont 这样后面的字体都变成10pt大小了。
使用给定字号:字号转换命令表
点数(pt) 相应中文字号 控制命令
25 一号 \\Huge
20 二号 \\huge
17 三号 \\LARGE
14 四号 \\Large
12 小四号 \\large
10 五号 \\normalsize(default)
9 小五号 \\small
8 六号 \\footnotesize
7 小六号 \\scriptsize
5 七号 \\tiny
中文字体
执行fc-list:lang=zh-cn命令查询简体中文的字体。同理查询繁体中文字体可以用fc-list:lang=zh-tw命令,查询日语字体可以用fc-list:lang=ja。
lz列出常用的几个示例:
SimSun,宋体:style=Regular,常规
KaiTi,楷体:style=Regular,Normal,obyčejné,Standard,Κανονικά,Normaali,Normál,Normale,Standa
STXingkai,华文行楷:style=Regular
Microsoft YaHei,微软雅黑,Microsoft YaHei Light,微软雅黑 Light:style=Light,Regular
Microsoft YaHei,微软雅黑:style=Regular,Normal,obyčejné,Standard,Κανονικά,Normaali,Normál,Normale,Standaard,Normalny,Обычный,Normálne,Navadno,Arrunta
YouYuan,幼圆:style=Regular
FangSong,仿宋:style=Regular,Normal,obyčejné,Standard,Κανονικά,Normaali,Normál,Normale,Standaard,Normalny,Обычный,Normálne,Navadno,Arrunta
SimHei,黑体:style=Regular,Normal,obyčejné,Standard,Κανονικά,Normaali,Normál,Normale,Standaard,Normalny,Обычный,Normálne,Navadno,Arrunta
NSimSun,新宋体:style=Regular,常规
/usr/share/fonts/方正兰亭黑.TTF: FZLanTingHeiS\\-R\\-GB,方正兰亭黑简体:style=Regular
方式1
linux latex 中文不显示
解决:使用xelatex编译(否则可能直接报错,而不是不显示中文了)
且加入
\\usepackagefontspec
\\setmainfontSimSun %宋体
就可以显示中文了
方式2
%使用支持汉字的CJK包
\\usepackageCJK
%开始CJK环境,只有在这句话之后,你才能使用汉字。另外,如果在Linux下,请将文件的编码格式设置成GBK,否则会显示乱码。
\\beginCJK*GBKsong
加粗或加斜某几个中文
使用\\bf或者\\textbf加粗中文无效果。
西文的习惯是使用加粗、倾斜、花体等来强调内容,而汉语的习惯则是使用不同的字形来强调内容。所以,一般的建议都是将粗宋体改用黑体,斜体之类的也改用仿宋、圆体之类的表示。
比如lz使用微软雅黑代替中文加粗:\\fontspecMicrosoft YaHei\\selectfont求职意向:大数据算法工程师
最好自定义一下:\\newcommand\\yahei[1]\\fontspecMicrosoft YaHei\\selectfont#1 使用\\yahei求职意向:大数据算法工程师
Latex同时设置中英文字体
中文标题+中文正文+英文字体:
- 中易宋体加粗+中易宋体+Calibri (中易宋体即 Windows 自带的宋体)
- 中易黑体+中易宋体+Calibri(无法使用PDF时首选)
- 华文细黑+华文细黑+Calibri(兼顾打印及分享,Office2013+MacOS自带)
- 方正兰亭黑+方正兰亭黑+Calibri (中文标题及正文使用华文细黑(Word文档)、方正兰亭黑(PDF文档))
\\RequirePackagexeCJK % 使用xeCJK宏包
\\setCJKmainfont方正兰亭黑简体 % 设置缺省中文字体
\\setmainfontCalibri % 如不指定,使用Tex的默认英文字体
中文标题lz使用的是方正兰亭粗黑简体
使用包xeCJK后,随时设置字体命令\\fontspec会无效,要使用\\CJKfontspec代替。
6 分节Sectioning
\\part
\\chapter
(report and book class only)
\\section
\\subsection
Note: \\section*Acknowledgments,标题不带number
\\subsubsection
\\paragraph
\\subparagraph
附录appendix
The \\appendix command changes the way following sectional unitsare numbered. The \\appendix command itself generates no textand does not affect the numbering of parts. The normal use of thiscommand is something like
\\chapterA Chapter
…
\\appendix
\\chapterThe First Appendix
修改Latex默认section,subsection样式
设置section字体为微软雅黑及其它设置说明
\\newcommand\\yahei[1]\\fontspecMicrosoft YaHei\\selectfont#1
\\titleformat\\section % Customise the \\section command
\\Large\\scshape\\raggedright\\yahei % Make the \\section headers large (\\Large),
% small capitals (\\scshape) and left aligned (\\raggedright)
0em % Can be used to give a prefix to all sections, like 'Section ...'
% Can be used to insert code before the heading
[\\titlerule] % Inserts a horizontal line after the heading
\\titlespacing*\\section0cm*1.8*1.8
section可选参数
\\section[short title]long title
7 交叉引用Cross references
• \\label: Assign a symbolic name to a piece of text.
一般定义的方式最好如下:
ch for chapters
sec for lower-level sectioning commands
fig for figures
tab for tables
eq for equations
• \\pageref: Refer to a page number.
• \\ref: Refer to a section, figure or similar.
对公式的引用建议使用\\eqref,这样会在公式引用自动添加()。
\\labelstylefiles #定义
\\refstylefiles #引用
8 环境Environment
8.1 Latex图片figure处理
\\beginfigure[placement]
  figure body
\\caption[loftitle]title
\\labellabel
\\endfigure
or

\\beginfigure*...\\endfigure*
示例
\\usepackagegraphicx
\\beginfigure[!t]
    \\centering
%    \\small
    \\includegraphics[width=1\\linewidth]./figures/compare1
%    \\vspace-3mm
    \\captionfigure caption
    %todo
%    \\vspace-5mm
    \\labelfig:compare1

\\endfigure
多图的插入
\\beginfigure[!htbp]
    \\centering
    \\beginsubfigure[b]0.45\\textwidth
      \\includegraphics[width=\\textwidth]oaspl_a
      \\caption
      \\labelfig:oaspl_a
    \\endsubfigure%
    ~%add desired spacing
    \\beginsubfigure[b]0.45\\textwidth
      \\includegraphics[width=\\textwidth]oaspl_b
      \\caption
      \\labelfig:oaspl_b
    \\endsubfigure
    \\caption***。(a)$A$,(b)$B$
    \\labelfig:oaspl
\\endfigure
1 插入双栏图片时需在figure的上标中加入符号* \\beginfigure*...\\endfigure*。双列模式中的插图:The starred form figure* is used when a document is in double-column mode (see \\twocolumn). It produces a figure thatspans both columns, at the top of the page.这样插图占两列,而不是只占一列。
2 图片插入的正确位置:初始引用页面的最上或者最下位置。Like tables, figures cannot be split across pages; the best placement for them is typically the top or the bottom of the page nearest their initial cite.
3 关键性的语句是:\\includegraphics[选项]图片.eps,其选项有:
height %指定图片的高度
width %指定图片的宽度 \\includegraphics[width=3in]file.eps 将 file.eps 插入文档并且它的宽度被缩放到 3 英寸,高度也会 按相应的比例缩放。如果用 \\textwidth 或 \\em 等的函数来 指定宽度,而不是用像 3 英寸这样的固定尺寸,将会使你的 LATEX 文 档更具通用性。例如:\\includegraphics[width=\\textwidth]graphics.eps 将所插入图形缩放到和文本行的宽度一样宽。width=0.8\\textwidth 设置图片为0.8倍的文本宽度;width=\\textwidth - 2.0in设置图片为文本宽度少2.0inches(当与 calc 宏包配合使用 时);
angle %指定图片旋转的角度 用graphicx包的includegraphics宏命令插入图片时还可以使图片旋转, 方法是 \\includegraphics[height=高度][angle=旋转角度]图片文件名
scale %缩放图形
trim 指定图形可以被看到的部分的另一选项。所给出的四个数字 分别代表了从左、下、右、上被截去的值。正数代表从此方向 截去的大小,而负数则代表从此方向加上的大小。如\\includegraphics[width=1\\linewidth, trim=0 132 0 155]./figures/framework0.eps截取图片上下的部分。lz一直没搞清楚trim和clip使用,如\\includegraphics[width=0.6\\textwidth, clip=true, trim=98mm 40mm 88mm 35mm]paper_organization.eps显示的并不是想像的先截取eps文件中间的图形,再放大为0.6倍textwidth!![Displaying only part of an EPS picture]
其它选项[includegraphics 命令]
插入的图形通常为eps、pdf或者jpg、png等格式,假设名字叫fig,把它放在你的tex文档同一目录下。Note: 最佳的引用格式一般使用eps格式,如果使用pdflatex编译,最好使用pdf格式图片。.eps files to be displayable with LATEX. If you work with pdfL A TEX, use files in the .pdf format. Note that most modern TEX systems will convert .eps to .pdf for you on the fly. 如果是eps的图形, 编译过程是latex, dvips, ps2pdf. 如果是pdf jpg png图形, 编译过程是 pdflatex .
4 图片描述/图标题caption
如果想使用双语描述,使用bicaption宏包:
\\usepackagebicaption
\\captionsetup[figure][bi-second]name=Figure %设置图的英文编号前缀
\\captionsetup[table][bi-second]name=Table %设置表的英文编号前缀
Note:也可以使用ccaption 宏包,\\usepackageccaption,将\\caption命令换成如下:\\bicaption图中文FigEnglish title,但这个宏包与caption宏包相互不兼容,很容易出错。
5 图标题和图居中
\\beginfigure[!htbp]
\\captionsetupjustification=centering %图标题强制居中
\\centering %图居中
\\endfigure
示例代码
\\beginfigure
\\centering
\\includegraphics[width=0.7\\linewidth]../../../../Downloads/figure_1
\\captionnono
\\labelfig:figure_1
\\endfigure
说明
在LaTeX文档中插入图片都是通过使用一些latex图形处理宏命令来实现的, 有很多宏命令都支持在在LaTeX文档中插入eps格式的图形文件, 主要有:
用includegraphics宏命令(graphicx包)
首先需在latex文档的文件说明部分加上:
\\usepackagegraphicx
然后在需要插入图片的地方引用:
\\includegraphics[height=高度]图片文件名 或者: \\includegraphics[width=宽度]图片文件名
其中的"高度"和"宽度"是指希望图片打印的高度和宽度, 必须给出单位, 可用厘米(cm)或英寸(in). 高度和宽度也可用上述格式同时给出, 这样可以改变原图的长宽比例. 上述命令中的图片文件名是指欲插入的图片文件 的文件名, 图片必需是eps格式的.(直接使用latex编译不能插入jpg图片,但是使用xelatex可以)
1、先导言区加一句\\usepackagegraphicx
2、如果想插入inline的图形, 直接使用
\\includegraphics[width=5in]fig,不用加后缀名。
3、如果你想插入浮动图形, 使用
\\beginfigure[htbp]
\\centering\\includegraphics[width=3.5in]fig
\\captionsomething
\\labelfig:1
\\endfigure
还有其它package插入的方法参考[LaTeX文档插入图片的几种常用方法 ]
latex插图的放置位置\\beginfigure[htbp]
图形(figure)环境有一个可选参数项允许用户来指示图形有可能 被放置的位置。这一可选参数项可以是下列字母的任意组合。
h 当前位置。 将图形放置在 正文文本中给出该图形环境的地方。如果本页所剩的页面不够, 这一参数将不起作用。
t 顶部。 将图形放置在页面的顶部。
b 底部。 将图形放置在页面的底部 16.1。
p 浮动页。 将图形放置在一只允许 有浮动对象的页面上。
注:
如果在图形环境中没有给出上述任一参数,则缺省为 [tbp]。
给出参数的顺序不会影响到最后的结果。因为在考虑这些参数时 LATEX 总是尝试以 h-t-b-p 的顺序来确定图形的位置。所以 [hb] 和 [bh] 都使 LATEX 以 h-b 的顺序来排版。
给出的参数越多, LATEX 的排版结果就会越好。 [htbp], [tbp], [htp], [tp] 这些组合得到的效果不错。
只给出单个的参数项极易引发问题16.2。 如果该图形不适合所指定的位置,它就会被搁置并阻碍对后面的图形 的处理。一旦这些阻塞的图形数目超过了 18 幅这一 LATEX 所能容许 的最大值,就会产生 ``Too Many Unprocessed Floats'' 的错误(见 第 16.3 节)。
在浮动位置选项前加上一个惊叹号(如 \\beginfigure[!ht]) 会使 LATEX 忽略应用于文本页的审美条件,试图用最严格的标准来放置浮动图形。不过, ! 不会影响应用于浮动页的审美条件。
当 LATEX `` 试图'' 放置一浮动图形时, 它将遵循以下规则:
- 图形只能置于由位置参数所确定的地点。
- 图形的放置不能造成超过版心的错误(overfull page)。
- 图形只能置于当前页或后面的页中16.3。所以图形只能 ``向后浮动'' 而 不能 ``向前浮动''。
- 图形必须按顺序出现。这样只有当前面的图形都被放置好之后才能被放置。
- 只要前面有未被处理的图形,一幅图形就不会被放在当前位置。
- 一幅 ``不可能放置'' 的图形将阻碍它后面的图形的放置。直到 文件结束或达到 LATEX 的浮动限制。参见第 16.4 节。
- 必须符合在第 17 章中给出的审美条件。例如,一页上的 浮动对象的数目不能超过 totalnumber。在浮动位置选项前加上一个惊叹号(如 \\beginfigure[!ht]) 会使 LATEX 忽略应用于文本页的审美条件,试图用最严格的标准来 放置浮动图形。不过, ! 不会影响应用于浮动页的审美条件。
8.2 + 8.22 + 8.23 Latex表格处理
标准 LaTeX 提供有 array 和 tabular两个制表环境,它们的完整格式如下:
\\beginarray[表格位置]列样式 \\endarray
\\begintabular[表格位置]列样式 \\endtabular or \\begintabular*表格总宽度[表格位置]列样式 \\endtabular*
这两个环境的选项和参数定义是相同的,不过 array 主要用于数组矩阵的排版,且只能用在数学环境中,如equation 等。
array
array 宏包扩展了array 和 tabular环境功能,主要增加和增强了列样式选项,甚至可编程定义新的列样式;还增加了许多细部微调功能,如改变垂直表格线的粗细和自动调整表格间隙等。使用该宏包可以排印出外形美观、功能丰富的表格。
array
\\beginarray[pos]cols
column 1 entry &column 2 entry ... &column n entry \\\\
...
\\endarraypos]cols
column 1 entry &column 2 entry ... &column n entry \\\\
...
\\endarray
table
table的位置:一般初次引用页的最上面。Because tables cannot be split across pages, the best placement for them is typically the top of the page nearest their initial cite.
To ensure this proper ``floating'' placement of tables, use the environment \\textbftable to enclose the table's contents and the table caption. The contents of the table itself must go in the \\textbftabular environment, to be aligned properly in rows and columns, with the desired horizontal and vertical rules.
Note: 1 \\caption放在主体下面时显示也是在表格下面,放在主体上面就显示在表格上面。
2 table*可以横跨两页面。
\\begintable[placement]
table body
\\caption[loftitle]title
\\labellabel
\\endtable
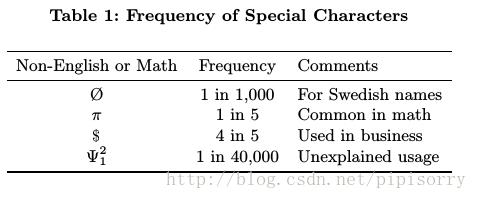
示例1(acm标准,三线图)
\\begintable
\\captionFrequency of Special Characters
\\labeltab:freq
\\begintabularccl
\\toprule
Non-English or Math&Frequency&Comments\\\\
\\midrule
\\O & 1 in 1,000& For Swedish names\\\\
$\\pi$ & 1 in 5& Common in math\\\\
\\$ & 4 in 5 & Used in business\\\\
$\\Psi^2_1$ & 1 in 40,000& Unexplained usage\\\\
\\bottomrule
\\endtabular
\\endtable
示例2:另一种三线图的实现,lz之前用的,不过感觉没有acm标准那个好。
\\begintable[!tbp]
\\small
\\centering
\\vspace-0mm
\\renewcommand\\arraystretch1.1
\\begintabular>\\centering p40pt >\\centering p120pt
\\Xhline1.1pt
\\textbfAttribute & \\textbfValue
\\tabularnewline \\hline Name & Bosie Tea Parlor
\\tabularnewline Address & New York,NY,United States
\\tabularnewline Category & Food
\\tabularnewline \\Xhline1.1pt
\\endtabular
\\vspace-1mm
\\captionInstance of a POI's content word set.
\\labeltab:lda
\\vspace-4mm
\\endtable

acm推荐使用的一个table格式包:booktabs
It is strongly recommended to use the package booktabs and follow its main principles of typography with respect to tables:
Never, ever use vertical rules.
Never use double rules.
It is also a good idea not to overuse horizontal rules.
tabular
参数
| 选项 | 说明 |
| l | 该列左对齐排列 |
| c | 该列居中排列 |
| r | 该列右对齐排列 |
| p列宽 | 设置该列宽度,文本顶对齐。如需要哪一列自动换行,直接指定该列宽即可实现。(但是合并单元格后的就不会自动换行了,还没解决这个问题) |
| @声明 | 该列每行插入声明中文本 |
| m列宽 | 设置该列宽度,文本居中对齐 |
| b列宽 | 设置该列宽度,文本底对齐 |
| >声明 | 声明可以是命令或插入列元素之前的文本 |
| <声明 | 声明可以是命令或插入列元素之后的文本 |
| | | 列边或列间加入一条垂直线 |
| !声明 | 用声明要求的样式取代列间垂直线 |
*numcols Equivalent to num copies of cols, where num is apositive integer and cols is a list of specifiers. Thus\\begintabular|*3l|r| is equivalent to\\begintabular|l|rl|rl|r|.
Note: 出错Extra alignment tab has been changed to \\cr是因为列数|c|c|...没写对。
LaTeX如何加粗表格横线
使用makecell宏包来定制表格线,这个包提供了\\Xhline来定制表格线。
\\Xhline1.2pt
合并单元格
合并一行多列单元格
	\\begintabular|c|c|c|c|
		\\hline
		\\multicolumn2|c|合并一行两列 & 三 & 四 \\\\
		\\hline
		1 & 2 & 3 & 4 \\\\
		\\hline
	\\endtabular
合并多行一列单元格
	\\begintabular|c|c|c|c|
		\\hline
		\\multirow2*合并两行一列 & 二 & 三 & 四 \\\\
		\\cline2-4
		~ & 2 & 3 & 4 \\\\
		\\hline
	\\endtabular
合并多行多列单元格
	\\begintabular|c|c|c|c|
		\\hline
		\\multicolumn2|c|\\multirow2*合并两行两列  & 三 & 四 \\\\
		\\cline3-4
		\\multicolumn2|c|~ & 3 & 4 \\\\
		\\hline
	\\endtabular
列表项
8.4 描述description
description顾名思义,对列表项的解释描述等,description项描述可以是多个段落,也可多个环境嵌套。
\\begindescription
\\item [first label] text of first item
\\item [second label] text of second item
  ...
\\enddescriptionfirst label] text of first item
\\item [second label] text of second item
  ...
\\enddescription效果是首行不缩进,从第二行开始缩进。也可以改变其表现[LaTeX技巧303:description列表不得不说的用法]。

8.7 有序列表 enumerate
有标号的缩进列表。\\beginenumerate[itemindent=1em] %在这里设置缩进的距离
\\beginenumerate
\\item [first label] text of first item
\\item [second label] text of second item
...
\\endenumeratefirst label] text of first item
\\item [second label] text of second item
...
\\endenumerate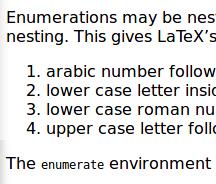
修改标号格式,如变成(1):
如果使用的是\\usepackageenumitem则使用 \\beginenumerate[itemsep=0pt, parsep=0pt,label=(\\arabic*)]
列表标签的控制指令有:
| 命令 | 例子 |
|---|---|
| \\arabic | 1, 2, 3 ... |
| \\alph | a, b, c ... |
| \\Alph | A, B, C ... |
| \\roman | i, ii, iii ... |
| \\Roman | I, II, III ... |
| \\fnsymbol | 星号,单剑号,双剑号等 |
如果使用的是\\usepackageenumerate则使用 \\beginenumerate[(1)]
使用混乱会出错:
Undefined control sequence. \\endenumerate OR
- Missing number, treated as zero.
8.14 分条列举(圆点)itemize
\\beginitemize
\\item item1
\\item item2
...
\\enditemize
The itemize environment produces an “unordered”, “bulleted”list. Itemizations can be nested within one another, up to fourlevels deep. They can also be nested within other paragraph-makingenvironments, such as enumerate (see enumerate).
示例:
紧凑的列表
以上的列表环境空白较大,如果需要更紧凑的列表方式,可以选用 mdwlist 宏包提供的 itemize*、enumerate* 和 description* 环境,用法和无星号的版本一致。
[在Latex使用條列式清單itemize , enumerate , description [转]]
8.19 picture
\\beginpicture(width,height)(xoffset,yoffset)
… picture commands …
\\endpicture
Note: 这个没有研究过,感觉可用于图片插入,以后再研究。
8.20 引用quotation and quote
\\beginquotation
text
\\endquotation
text
\\endquotation
or
\\beginquote
text
\\endquote
text
\\endquote
8.24 参考文献bibliography
使用BibTeX管理参考文献
%% The file named.bst is a bibliography style file for BibTeX 0.99c
\\bibliographystylenamed
\\bibliographyijcai17
ijcai17.bib内容:
@article gottlob:nonmon,
author = "Georg Gottlob",
title = "Complexity results for nonmonotonic logics",
journal = "Journal of Logic and Computation",
volume = "2",
number = "3",
pages = "397--425",
month = "June",
year = "1992"
Note: @article gottlob:nonmon...中的gottlob首字母必须小写,否则引用可以失败。
简写
编写bib文件时,若要使用一个简写来代替很长的字符串,可以使用
@string(Abbrv="Long string")
比如: @string(TIT="IEEE Trans. Inf. Theory")
这样在条目中,journal=TIT等价于journal=IEEE Trans. Inf. Theory
注意使用简写的时候不要加大括号,大括号的作用是防止latex对内容做处理,比如在title中有些简写是需要大写的,为防止在参考文献列表中把这些简写变成小写字母,可以在简写两边加上大括号。
正文中引用参考文献 \\cite[subcite]keys
The keys argument is a list of one or more citation keys, separated by commas. This command generates an in-text citation to the references associated with keys by entries in the .aux file. The text of the optional subcite argument appears after the citation. For example, \\cite[p.~314]knuth might produce ‘[Knuth, p. 314]’.
\\nocite: Include an item in the bibliography.The \\nocite command produces no text, but writes keys,which is a list of one or more citation keys, to the .aux file.若要把没引用的文档列入参考文献,用\\nocite。\\nocite*列入所有bib文件中的文献。\\nocite*命令是写在.tex文件中而不是.bib文件。
Note: key一般取一作的姓和标题的一个词。The key is a short reference you invent to uniquely identify each work; in this sample document, the key is the first author's surname and a word from the title.
示例
Gottlob~\\shortcitegottlob:nonmon has shown that, rather than, In our previous work~\\citegottlob:nonmon
Gottlob [1992] has shown that, rather than, In our previous work [Gottlob, 1992]
单作:[Gottlob, 1992] 或者Nebel [2000](很容易看出来时)
二作:[Brachman and Schmolze, 1985]
多作:[Baumgartner et al., 2001]
多篇引用使用,隔开:[Gott-
lob et al., 2002; Levesque, 1984a]
latex代码:\\citegls:hypertrees,levesque:functional-foundations
引用作者\\citeauthor
如同时引用作者和文献 Early,~\\citeauthoreagle2009inferring~\\citeeagle2009inferring examined the communications
结果Early, Eagle et al. [6] examined the communications
注意\\citeauthor是由包\\usepackagenatbib提供,否则出错。
其它包中添加这种行为:
\\documentclassarticle
\\usepackagenatbib
\\begindocument
\\citeauthorlamport94

\\citetlamport94

\\beginthebibliography9
\\bibitem[Lamport (1994)]lamport94Leslie Lamport,   \\emph\\LaTeX:
   A Document Preparation System.   Addison Wesley, Massachusetts,
   2nd Edition,   1994.
\\endthebibliography
\\enddocument[Problem displaying author in citation when using natbib's \\citeauthor command]
11 脚注Footnotes
\\footnote
\\footnote[number]text
LaTeX 提供了 \\pagestyle 命令让我们可以文档所有页面的样式 (包括页边距, 页眉和页脚等内容); 同时, 还提供了 \\pagenumbering 来设置页码的显示格式. LaTeX 提供了四种不同的页面样式:
- \\pagestyleempty 设置页面的样式为没有页眉和页脚.
- \\pagestyleplain 设置页面的样式为没有页眉, 页脚中间是页码.
- \\pagestyleheadings 设置页面的样式为没有页脚, 页眉显章节标题和页码.
- \\pagestylemyheadings 设置页面的样式为没有页脚, 页眉中显示用户提供的内容.
页眉页脚注释包fancyhdr 宏包
设置没有页眉,页脚居中显示自定义字符串
\\usepackagefancyhdr
\\renewcommand\\headrulewidth0.0pt #去除页眉的横线bar
\\pagestylefancy
\\fancyhf %\\fancyhead #去除页眉内容
\\cfootPassion in my heart, Dynamic in my body! #设置页脚居中字符串
[How to remove the top horizontal bar in fancyhdr?]
12 定义Definitions
\\newcommand & \\renewcommand
\\newcommand and \\renewcommand define and redefine a command, respectively.
使用\\newcommand可以自己定制命令
语法格式 \\newcommand\\yourcommand[参数个数]内容
比如:\\newcommand\\wuhao\\fontsize10.5pt10.5pt\\selectfont用来定义一个选定字号命令
Here’s a command definition that uses arguments:
\\newcommand\\defreference[1]Definition~\\ref#1
Then, \\defreferencedef:basis will expand to something like ‘Definition~3.14’.
\\newcommand示例
\\newcommand\\home[2][]\\faHome\\
\\ifthenelse\\isempty#1
\\href#2#2
\\href#2#1
使用\\home[***.github.io]http://***.github.io/
pdf效果 点击就可以跳转
不过lz没有搞懂[2][]的用法,知道的麻烦给个链接吧?比如如何定义4个参数的两个不同链接?
Note: \\href网址描述:生成网址链接,以正常字体显示描述,隐藏网址。
所以可以简单的使用\\hrefhttp://blog.csdn.net/pipisorryblog.csdn.net/pipisorry来表示上面的链接。但是如何定义4个参数的两个不同链接?
[How to use \\newcommand for \\href?]
LaTeX里的超链接如何取消方框?
\\usepackage[colorlinks,
linkcolor=red,
anchorcolor=blue,
citecolor=green
]hyperref
\\newtheorem
Define a new theorem-like environment. Synopses:
\\newtheoremnametitle[numbered_within]
\\newtheoremname[numbered_like]title
   \\newtheorem定理环境名标题[主计数器名]
   %例如
   \\newtheoremtheoremTheorem[Chapter]
示例
\\newtheoremproblemProblem
\\beginproblem
\\textbf(Location-based Recommendation)
Given a user activity dataset ...
\\endproblem

definition
示例1(lz都是使用这个来定义的!)
\\begindefinition
If $z$ is irrational, then by $e^z$ we mean the
unique number that has
logarithm $z$:
\\begindisplaymath
\\log e^z = z.
\\enddisplaymath
\\enddefinition

示例2:定义\\newdef
\\newdefdefinition3Definition
\\begindefinition3
\\textbf(\\textitPOI)
A POI is defined as ...
\\enddefinition3

Note: lz也不知道\\newdef是什么意思。。。
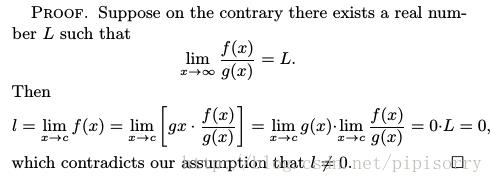
proof
\\beginproof
Suppose on the contrary there exists a real number $L$ such that
\\begindisplaymath
\\lim_x\\rightarrow\\infty \\fracf(x)g(x) = L.
\\enddisplaymath
Then
\\begindisplaymath
l=\\lim_x\\rightarrow c f(x)
= \\lim_x\\rightarrow c
\\left[ gx \\cdot \\fracf(x)g(x) \\right ]
= \\lim_x\\rightarrow c g(x) \\cdot \\lim_x\\rightarrow c
\\fracf(x)g(x) = 0\\cdot L = 0,
\\enddisplaymath
which contradicts our assumption that $l\\neq 0$.
\\endproof
15 段落Making paragraphs
| • \\indent: | Indent this paragraph. | |
| • \\noindent: | Do not indent this paragraph. Latex 换行顶格、不缩进 | |
| • \\parskip: | Space added before paragraphs. | |
| • Marginal notes: | Putting remarks in the margin. |
16 数学公式Math Formulas
16.2 数学符号 Math Symbols
常用数学符号的LaTeX 表示方法,数学符号表,请参考[WiKibook Mathematics][symbols] [unofficial reference manual16.2]
\\箭头
在Latex 中怎样在指向左或右的箭头上方标注字母?
宏包amsmath 提供了两个可以伸长的单箭头符号
\\xleftarrow[下方公式]上方公式
上方可输入中文的双向箭头
双向箭头,且上方可输入中文,且箭头居中。
\\usepackageextarrows,$\\xleftrightarrow\\text社交联系$
或者$\\stackrel\\underleftrightarrow\\text社交联系$,其中\\stackrel上层符号下层符号表示将任意两个符号重叠在一起。
附加:括号的使用
可以使用\\left和\\right来显示不同的括号:
| 功能 | 语法 | 显示 |
|---|---|---|
| 圆括号,小括号 | \\left( \\fracab\\right) |  |
| 方括号,中括号 以上是关于Latex:入门教程的主要内容,如果未能解决你的问题,请参考以下文章 |