Python OpenCV 单目相机标定坐标转换相关代码(包括鱼眼相机)
Posted 秋山丶雪绪
tags:
篇首语:本文由小常识网(cha138.com)小编为大家整理,主要介绍了Python OpenCV 单目相机标定坐标转换相关代码(包括鱼眼相机)相关的知识,希望对你有一定的参考价值。
前言
本文不讲原理,只关注代码,有很多博客是讲原理的,但是代码最多到畸变矫正就结束了,实际上就是到 OpenCV 官方示例涉及的部分。
在官方示例中使用黑白棋盘格求解了相机的内外参和畸变系数,并对图像做了畸变矫正,但在实际使用时还缺少很多功能,以下是本文包含的部分:
(1)按实际应用场景求解外参,棋盘格的外参是相对于棋盘格的世界坐标系的,无法直接使用;
(2)在实际场景下,不使用棋盘格,采用标点的方法求解内外参和畸变系数;
(3)世界坐标系的点转换到像素坐标系,包括畸变矫正前的图像和矫正后的图像;
(4)畸变矫正后的图像像素坐标转换到世界坐标;
(5)鱼眼相机上述相关功能;(2022.12.9 更新)
环境:
Python 3.7
OpenCV 4.5.3.56
1. 棋盘格相机标定
这个部分代码是在官方示例上略作了修改,由于一些条件限制,棋盘格图像 chess_path 是在本地用同款相机拍摄的,实拍图像 real_path 是现场安装相机拍摄的图像。
1.1 核心代码解析
1.1.1 求内参、畸变系数、外参
retval, cameraMatrix, distCoeffs, rvecs, tvecs = cv2.calibrateCamera(objectPoints, imagePoints, imageSize, cameraMatrix, distCoeffs[, rvecs[, tvecs[, flags[, criteria]]]])
# 实际使用
rms, camera_matrix, dist_coefs, _rvecs, _tvecs = cv2.calibrateCamera(obj_points, img_points, (w, h), None, None)
-
输入:
obj_points:棋盘格世界坐标,这里的世界坐标是以棋盘格平面自行构建的,z轴坐标都是0,xy 坐标按网格设置,世界坐标为[0,0,0], [1,0,0], …, [0,1,0], [1,1,0], …;img_points:棋盘格像素坐标,主要通过cv2.findChessboardCorners找的点位;(w, h):图像大小
-
输出:
rms:重投影误差camera_matrix:内参,[3,3]dist_coefs:畸变系数,[1, 5]_rvecs:旋转向量,长度为n的list,每一项为[3,1]的向量,n为有效棋盘格图像的数量_tvecs:平移向量,同(4)
补充说明:
(1)cv2.findChessboardCorners(image, patternSize) 在找棋盘格角点时要输入棋盘格的内角数 patternSize,例如
10
×
7
10\\times7
10×7 的棋盘格(格子数量)内角数是
9
×
6
9\\times6
9×6(内圈角点数量)
(2)矫正结果与输入数据(棋盘格图像)有很大关系,包括输入图像顺序、棋盘格的分布、图像数量等,这些方面官网也说并不能给出准确的建议,根据一般的经验图像数量在10张以上,棋盘格要分布在图像的各个位置,注意覆盖边角。
1.1.2 畸变矫正
方法一:
newcameramtx, roi = cv2.getOptimalNewCameraMatrix(camera_matrix, dist_coefs, (w, h), 1, (w, h))
dst = cv2.undistort(self.camera_img, camera_matrix, dist_coefs, None, newcameramtx)
x, y, w, h = roi
dst_crop = dst[y:y + h, x:x + w]
(1)newcameramtx, roi = cv2.getOptimalNewCameraMatrix(cameraMatrix, distCoeffs, imageSize, alpha[, newImgSize[, centerPrincipalPoint]])
-
输入:
- 主要讲下
alpha,取值范围是 [ 0 , 1 ] [0,1] [0,1],当取0时矫正后图像只保留有效区域(裁剪掉黑边、扭曲的部分);当取1时所有原图像素都保留(不做裁剪)
- 主要讲下
-
输出:
newcameramtx:矫正图像的新内参roi:矫正图像还需要裁剪的区域
(2)dst = cv2.undistort(src, cameraMatrix, distCoeffs[, dst[, newCameraMatrix]])
-
输入:
newCameraMatrix:用于调节矫正图像在原图中的范围,同时代表dst的内参,取None时默认为cameraMatrix
-
输出:
dst:矫正图像
补充说明:
下图可以直观的感受 alpha 带来的差异;左图:alpha=1 未裁剪图像,中图:alpha=1 裁剪后图像,右图:alpha=0 图像(此时已不需要裁剪,roi=(0, 0, 1919, 1079))

方法二:
用方法一对视频进行逐帧矫正的时候发现速度比较慢,后注意官方文档中说明方法一中的 cv2.initUndistortRectifyMap() 其实是 cv2.remap() 和 cv2.undistort() 的结合。由于 map 变换是固定的,提前算好可以节省一个环节的时间,提高不少效率。
newcameramtx, roi = cv2.getOptimalNewCameraMatrix(camera_matrix, dist_coefs, (w, h), 1, (w, h))
map1, map2 = cv2.initUndistortRectifyMap(camera_matrix, dist_coefs, None, newcameramtx, (w, h), cv2.CV_16SC2)
dst = cv2.remap(self.camera_img, map1, map2, cv2.INTER_LINEAR)
(1)map1, map2 = cv2.initUndistortRectifyMap(cameraMatrix, distCoeffs, R, newCameraMatrix, size, m1type[, map1[, map2]])
- 输入:
R:在cv2.initUndistortRectifyMap()中假定为单位矩阵m1type:CV_32FC1,CV_32FC2 或 CV_16SC2
(2)dst = cv2.remap(src, map1, map2, interpolation[, dst, borderMode, borderValue])
补充说明:
这里暂不细说 m1type 对应 map 的类型等,但使用 CV_16SC2 可以使 remap 的速度更快。
1.2 完整代码
import argparse
import os
from glob import glob
import numpy as np
import cv2


def check_path(path):
    if not os.path.exists(path):
        os.mkdir(path)


def splitfn(fn):
    path, fn = os.path.split(fn)
    name, ext = os.path.splitext(fn)
    return path, name, ext


def calibrate(args):
    check_path(args.out_path)
    out_chess_path = os.path.join(args.out_path, "output")
    check_path(out_chess_path)
    # 棋盘格图像文件
    # img_names = sorted(os.listdir(args.chess_path))
    file_names = glob(os.path.join(args.chess_path, "test_??.jpg"))
    # 生成棋盘格世界坐标
    pattern_points = np.zeros((np.prod(args.pattern_size), 3), np.float32)
    pattern_points[:, :2] = np.indices(args.pattern_size).T.reshape(-1, 2)
    pattern_points *= args.square_size

    obj_points = []
    img_points = []
    h, w = cv2.imread(file_names[0], 0).shape[:2]

    # 多线程获取检测棋盘格角点坐标
    def processImage(fn):
        print('processing %s... ' % fn)
        img = cv2.imread(fn, 0)
        if img is None:
            print("Failed to load", fn)
            return None

        assert w == img.shape[1] and h == img.shape[0], ("size: %d x %d ... " % (img.shape[1], img.shape[0]))
        found, corners = cv2.findChessboardCorners(img, args.pattern_size)
        if found:
            term = (cv2.TERM_CRITERIA_EPS + cv2.TERM_CRITERIA_COUNT, 30, 0.1)
            cv2.cornerSubPix(img, corners, (5, 5), (-1, -1), term)

        vis = cv2.cvtColor(img, cv2.COLOR_GRAY2BGR)
        cv2.drawChessboardCorners(vis, args.pattern_size, corners, found)
        _path, name, _ext = splitfn(fn)
        outfile = os.path.join(out_chess_path, name + '_chess.png')
        cv2.imwrite(outfile, vis)

        if not found:
            print('chessboard not found')
            return None
        print('           %s... OK' % fn)
        return corners.reshape(-1, 2), pattern_points

    threads_num = args.threads
    if threads_num <= 1:
        chessboards = [processImage(fn) for fn in file_names]
    else:
        print("Run with %d threads..." % threads_num)
        from multiprocessing.dummy import Pool as ThreadPool
        pool = ThreadPool(threads_num)
        chessboards = pool.map(processImage, file_names)

    chessboards = [x for x in chessboards if x is not None]
    for (corners, pattern_points) in chessboards:
        img_points.append(corners)
        obj_points.append(pattern_points)

    # 计算相机畸变
    rms, camera_matrix, dist_coefs, _rvecs, _tvecs = cv2.calibrateCamera(obj_points, img_points, (w, h), None, None)
    np.savez("calibrate_parm.npz", camera_matrix=camera_matrix, dist_coefs=dist_coefs)
    print("\\nRMS:", rms)
    print("camera matrix:\\n", camera_matrix)
    print("distortion coefficients: ", dist_coefs.ravel())

    # 图像矫正
    for fn in file_names:
        _path, name, _ext = splitfn(fn)
        img_found = os.path.join(out_chess_path, name + '_chess.png')
        outfile = os.path.join(out_chess_path, name + '_undistorted.png')
        outfile_crop = os.path.join(out_chess_path, name + '_undistorted_crop.png')
        img = cv2.imread(img_found)
        if img is None:
            continue

        h, w = img.shape[:2]
        newcameramtx, roi = cv2.getOptimalNewCameraMatrix(camera_matrix, dist_coefs, (w, h), 1, (w, h))
        dst = cv2.undistort(img, camera_matrix, dist_coefs, None, newcameramtx)
        x, y, w, h = roi
        dst_crop = dst[y:y + h, x:x + w]
        cv2.imwrite(outfile, dst)
        cv2.imwrite(outfile_crop, dst_crop)
        print('Undistorted image written to: %s' % outfile)

    if args.real_path:
        out_real_path = os.path.join(args.out_path, "output_real")
        check_path(out_real_path)
        for file in os.listdir(args.real_path):
            fn = os.path.join(args.real_path, file)
            _path, name, _ext = splitfn(fn)
            outfile = os.path.join(out_real_path, name + '_undistorted.png')
            outfile_crop = os.path.join(out_real_path, name + '_undistorted_crop.png')
            real_img = cv2.imread(fn)
            if real_img is None:
                continue
            h, w = real_img.shape[:2]
            newcameramtx, roi = cv2.getOptimalNewCameraMatrix(camera_matrix, dist_coefs, (w, h), 1, (w, h))
            dst = cv2.undistort(real_img, camera_matrix, dist_coefs, None, newcameramtx)
            x, y, w, h = roi
            dst_crop = dst[y:y + h, x:x + w]
            cv2.imwrite(outfile, dst)
            cv2.imwrite(outfile_crop, dst_crop)
            print('Undistorted real image written to: %s' % outfile)


if __name__ == '__main__':
    parser = argparse.ArgumentParser()
    parser.add_argument('--chess_path', type=str, default="data/chess_img", help="棋盘格图像文件夹")
    parser.add_argument('--real_path', type=str, default="data/real_img", help="实拍图像文件夹")
    parser.add_argument('--threads', type=int, default=4)
    parser.add_argument('--square_size', type=float, default=1.0)
    parser.add_argument('--pattern_size', type=int, nargs=2, default=[9, 6], help="棋盘格尺寸")
    parser.add_argument('--out_path', type=str, default="run")
    opt = parser.parse_args()
    print(opt)
    calibrate(opt)
2. 标点相机标定
2.1 已知内参求外参
最初使用棋盘格标定获取的内参和畸变系数,并且手动选择了一些图像中标志物的位置,并构建其世界坐标系,最终使用内外参映射点位时有较大的误差。很可能是同型号的相机也有着不同的内参和畸变系数,或是棋盘格矫正的效果还有待提升。
retval, rvec, tvec = cv2.solvePnP(objectPoints, imagePoints, cameraMatrix, distCoeffs[, rvec[, tvec[, useExtrinsicGuess[, flags]]]])
-
输入:
objectPoints:世界坐标img_points:像素坐标cameraMatrix:内参矩阵distCoeffs:畸变系数
-
输出:
retval:重投影误差rvec:旋转向量tvec:平移向量
2.2 世界坐标转像素坐标
基于此方法可以验证求得的参数用来做坐标转换时的误差。
imagePoints, jacobian = cv2.projectPoints(objectPoints, rvec, tvec, cameraMatrix, distCoeffs[, imagePoints[, jacobian[, aspectRatio]]] )
-
输入:
objectPoints:世界坐标rvec:旋转向量tvec:平移向量cameraMatrix:内参矩阵distCoeffs:畸变系数
-
输出:
imagePoints:像素坐标jacobian:关于旋转、平移、焦距、光心坐标、畸变的雅可比矩阵
补充说明:
当 cameraMatrix=newCameraMatrix, distCoeffs=None 时,得到的像素坐标是相对于畸变矫正后的图像 dst 的。
2.3 原图坐标转矫正图坐标
dst = cv2.undistortPoints(src, cameraMatrix, distCoeffs[, dst[, R[, P]]])
# 实际使用
undistortImagePoints = cv2.undistortPoints(imagePoints, cameraMatrix, distCoeffs, None, np.eye(3), newcameramtx)
- 输入:
src:原图坐标cameraMatrix:内参矩阵distCoeffs:平移畸变系数
2.4 手动标点相机标定
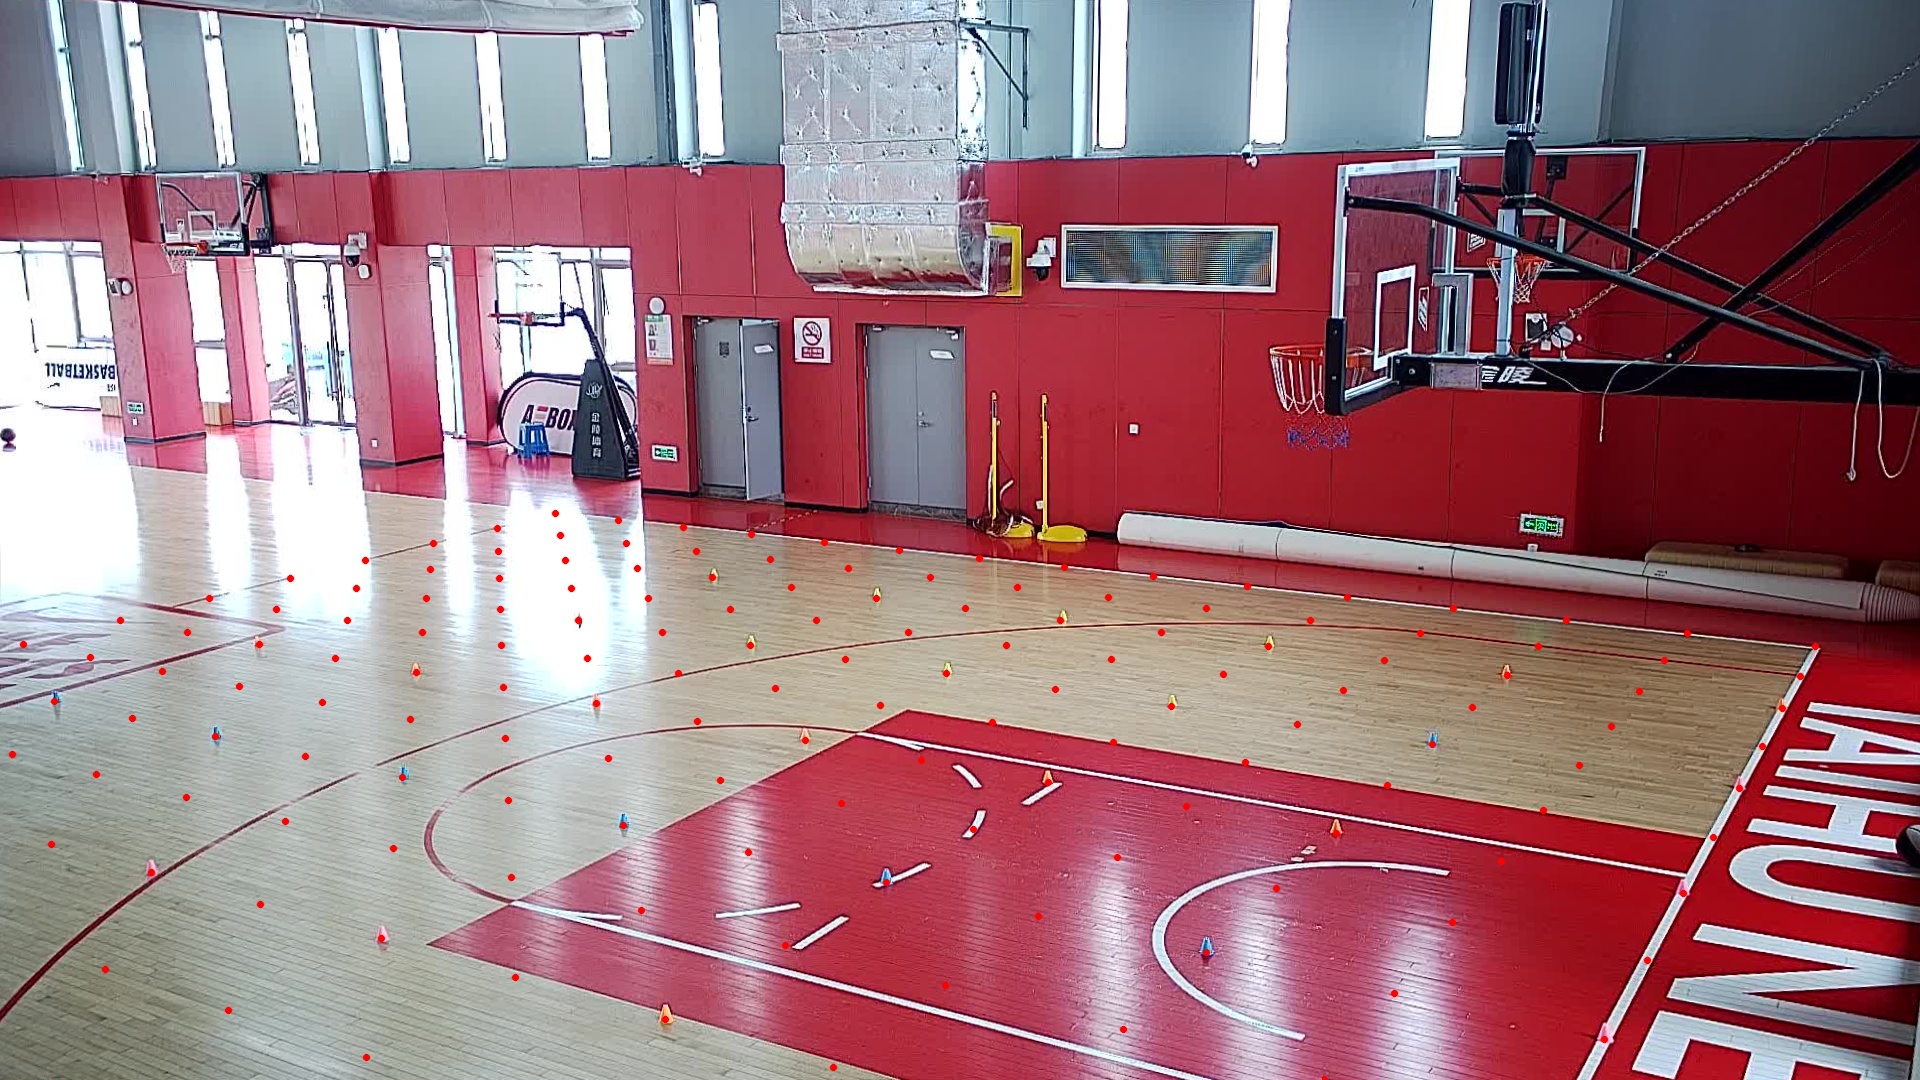
在个人篮球场这个实用场景中,只需要在地面按一定间隔摆放标志物(类似用标志物摆出一个棋盘格),之后在拍摄的图像中手动获取标志物的像素坐标,同样可以得到相机的内外参和畸变系数。
构建世界坐标系的时候绘制一张篮球场的模板图,同样手动选点即可,z轴坐标依然是0。
下图将世界坐标系中点位映射到畸变矫正图像的像素坐标系进行验证,可以看出映射非常准确。
注意:
(1)代码中输入 cv2.calibrateCamera 的点坐标数据类型需要是 np.float32 的
(2)取点的时候并不需要
n
×
m
n \\times m
n×m 这样类似网格的点,只要能一一对应即可
下面给出完整代码以供参考。
解释:
标点时鼠标左键取点,右键删点,标完后键盘按 s 进入标定。
camera_img_path:相机拍摄的图像
pattern_img_path:篮球场的模板图
camera_kpts_path:同下
pattern_kpts_path:npz文件,由于是模板图可以直接把精确的标志点位存下来,通过内部的 auto_select_kpt 函数鼠标点击附近的时候会自动选择精确的点位,便于取点,如果没有输入 None 即可
camera_select_kpts_path:同下
pattern_select_kpts_path:每次运行完后会存储所选择的点,方便之后可以直接读取,在此基础上进行增减点位等,没有同样输入 None 即可
mode:‘fisheye’ 对应鱼眼相机,否则为普通相机
import cv2.fisheye
from common import *
class App(object):
def __init__(self, camera_img_path, pattern_img_path,
camera_kpts_path=None, pattern_kpts_path=None,
camera_select_kpts_path=None, pattern_select_kpts_path=None,
save_path='output', mode=''):
check_path(save_path)
self.save_path = save_path
self.mode = mode
self.camera_window = 'camera'
self.pattern_window = 'pattern'
self.camera_img_path = camera_img_path
self.camera_img = cv2.imread(camera_img_path)
self.camera_kpts = None if camera_kpts_path is None else np.load(camera_kpts_path)['kpts']
self.pattern_img_path = pattern_img_path
self.pattern_img = cv2.imread(pattern_img_path)
self.pattern_kpts = None if pattern_kpts_path is None else np.load(pattern_kpts_path)['kpts']
self.pattern_kpts_select = self.read_select_kpts(pattern_select_kpts_path)
self.camera_kpts_select = self.read_select_kpts(camera_select_kpts_path)
@staticmethod
def read_select_kpts(path):
return [] if path is None else np.load(path)['kpts'].astype(np.int16).tolist()
@staticmethod
def auto_select_kpt(xy, kpts, dis=16):
x, y = xy
if kpts is None:
return xy
new_xy = kpts[np.argmin(np.sum((kpts - [x, y]) ** 2, 1))]
if np.sum((new_xy - [x, y]) ** 2) < dis ** 2:
return new_xy
else:
return xy
@staticmethod
def show_img(img, kpts, window, kpt_size=10, font_size=1):
i_show = img.copy()
for i, kpt in enumerate(kpts):
x, y = kpt
cv2.circle(i_show, (x, y), kpt_size, green, -1, 16)
cv2.putText(i_show, str(i), (kpt[0] + 10, kpt[1]),
cv2.FONT_HERSHEY_TRIPLEX, font_sizeopencv 单目相机pnp测距(Cpp)
概述
单目相机pnp测距是通过单目相机拍摄的一张2d图片,来测量图片中某物与相机的距离。
需要知道被测物的实际尺寸
测距前需要先相机标定,需要使用哪个相机进行测距就标定哪个。一旦换成了其他相机, 就要重新标定最终相机。
为什么要相机标定?
相机标定是为了得到从
3d世界中任意一点映射到相机拍摄得的
图片上对应点的
坐标变换细节。
上述坐标变换可以用矩阵运算式描述。
相机标定是为了获得
相机内参矩阵
。
相机内参矩阵只与相机本身有关,所以更换相机就需要获得新相机的两个矩阵,而与更换被测目标物体无关。
相机成像相关原理
相机内参矩阵:包括相机矩阵和畸变系数。
相机矩阵:[fx, 0, cx; 0, fy, cy; 0,0,1]。其中焦距(fx, fy),光学中心(cx, cy)。
畸变系数:畸变数学模型的5个参数k1,k2, P1, P2, k3。
相机外参:通过旋转和平移变换将点在3d世界的坐标转换为2d图像的平面坐标,其中的旋转矩阵和平移矩阵被称为相机外参。
相机成像的坐标变换过程:
3d世界坐标系-->相机坐标系:【3d世界的物体相对于世界原点的3维坐标】转换为【该物体以相机镜头中心为坐标原点时的3维坐标】
相机坐标系-->图像坐标系:【该物体以相机镜头中心为坐标原点时的3维坐标】转换为【成像到图像传感器上的2维坐标】
图像坐标系-->像素坐标系:图像坐标系上为连续的信息,对其采样,转换为非连续的像素
相机标定
准备
本文采用张正友标定法,标定板使用棋盘格。(标定的目的是获取相机内参,用什么方法、什么标定板不重要)
棋盘格可以使用opencv安装目录下自带的图片。(pip下载的python版不知道有没有)
D:\\opencv\\sources\\samples\\data (参考此路径)

注:将图片打印到纸上,可以缩放,但图片比例不要变。
标定时需要查找棋盘格的角点。
实测若棋盘格上覆盖有反光材料的时候极可能会
找不到角点(即便用肉眼看相机拍出来的图片根本看不出反光)。包括
用屏幕显示棋盘格、
在棋盘格纸上贴透明胶带。
拍摄标定要用的图片
运行一下代码
#include <opencv2/opencv.hpp>
#include <string>
#include <iostream>
using namespace cv;
using namespace std;
int main()
VideoCapture inputVideo(0);
if (!inputVideo.isOpened())
cout << "Could not open the input video " << endl;
return -1;
Mat frame;
Mat frameCopy;
string imgname;
vector<Point2f> image_points_buf;
bool isFound;
int f = 1;
while (1)
inputVideo >> frame;
frame.copyTo(frameCopy);
if (frame.empty())
break;
// 在未找到角点时,视频会很卡。可以将30到33行注释掉
isFound = findChessboardCorners(frameCopy, Size(7, 7), image_points_buf);
if(isFound)
drawChessboardCorners(frameCopy, Size(7, 7), image_points_buf, isFound);
imshow("Camera", frameCopy);
char key = waitKey(1);
if (key == 'q' || key == 'Q') // quit退出
break;
if (key == 'k' || key == 'K') // 拍摄当前帧
cout << "frame:" << f << endl;
imgname = "snapPhotos/"+to_string(f++) + ".jpg";
imwrite(imgname, frame);
cout << "Finished writing" << endl;
return 0;
上述代码会把拍摄的图片保存到当前工作目录下的snapPhotos文件夹内。
注:若代码无误,运行过程也没报错,运行完却找不到所拍摄的图片,可以看我这篇文章:https://blog.csdn.net/qq_35858902/article/details/128933950
在当前工作目录下新建calibdata.txt文件,填入一下内容(不要有空格,最后不要空行,别忘记保存):
snapPhotos/1.jpg
snapPhotos/2.jpg
snapPhotos/3.jpg
snapPhotos/4.jpg
snapPhotos/5.jpg
snapPhotos/6.jpg
snapPhotos/7.jpg
snapPhotos/8.jpg
snapPhotos/9.jpg
snapPhotos/10.jpg
若上面拍摄图片时,你没有保存到snapPhotos文件夹内,则需修改为你保存的实际路径。上为相对路径,也可以使用绝对路径:
D:/project_root/snapPhotos/1.jpg
开始标定
运行以下代码
此代码自https://blog.csdn.net/u012319493/article/details/77622053稍有修改
#include <iostream>
#include <sstream>
#include <time.h>
#include <stdio.h>
#include <fstream>
#include <opencv2/core/core.hpp>
#include <opencv2/imgproc/imgproc.hpp>
#include <opencv2/calib3d/calib3d.hpp>
#include <opencv2/highgui/highgui.hpp>
using namespace cv;
using namespace std;
void main()
ifstream fin("calibdata.txt"); /* 标定所用图像文件的路径 */
ofstream fout("caliberation_result.txt"); /* 保存标定结果的文件 */
// 读取每一幅图像,从中提取出角点,然后对角点进行亚像素精确化
int image_count = 0; /* 图像数量 */
Size image_size; /* 图像的尺寸 */
Size board_size = Size(7, 7); /* 标定板上每行、列的角点数 */
vector<Point2f> image_points_buf; /* 缓存每幅图像上检测到的角点 */
vector<vector<Point2f>> image_points_seq; /* 保存检测到的所有角点 */
string filename; // 图片名
vector<string> filenames;
while (getline(fin, filename))
++image_count;
Mat imageInput = imread(filename);
filenames.push_back(filename);
//imshow("file", imageInput);
//waitKey(0);
// 读入第一张图片时获取图片大小
if (image_count == 1)
image_size.width = imageInput.cols;
image_size.height = imageInput.rows;
/* 提取角点 */
if (findChessboardCorners(imageInput, board_size, image_points_buf) == false)
cout << "can not find chessboard corners!找不到角点\\n"; // 找不到角点
exit(1);
else
Mat view_gray;
cvtColor(imageInput, view_gray, COLOR_BGR2GRAY); // 转灰度图
/* 亚像素精确化 */
// image_points_buf 初始的角点坐标向量,同时作为亚像素坐标位置的输出
// Size(5,5) 搜索窗口大小
// (-1,-1)表示没有死区
// TermCriteria 角点的迭代过程的终止条件, 可以为迭代次数和角点精度两者的组合
cornerSubPix(view_gray, image_points_buf, Size(5, 5), Size(-1, -1), TermCriteria(TermCriteria::EPS + TermCriteria::MAX_ITER, 30, 0.1));
image_points_seq.push_back(image_points_buf); // 保存亚像素角点
/* 在图像上显示角点位置 */
drawChessboardCorners(view_gray, board_size, image_points_buf, false); // 用于在图片中标记角点
imshow("Camera Calibration", view_gray); // 显示图片
waitKey(500); //暂停0.5S
int CornerNum = board_size.width * board_size.height; // 每张图片上总的角点数
//-------------以下是摄像机标定------------------
/*棋盘三维信息*/
Size square_size = Size(2.6, 2.6); /* 实际测量得到的标定板上每个棋盘格的两边长,单位自定,但要保持统一 */
vector<vector<Point3f>> object_points; /* 保存标定板上角点的三维坐标 */
/*内外参数*/
Mat cameraMatrix = Mat(3, 3, CV_32FC1, Scalar::all(0)); /* 摄像机内参数矩阵 */
vector<int> point_counts; // 每幅图像中角点的数量
Mat distCoeffs = Mat(1, 5, CV_32FC1, Scalar::all(0)); /* 摄像机的5个畸变系数:k1,k2,p1,p2,k3 */
vector<Mat> tvecsMat; /* 每幅图像的旋转向量 */
vector<Mat> rvecsMat; /* 每幅图像的平移向量 */
/* 初始化标定板上角点的三维坐标 */
int i, j, t;
for (t = 0; t < image_count; t++)
vector<Point3f> tempPointSet;
for (i = 0; i < board_size.height; i++)
for (j = 0; j < board_size.width; j++)
Point3f realPoint;
/* 假设标定板放在世界坐标系中z=0的平面上 */
realPoint.x = i * square_size.width;
realPoint.y = j * square_size.height;
realPoint.z = 0;
tempPointSet.push_back(realPoint);
object_points.push_back(tempPointSet);
/* 初始化每幅图像中的角点数量,假定每幅图像中都可以看到完整的标定板 */
for (i = 0; i < image_count; i++)
point_counts.push_back(board_size.width * board_size.height);
/* 开始标定 */
// object_points 世界坐标系中的角点的三维坐标
// image_points_seq 每一个内角点对应的图像坐标点
// image_size 图像的像素尺寸大小
// cameraMatrix 输出,内参矩阵
// distCoeffs 输出,畸变系数
// rvecsMat 输出,旋转向量
// tvecsMat 输出,位移向量
// 0 标定时所采用的算法
calibrateCamera(object_points, image_points_seq, image_size, cameraMatrix, distCoeffs, rvecsMat, tvecsMat, 0);
//------------------------标定完成------------------------------------
// -------------------对标定结果进行评价------------------------------
double total_err = 0.0; /* 所有图像的平均误差的总和 */
double err = 0.0; /* 每幅图像的平均误差 */
vector<Point2f> image_points2; /* 保存重新计算得到的投影点 */
fout << "每幅图像的标定误差:\\n";
for (i = 0; i < image_count; i++)
vector<Point3f> tempPointSet = object_points[i];
/* 通过得到的摄像机内外参数,对空间的三维点进行重新投影计算,得到新的投影点 */
projectPoints(tempPointSet, rvecsMat[i], tvecsMat[i], cameraMatrix, distCoeffs, image_points2);
/* 计算新的投影点和旧的投影点之间的误差*/
vector<Point2f> tempImagePoint = image_points_seq[i];
Mat tempImagePointMat = Mat(1, tempImagePoint.size(), CV_32FC2);
Mat image_points2Mat = Mat(1, image_points2.size(), CV_32FC2);
for (int j = 0; j < tempImagePoint.size(); j++)
image_points2Mat.at<Vec2f>(0, j) = Vec2f(image_points2[j].x, image_points2[j].y);
tempImagePointMat.at<Vec2f>(0, j) = Vec2f(tempImagePoint[j].x, tempImagePoint[j].y);
err = norm(image_points2Mat, tempImagePointMat, NORM_L2);
total_err += err /= point_counts[i];
fout << "第" << i + 1 << "幅图像的平均误差:" << err << "像素" << endl;
fout << "总体平均误差:" << total_err / image_count << "像素" << endl << endl;
//-------------------------评价完成---------------------------------------------
//-----------------------保存定标结果-------------------------------------------
Mat rotation_matrix = Mat(3, 3, CV_32FC1, Scalar::all(0)); /* 保存每幅图像的旋转矩阵 */
fout << "相机内参数矩阵:" << endl;
fout << cameraMatrix << endl << endl;
fout << "畸变系数:\\n";
fout << distCoeffs << endl << endl << endl;
for (int i = 0; i < image_count; i++)
fout << "第" << i + 1 << "幅图像的旋转向量:" << endl;
fout << tvecsMat[i] << endl;
/* 将旋转向量转换为相对应的旋转矩阵 */
Rodrigues(tvecsMat[i], rotation_matrix);
fout << "第" << i + 1 << "幅图像的旋转矩阵:" << endl;
fout << rotation_matrix << endl;
fout << "第" << i + 1 << "幅图像的平移向量:" << endl;
fout << rvecsMat[i] << endl << endl;
fout << endl;
//--------------------标定结果保存结束-------------------------------
//----------------------显示定标结果--------------------------------
Mat mapx = Mat(image_size, CV_32FC1);
Mat mapy = Mat(image_size, CV_32FC1);
Mat R = Mat::eye(3, 3, CV_32F);
string imageFileName;
std::stringstream StrStm;
for (int i = 0; i != image_count; i++)
initUndistortRectifyMap(cameraMatrix, distCoeffs, R, cameraMatrix, image_size, CV_32FC1, mapx, mapy);
Mat imageSource = imread(filenames[i]);
Mat newimage = imageSource.clone();
remap(imageSource, newimage, mapx, mapy, INTER_LINEAR);
StrStm.clear();
imageFileName.clear();
StrStm << i + 1;
StrStm >> imageFileName;
imageFileName += "_d.jpg";
imageFileName = "calibrated/" + imageFileName;
imwrite(imageFileName, newimage);
fin.close();
fout.close();
return;
-上述代码第23行board_size,(7, 7)指棋盘格内部横纵各有7个角点,如果你用的是本文提供的opencv自带的棋盘格,则不需要修改。
- 第76行看注释自行修改
运行成功后会在当前工作目录下生成一个caliberation_result.txt文件,里面有内参矩阵。
测距
运行如下代码:
#include <opencv2/opencv.hpp>
#include <math.h>
using namespace std;
using namespace cv;
int main(int argc, char** argv)
Mat image = imread("test.jpg");
//被测物某个平面需要特征点,特征点可以是角点,但需要可测出实际坐标
//2d图像特征点像素坐标,可以用鼠标事件找出特征点坐标
vector<Point2d> image_points;
image_points.push_back(Point2d(298, 159));
image_points.push_back(Point2d(380, 159));
image_points.push_back(Point2d(380, 240));
image_points.push_back(Point2d(298, 240));
// 画出特征点
for (int i = 0; i < image_points.size(); i++)
circle(image, image_points[i], 3, Scalar(0, 0, 255), -1);
// 3D 特征点世界坐标,与像素坐标对应,单位是与标定时填的实际测量棋盘格大小的单位相同,如同是cm或同是mm
//世界坐标指所选的特征点在物理世界中的3d坐标,坐标原点自己选。
//下面以物块平面正中心为坐标原点,x正方向朝右,y正方向朝下
std::vector<Point3d> model_points;
model_points.push_back(Point3d(-1.4f, -1.45f, 0)); // 左上角(-1.4cm,-1.45cm)
model_points.push_back(Point3d(+1.4f, -1.45f, 0));
model_points.push_back(Point3d(+1.4f, +1.45f, 0));
model_points.push_back(Point3d(-1.4f, +1.45f, 0));
// 注意世界坐标和像素坐标要一一对应
// 相机内参矩阵和畸变系数均由相机标定结果得出
// 相机内参矩阵
Mat camera_matrix = (Mat_<double>(3, 3) << 659.9293277147924, 0, 145.8791713723572,
0, 635.3941888799933, 120.2096985290085,
0, 0, 1);
// 相机畸变系数
Mat dist_coeffs = (Mat_<double>(5, 1) << -0.5885200737681696, 0.6747491058456546, 0.006768694852797847,
0.02067272313155804, -0.3616453058722507);
cout << "Camera Matrix " << endl << camera_matrix << endl << endl;
// 旋转向量
Mat rotation_vector;
// 平移向量
Mat translation_vector;
// pnp求解
solvePnP(model_points, image_points, camera_matrix, dist_coeffs, \\
rotation_vector, translation_vector, 0, SOLVEPNP_ITERATIVE);
// ITERATIVE方法,其他方法参照官方文档
cout << "Rotation Vector " << endl << rotation_vector << endl << endl;
cout << "Translation Vector" << endl << translation_vector << endl << endl;
Mat Rvec;
Mat_<float> Tvec;
rotation_vector.convertTo(Rvec, CV_32F); // 旋转向量转换格式
translation_vector.convertTo(Tvec, CV_32F); // 平移向量转换格式
Mat_<float> rotMat(3, 3);
Rodrigues(Rvec, rotMat);
// 旋转向量转成旋转矩阵
cout << "rotMat" << endl << rotMat << endl << endl;
Mat P_oc;
P_oc = -rotMat.inv() * Tvec;
// 求解相机的世界坐标,得出p_oc的第三个元素即相机到物体的距离即深度信息,单位是mm
cout << "P_oc" << endl << P_oc << endl;
imshow("Output", image);
waitKey(0);
第12、27、36、40行,看注释修改。
运行成功后终端会输出信息,P_oc最后一个数即为距离,单位跟之前一致。
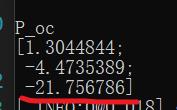
本文使用的单位是cm,故测出来约为21.7568cm
以上是关于Python OpenCV 单目相机标定坐标转换相关代码(包括鱼眼相机)的主要内容,如果未能解决你的问题,请参考以下文章