目标检测小脚本:YOLO标签可视化
Posted zstar-_
tags:
篇首语:本文由小常识网(cha138.com)小编为大家整理,主要介绍了目标检测小脚本:YOLO标签可视化相关的知识,希望对你有一定的参考价值。
需求分析
在下载别人标注好的目标检测数据集时,我突然想到一个问题:怎么直观得看别人标注的是否正确呢?于是我想到了可以利用opencv将标注数据还原到原图上。
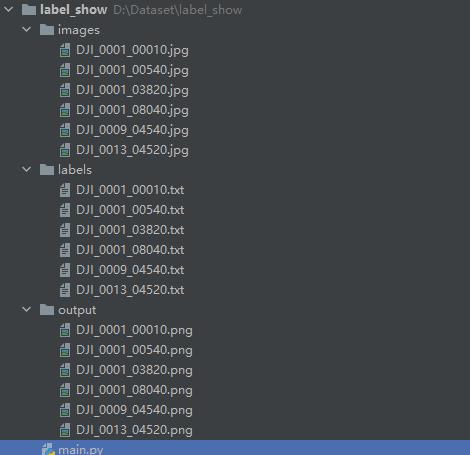
更具体的说,指定图片和标签文件夹,批量输出还原后的图片。
需求实现
由于没找到完全符合我需求的脚本,于是在前人的基础上,新增了批量修改,颜色修改等功能,满足了我的需求。
注意标签须是YOLO所需要的txt类型。
import os
import numpy as np
import cv2

# 修改输入图片文件夹
img_folder = "images/"
img_list = os.listdir(img_folder)
img_list.sort()
# 修改输入标签文件夹
label_folder = "labels/"
label_list = os.listdir(label_folder)
label_list.sort()
# 输出图片文件夹位置
path = os.getcwd()
output_folder = path + '/' + str("output")
os.mkdir(output_folder)
# labels = ['truck', 'panzer', 'tank', 'SUV', 'cam_net', 'cam_tar']
colormap = [(0, 255, 0), (132, 112, 255), (0, 191, 255)]  # 色盘,可根据类别添加新颜色


# 坐标转换
def xywh2xyxy(x, w1, h1, img):
    label, x, y, w, h = x
    # print("原图宽高:\\nw1=\\nh1=".format(w1, h1))
    # 边界框反归一化
    x_t = x * w1
    y_t = y * h1
    w_t = w * w1
    h_t = h * h1
    # print("反归一化后输出:\\n第一个:\\t第二个:\\t第三个:\\t第四个:\\t\\n\\n".format(x_t, y_t, w_t, h_t))
    # 计算坐标
    top_left_x = x_t - w_t / 2
    top_left_y = y_t - h_t / 2
    bottom_right_x = x_t + w_t / 2
    bottom_right_y = y_t + h_t / 2

    # print('标签:'.format(labels[int(label)]))
    # print("左上x坐标:".format(top_left_x))
    # print("左上y坐标:".format(top_left_y))
    # print("右下x坐标:".format(bottom_right_x))
    # print("右下y坐标:".format(bottom_right_y))
    # 绘制矩形框
    cv2.rectangle(img, (int(top_left_x), int(top_left_y)), (int(bottom_right_x), int(bottom_right_y)), colormap[1], 2)
    """
    # (可选)给不同目标绘制不同的颜色框
    if int(label) == 0:
       cv2.rectangle(img, (int(top_left_x), int(top_left_y)), (int(bottom_right_x), int(bottom_right_y)), (0, 255, 0), 2)
    elif int(label) == 1:
       cv2.rectangle(img, (int(top_left_x), int(top_left_y)), (int(bottom_right_x), int(bottom_right_y)), (255, 0, 0), 2)
    """
    return img


if __name__ == '__main__':
    for i in range(len(img_list)):
        image_path = img_folder + "/" + img_list[i]
        label_path = label_folder + "/" + label_list[i]
        # 读取图像文件
        img = cv2.imread(str(image_path))
        h, w = img.shape[:2]
        # 读取 labels
        with open(label_path, 'r') as f:
            lb = np.array([x.split() for x in f.read().strip().splitlines()], dtype=np.float32)
        # 绘制每一个目标
        for x in lb:
            # 反归一化并得到左上和右下坐标,画出矩形框
            img = xywh2xyxy(x, w, h, img)
        """
        # 直接查看生成结果图
        cv2.imshow('show', img)
        cv2.waitKey(0)
        """
        cv2.imwrite(output_folder + '/' + '.png'.format(image_path.split('/')[-1][:-4]), img)
文件结构

以上是关于目标检测小脚本:YOLO标签可视化的主要内容,如果未能解决你的问题,请参考以下文章