uniapp-路由uni-simple-router
Posted 智江鹏
tags:
篇首语:本文由小常识网(cha138.com)小编为大家整理,主要介绍了uniapp-路由uni-simple-router相关的知识,希望对你有一定的参考价值。
背景
- 专为uniapp打造的路由器,和uniapp深度集成
- 通配小程序、App和H5端
- H5能完全使用vue-router开发
- 模块化、查询、通配符、路由参数
- 使 uni-app实现嵌套路由(仅H5端完全使用vue-router)
- uniapp用到了很多vue的api,但在路由管理的功能相对于vue-router还是比较欠缺的,比如全局导航守卫
安装
// 项目根目录执行命令行
npm install uni-simple-router
// 根据pages.json总的页面,自动构建路由表
npm install uni-read-pages
配置vue.config.js
注:如果根目录没有vue.config.js文件,请手动创建
// vue.config.js
const TransformPages = require('uni-read-pages')
const  webpack  = new TransformPages()
module.exports =
	configureWebpack:
		plugins: [
			new webpack.DefinePlugin(
				ROUTES: webpack.DefinePlugin.runtimeValue(() =>
					const tfPages = new TransformPages(
						includes: ['path', 'name', 'aliasPath','meta']
					);
					return JSON.stringify(tfPages.routes)
				, true)
			)
		]
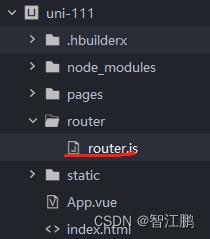
新建router.js文件
import  RouterMount, createRouter  from 'uni-simple-router';

const router = createRouter(
	platform: process.env.VUE_APP_PLATFORM,
	routes: [...ROUTES]
);
//全局路由前置守卫
router.beforeEach((to, from, next) =>
//权限控制登录
	if(to.meta.auth)
		console.log("需要登录");
		if("token")
			next();
		else
			console.log("请登录");

	else
		console.log("不需要登录");
         next();


	console.log("前置守卫"+JSON.stringify(to));

);
// 全局路由后置守卫
router.afterEach((to, from) =>
	console.log('跳转结束')
)

export
	router,
	RouterMount
main.js
import router,RouterMount from './router/router.js'  //路径换成自己的
Vue.use(router)


//v1.3.5起 H5端 你应该去除原有的app.$mount();使用路由自带的渲染方式
// #ifdef H5
	RouterMount(app,router,'#app')
// #endif

// #ifndef H5
	app.$mount(); //为了兼容小程序及app端必须这样写才有效果
// #endif
page.json
	"pages": [ //pages数组中第一项表示应用启动页,参考:https://uniapp.dcloud.io/collocation/pages

			"path": "pages/index/index",
			"name": "index",
			"style":
				"navigationBarTitleText": "uni-app"

		,
			"path": "pages/home/home",
			"name": "home",
			"meta":
				"auth": false, //需要登录
				"async": true, //是否同步
				"title": "首页", //标题
				"group": "商城" //分组
			,
			"style":
				"navigationBarTitleText": "",
				"enablePullDownRefresh": false


		,
			"path": "pages/haha/haha",
			"name": "haha",
			"meta":
				"auth": true, //需要登录
				"async": true, //是否同步
				"title": "首页", //标题
				"group": "商城" //分组
			,
			"style":
				"navigationBarTitleText": "",
				"enablePullDownRefresh": false


	],
	"globalStyle":
		"navigationBarTextStyle": "black",
		"navigationBarTitleText": "uni-app",
		"navigationBarBackgroundColor": "#F8F8F8",
		"backgroundColor": "#F8F8F8"
页面跳转和参数接收
- push()
- pushTab() : 跳转tar栏
- replace() : 替换
- replaceAll() : 替换所有
- back() : 直接带上数字返回第几层
- 注意:path和query配合使用,而name和params配合使用
//通过name方式跳转
this.$Router.push(
					name: 'home',
					params:
						name: 'Joseph',
						age: 22

				)

------------------------------------
//通过path形式进行跳转
this.$Router.push(
					 path: '/pages/haha/haha',
					    query:
					        name: 'Josdep33333h',
					        age: 24

				)
-------------------------------------
//用uni形式跳转到新页面,并传递参数
uni.navigateTo(
					url:'/pages/home/home?id=2&name=Josep33333h'
				);
// 页面接收参数——query中的参数
onLoad()
// query传参
const query=this.$Route.query
// params传参
const params=this.$Route.params
组件
// 首先在main.js中进行注册,将my-link注册为全局组件,注册后使用方法同<router-link>
import Mylink from './node_modules/uni-simple-router/dist/link.vue'
Vue.component('my-link',Mylink)


// 使用
// navType对应的就是push/pushTab/replace/replaceAll
<my-link to="path: '/pages/mine/index',query: name: '我只想去tab5的my-link'" navType="pushTab">
    <button type="default">我是router-link</button>
</my-link>
	onLoad(option)
			//原生获取数据
				console.log("zz",option);
			// query传参
			    const query=this.$Route.query
				console.log(query);
			    // params传参
			    const params=this.$Route.params
				console.log(params);
详情使用参考
uniapp路由—— uni-simple-router
要在uniapp中使用路由守卫,uniapp原生的api是比较欠缺的,所以要用‘uni-simple-router’插件包
安装
// 项目根目录执行命令行
npm install uni-simple-router
// 根据pages.json总的页面,自动构建路由表
npm install uni-read-pages
配置vue.config.js
注:如果根目录没有vue.config.js文件,要手动创建
// vue.config.js
const TransformPages = require('uni-read-pages')
const  webpack  = new TransformPages()
module.exports =
	configureWebpack:
		plugins: [
			new webpack.DefinePlugin(
				ROUTES: webpack.DefinePlugin.runtimeValue(() =>
					const tfPages = new TransformPages(
						includes: ['path', 'name', 'aliasPath','meta']
					);
					return JSON.stringify(tfPages.routes)
				, true)
			)
		]
在router文件夹 下对应的 js文件 中写如下代码
import  RouterMount, createRouter  from 'uni-simple-router';

const router = createRouter(
	platform: process.env.VUE_APP_PLATFORM,
	routes: [...ROUTES]
);
//全局路由前置守卫
router.beforeEach((to, from, next) =>
//权限控制登录
	if(to.meta.auth)
		console.log("需要登录");
		if("token")
			next();
		else
			console.log("请登录");

	else
		console.log("不需要登录");
         next();


	console.log("前置守卫"+JSON.stringify(to));

);
// 全局路由后置守卫
router.afterEach((to, from) =>
	console.log('跳转结束')
)

export
	router,
	RouterMount
main.js
import router,RouterMount from './router/router.js'  //路径换成自己的
Vue.use(router)


//v1.3.5起 H5端 你应该去除原有的app.$mount();使用路由自带的渲染方式
// #ifdef H5
	RouterMount(app,router,'#app')
// #endif

// #ifndef H5
	app.$mount(); //为了兼容小程序及app端必须这样写才有效果
// #endif
page.json
	"pages": [ //pages数组中第一项表示应用启动页,参考:https://uniapp.dcloud.io/collocation/pages

			"path": "pages/index/index",
			"name": "index",
			"style":
				"navigationBarTitleText": "uni-app"

		,
			"path": "pages/home/home",
			"name": "home",
			"meta":
				"auth": false, //需要登录
				"async": true, //是否同步
				"title": "首页", //标题
				"group": "商城" //分组
			,
			"style":
				"navigationBarTitleText": "",
				"enablePullDownRefresh": false


		,
			"path": "pages/haha/haha",
			"name": "haha",
			"meta":
				"auth": true, //需要登录
				"async": true, //是否同步
				"title": "首页", //标题
				"group": "商城" //分组
			,
			"style":
				"navigationBarTitleText": "",
				"enablePullDownRefresh": false


	],
	"globalStyle":
		"navigationBarTextStyle": "black",
		"navigationBarTitleText": "uni-app",
		"navigationBarBackgroundColor": "#F8F8F8",
		"backgroundColor": "#F8F8F8"
页面跳转和参数接收
- push()
- pushTab() : 跳转tar栏
- replace() : 替换
- replaceAll() : 替换所有
- back() : 直接带上数字返回第几层
- 注意:path和query配合使用,而name和params配合使用
//通过name方式跳转
this.$Router.push(
					name: 'home',
					params:
						name: 'Joseph',
						age: 22

				)

------------------------------------
//通过path形式进行跳转
this.$Router.push(
					 path: '/pages/haha/haha',
					    query:
					        name: 'Josdep33333h',
					        age: 24

				)
-------------------------------------
//用uni形式跳转到新页面,并传递参数
uni.navigateTo(
					url:'/pages/home/home?id=2&name=Josep33333h'
				);
获取参数
	onLoad(option)
			//原生获取数据
				console.log("zz",option);
			// query传参
			    const query=this.$Route.query
				console.log(query);
			    // params传参
			    const params=this.$Route.params
				console.log(params);
以上是关于uniapp-路由uni-simple-router的主要内容,如果未能解决你的问题,请参考以下文章