使用Eclipse搭建SpringBoot项目
Posted 川上川下山
tags:
篇首语:本文由小常识网(cha138.com)小编为大家整理,主要介绍了使用Eclipse搭建SpringBoot项目相关的知识,希望对你有一定的参考价值。
使用Eclipse搭建SpringBoot项目
一、创建项目过程
01、点击eclipse左上角file—new—other
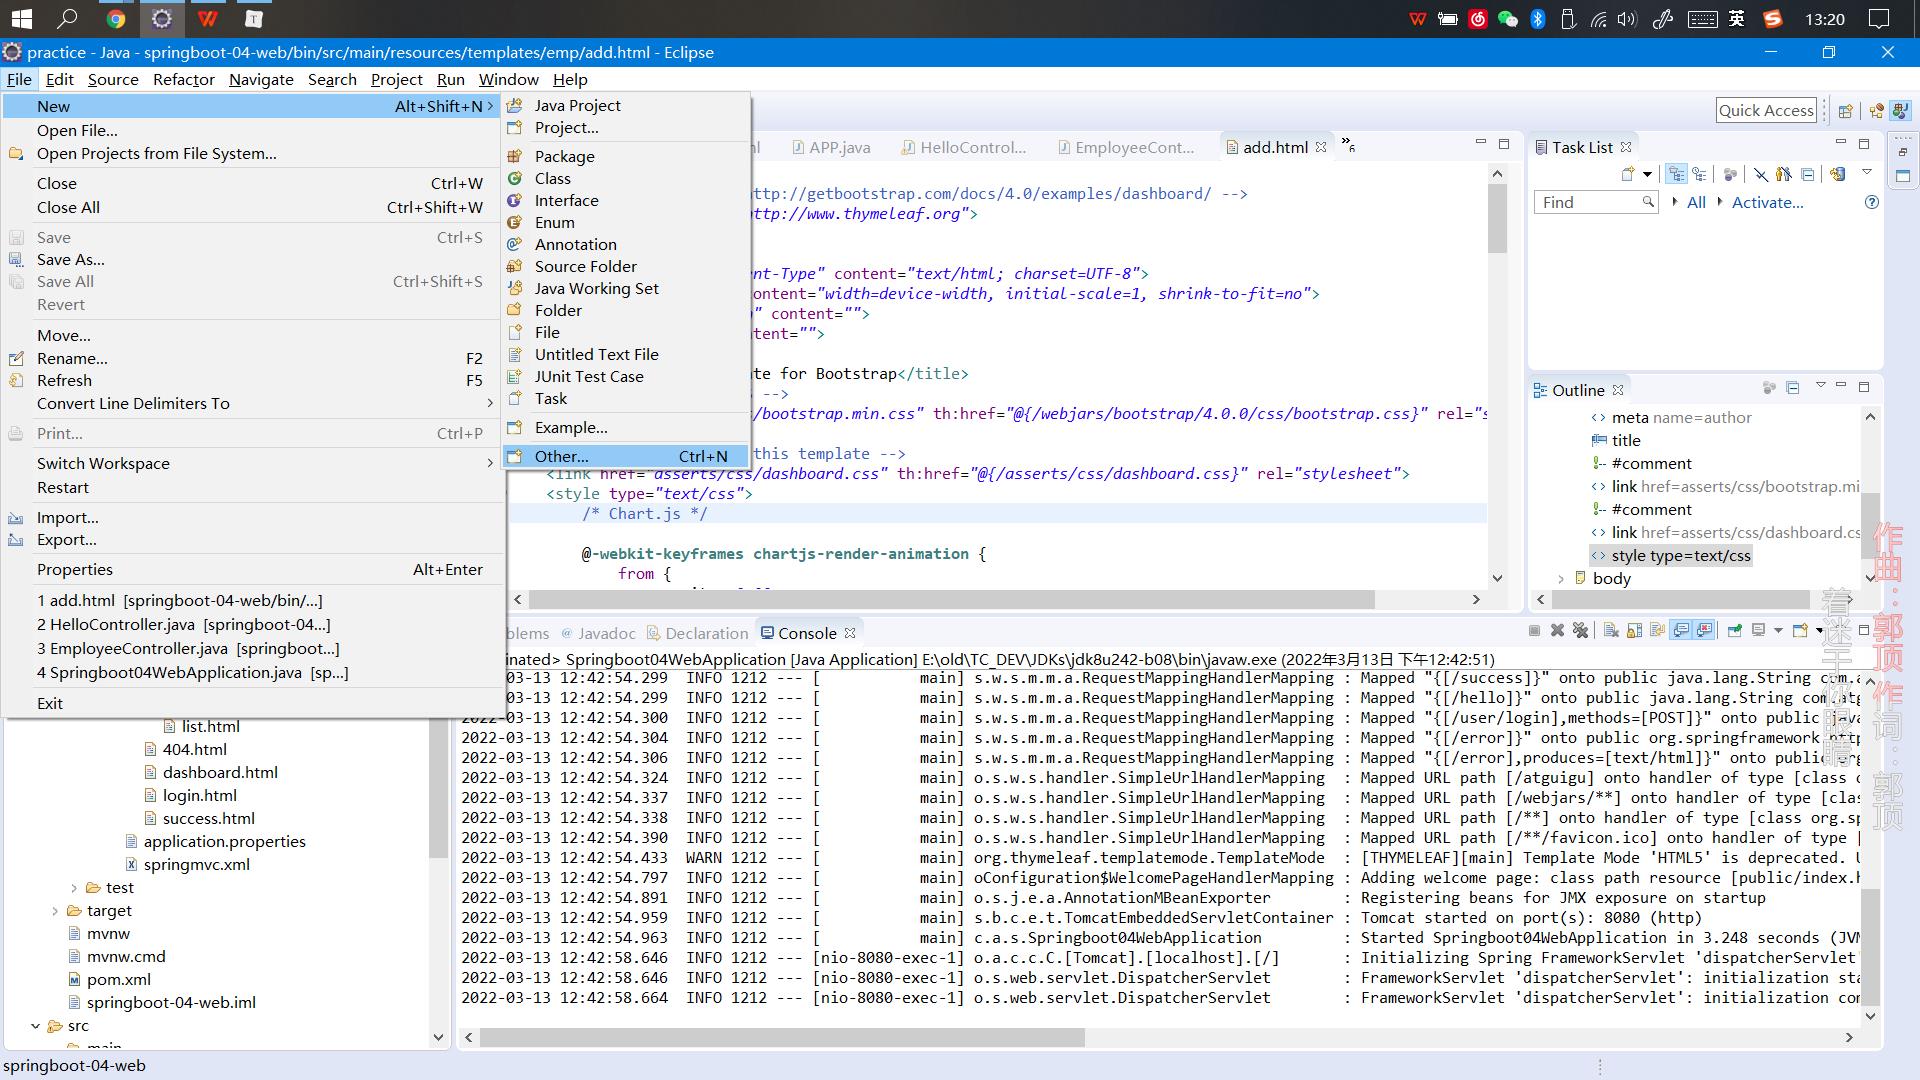
02、选择 Maven Project,点击Next
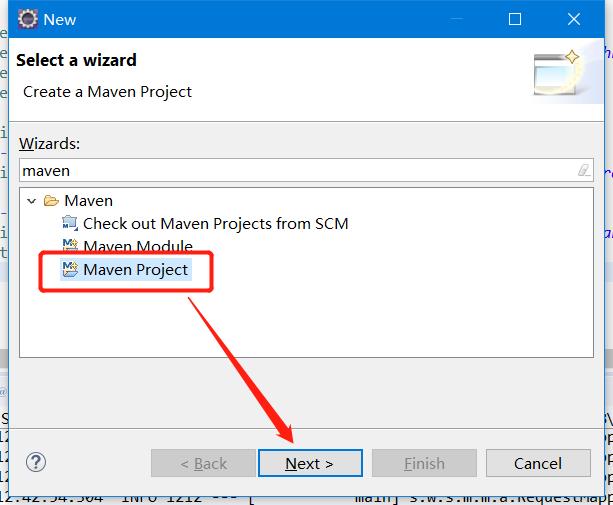
03、 选择项目存放位置,点击Next
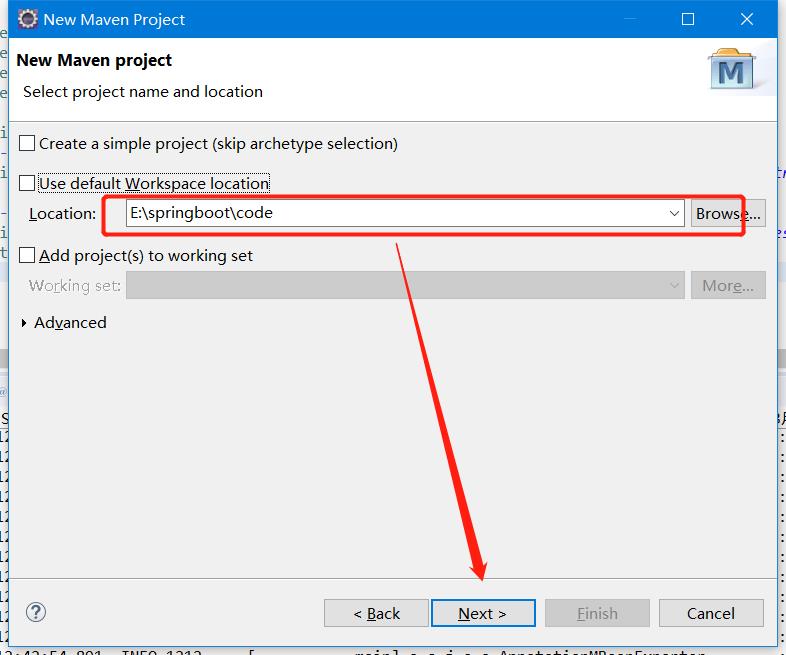
04、选择以 quickstart 或者webapp结尾的点击Next
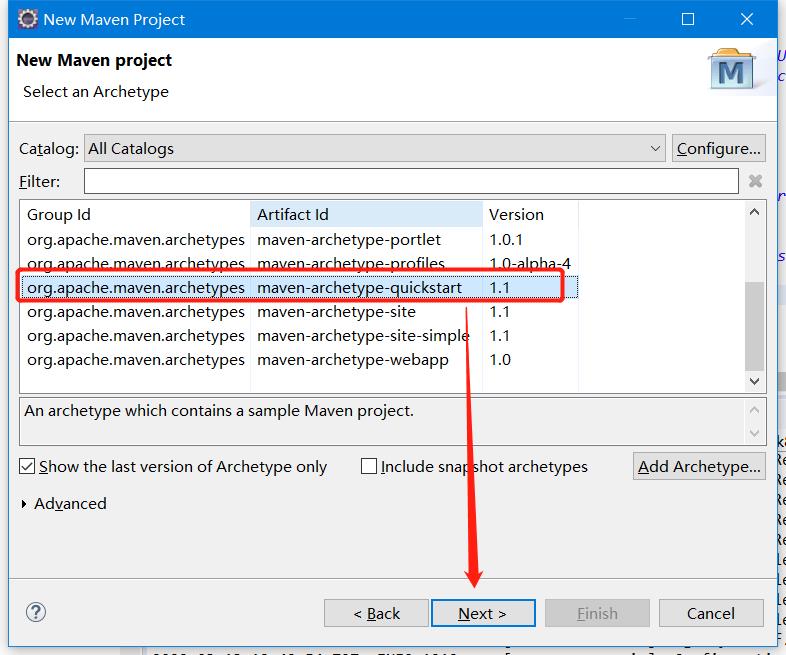
05、填写好Group Id、 Artifact Id , 填写好后,Package一栏会自动生成,这也就是项目中的包名,点击Finish
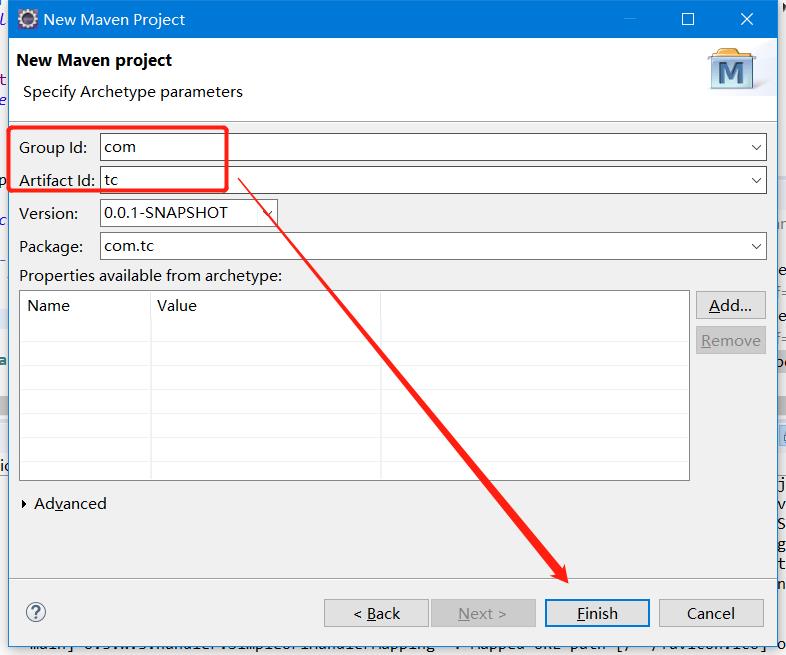
06、项目创建完成
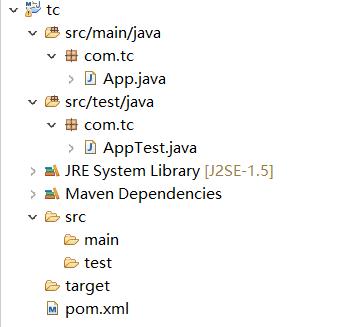
第一次创建springboot项目时,创建完成后项目会有一个红叉(虽然不影响运行)
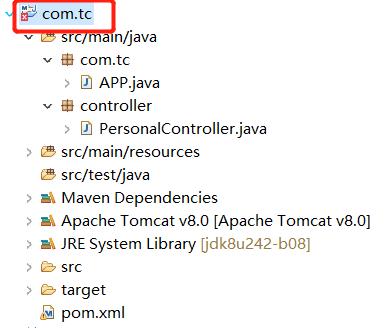
原因: maven默认编译版本与使用的jdk不匹配
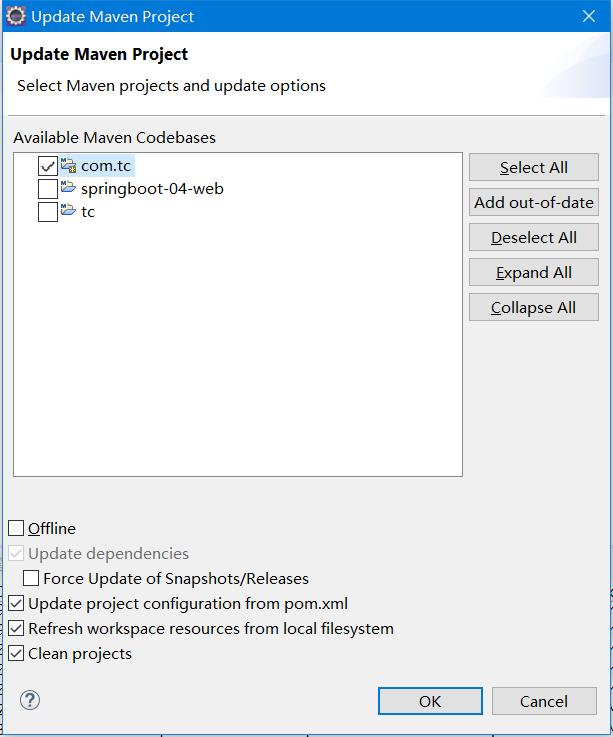
解决办法: 选中工程:右键单击–> Maven --> Update Project
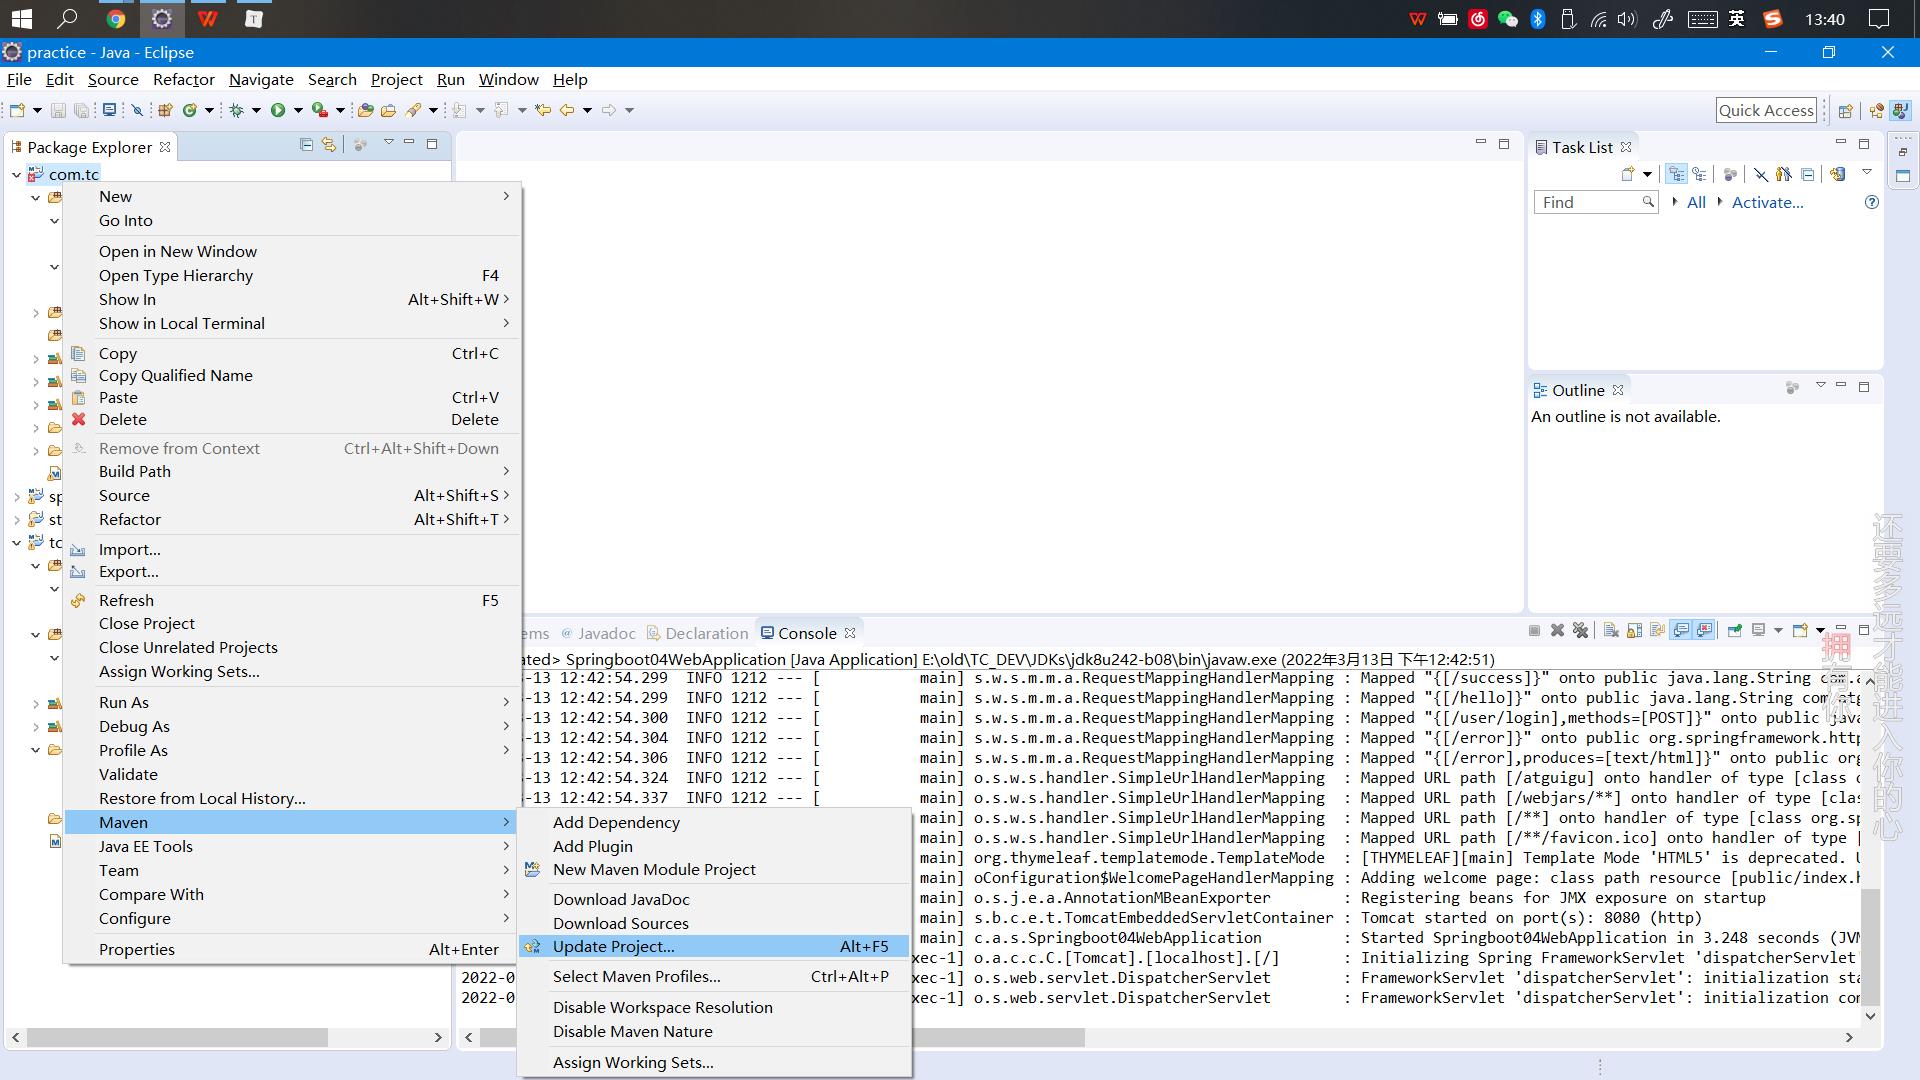
什么都不用管,直接点击ok就行
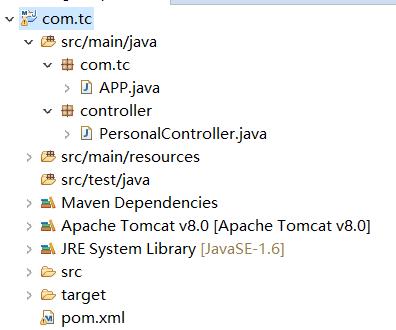
解决完成,小红叉消失了
二、加入相关依赖、配置
01、加入SpringBoot框架: 打开pom.xml文件
定义父类:springboot 所有jar包版本,我这里使用 2.0.5.RELEASE 版本
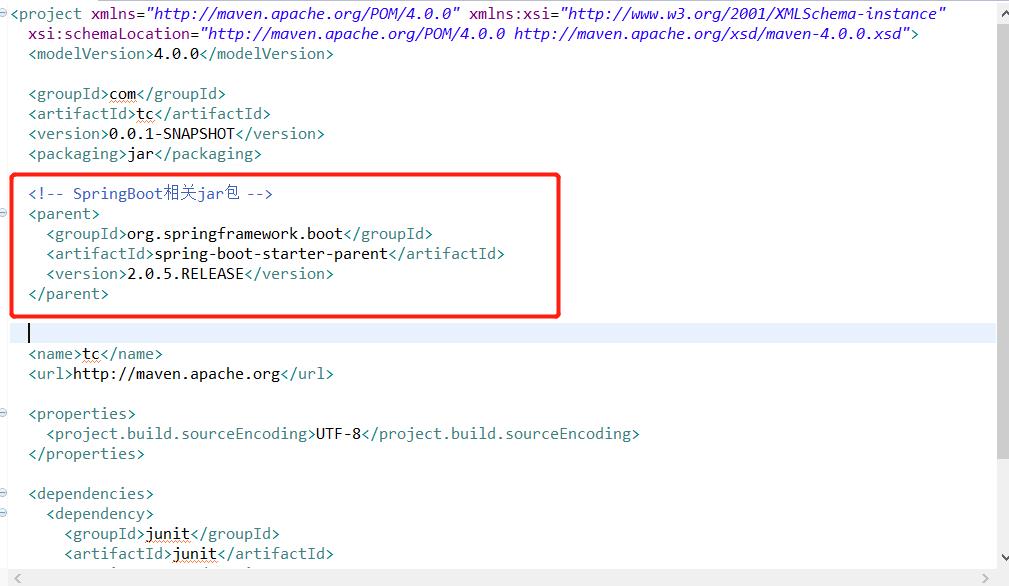
<!-- SpringBoot相关jar包 -->
   <parent>
  	<groupId>org.springframework.boot</groupId>
  	<artifactId>spring-boot-starter-parent</artifactId>
  	<version>2.0.5.RELEASE</version>
  </parent>
02、加入springboot核心包和web开发的一些必要的包
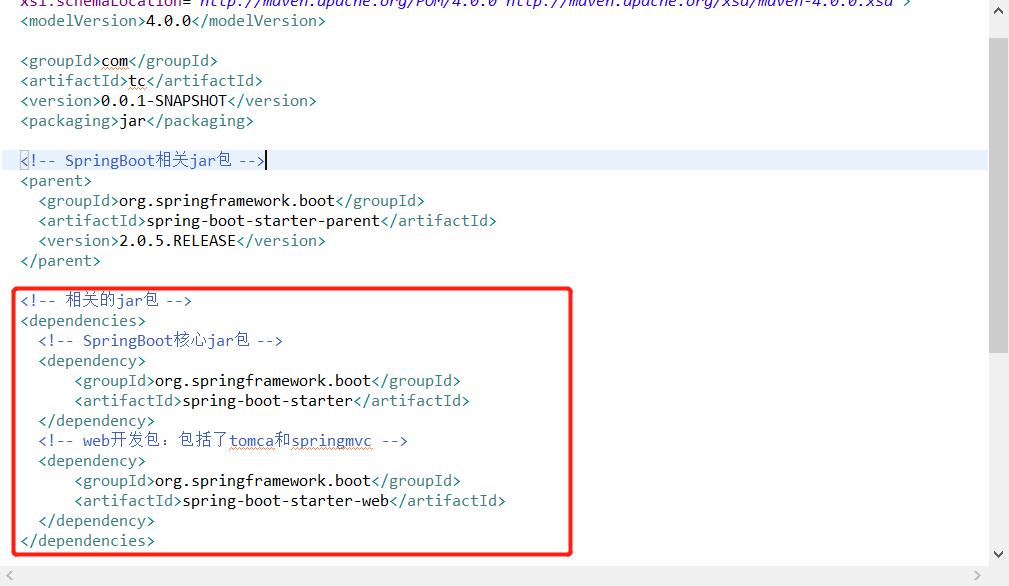
<!-- 相关的jar包 -->
  <dependencies>
  	<!-- SpringBoot核心jar包 -->
  	<dependency>
  		<groupId>org.springframework.boot</groupId>
  		<artifactId>spring-boot-starter</artifactId>
  	</dependency>
  	<!-- web开发包:包括了tomca和springmvc -->
  	<dependency>
  		<groupId>org.springframework.boot</groupId>
  		<artifactId>spring-boot-starter-web</artifactId>
  	</dependency>
  </dependencies>
03、创建App类,用来启动项目(创建项目的时候已经生成有这个类了,只需要修改就行:这个类里就一个注释和一个程序启动方法)
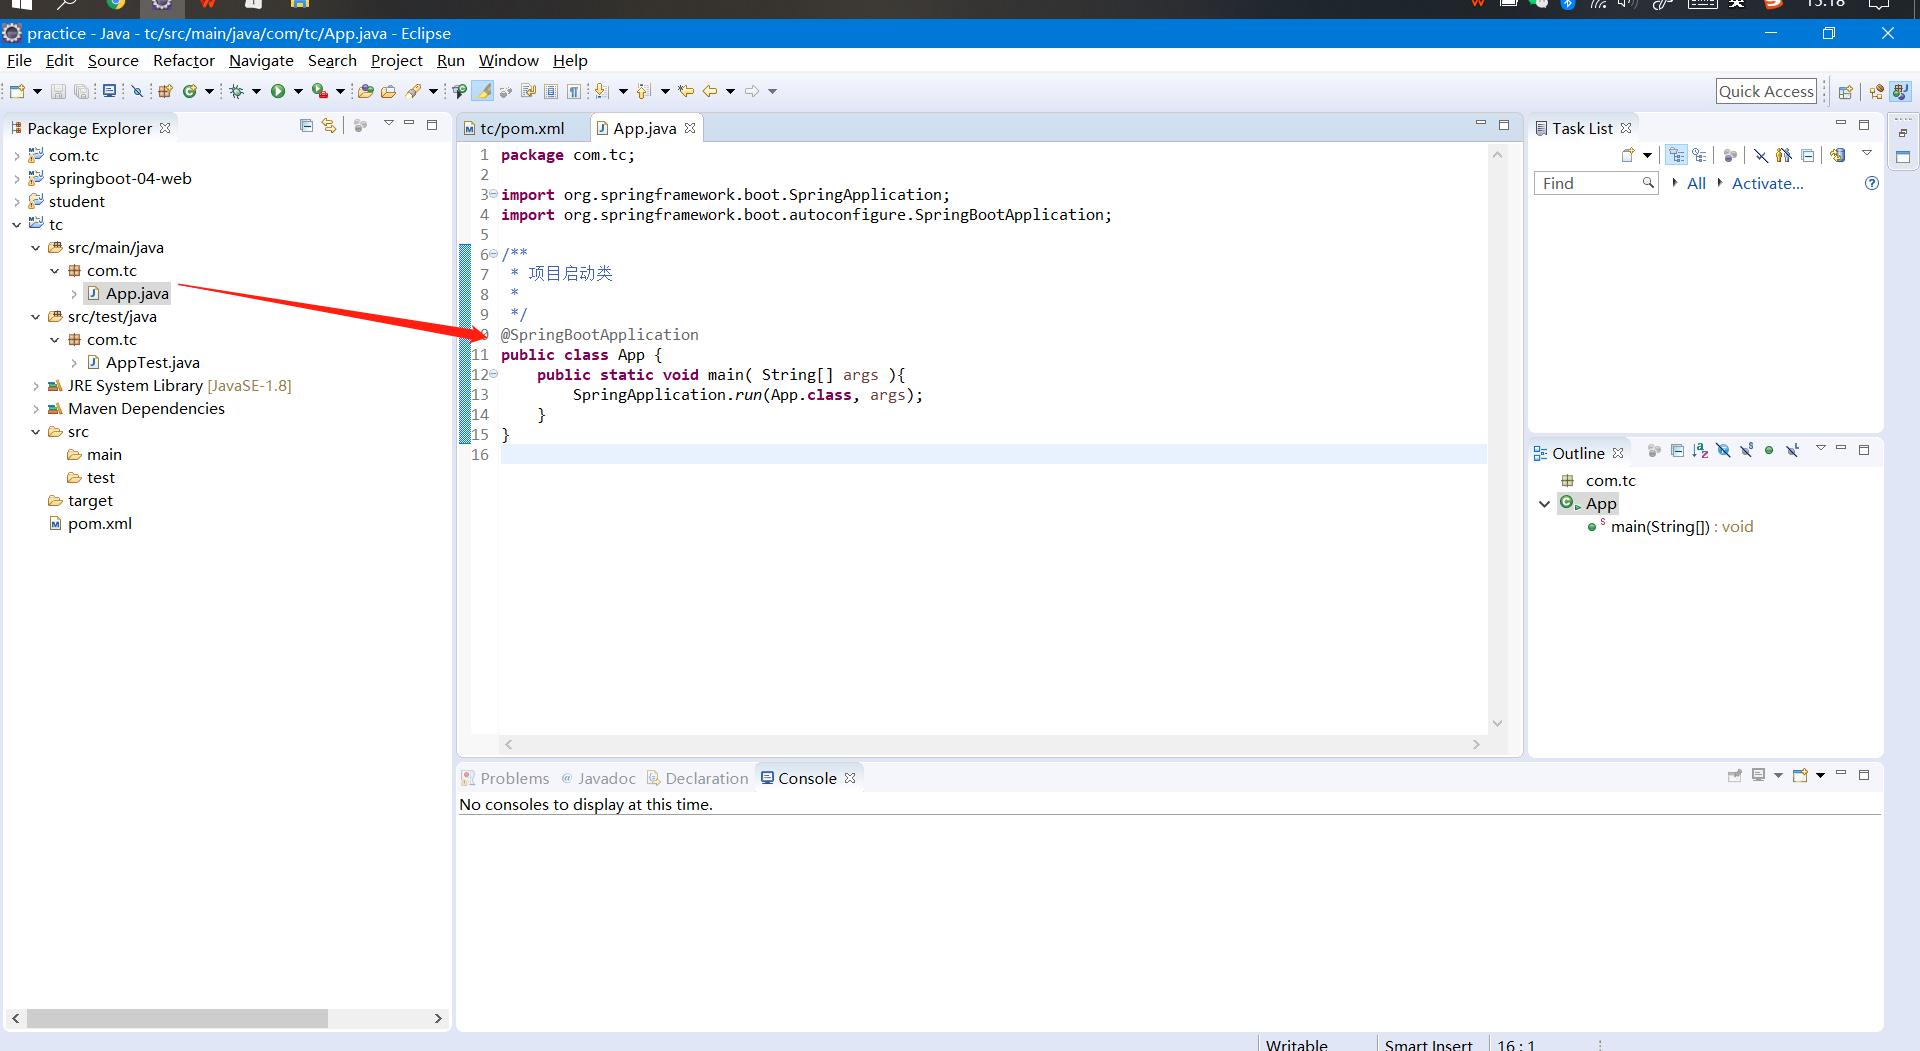
04、创建controller(在com.tc下创建的controller)
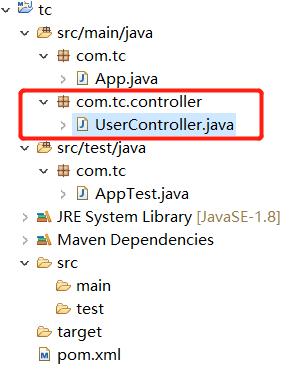
编辑controller类
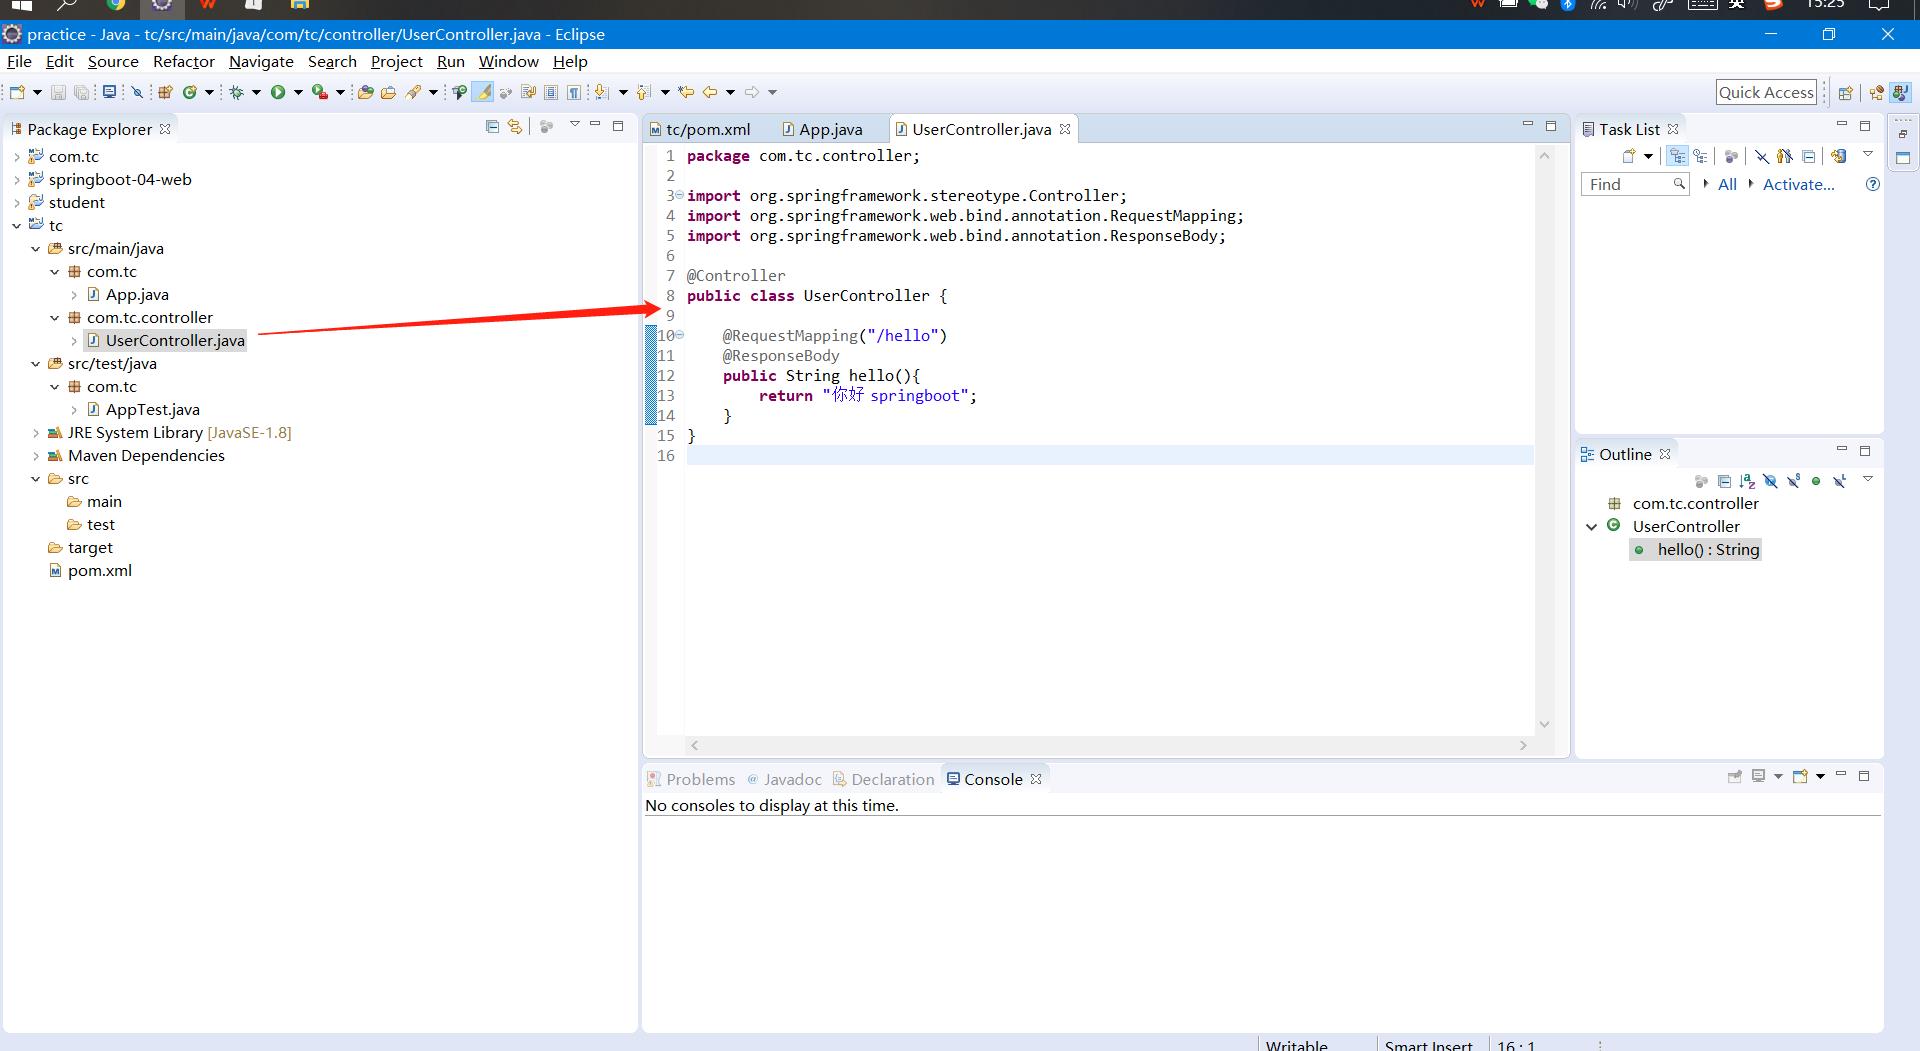
package com.tc.controller;

import org.springframework.stereotype.Controller;
import org.springframework.web.bind.annotation.RequestMapping;
import org.springframework.web.bind.annotation.ResponseBody;

@Controller
public class UserController

@RequestMapping("/hello")
@ResponseBody
public String hello()
	return "你好 springboot";
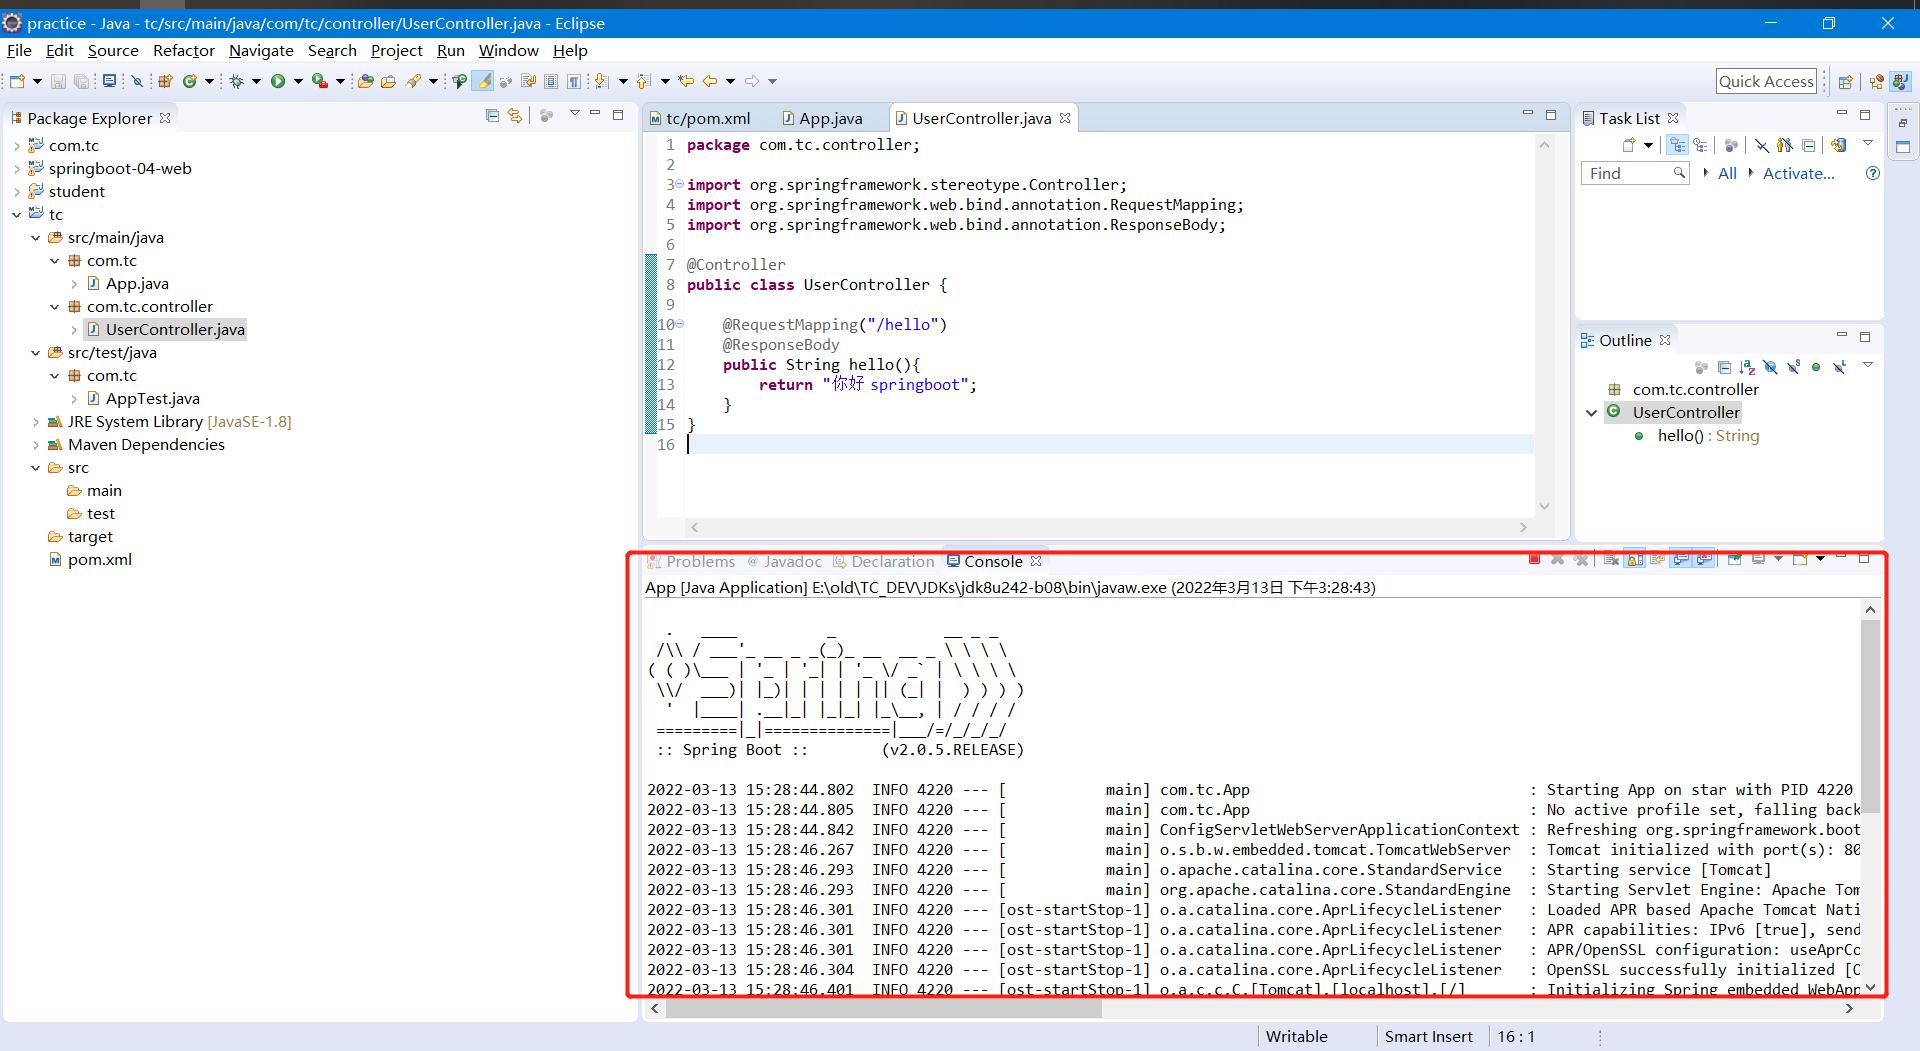
05、启动项目,查看控制台,控制台如果打印出,以下样式,则表明项目启动成功
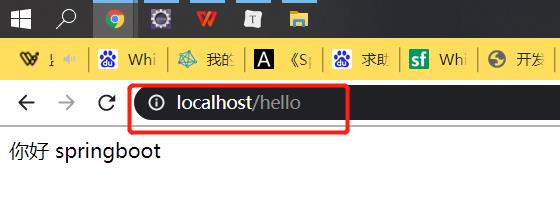
06、访问:打开浏览器,地址栏输入 localhost:8080/hello 进行访问,如果能看到“你好 springboot”字样,则说明项目springboot已经搭建成功了。
三、常用配置设置
01、创建 resources文件夹 ,这个文件夹主要用来存放配置资源的,如果创建项目时已经存在则不需要再创建了,没有就手动创建一个
创建方式参照:创建的项目如果没有src/main/resources文件夹,如何解决?
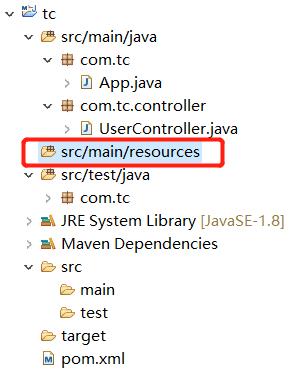
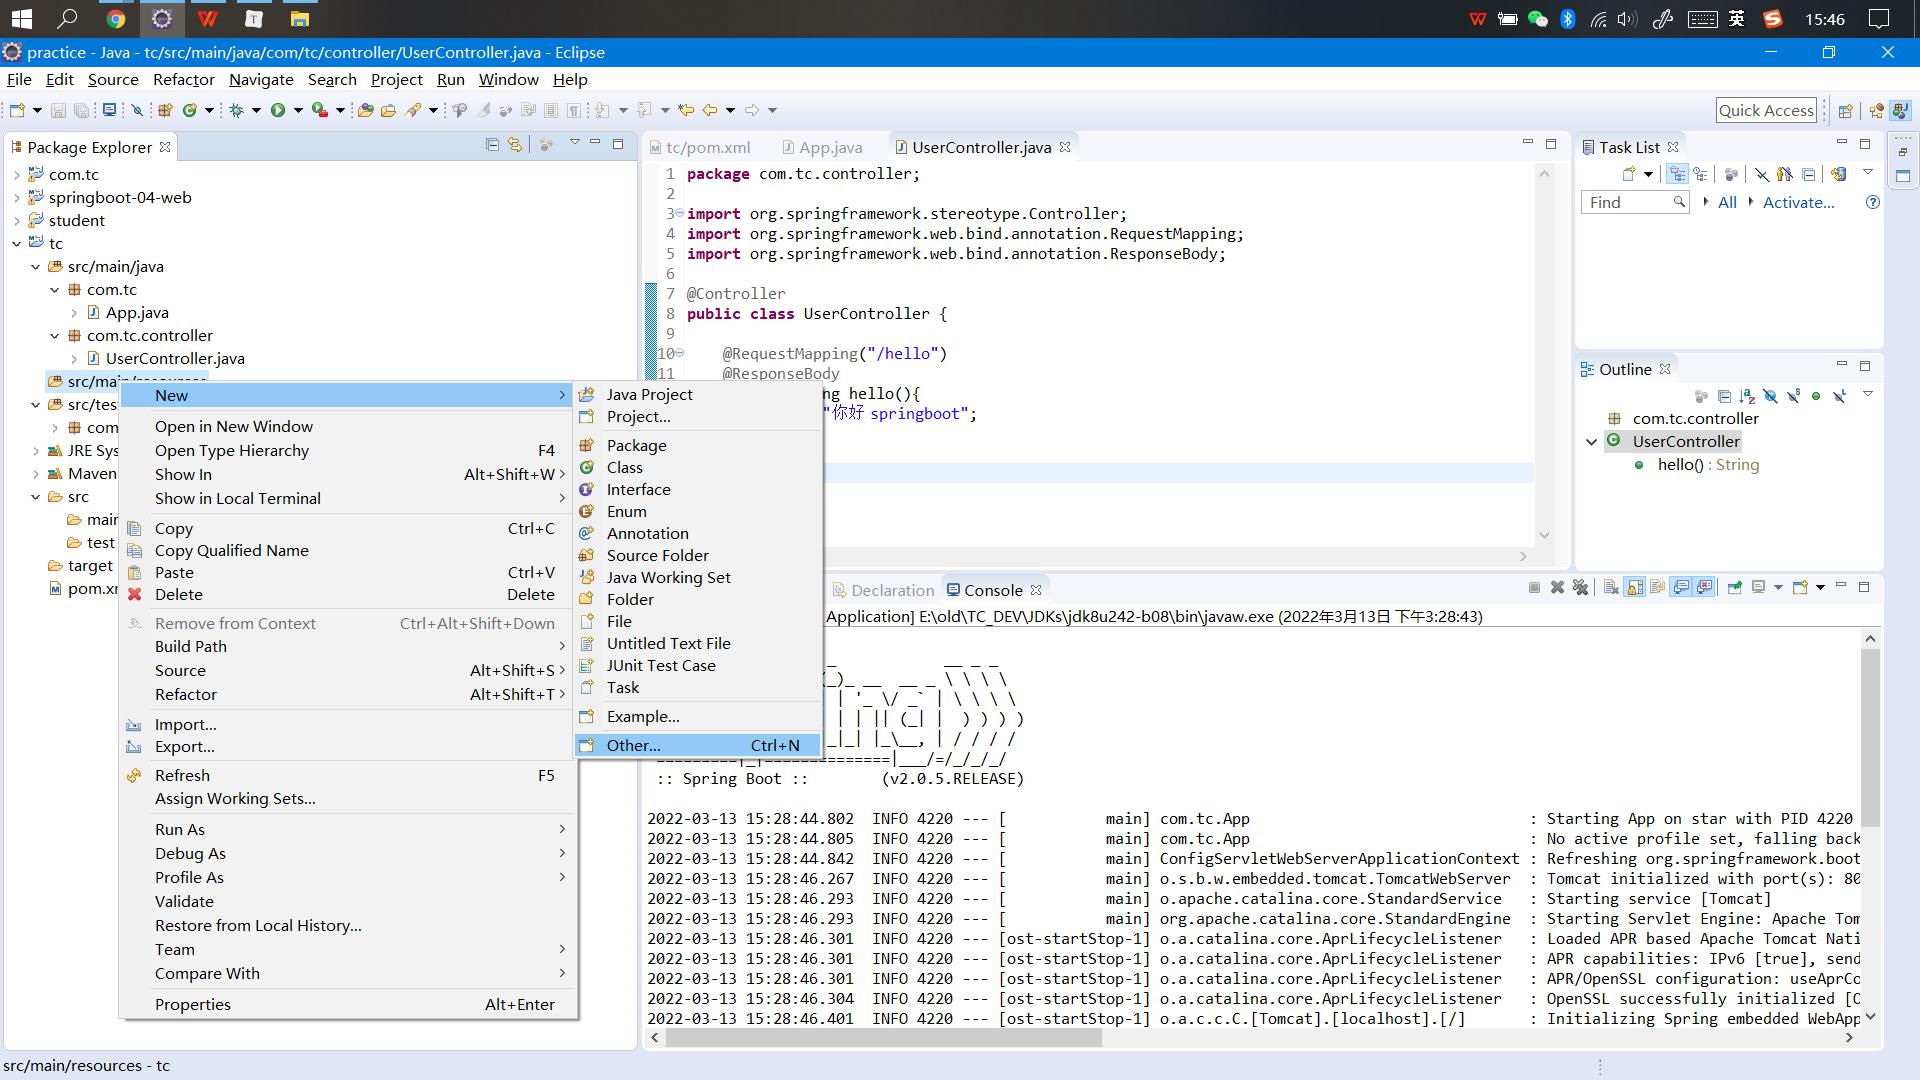
02、创建yml文件(在刚刚创建的 src/main/java/resources/文件夹 上右键—new—other)
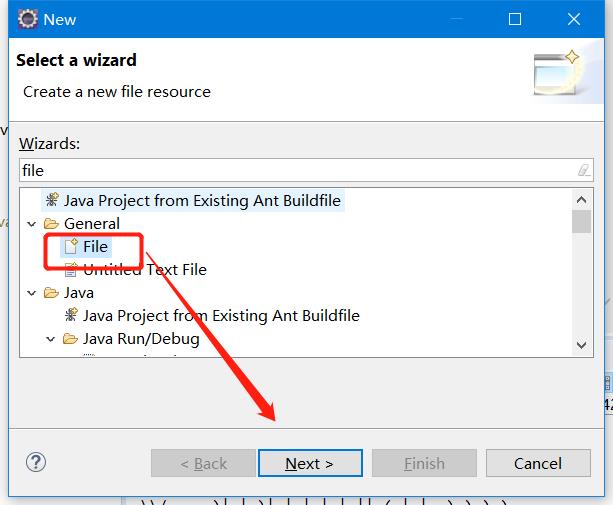
输入file后选择 General文件夹下的File,点击Next
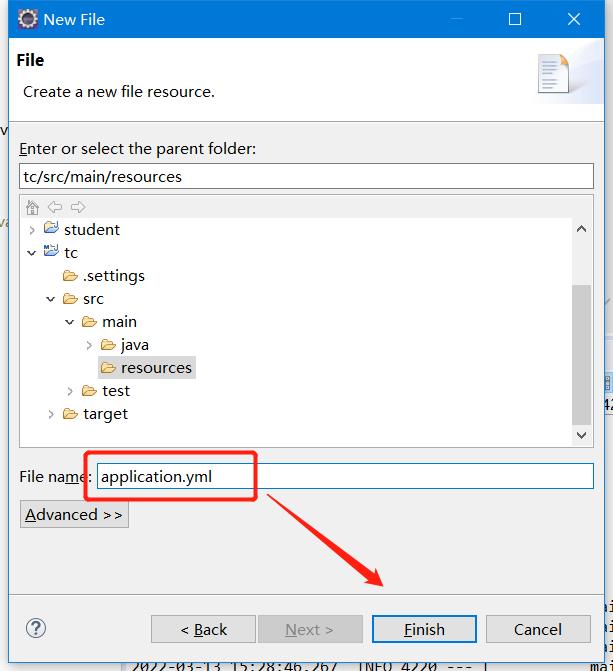
名称填写为 application.yml,点击Finish。
03、打开 application.yml 文件进行服务器配置(注意:排版保持一致、冒号后都有一个空格)
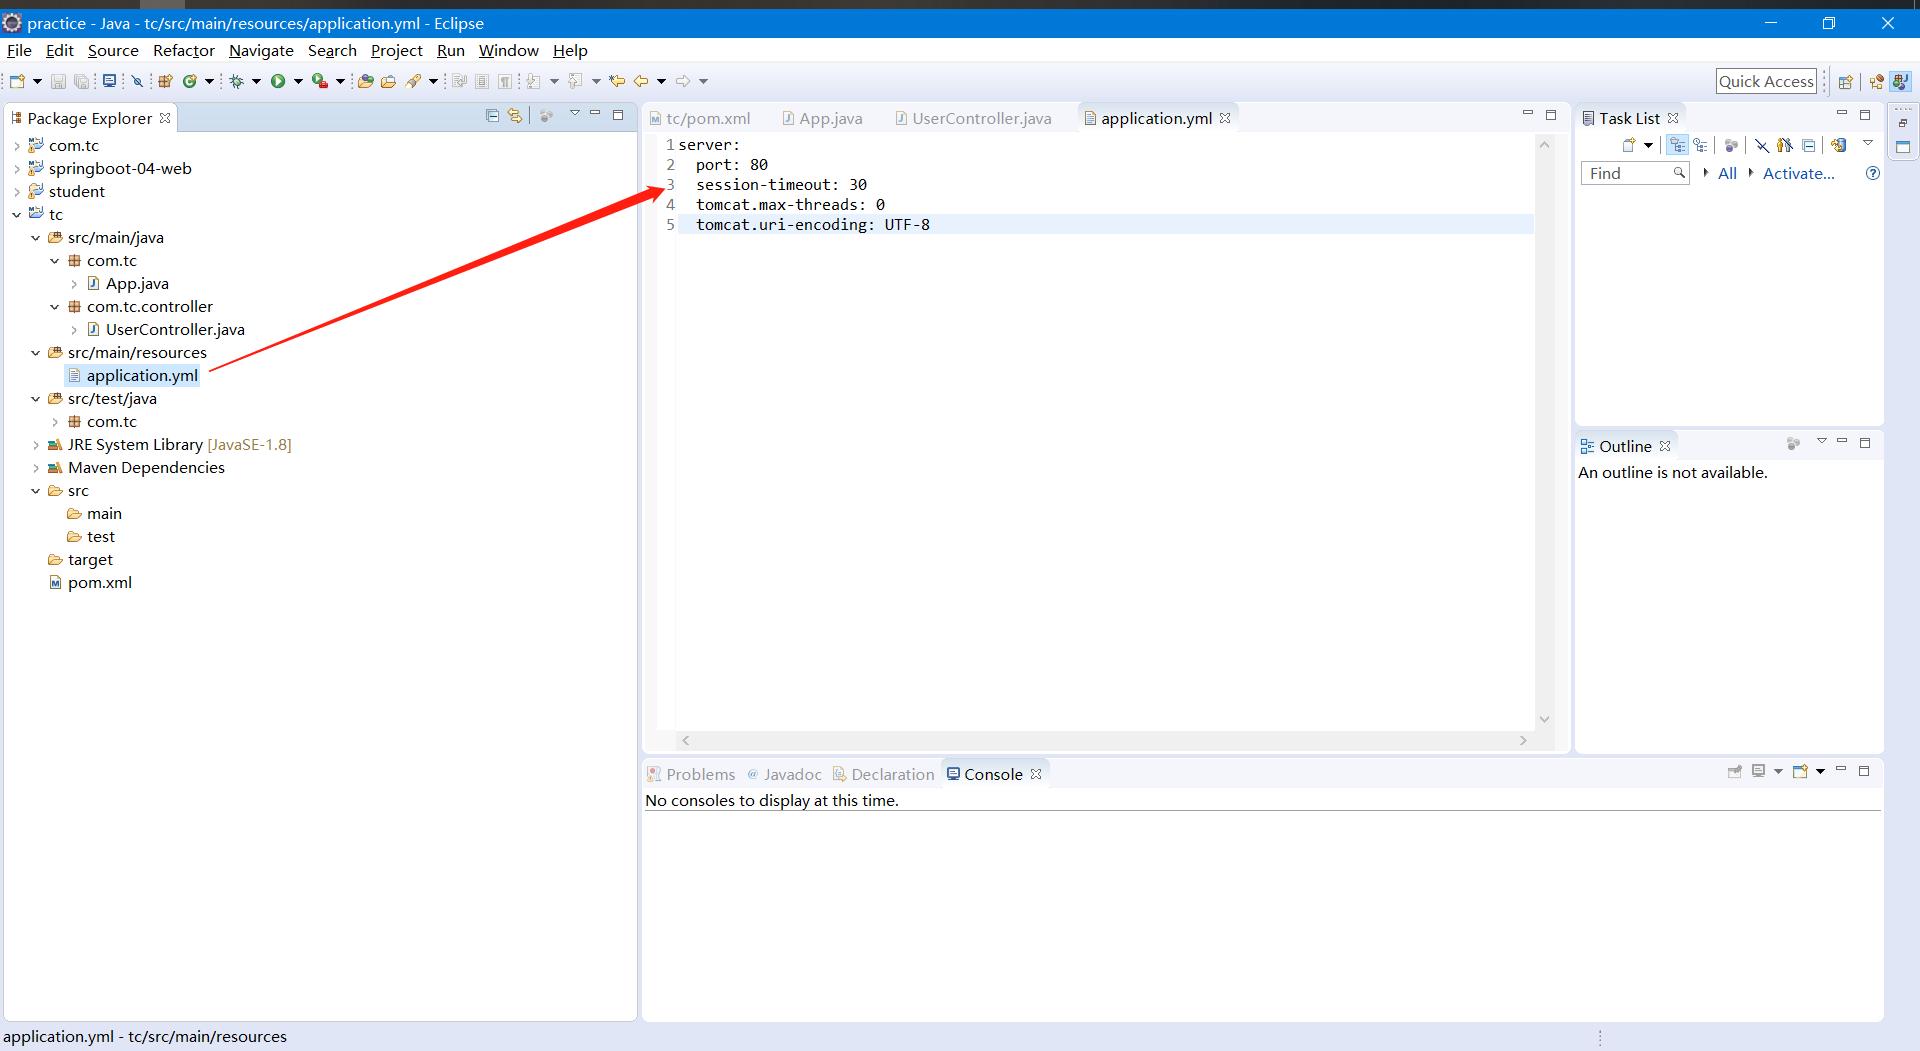
这样配置完成后,重启访问项目就不需要输入端口号了
四、热部署:即有文件修改保存后,自动重启
01、打开pom.xml,加入springboot热部署依赖
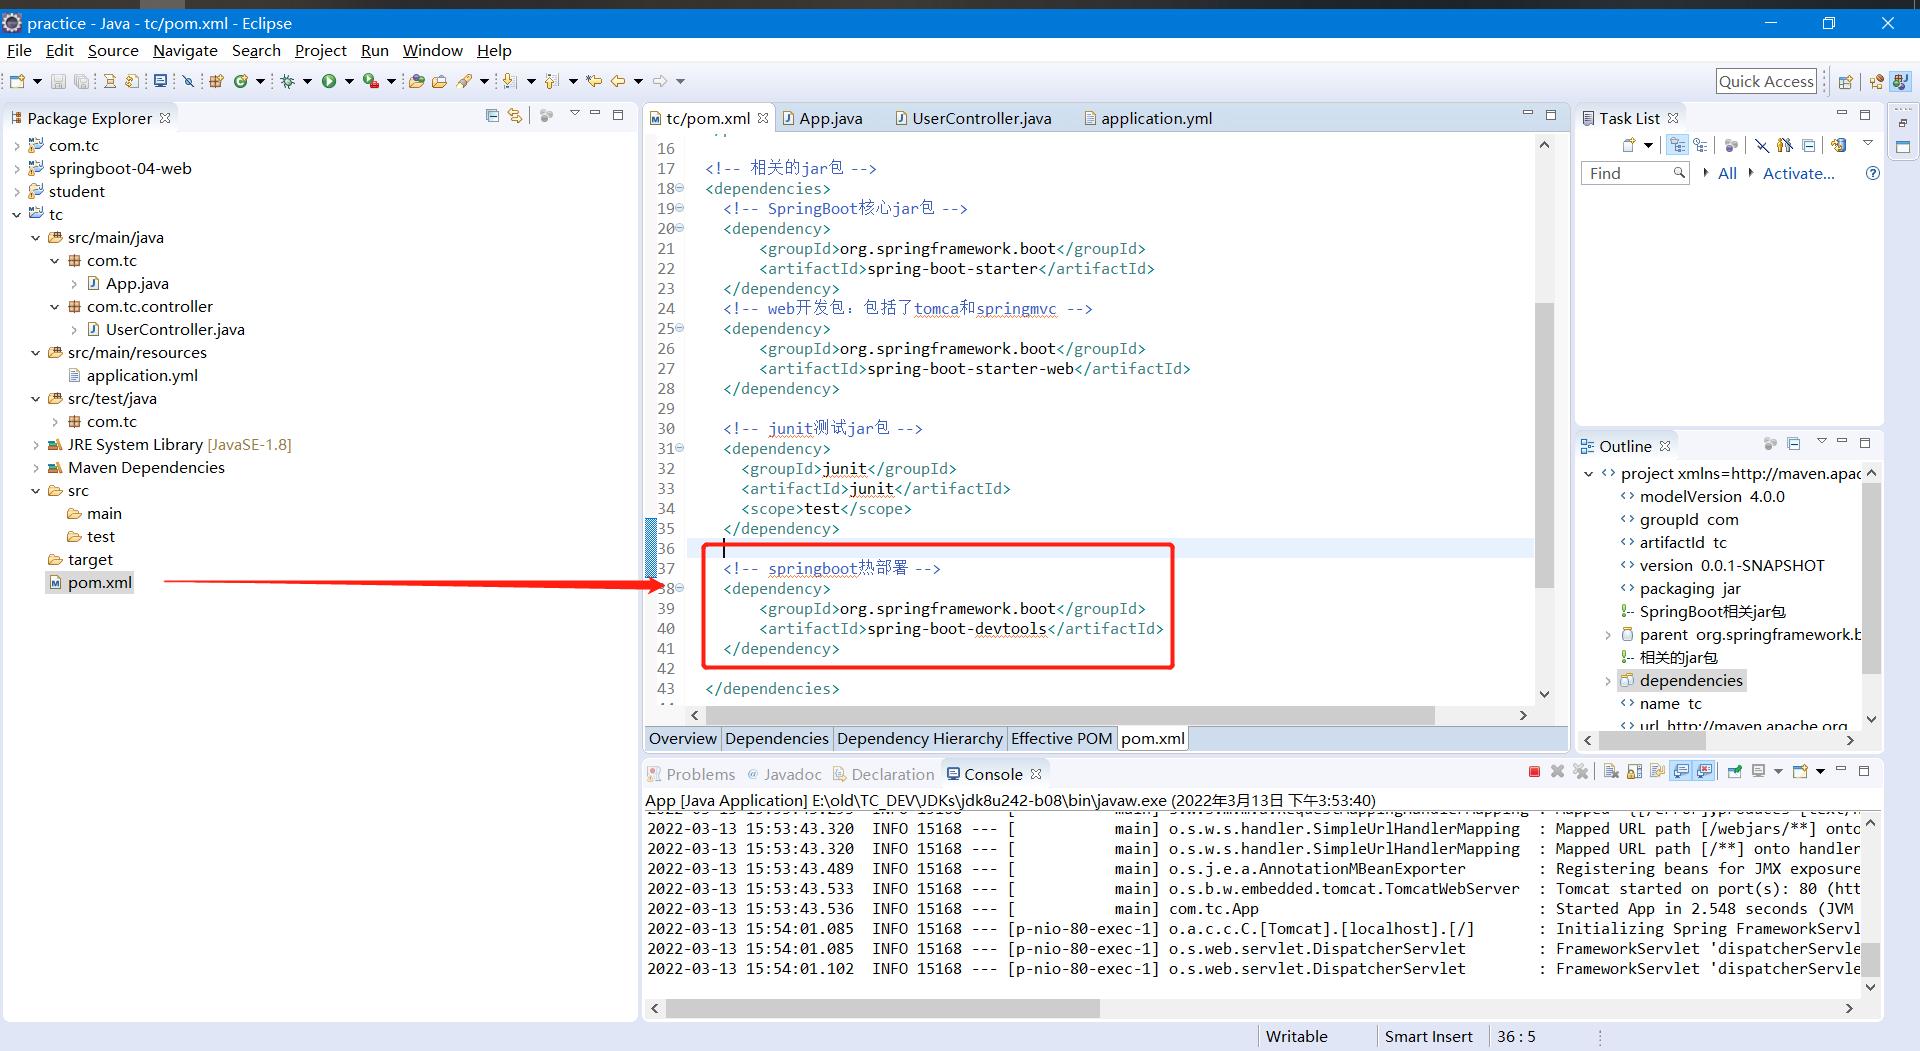
<!-- springboot热部署 -->
    <dependency>
    	<groupId>org.springframework.boot</groupId>
    	<artifactId>spring-boot-devtools</artifactId>
    </dependency>
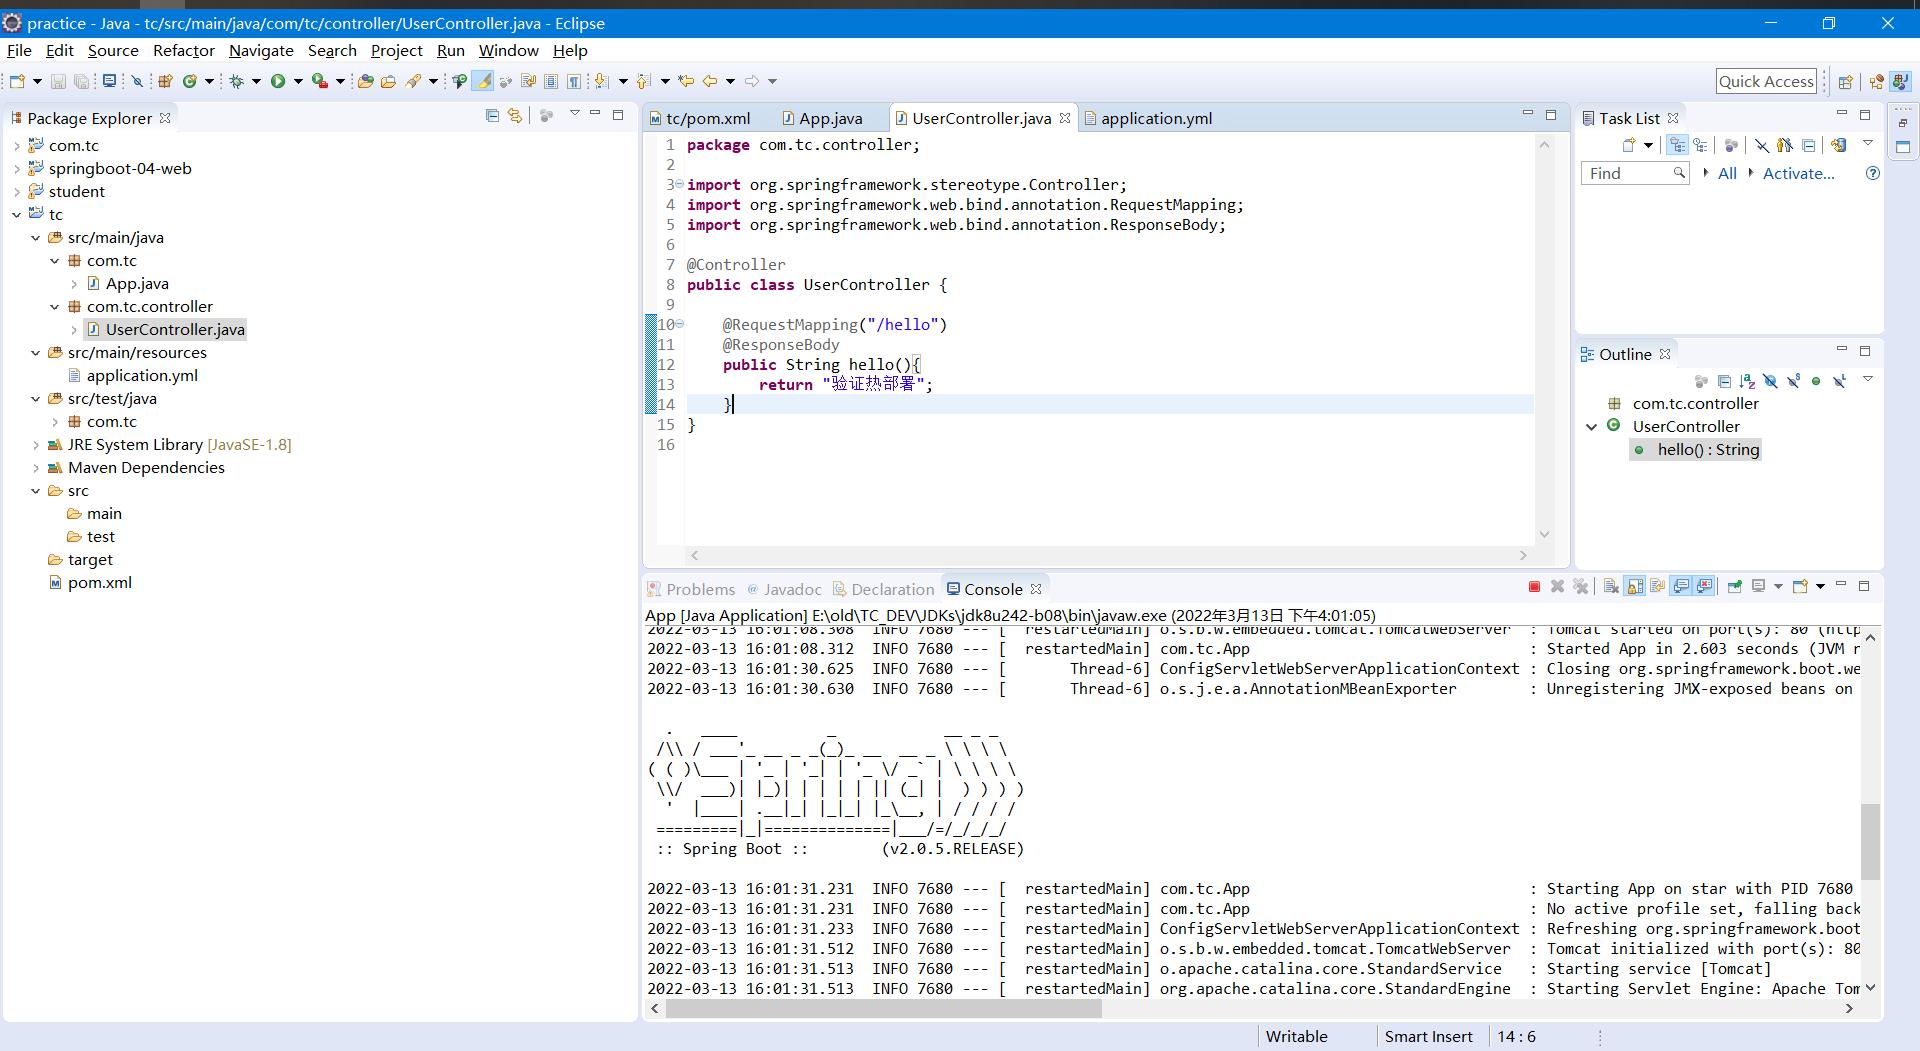
02、验证:修改页面返回语句后保存,就会发现项目自动重启了且可以访问成功,说明热部署生效了

五、配置Thymeleaf
01、在pom.xml中加入 Thymeleaf
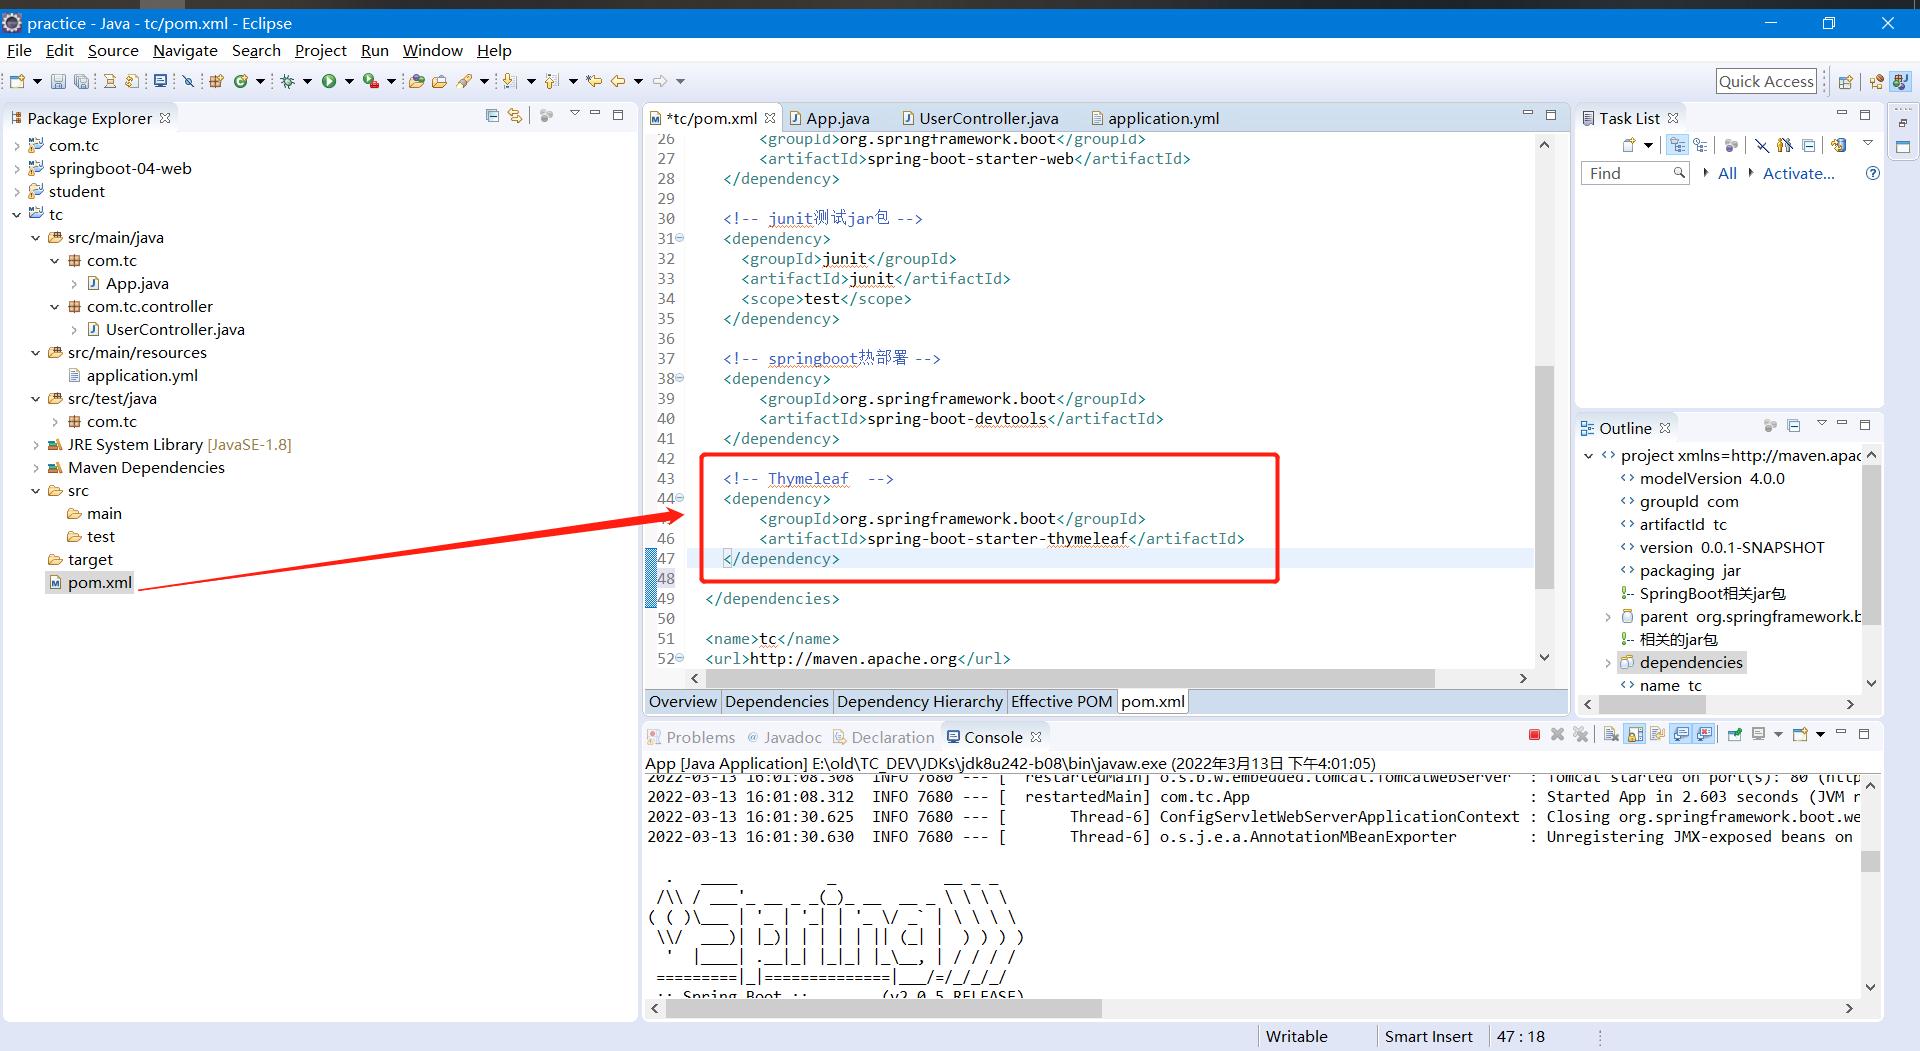
<!-- Thymeleaf --><dependency><groupId>org.springframework.boot</groupId><artifactId>spring-boot-starter-thymeleaf</artifactId></dependency>
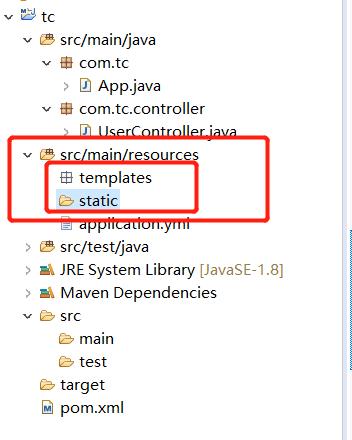
02、在 resoures 下创建 templates 文件夹和 static 文件夹,分别用例放html文件和css/js文件
03、在yml文件中配置 Thymeleaf
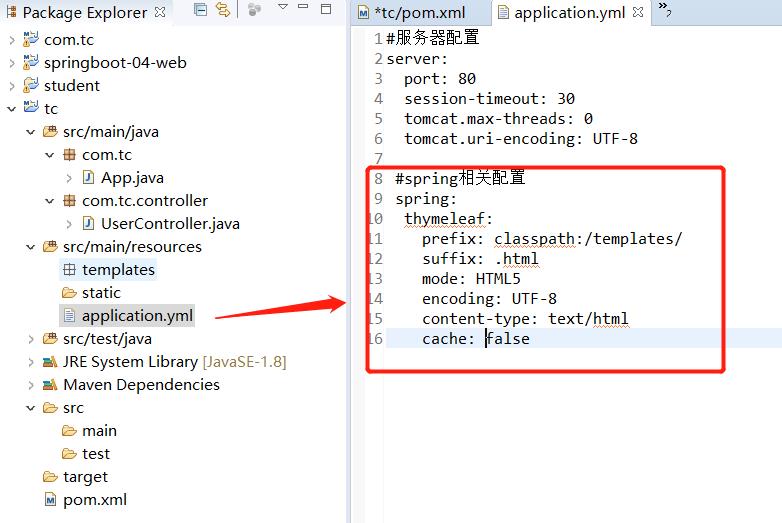
spring:
 thymeleaf:
 prefix: classpath:/templates/
 suffix: .html
 mode: HTML5
 encoding: UTF-8
 content-type: text/html
 cache: false
04、 UserController.java文件中加入如下代码,保存
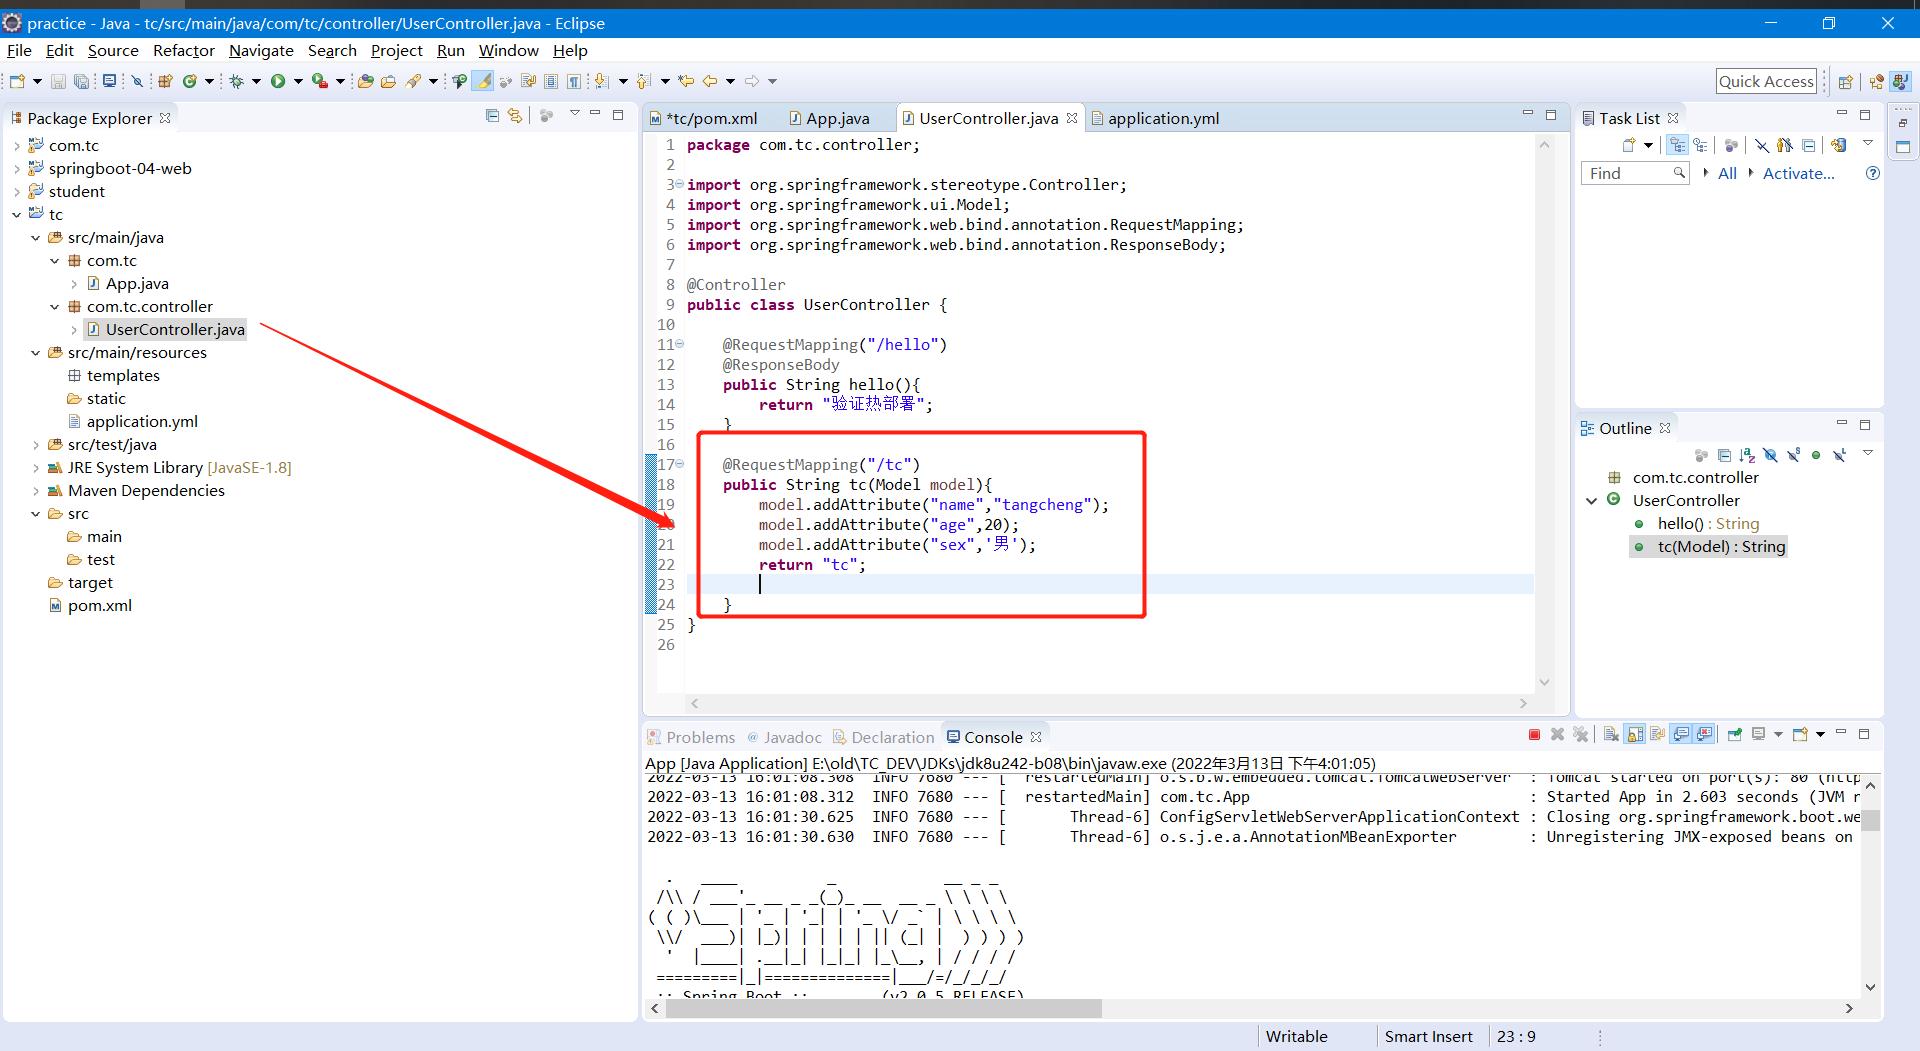
@RequestMapping("/tc")
public String tc(Model model)
	model.addAttribute("name","tangcheng");
	model.addAttribute("age",20);
	model.addAttribute("sex",'男');
	return "tc";
05、在 templates 文件夹下加入tc.html 页面
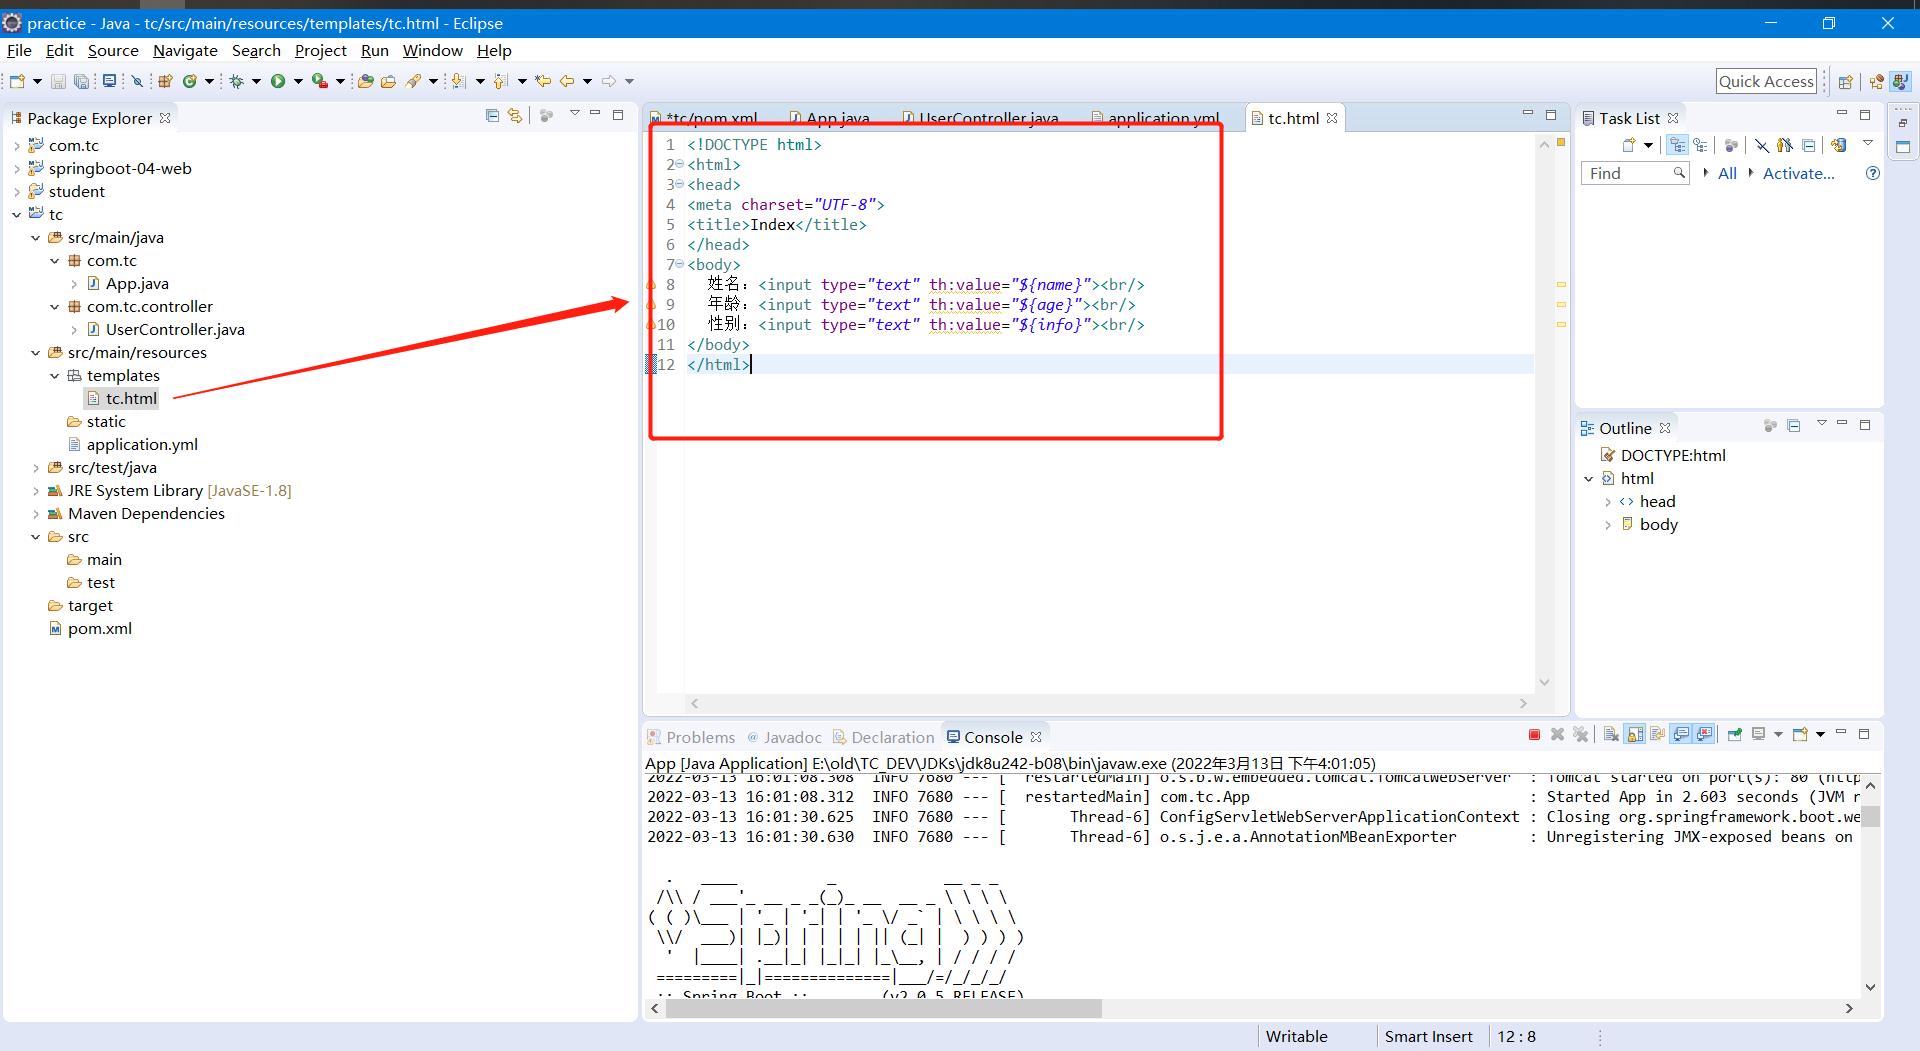
<!DOCTYPE html>
<html>
<head>
<meta charset="UTF-8">
<title>Index</title>
</head>
<body>
    姓名:<input type="text" th:value="$name"><br/>
    年龄:<input type="text" th:value="$age"><br/>
    性别:<input type="text" th:value="$info"><br/>
</body>
</html>
06、由于修改了配置文件,所以热部署就不生效了,这里需要重新启动项目一次,浏览器再访问:localhost/tc
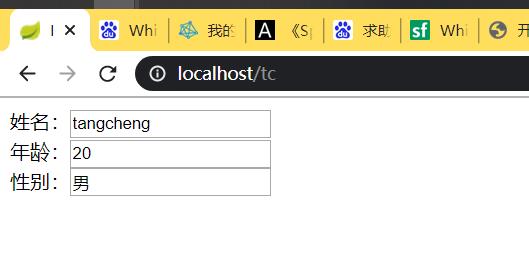
现在前端、后端已经连接通了,最后一步连接数据库,将数据存入到数据库中,将下期更新。
Eclipse搭建springboot项目热部署
知识点:SpringBoot2.x使用Dev-tool工具热部署,快速加载启动应用
官方地址:https://docs.spring.io/spring-boot/docs/2.1.0.BUILD-SNAPSHOT/reference/htmlsingle/#using-boot-devtools
核心依赖包:
<dependency>
    <groupId>org.springframework.boot</groupId>
        <artifactId>spring-boot-devtools</artifactId>
    <optional>true</optional>
</dependency>
添加依赖后,在ide里面重启应用,后续修改后马上可以生效
classloader
不被热部署的文件
1、/META-INF/maven, /META-INF/resources, /resources, /static, /public, or /templates
2、指定文件不进行热部署 spring.devtools.restart.exclude=static/**,public/**
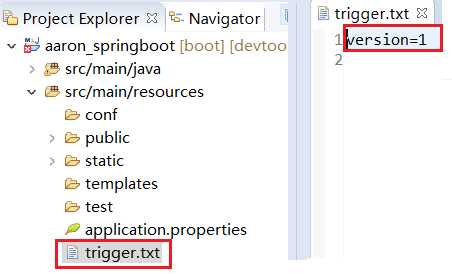
3、手工触发重启(类似于触发器) spring.devtools.restart.trigger-file=trigger.txt
改代码不重启,通过一个文本去控制
https://docs.spring.io/spring-boot/docs/2.1.0.BUILD-SNAPSHOT/reference/htmlsingle/#using-boot-devtools-restart-exclude
注意点:生产环境不要开启这个功能,如果用java -jar启动,springBoot是不会进行热部署的
1.配置pom依赖

2.在application.properties中配置触发器

3.创建触发文本,递增版本数字即可实现热部署
以上是关于使用Eclipse搭建SpringBoot项目的主要内容,如果未能解决你的问题,请参考以下文章