linux命令:通过PHPmyqlhttpd建立论坛博客网站
Posted
tags:
篇首语:本文由小常识网(cha138.com)小编为大家整理,主要介绍了linux命令:通过PHPmyqlhttpd建立论坛博客网站相关的知识,希望对你有一定的参考价值。
php、mysql基础
需先安装httpd服务,使得web服务器启用。
一、安装php
[[email protected] ~]# ls #先下载rpm安装包
php53-5.3.3-23.el5_10.x86_64.rpm sys dead.letter inittab.des3
php53-cli-5.3.3-23.el5_10.x86_64.rpm sysroo1.gz install.log.syslog
php53-common-5.3.3-23.el5_10.x86_64.rpm dev php53-mbstring-5.3.3-23.el5_10.x86_64.rpm
dropbear-2013.56 ks.cfg php53-mysql-5.3.3-23.el5_10.x86_64.rpm
dropbear-2013.56.tar.bz2 lib php53-pdo-5.3.3-23.el5_10.x86_64.rpm
[[email protected] ~]# rpm -ivh php53-common-5.3.3-23.el5_10.x86_64.rpm
warning: php53-common-5.3.3-23.el5_10.i386.rpm: Header V3 DSA signature: NOKEY, key ID e8562897
Preparing... ########################################### [100%]
1:php53-common ########################################### [100%]
[[email protected] ~]# rpm -ivh php53-cli-5.3.3-23.el5_10.x86_64.rpm
warning: php53-cli-5.3.3-23.el5_10.i386.rpm: Header V3 DSA signature: NOKEY, key ID e8562897
Preparing... ########################################### [100%]
1:php53-cli ########################################### [100%]
[[email protected] ~]# rpm -ivh php53-mbstring-5.3.3-23.el5_10.x86_64.rpm
warning: php53-mbstring-5.3.3-23.el5_10.i386.rpm: Header V3 DSA signature: NOKEY, key ID e8562897
Preparing... ########################################### [100%]
1:php53-mbstring ########################################### [100%]
[[email protected] ~]# rpm -ivh php53-5.3.3-23.el5_10.x86_64.rpm
warning: php53-5.3.3-23.el5_10.i386.rpm: Header V3 DSA signature: NOKEY, key ID e8562897
Preparing... ########################################### [100%]
1:php53 ########################################### [100%]
[[email protected] ~]# rpm -ivh php53-mysql-5.3.3-23.el5_10.x86_64.rpm
warning: php53-mysql-5.3.3-23.el5_10.x86_64.rpm: Header V3 DSA signature: NOKEY, key ID e8562897
error: Failed dependencies:
php53-pdo is needed by php53-mysql-5.3.3-23.el5_10.x86_64 #提示依赖php53-pdo
[[email protected] ~]# rpm -ivh php53-pdo-5.3.3-23.el5_10.x86_64.rpm
warning: php53-pdo-5.3.3-23.el5_10.x86_64.rpm: Header V3 DSA signature: NOKEY, key ID e8562897
Preparing... ########################################### [100%]
1:php53-pdo ########################################### [100%]
[[email protected] ~]# rpm -ivh php53-mysql-5.3.3-23.el5_10.x86_64.rpm
warning: php53-mysql-5.3.3-23.el5_10.x86_64.rpm: Header V3 DSA signature: NOKEY, key ID e8562897
Preparing... ########################################### [100%]
1:php53-mysql ########################################### [100%]
[[email protected] ~]# cd /var/www/a.com/
[[email protected] a.com]# vim index.php #内容修改为以下
<title>a.com</title>
<h1>test a.com</h1>
<?php
$conn=mysql_connect(‘localhost‘,‘root‘,‘123456‘);
if ($conn)
echo "Success...";
else
echo "Failure...";
?>
[[email protected] a.com]# service httpd restart #重启httpd服务
停止 httpd: [确定]
启动 httpd: [确定]
[[email protected] a.com]# service mysqld restart #重启mysqld服务
停止 MySQL: [确定]
启动 MySQL: [确定]
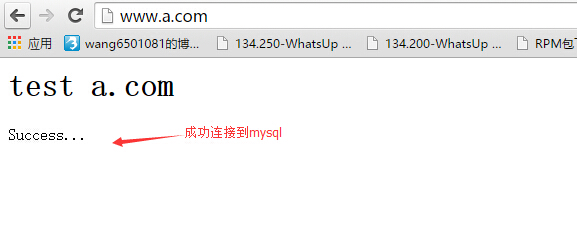
通过网页访问如下:
1、使用phpMyAdmin提供管理mysql界面部署网站:
首先下载phpMyAdmin:
[[email protected] ~]# ls
dropbear-2013.56.tar.bz2 php53-pdo-5.3.3-23.el5_10.x86_64.rpm
etc phpMyAdmin-3.4.9-all-languages.zip
[[email protected] ~]# mv phpMyAdmin-3.4.9-all-languages /var/www/a.com/
[[email protected] ~]# cd /var/www/a.com/
[[email protected] a.com]# ls
index.php phpMyAdmin-3.4.9-all-languages
[[email protected] a.com]# mv phpMyAdmin-3.4.9-all-languages pma
[[email protected] a.com]# ls
index.php pma
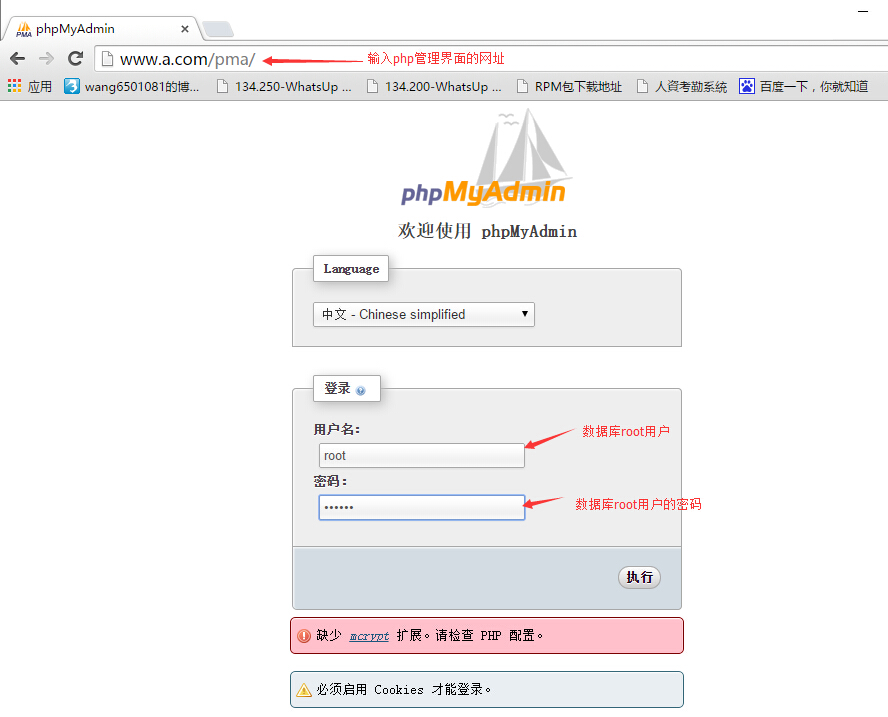
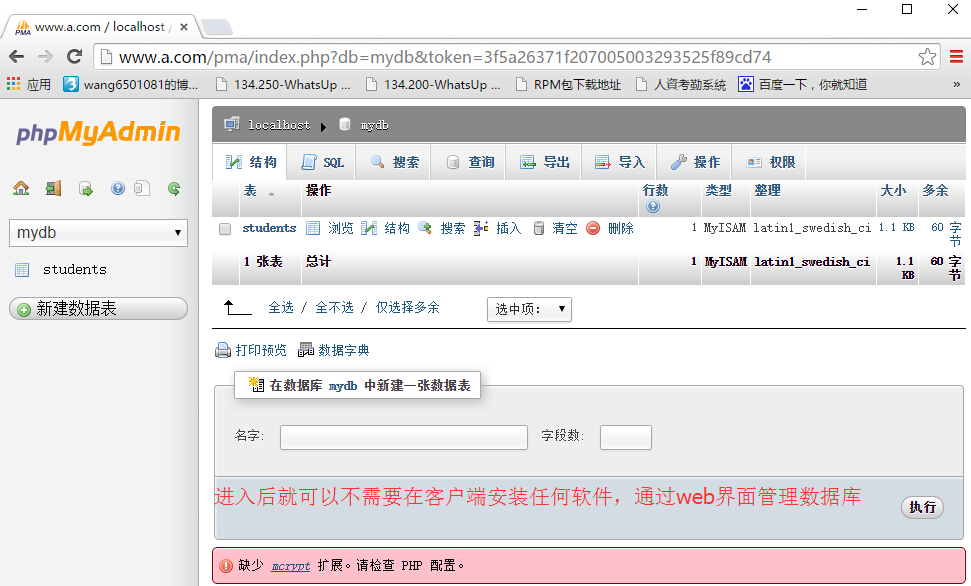
在客户端通过以下网址即可登录php管理数据库界面:www.a.com/pma
2、通过discuz部署论坛网页:
首先下载discuz x2.5版本:http://www.discuz.net/thread-2744369-1-1.html
[[email protected] ~]# ls
......
Discuz_X2.5_SC_UTF8.zip php53-mysql-5.3.3-23.el5_10.x86_64.rpm
......
[[email protected] ~]# unzip Discuz_X2.5_SC_UTF8.zip #解压该压缩包
[[email protected] ~]# rm -rf /var/www/b.com/* #先把b.com中的内容清空
[[email protected] ~]# mv upload/* /var/www/b.com/ 把刚才解压出来的upload文目录中的文件都移 至需要配置部署的网址目录中/var/www/b.com
[[email protected] ~]# ls /var/www/b.com/
admin.php config data home.php member.php robots.txt template
api connect.php favicon.ico misc.php search.php uc_client
api.php cp.php forum.php index.php plugin.php source uc_server
archiver crossdomain.xml group.php install portal.php static userapp.php
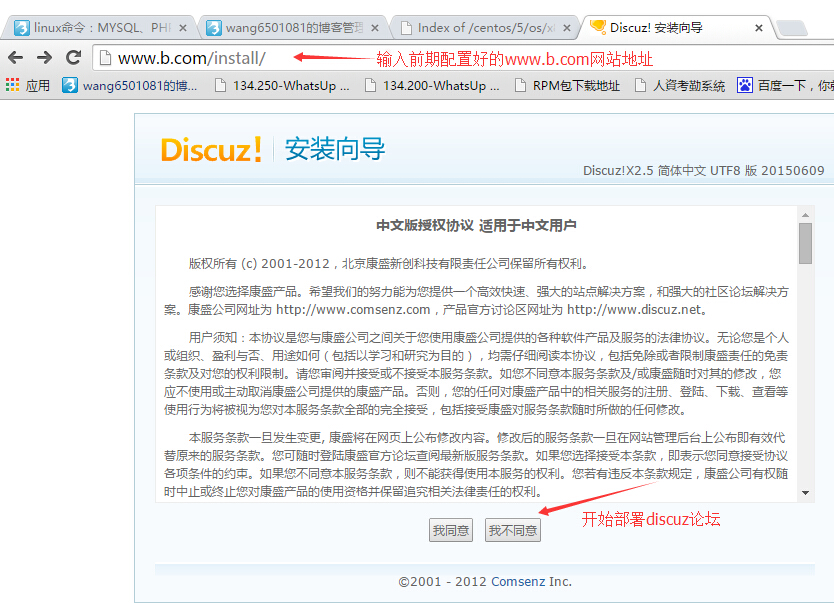
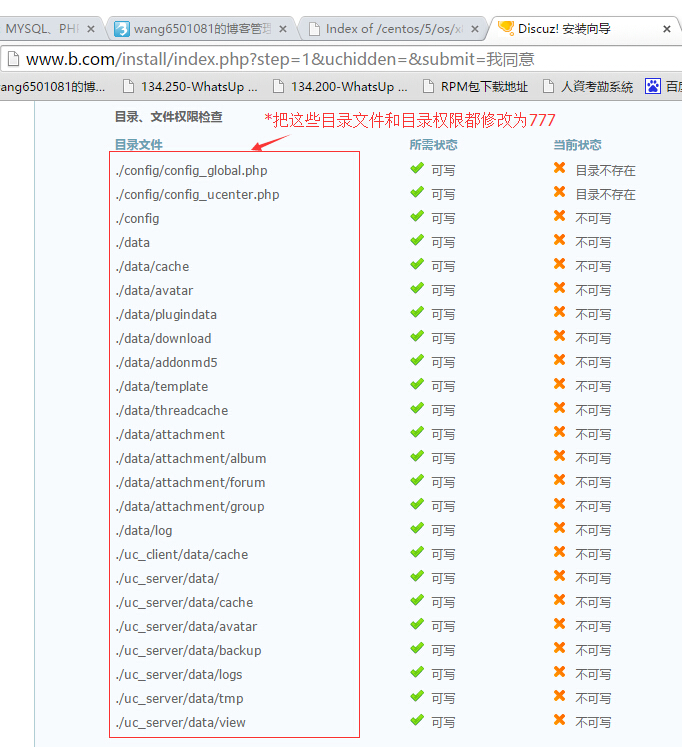
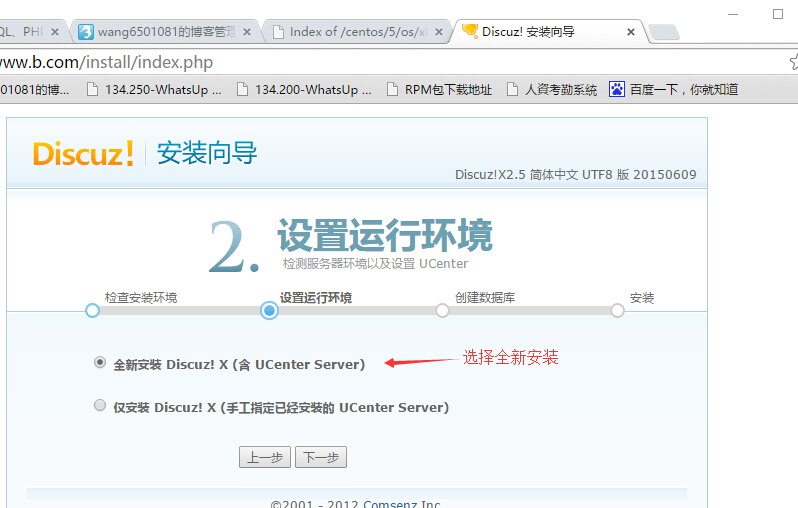
在客户端网页中输入:www.b.com
把上图红色框内的文件和目录的权限都修改为777:
[[email protected] b.com]# chmod 777 ./config/config_global_default.php
[[email protected] b.com]# chmod 777 ./config/config_ucenter_default.php
[[email protected] b.com]# chmod 777 ./config
[[email protected] b.com]# chmod 777 ./data
[[email protected] b.com]# chmod 777 ./data/cache
[[email protected] b.com]# chmod 777 ./data/avatar
[[email protected] b.com]# chmod 777 ./data/plugindata
[[email protected] b.com]# chmod 777 ./data/download
[[email protected] b.com]# chmod 777 ./data/addonmd5
[[email protected] b.com]# chmod 777 ./data/template
[[email protected] b.com]# chmod 777 ./data/threadcache
[[email protected] b.com]# chmod 777 ./data/attachment
[[email protected] b.com]# chmod 777 ./data/attachment/album
[[email protected] b.com]# chmod 777 ./data/attachment/forum
[[email protected] b.com]# chmod 777 ./data/attachment/group
[[email protected] b.com]# chmod 777 ./data/log
[[email protected] b.com]# chmod 777 ./uc_
uc_client/ uc_server/
[[email protected] b.com]# chmod 777 ./uc_client/data/cache
[[email protected] b.com]# chmod 777 ./uc_server/data/
[[email protected] b.com]# chmod 777 ./uc_server/data/{cache,avatar,backup,logs,tmp,view}
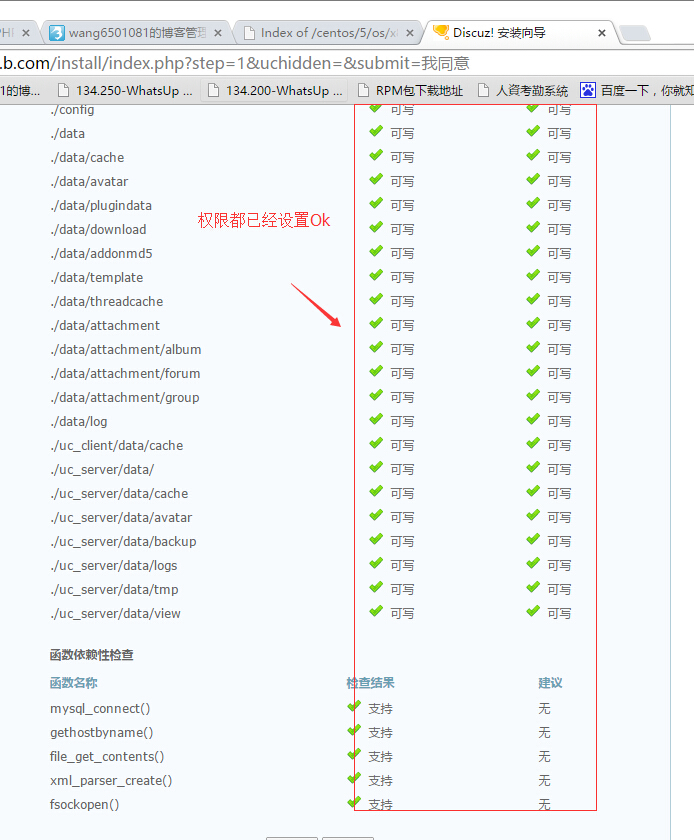
修改完成后,刷新网站,如下:
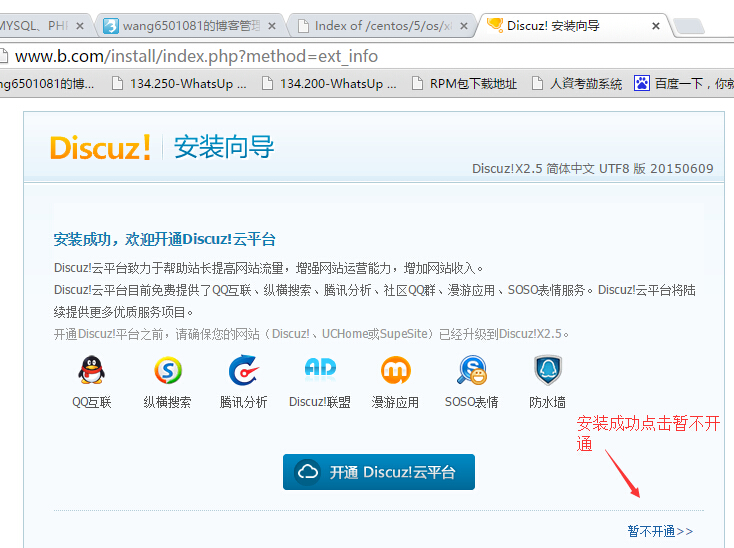
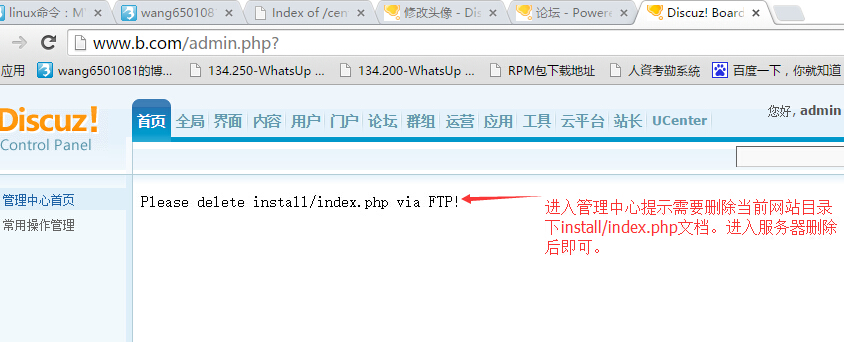
[[email protected] b.com]# cd install
[[email protected] install]# ls
data images include index.php
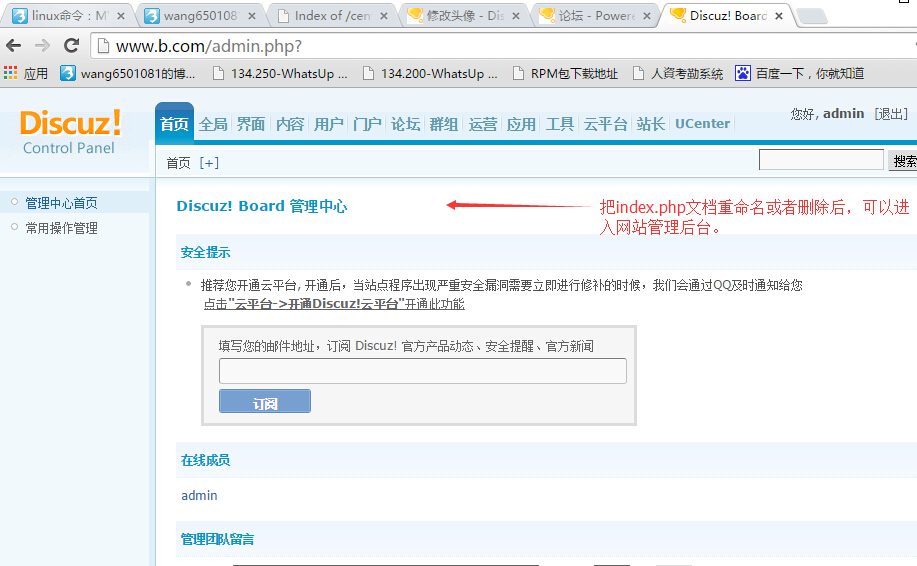
[[email protected] install]# mv index.php index.php.bak
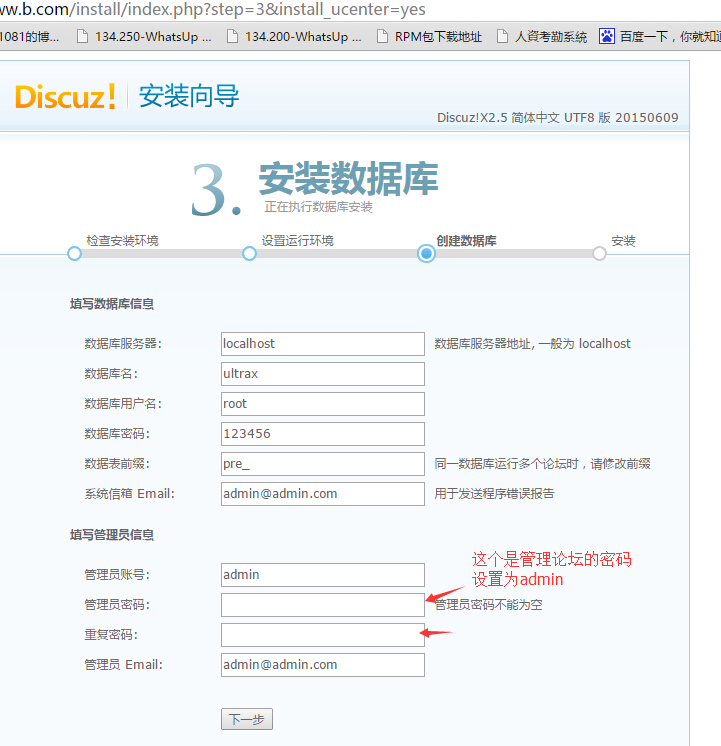
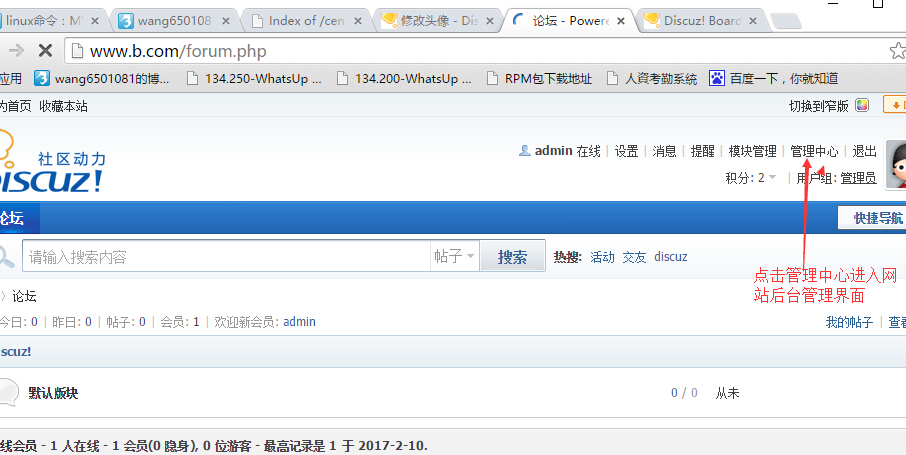
至此一个论坛模板的网站已经建立,并可以进行后台管理。
3、通过workpress部署博客网页:
首先下载workpress4.7.2版本:https://cn.wordpress.org/
[[email protected] ~]# ls
wordpress-4.7.2-zh_CN.zip
[[email protected] ~]# unzip wordpress-4.7.2-zh_CN.zip
[[email protected] ~]# cd wordpress
[[email protected] wordpress]# ls
index.php wp-admin wp-content wp-load.php wp-signup.php
license.txt wp-blog-header.php wp-cron.php wp-login.php wp-trackback.php
readme.html wp-comments-post.php wp-includes wp-mail.php xmlrpc.php
wp-activate.php wp-config-sample.php wp-links-opml.php wp-settings.php
[[email protected] wordpress]# ls /var/www/weblinux.com/
index.html
[[email protected] wordpress]# rm /var/www/weblinux.com/* -rf
[[email protected] wordpress]# ls /var/www/weblinux.com/
[[email protected] wordpress]# cd /var/www/weblinux.com/
[[email protected] weblinux.com]# ls
index.php wp-admin wp-content wp-load.php wp-signup.php
license.txt wp-blog-header.php wp-cron.php wp-login.php
wp-trackback.php readme.html wp-comments-post.php wp-includes wp-mail.php xmlrpc.phpwp-activate.php wp-config-sample.php wp-links-opml.php wp-settings.php
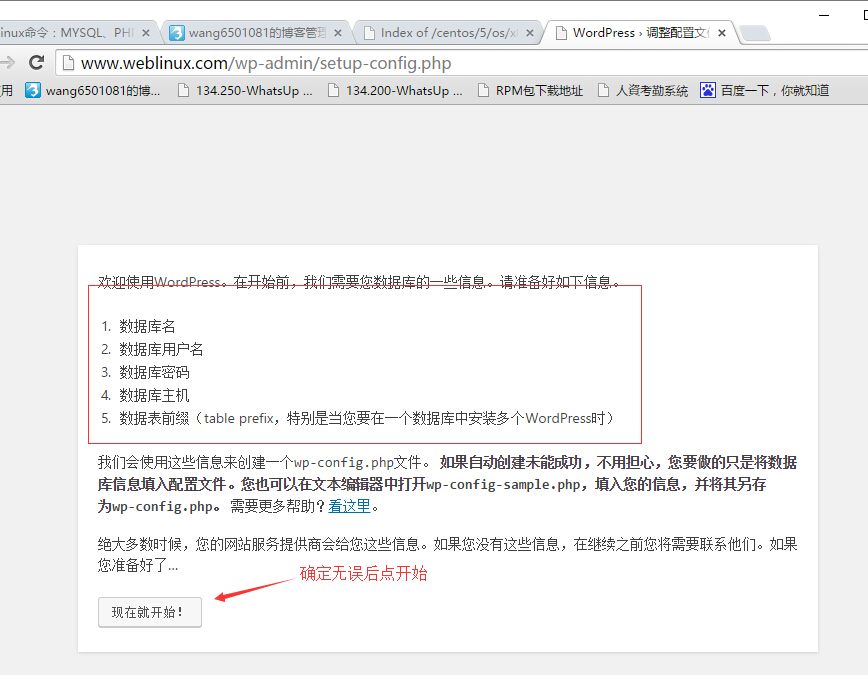
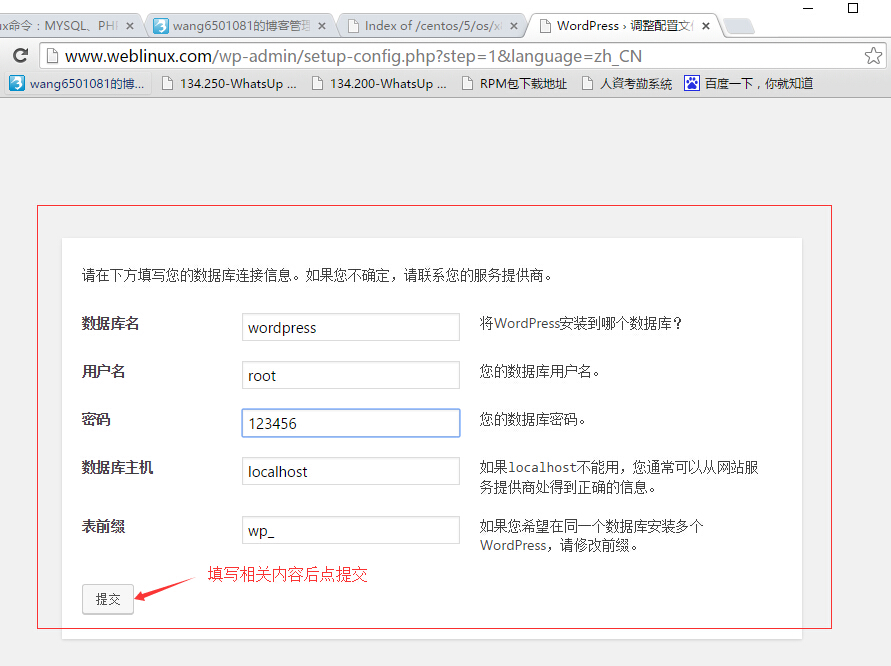
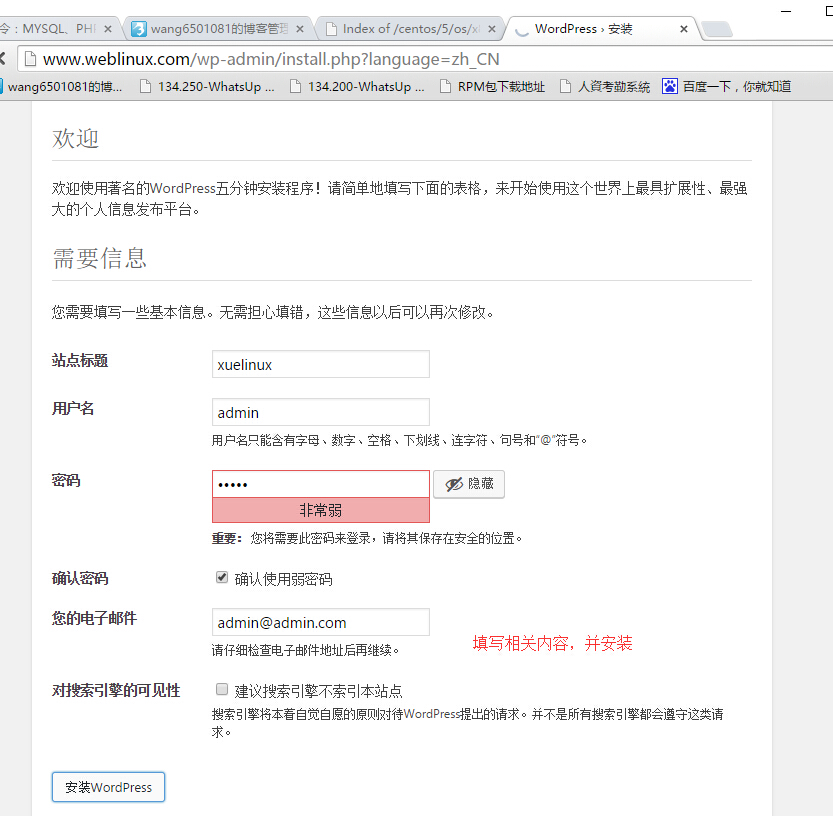
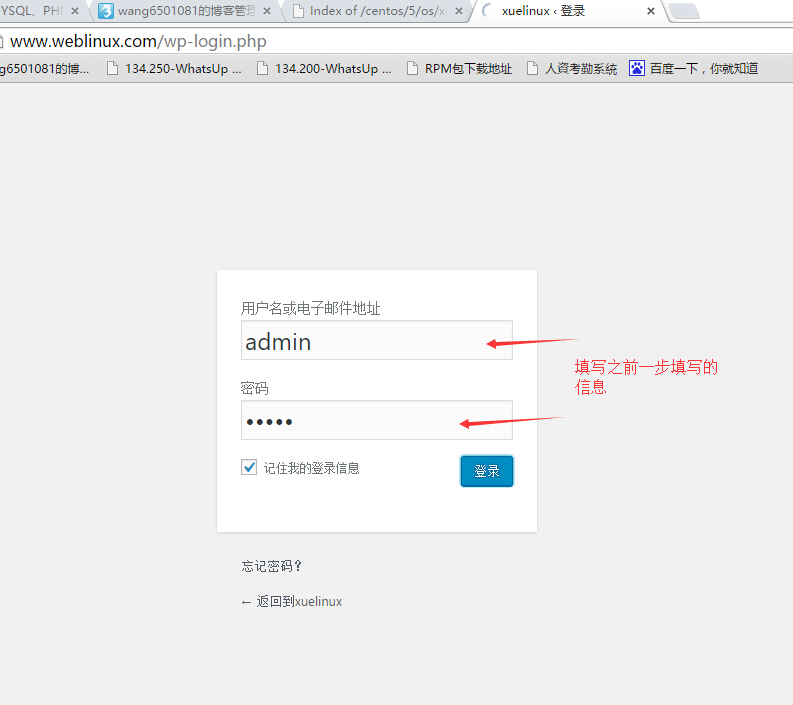
在客户端网页中输入:www.weblinux.com
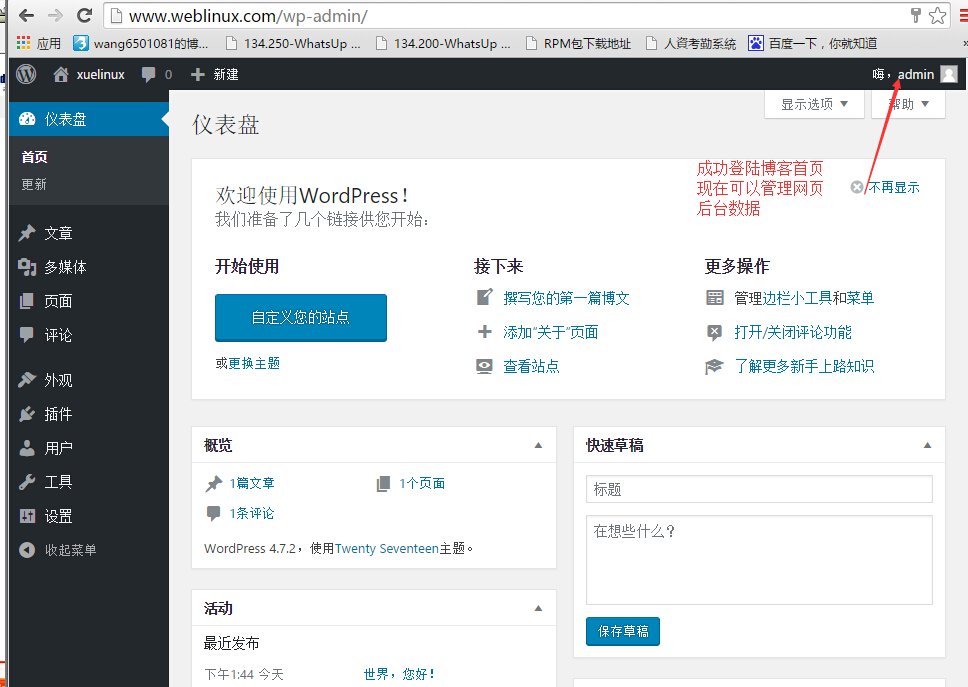
可能在配置过程中会出现点小错误,按照错误提示设置即可。 至此wordpress博客网页就建立成功。
本文出自 “学linux历程” 博客,请务必保留此出处http://woyaoxuelinux.blog.51cto.com/5663865/1896765
以上是关于linux命令:通过PHPmyqlhttpd建立论坛博客网站的主要内容,如果未能解决你的问题,请参考以下文章
