tomcat安装及配置教程(保姆级)
Posted 爱你的阿白~
tags:
篇首语:本文由小常识网(cha138.com)小编为大家整理,主要介绍了tomcat安装及配置教程(保姆级)相关的知识,希望对你有一定的参考价值。
Tomcat安装教程
(以tomcat-9.0.62为例:)
1.下载安装包
可以从官网下载安装包:
(1)从官网下载
输入网址进入官网
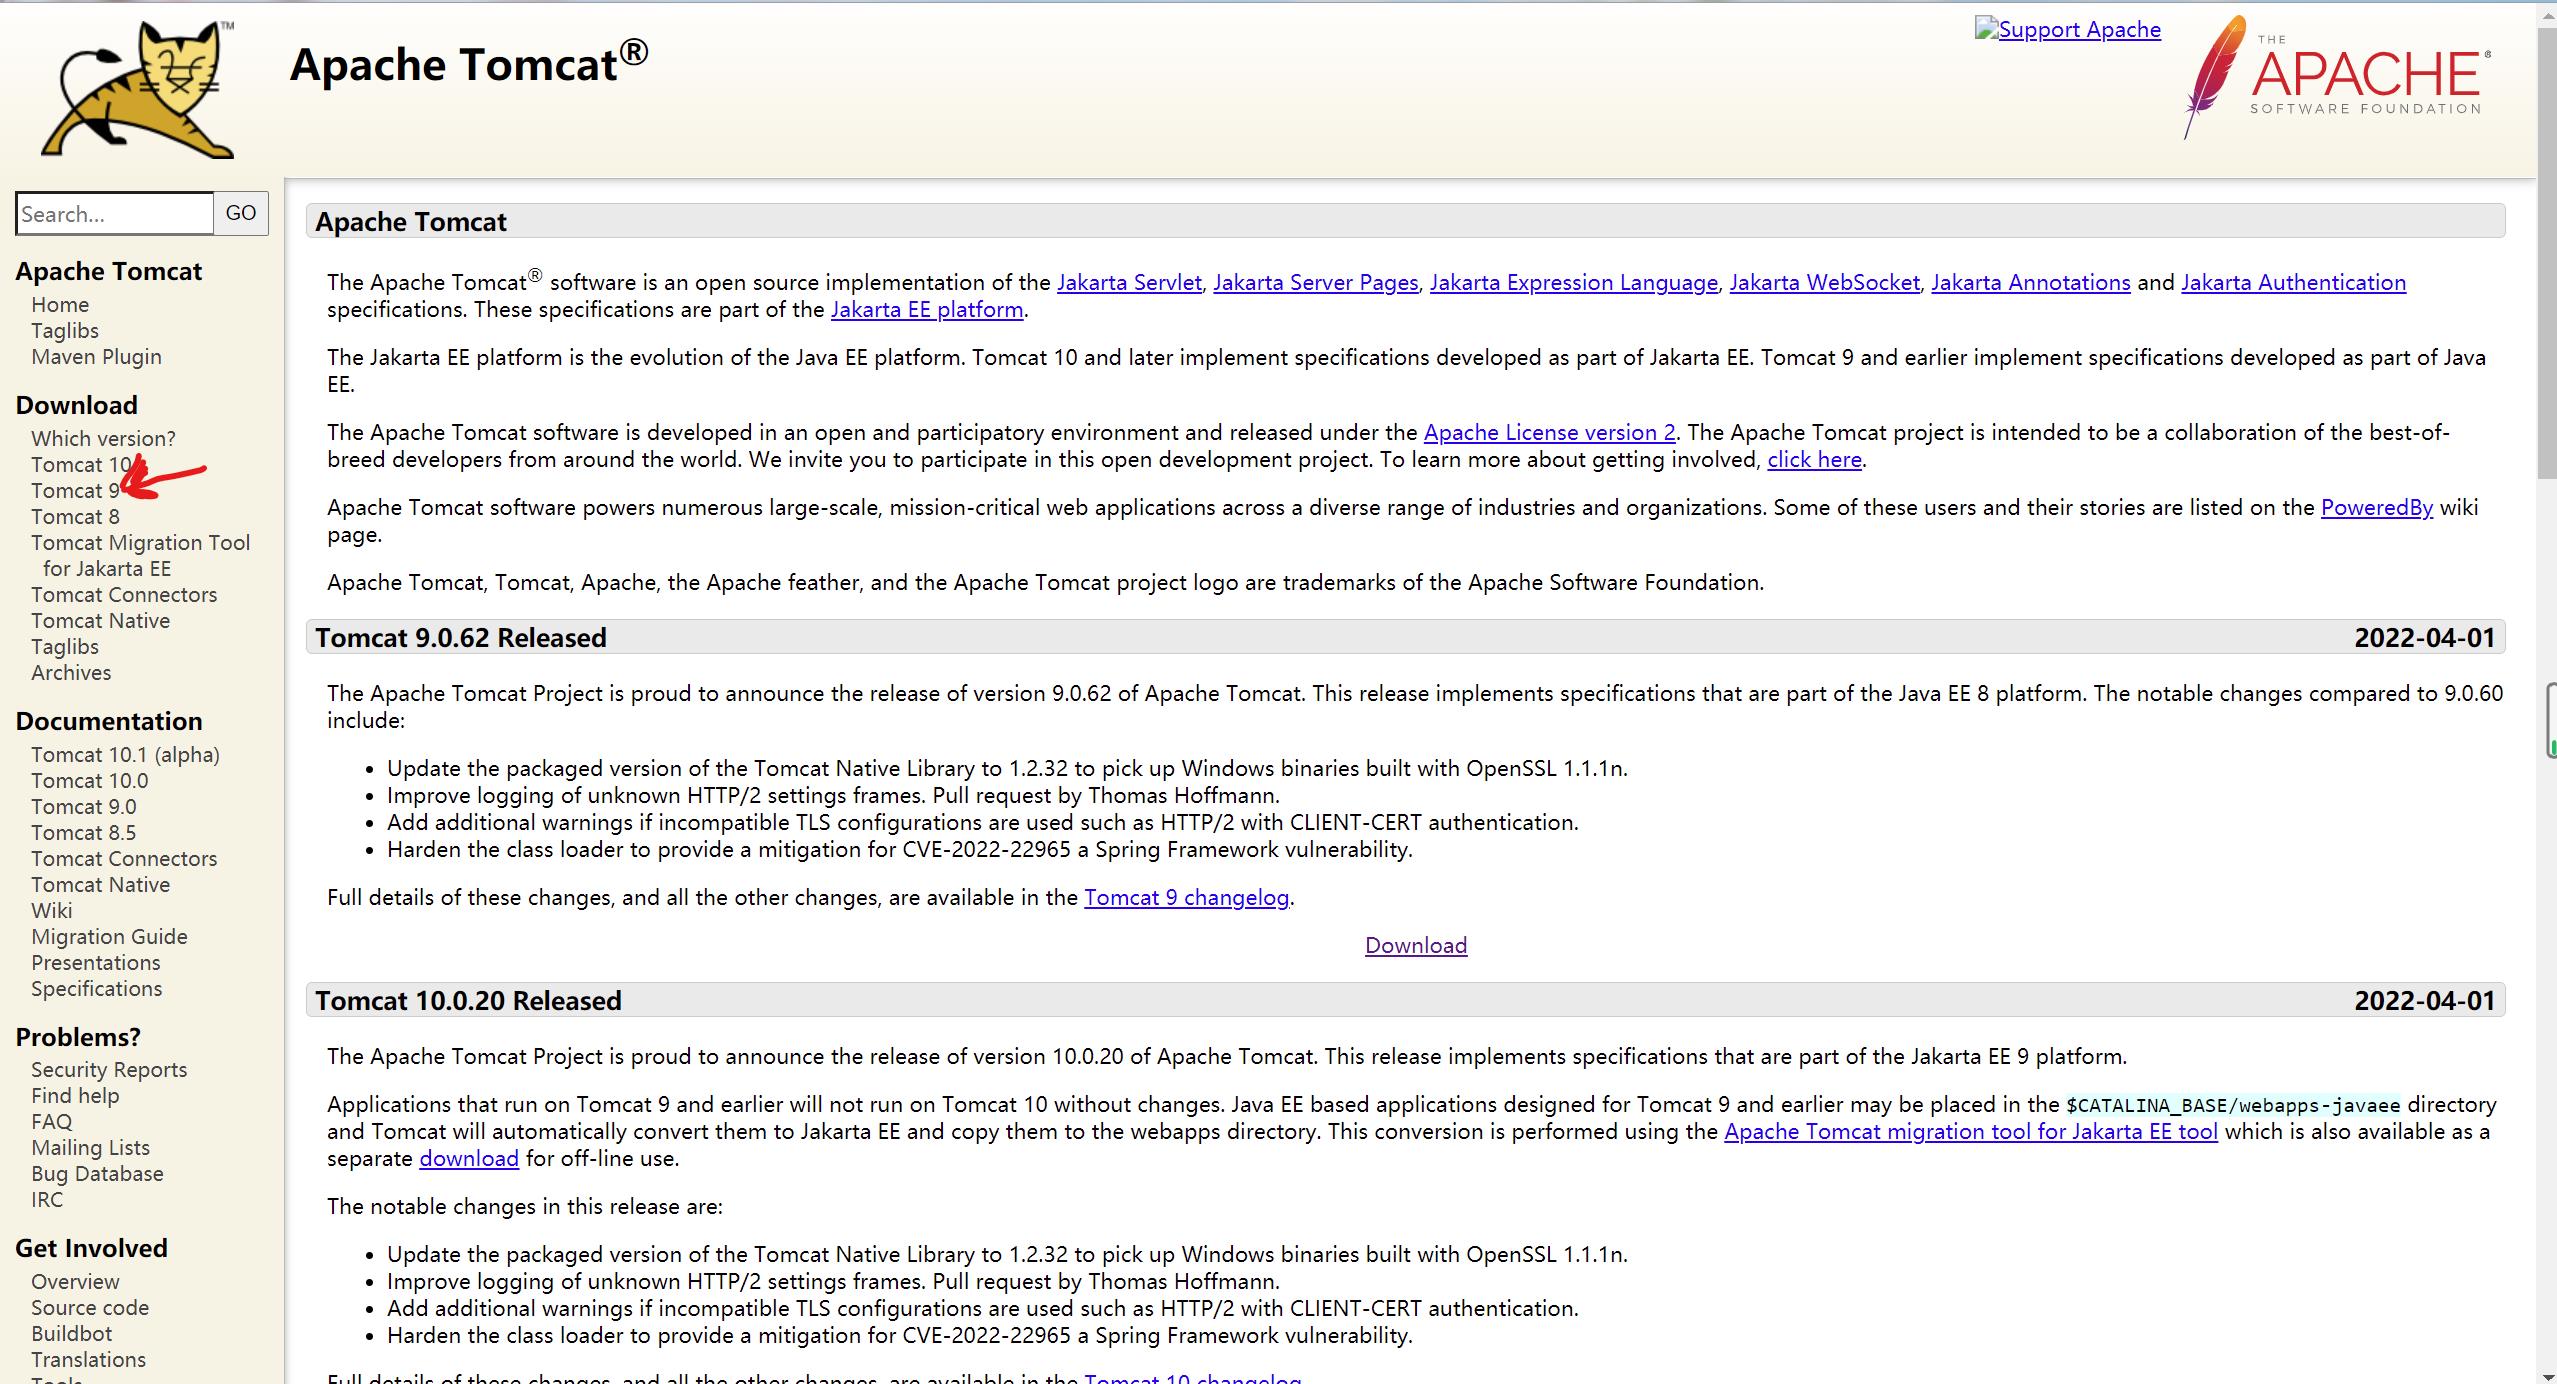
选择版本10,版本9,或者版本8,都可以,这里下载的版本9
不想去官网的直接百度网盘自提:
链接:https://pan.baidu.com/s/1_wWx48RVn_BSk3eXneAZYw?pwd=aijy
提取码:aijy
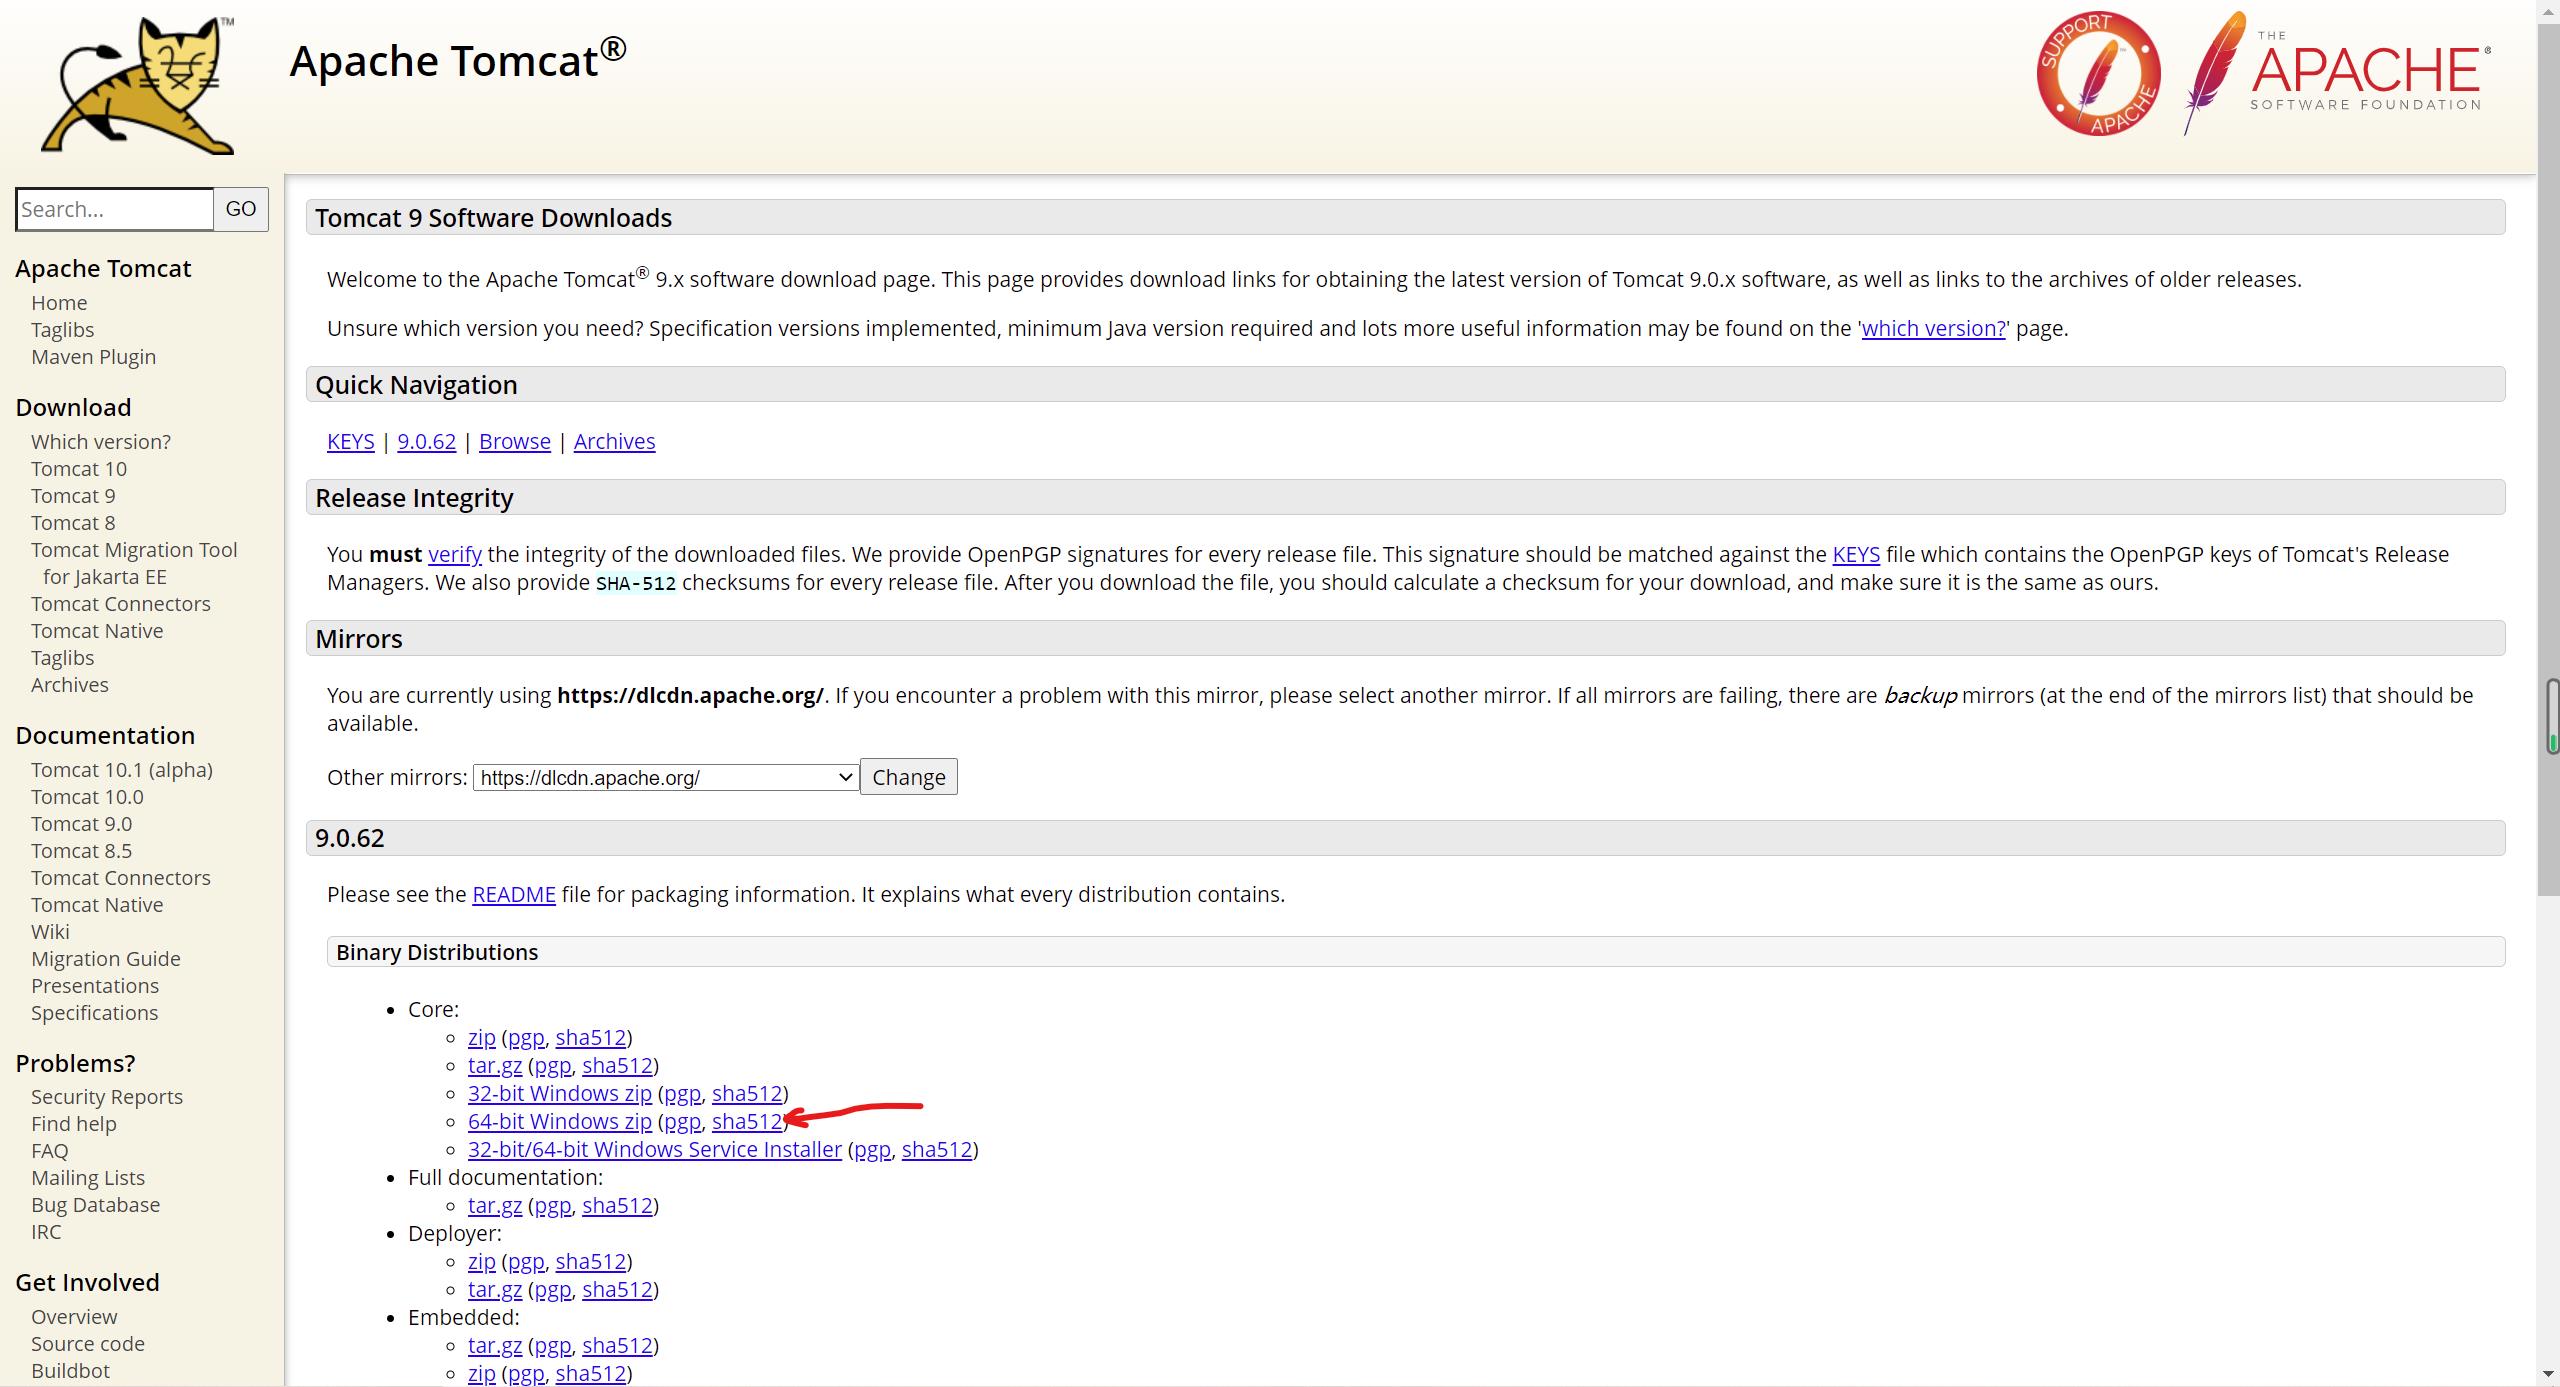
选择下载64-Bit Windows zip(Win64),根据电脑版本选择(目前大多数笔记本电脑都是64位滴)
(2)选择解压路径
解压到电脑其中一个文件夹,记住解压路径
2.配置环境变量
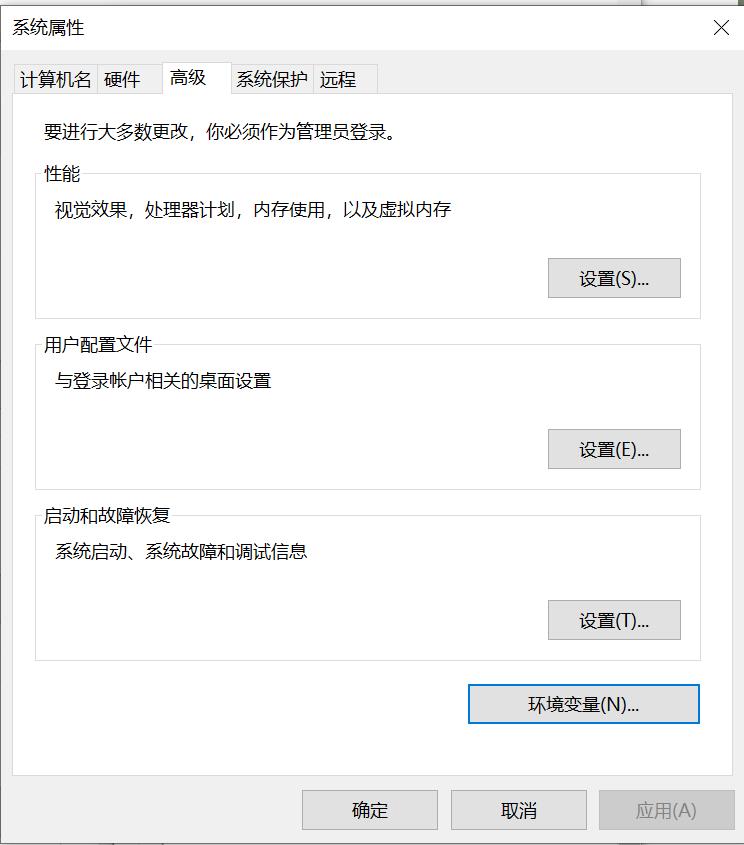
(1)打开高级设置
电脑-属性-高级系统设置
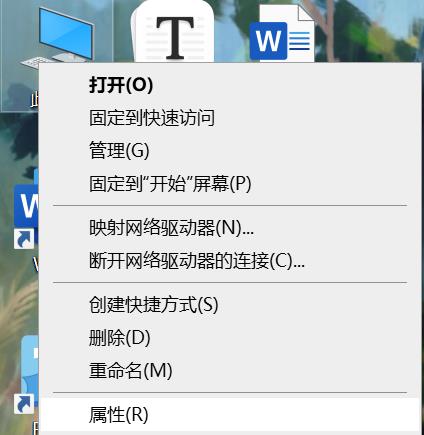
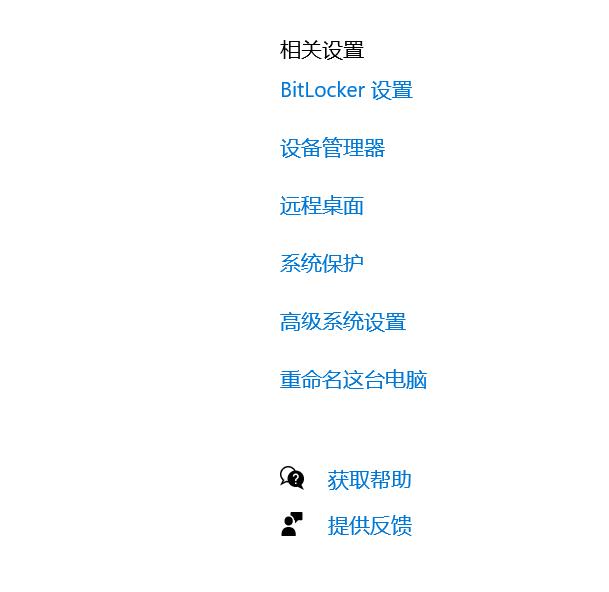
(2)点击高级系统设置-环境变量-新建系统变量
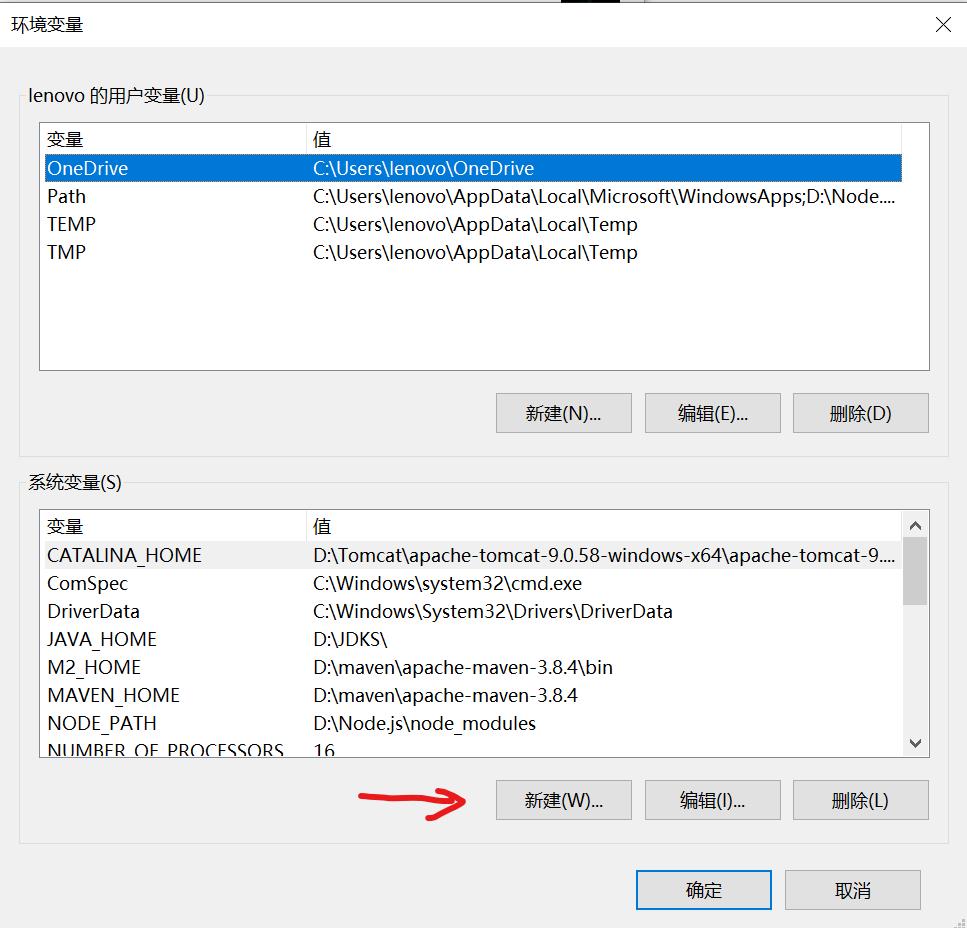
(3)新建系统变量,变量名为CATALINA_HOME
新建系统变量,变量名为 CATALINA_HOME

(4)变量值为解压路径
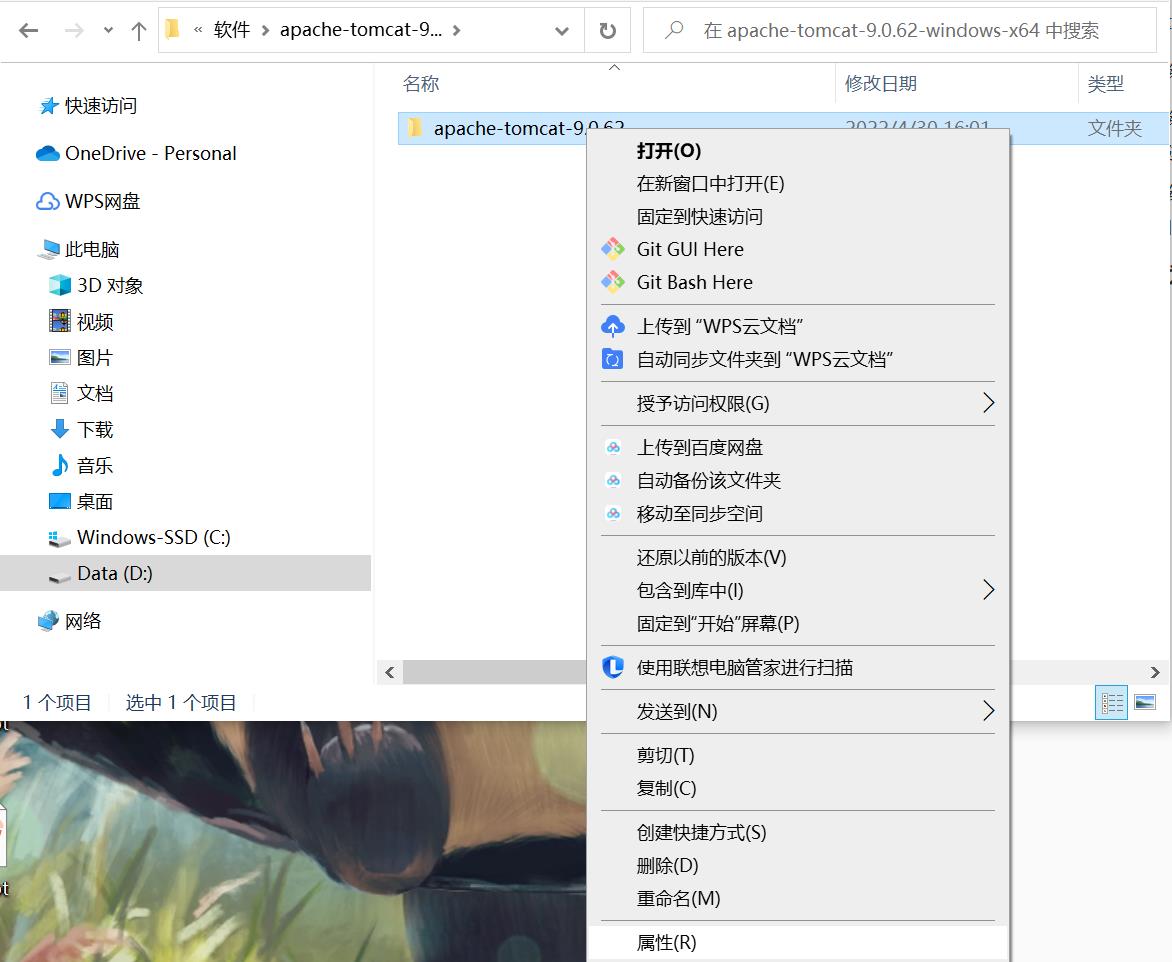
那么解压路径如何查找呢?

点进去,右击文件选择属性
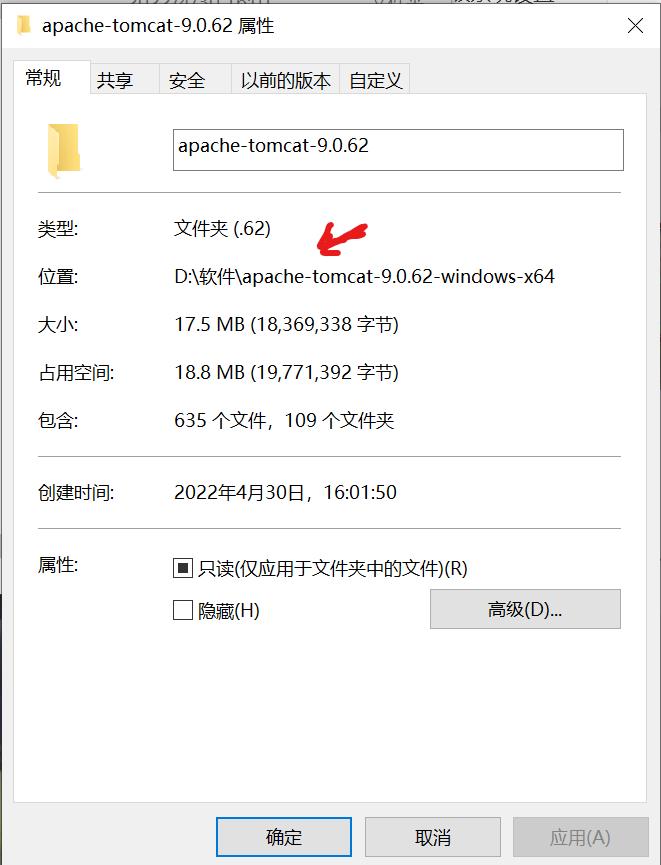
变量值:D:\\软件\\apache-tomcat-9.0.62-windows-x64\\apache-tomcat-9.0.62
(记得在文件后面再加上文件名称)
(记得在文件后面再加上文件名称)
(记得在文件后面再加上文件名称)
否则会以后的报错

点击确定
(5)找到系统变量中的Path,双击空白处或新建即可在末尾加上%CATALINA_HOME%\\bin
注意是系统变量中的Path
注意是系统变量中的Path
注意是系统变量中的Path
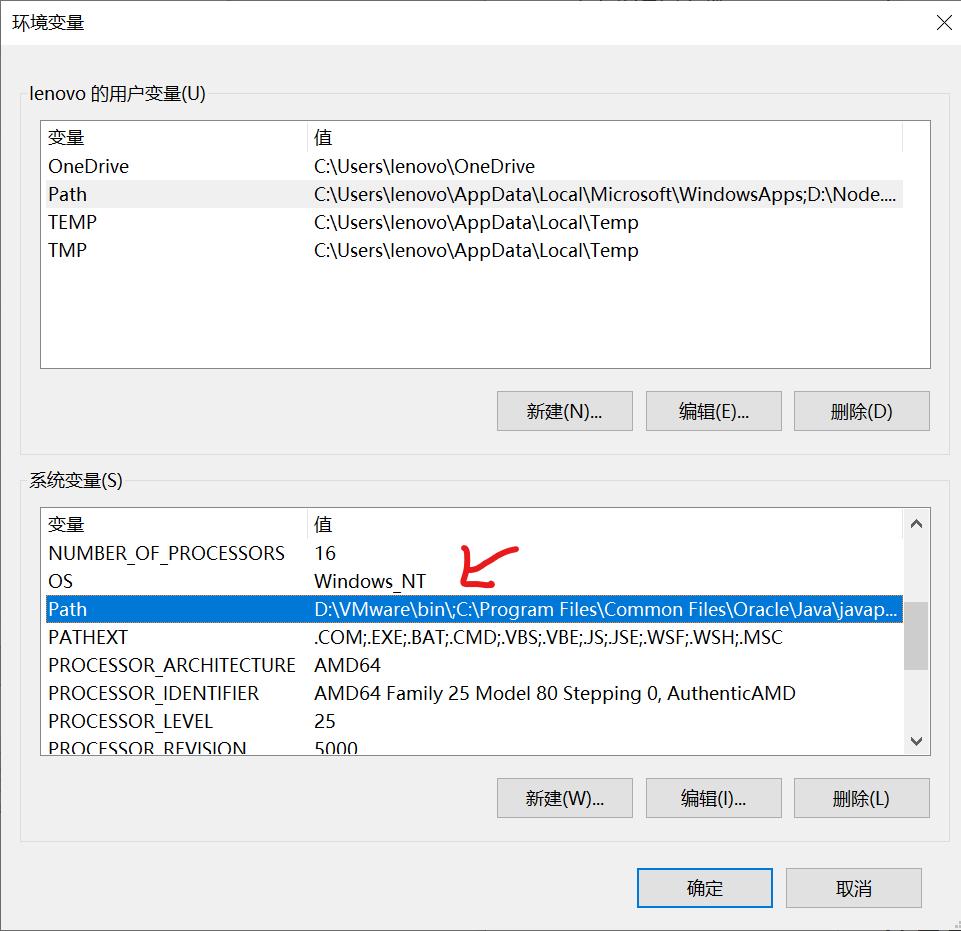
双击进入
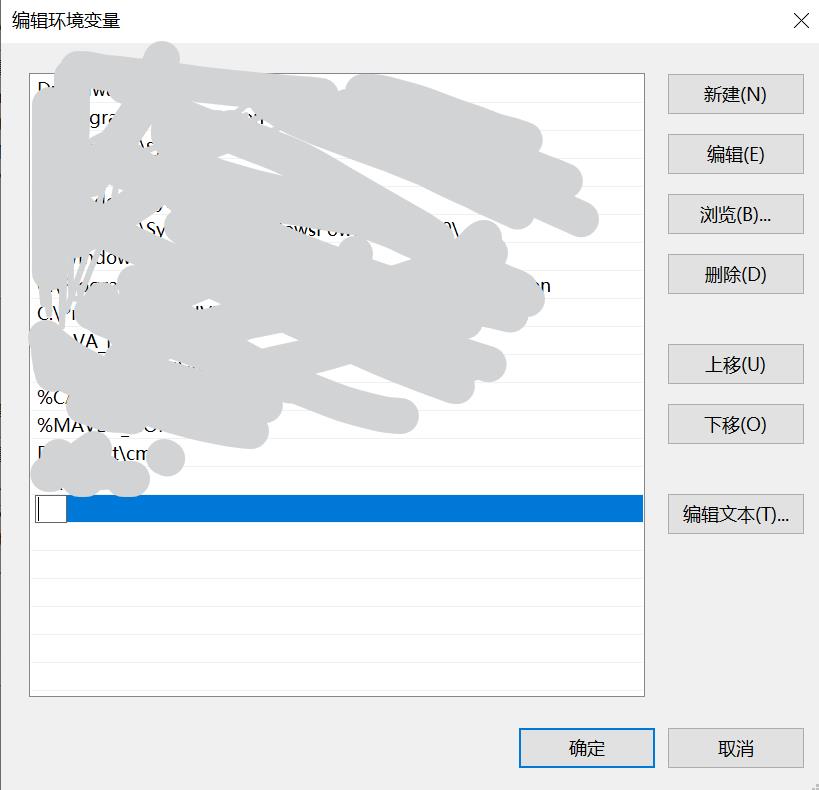
双击空白处或新建即可在末尾加上%CATALINA_HOME%\\bin
3.检验配置成功
(1)win+r
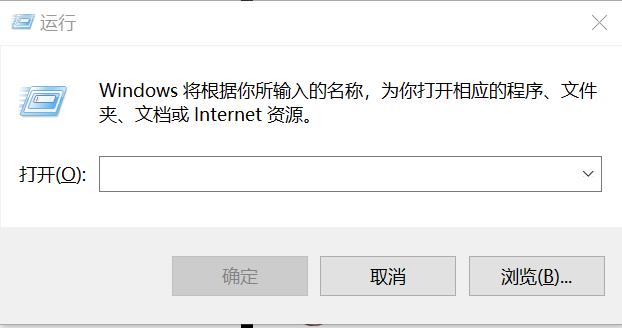
(2)startup.bat
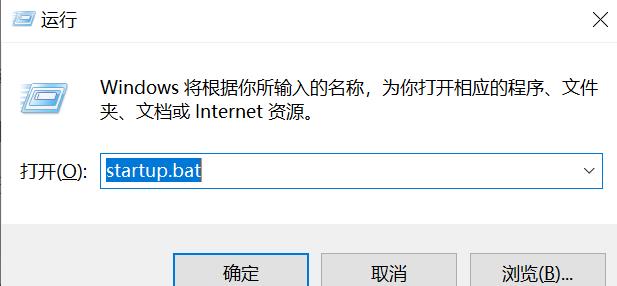
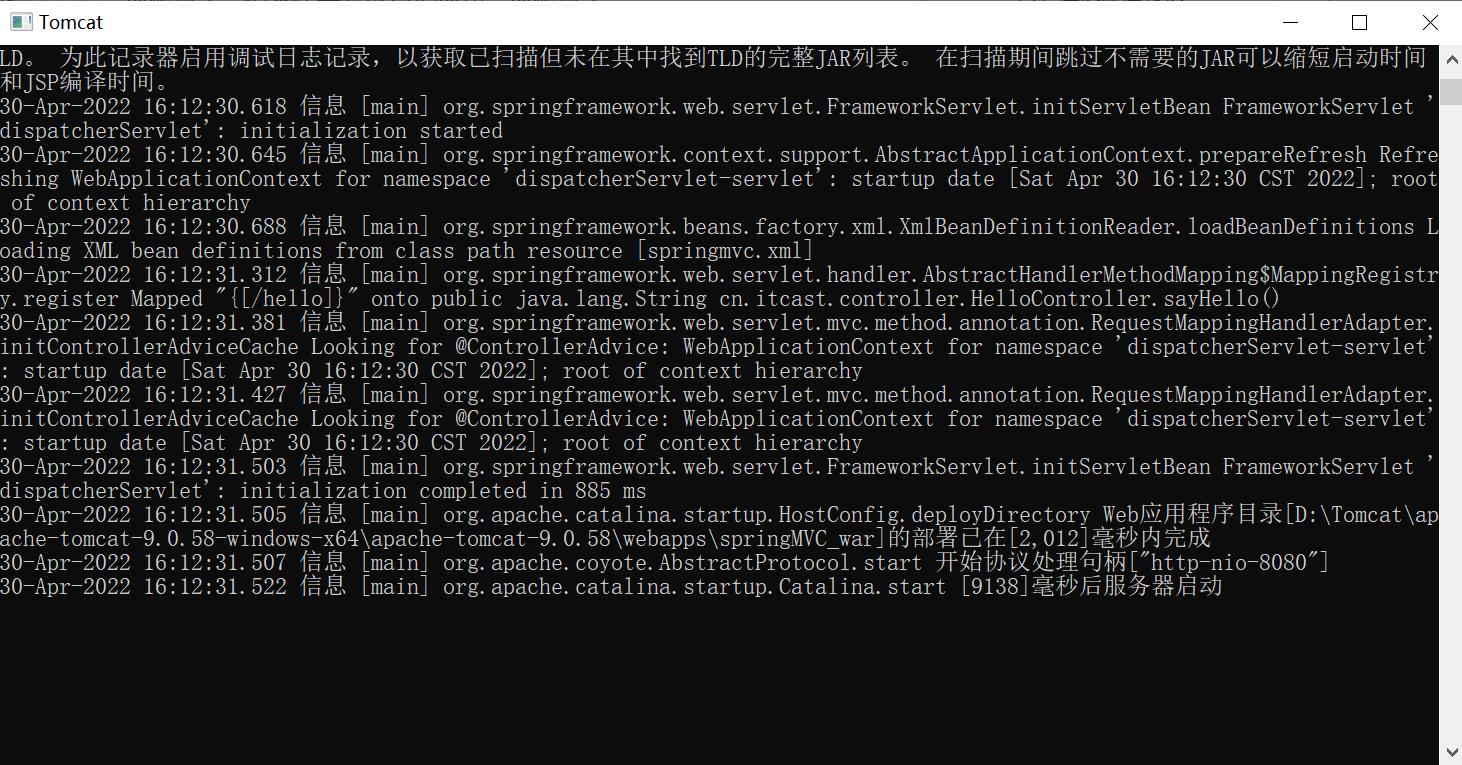
(这步可以跳过可有可无)如果你的运行窗口中出现乱码,比如:

其实这个不影响检验,如果有强迫症的话,接下来教你怎么改
Tomcat运行框乱码问题解决
这时打开浏览器
搜索网址
http://localhost:8080/
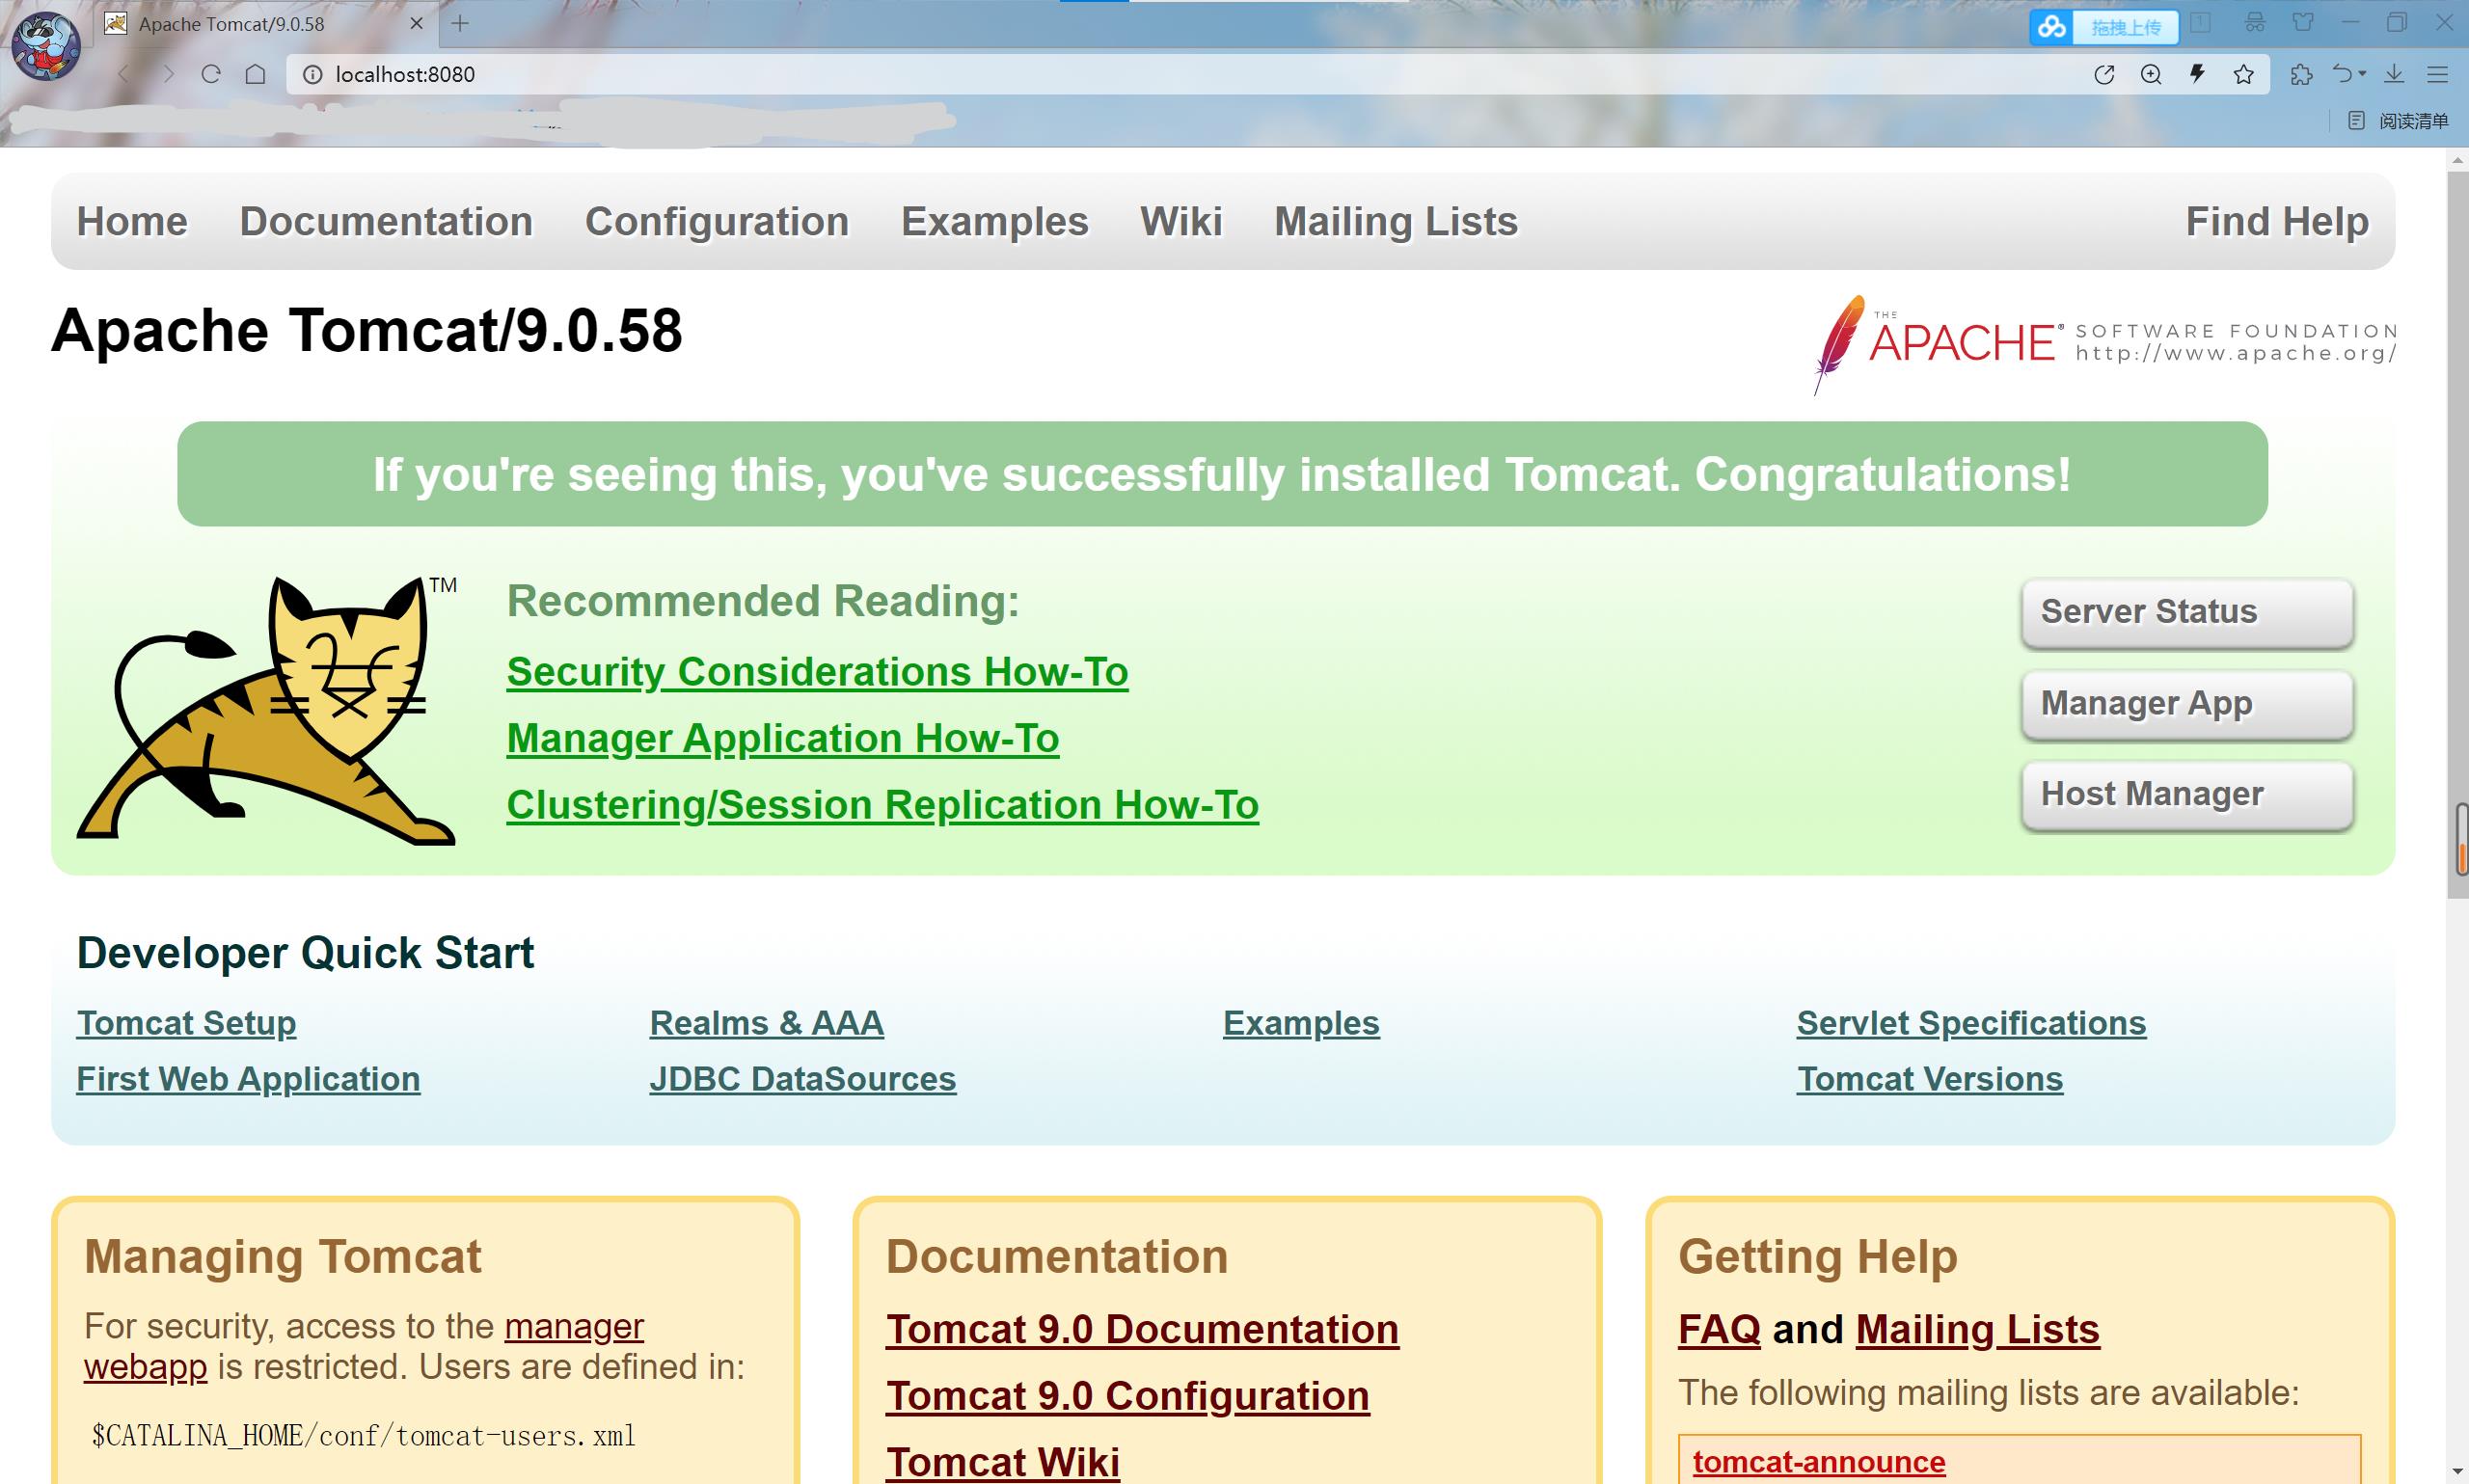
出现这个,恭喜你成功啦!!!
如果显示404,或者别的,这种原因好多好多
解决网址(也是作者的博客啦)
minio安装配置教程及整合springboot(史上最强保姆级教程---minio入门)
minio安装配置教程及整合springboot
- 1、进入minio官网
- 2、选择放置minio文件路径
- 3、根据命令行提示访问minio面板
- 4、minio配置(yaml文件版)
- 5、编写minio的配置文件MinIoClientConfig
- 6、新建minio工具类需要的实体类ObjectItem
- 7、编写minio的工具类MinioUtils
- 8、编写minio的Controller层MinioController
- 9.通过接口测试工具测试
1、进入minio官网
https://www.minio.org.cn/
点击下载(Download),选择自己需要的版本即可
2、选择放置minio文件路径
在此路径下,
新建文件夹minioData(与minio.exe处于同一路径)
在minio.exe文件夹的路径处输入cmd进入命令行界面(该exe文件不能双击运行)
输入命令:minio.exe server minioData全路径
例如:minio.exe server E:\\software\\minioData
后面路径为创建的minioData文件夹的路径
(如果上面命令执行的时候,命令框在疯狂跳动,就关闭该命令框,以管理员方式开启cmd窗口,进入自己的minio文件夹,执行上面的命令即可)
3、根据命令行提示访问minio面板
有多个url可以访问,但是其中固定的是127.0.0.1:9000
第一次访问,会进入登录页面,登录账户和密码均为minioadmin,
进入点击Create Bucket,bucket Name 建议设定为项目的名字,再点击Create Bucket即可,注意如果需要后期通过访问url预览,需要在新建的bucket Name点击Manage,点击AccessPolicy后面的icon(图标),将访问权限改为Public即可,在项目运行中必须开启minio服务,否则无法使用minion。
4、minio配置(yaml文件版)
spring:
  # 配置文件上传大小限制(minio文件上传)
  servlet:
    multipart:
      max-file-size: 200MB
      max-request-size: 200MB

minio:
  endpoint: http://127.0.0.1:9000
  accessKey:  minioadmin
  secretKey:  minioadmin
  bucketName: community-web
如果前面有spring配置,只需要将spring的配置minio文件限制复制贴贴到spring下即可。
5、编写minio的配置文件MinIoClientConfig
package com.example.config;

import io.minio.MinioClient;
import lombok.Data;
import org.springframework.beans.factory.annotation.Value;
import org.springframework.context.annotation.Bean;
import org.springframework.stereotype.Component;

@Data
@Component
public class MinIoClientConfig
    @Value("$minio.endpoint")
    private String endpoint;
    @Value("$minio.accessKey")
    private String accessKey;
    @Value("$minio.secretKey")
    private String secretKey;


    /**
     * 注入minio 客户端
     *
     * @return
     */
    @Bean
    public MinioClient minioClient()

        return MinioClient.builder()
                .endpoint(endpoint)
                .credentials(accessKey, secretKey)
                .build();
6、新建minio工具类需要的实体类ObjectItem
package com.example.sys.entity;

import lombok.Data;

@Data
public class ObjectItem
    private String objectName;
    private Long size;
7、编写minio的工具类MinioUtils
package com.example.utils;

import com.example.sys.entity.ObjectItem;
import io.minio.*;
import io.minio.messages.DeleteError;
import io.minio.messages.DeleteObject;
import io.minio.messages.Item;
import org.apache.tomcat.util.http.fileupload.IOUtils;
import org.springframework.beans.factory.annotation.Autowired;
import org.springframework.beans.factory.annotation.Value;
import org.springframework.http.HttpHeaders;
import org.springframework.http.HttpStatus;
import org.springframework.http.MediaType;
import org.springframework.http.ResponseEntity;
import org.springframework.stereotype.Component;
import org.springframework.web.multipart.MultipartFile;

import java.io.ByteArrayOutputStream;
import java.io.IOException;
import java.io.InputStream;
import java.io.UnsupportedEncodingException;
import java.net.URLEncoder;
import java.util.ArrayList;
import java.util.Arrays;
import java.util.List;
import java.util.stream.Collectors;

/**
 * @description: minio工具类
 * @version:1.0
 */
@Component
public class MinioUtils
    @Autowired
    private MinioClient minioClient;

    @Value("$minio.bucketName")
    private String bucketName;

    /**
     * description: 判断bucket是否存在,不存在则创建
     *
     * @return: void
     */
    public void existBucket(String name)
        try
            boolean exists = minioClient.bucketExists(BucketExistsArgs.builder().bucket(name).build());
            if (!exists)
                minioClient.makeBucket(MakeBucketArgs.builder().bucket(name).build());

         catch (Exception e)
            e.printStackTrace();


    /**
     * 创建存储bucket
     *
     * @param bucketName 存储bucket名称
     * @return Boolean
     */
    public Boolean makeBucket(String bucketName)
        try
            minioClient.makeBucket(MakeBucketArgs.builder()
                    .bucket(bucketName)
                    .build());
         catch (Exception e)
            e.printStackTrace();
            return false;

        return true;


    /**
     * 删除存储bucket
     *
     * @param bucketName 存储bucket名称
     * @return Boolean
     */
    public Boolean removeBucket(String bucketName)
        try
            minioClient.removeBucket(RemoveBucketArgs.builder()
                    .bucket(bucketName)
                    .build());
         catch (Exception e)
            e.printStackTrace();
            return false;

        return true;


    /**
     * description: 上传文件
     *
     * @param multipartFile
     * @return: java.lang.String
     */
    public List<String> upload(MultipartFile[] multipartFile)
        List<String> names = new ArrayList<>(multipartFile.length);
        for (MultipartFile file : multipartFile)
            String fileName = file.getOriginalFilename();
            String[] split = fileName.split("\\\\.");
            if (split.length > 1)
                fileName = split[0] + "_" + System.currentTimeMillis() + "." + split[1];
             else
                fileName = fileName + System.currentTimeMillis();

            InputStream in = null;
            try
                in = file.getInputStream();
                minioClient.putObject(PutObjectArgs.builder()
                        .bucket(bucketName)
                        .object(fileName)
                        .stream(in, in.available(), -1)
                        .contentType(file.getContentType())
                        .build()
                );
             catch (Exception e)
                e.printStackTrace();
             finally
                if (in != null)
                    try
                        in.close();
                     catch (IOException e)
                        e.printStackTrace();


            names.add(fileName);

        return names;


    /**
     * description: 下载文件
     *
     * @param fileName
     * @return: org.springframework.http.ResponseEntity<byte [ ]>
     */
    public ResponseEntity<byte[]> download(String fileName)
        ResponseEntity<byte[]> responseEntity = null;
        InputStream in = null;
        ByteArrayOutputStream out = null;
        try
            in = minioClient.getObject(GetObjectArgs.builder().bucket(bucketName).object(fileName).build());
            out = new ByteArrayOutputStream();
            IOUtils.copy(in, out);
            //封装返回值
            byte[] bytes = out.toByteArray();
            HttpHeaders headers = new HttpHeaders();
            try
                headers.add("Content-Disposition", "attachment;filename=" + URLEncoder.encode(fileName, "UTF-8"));
             catch (UnsupportedEncodingException e)
                e.printStackTrace();

            headers.setContentLength(bytes.length);
            headers.setContentType(MediaType.APPLICATION_OCTET_STREAM);
            headers.setAccessControlExposeHeaders(Arrays.asList("*"));
            responseEntity = new ResponseEntity<byte[]>(bytes, headers, HttpStatus.OK);
         catch (Exception e)
            e.printStackTrace();
         finally
            try
                if (in != null)
                    try
                        in.close();
                     catch (IOException e)
                        e.printStackTrace();


                if (out != null)
                    out.close();

             catch (IOException e)
                e.printStackTrace();


        return responseEntity;


    /**
     * 查看文件对象
     *
     * @param bucketName 存储bucket名称
     * @return 存储bucket内文件对象信息
     */
    public List<ObjectItem> listObjects(String bucketName)
        Iterable<Result<Item>> results = minioClient.listObjects(
                ListObjectsArgs.builder().bucket(bucketName).build());
        List<ObjectItem> objectItems = new ArrayList<>();
        try
            for (Result<Item> result : results)
                Item item = result.get();
                ObjectItem objectItem = new ObjectItem();
                objectItem.setObjectName(item.objectName());
                objectItem.setSize(item.size());
                objectItems.add(objectItem);

         catch (Exception e)
            e.printStackTrace();
            return null;

        return objectItems;


    /**
     * 批量删除文件对象
     *
     * @param bucketName 存储bucket名称
     * @param objects    对象名称集合
     */
    public Iterable<Result<DeleteError>> removeObjects(String bucketName, List<String> objects)
        List<DeleteObject> dos = objects.stream().map(e -> new DeleteObject(e)).collect(Collectors.toList());
        Iterable<Result<DeleteError>> results = minioClient.removeObjects(RemoveObjectsArgs.builder().bucket(bucketName).objects(dos).build());
        return results;
8、编写minio的Controller层MinioController
package com.example.sys.controller;

import com.example.utils.MinioUtils;
import lombok.extern.slf4j.Slf4j;
import org.springframework.beans.factory.annotation.Autowired;
import org.springframework.beans.factory.annotation.Value;
import org.springframework.web.bind.annotation.PostMapping;
import org.springframework.web.bind.annotation.RestController;
import org.springframework.web.multipart.MultipartFile;

import java.util.List;

@RestController
@Slf4j
public class MinioController
    @Autowired
    private MinioUtils minioUtils;
    @Value("$minio.endpoint")
    private String address;
    @Value("$minio.bucketName")
    private String bucketName;

    @PostMapping("/upload")
    public Object upload(MultipartFile file)

        List<String> upload = minioUtils.upload(new MultipartFile[]file);

        return address + "/" + bucketName + "/" + upload.get(0);
9.通过接口测试工具测试
1)新建一个请求(Request)
2)请求方式修改为post
3)请求的url,项目访问路径/upload
例如:http://127.0.0.1:8080/upload
4)选择Body
5)选择Form-Data
6)填写key和value
第一个键值
key—>file
参数类型为file
value—>点击Select Files按钮,选择文件(建议图片)
第二个键值
key—>bucketName
参数类型:选择String
value—>个人设置的桶(bucketName)的名称
最后点击send,发送即可
通过响应的url,复制到浏览器,打开即可,一般打开即可预览到图片,有些电脑会直接下载图片。
以上是关于tomcat安装及配置教程(保姆级)的主要内容,如果未能解决你的问题,请参考以下文章