图像处理:双边滤波算法
Posted 夏天是冰红茶
tags:
篇首语:本文由小常识网(cha138.com)小编为大家整理,主要介绍了图像处理:双边滤波算法相关的知识,希望对你有一定的参考价值。
今天主要是回顾一下双边滤波,我曾经在这篇——图像处理:推导五种滤波算法中推导过它,其中包含了我自己写的草稿图。
目录
双边滤波算法原理
双边滤波(Bilateral filter)是一种非线性的滤波方法,是结合图像的空间邻近度和像素值相似度的一种折中处理,同时考虑空域信息和灰度相似性,达到保边去噪的目的。具有简单、非迭代、局部的特点。双边滤波器的好处是可以做边缘保存(Edge preserving),一般用高斯滤波去降噪,会较明显地模糊边缘,对于高频细节的保护效果并不明显。
双边滤波器之所以能够做到在平滑去噪的同时还能够很好的保存边缘(Edge Preserve),是由于其滤波器的核由两个函数生成:空间域核和值域核。
(1)空间域核
由像素位置欧式距离决定的模板权值 。
。

为模板窗口的其他系数的坐标;
为模板窗口的中心坐标点;
为高斯函数的标准差。
使用公式生成的滤波器模板和高斯滤波器使用的模板是没有区别的。权值
称为定义域核,也称为空间系数、空间域。显示由
的计算公式可知,它是计算临近点q到中心点p临近程度,因此定义域核
是用于衡量空间临近的程度。
(2)值域核
由像素值的差值决定的模板权值 。
。

其中,
为模板窗口的其他系数的坐标,
表示图像在点
处的像素值;
为模板窗口的中心坐标点,对应的像素值为
;
为高斯函数的标准差。
一般会将权值
称为值域核,或像素值域,但不管是值域核
还是空间域核
,其大小都在[0 1]之间。
最后,将上述两个模板相乘就得到了双边滤波器的模板权值:

因此,双边滤波器的数据公式可以表示如下:

理解双边滤波
双边滤波(Bilateral filter)其综合了高斯滤波器和α-截尾均值滤波器的特点,同时考虑了空间域与值域的差别,而高斯滤波器和α均值滤波分别只考虑了空间域和值域差别。高斯滤波器只考虑像素间的欧式距离,其使用的模板系数随着和窗口中心的距离增大而减小;α-截尾均值滤波器则只考虑了像素灰度值之间的差值,去掉α%的最小值和最大值后再计算均值。
空域权重 和值域权重
和值域权重 的意义
的意义
空域权重 衡量的是 两点之间的距离,距离越远权重越低;
值域权重 衡量的是两点之间的像素值相似程度,越相似权重越大。
这里从图像的平坦区域和边缘区域定性分析双边滤波的降噪效果
- 在平坦区域,临近像素的像素值的差值较小,对应值域权重
接近于1,此时空域权重起主要作用,相当于直接对此区域进行高斯模糊。因此,平坦区域相当于进行高斯模糊。
- 在边缘区域,临近像素的像素值的差值较大,对应值域权重
接近于0,导致此处核函数下降(因
),当前像素受到的影响就越小,从而保持了原始图像的边缘的细节信息。
Opencv实现双边滤波
查阅资料才发现,原来双边滤波函数已经在Opencv中实现了。
我们来查看一下这个函数:
def bilateralFilter(src, d, sigmaColor, sigmaSpace, dst=None, borderType=None): # real signature unknown; restored from __doc__
    """
    bilateralFilter(src, d, sigmaColor, sigmaSpace[, dst[, borderType]]) -> dst
    .   @brief Applies the bilateral filter to an image.
    .
    .   The function applies bilateral filtering to the input image, as described in
    .   http://www.dai.ed.ac.uk/CVonline/LOCAL_COPIES/MANDUCHI1/Bilateral_Filtering.html
    .   bilateralFilter can reduce unwanted noise very well while keeping edges fairly sharp. However, it is
    .   very slow compared to most filters.
    .
    .   _Sigma values_: For simplicity, you can set the 2 sigma values to be the same. If they are small (\\<
    .   10), the filter will not have much effect, whereas if they are large (\\> 150), they will have a very
    .   strong effect, making the image look "cartoonish".
    .
    .   _Filter size_: Large filters (d \\> 5) are very slow, so it is recommended to use d=5 for real-time
    .   applications, and perhaps d=9 for offline applications that need heavy noise filtering.
    .
    .   This filter does not work inplace.
    .   @param src Source 8-bit or floating-point, 1-channel or 3-channel image.
    .   @param dst Destination image of the same size and type as src .
    .   @param d Diameter of each pixel neighborhood that is used during filtering. If it is non-positive,
    .   it is computed from sigmaSpace.
    .   @param sigmaColor Filter sigma in the color space. A larger value of the parameter means that
    .   farther colors within the pixel neighborhood (see sigmaSpace) will be mixed together, resulting
    .   in larger areas of semi-equal color.
    .   @param sigmaSpace Filter sigma in the coordinate space. A larger value of the parameter means that
    .   farther pixels will influence each other as long as their colors are close enough (see sigmaColor
    .   ). When d\\>0, it specifies the neighborhood size regardless of sigmaSpace. Otherwise, d is
    .   proportional to sigmaSpace.
    .   @param borderType border mode used to extrapolate pixels outside of the image, see #BorderTypes
    """
pass在python当中是看不到源代码的,而且参数释义也是英文的,不过它这里倒是给出了一个网址,好像是介绍双边滤波的,我们一起来看看双边滤波。

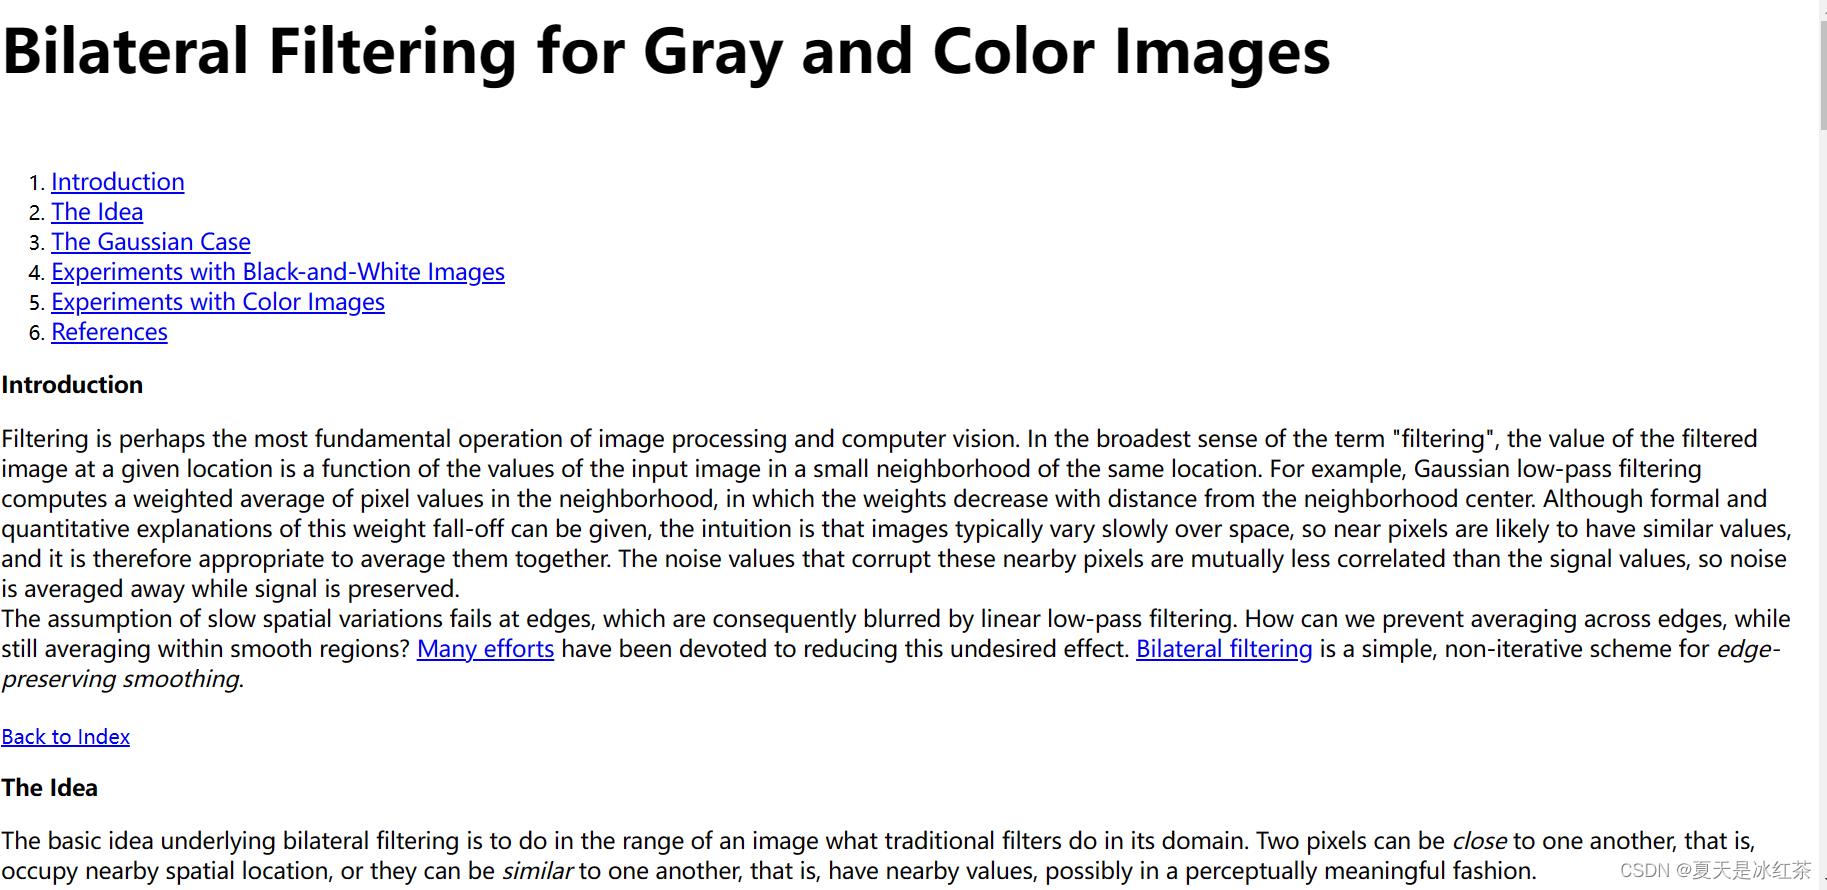
原来是这是一篇有关于双边滤波论文。


它这里做了两种实验分别是黑白实验以及颜色实验。
- 黑白实验中做了三组,分别是猫咪、水果静物、洋葱,经过双边滤波处理后,大部分的精细纹理被消除掉了。
- 颜色实验做了两组,黑白实验中当使用标准低通滤波器平滑黑白图像, 在边缘上产生中间层次的灰色,从而产生模糊的图像,颜色实验要复杂的多,产生的是两个颜色的融合颜色,例如,在蓝色之间红色有各种深浅不一的粉红色和紫色。而且平滑颜色边缘时可能会产生色带,平滑的图像不仅看起来模糊,而且还表现出物体周围有奇特的彩色光环。第二组是红衣小男孩,图(一)显示出了五次迭代的效果,图(二)单次迭代会比原来的图像更清晰,可能足以满足我们图像处理上的大多数要求,多个迭代具有拼合图像中颜色的效果相当多,但没有模糊的边缘。图(三)卡通形象,所有阴影和边缘都是保留了下来,但大部分阴影都消失了,没有“新”颜色通过过滤引入。

接下来,还是来看看双边滤波的一个效果,我们自己来实现一下看看,万一人家作者是吹嘘的呢?
双边滤波代码实现
既然opencv中有这个函数了,那我们也就不用再费时间自己去写了,毕竟你自己写的效果可能还真不如这里面已经集成好的。
def bilateralFilter(src, d, sigmaColor, sigmaSpace, dst=None, borderType=None):
- src: 输入的原始图像。
- d: 表示在过滤过程中每个像素邻域的直径范围。如果这个值是非正数,则函数会从第五个参数sigmaSpace计算该值。
- sigmaColor:颜色空间过滤器的sigma值,这个参数的值月大,表明该像素邻域内有越宽广的颜色会被混合到一起,产生较大的半相等颜色区域。 (这个参数可以理解为值域核
的
)
- sigmaSpace:,如果该值较大,则意味着颜⾊相近的较远的像素将相互影响,从而使更⼤的区域中足够相似的颜色获取相同的颜色。当d>0时,d指定了邻域大小,那么不考虑sigmaSpace值,否则d正比于sigmaSpace。(这个参数可以理解为空间域核
的
)
- dst:输出图像。
- borderType:用于推断图像外部像素的某种边界模式,有默认值BORDER_DEFAULT。
双边滤波器可以很好的保存图像边缘细节而滤除掉低频分量的噪音,但是双边滤波器的效率不是太高,花费的时间相较于其他滤波器而言也比较长。
对于简单的滤波而言,可以将两个sigma值设置成相同的值,如果值<10,则对滤波器影响很小,如果值>150则会对滤波器产生较大的影响,会使图片看起来像卡通,就像是上面论文中那样。
import cv2
import numpy as np


def stackImages(scale,imgArray):
    rows = len(imgArray)
    cols = len(imgArray[0])
    rowsAvailable = isinstance(imgArray[0], list)
    width = imgArray[0][0].shape[1]
    height = imgArray[0][0].shape[0]
    if rowsAvailable:
        for x in range ( 0, rows):
            for y in range(0, cols):
                if imgArray[x][y].shape[:2] == imgArray[0][0].shape [:2]:
                    imgArray[x][y] = cv2.resize(imgArray[x][y], (0, 0), None, scale, scale)
                else:
                    imgArray[x][y] = cv2.resize(imgArray[x][y], (imgArray[0][0].shape[1], imgArray[0][0].shape[0]), None, scale, scale)
                if len(imgArray[x][y].shape) == 2: imgArray[x][y]= cv2.cvtColor( imgArray[x][y], cv2.COLOR_GRAY2BGR)
        imageBlank = np.zeros((height, width, 3), np.uint8)
        hor = [imageBlank]*rows
        hor_con = [imageBlank]*rows
        for x in range(0, rows):
            hor[x] = np.hstack(imgArray[x])
        ver = np.vstack(hor)
    else:
        for x in range(0, rows):
            if imgArray[x].shape[:2] == imgArray[0].shape[:2]:
                imgArray[x] = cv2.resize(imgArray[x], (0, 0), None, scale, scale)
            else:
                imgArray[x] = cv2.resize(imgArray[x], (imgArray[0].shape[1], imgArray[0].shape[0]), None,scale, scale)
            if len(imgArray[x].shape) == 2: imgArray[x] = cv2.cvtColor(imgArray[x], cv2.COLOR_GRAY2BGR)
        hor= np.hstack(imgArray)
        ver = hor
    return ver

def empty(a):
    pass

path = './Images/rgblena.jpg'
img = cv2.imread(path)

cv2.namedWindow('image')
cv2.createTrackbar('d', 'image', 1, 50, empty)
cv2.createTrackbar('sigmaColor', 'image', 1, 150, empty)
cv2.createTrackbar('sigmaSpace', 'image', 1, 150, empty)
while True:
    d = cv2.getTrackbarPos('d', 'image')
    sigmaColor = cv2.getTrackbarPos('sigmaColor', 'image')
    sigmaSpace = cv2.getTrackbarPos('sigmaSpace', 'image')
    print(d,sigmaColor,sigmaSpace)
    dst = cv2.bilateralFilter(img, d, sigmaColor, sigmaSpace)
    stackimg=stackImages(0.5,[img,dst])
    cv2.imshow('image', stackimg)

    k = cv2.waitKey(1) & 0xFF
    if k == 27:
        break

cv2.destroyAllWindows()
网上都是有关于轨迹栏控制C++版本的双边滤波,所以我这里就使用python来实现它。请一定一定要注意的是,轨迹栏滑动条请慢点调使,双边滤波的计算是比较费时间的,搞不好窗口会被卡住。

我们使用cv2.namedWindow函数创建了一个名为“image”的窗口,并使用cv2.createTrackbar函数创建了三个滑动条,分别用来调整d、sigmaColor和sigmaSpace参数。
在while循环中,使用cv2.getTrackbarPos函数获取滑动条的当前值,并将其作为双边滤波函数的参数,然后将滤波结果显示在窗口中。
参考资料
浅析bilateral filter双边滤波器的理解-面圈网
双边滤波方法原理与代码实践(附完整代码)_双边滤波器公式_小小何先生的博客-CSDN博客
基于卷积神经网络的坝面表观缺陷实时检测方法与应用 - 中国知网 (cnki.net)
OpenCv 026---高斯双边滤波
1 前备知识
此前的图像卷积处理无论是均值还是高斯都是属于模糊卷积,它们都有一个共同的特点就是模糊之后图像的边缘信息不复存在或者受到了破坏。而高斯双边滤波可以通过卷积处理实现图像模糊的同时减少图像边缘破坏,滤波之后的输出完整的保存了图像整体边缘(轮廓)信息,我们称这类滤波算法为边缘保留滤波算法(EPF)。最常见的边缘保留滤波算法有以下几种:
- 高斯双边模糊:高斯模糊是考虑图像空间位置对权重的影响,但是它没有考虑图像像素分布对图像卷积输出的影响,双边模糊考虑了像素值分布的影响,对像素值空间分布差异较大的进行保留从而完整的保留了图像的边缘信息。
- Meanshift均值迁移模糊:TODO
- 局部均方差模糊:TODO
- OpenCV中对边缘保留滤波还有一个专门的API:下文
2 所用到的主要OpenCv API
/** @brief Applies the bilateral filter to an image.
The function applies bilateral filtering to the input image, as described in
http://www.dai.ed.ac.uk/CVonline/LOCAL_COPIES/MANDUCHI1/Bilateral_Filtering.html
bilateralFilter can reduce unwanted noise very well while keeping edges fairly sharp. However, it is
very slow compared to most filters.
_Sigma values_: For simplicity, you can set the 2 sigma values to be the same. If they are small (<
10), the filter will not have much effect, whereas if they are large (> 150), they will have a very
strong effect, making the image look "cartoonish".
_Filter size_: Large filters (d > 5) are very slow, so it is recommended to use d=5 for real-time
applications, and perhaps d=9 for offline applications that need heavy noise filtering.
This filter does not work inplace.
@param src Source 8-bit or floating-point, 1-channel or 3-channel image.
@param dst Destination image of the same size and type as src .
@param d Diameter of each pixel neighborhood that is used during filtering. If it is non-positive,
it is computed from sigmaSpace.
@param sigmaColor Filter sigma in the color space. A larger value of the parameter means that
farther colors within the pixel neighborhood (see sigmaSpace) will be mixed together, resulting
in larger areas of semi-equal color.
@param sigmaSpace Filter sigma in the coordinate space. A larger value of the parameter means that
farther pixels will influence each other as long as their colors are close enough (see sigmaColor
). When d>0, it specifies the neighborhood size regardless of sigmaSpace. Otherwise, d is
proportional to sigmaSpace.
@param borderType border mode used to extrapolate pixels outside of the image, see #BorderTypes
 */
CV_EXPORTS_W void bilateralFilter( InputArray src, OutputArray dst, int d,
                                   double sigmaColor, double sigmaSpace,
                                   int borderType = BORDER_DEFAULT );
3 程序代码
#include <opencv2/opencv.hpp>
#include <iostream>

using namespace cv;
using namespace std;

int main(int artc, char** argv) {
    Mat src = imread("images/Demo.jpg");
    if (src.empty()) {
        printf("could not load image...
");
        return -1;
    }
    namedWindow("input", CV_WINDOW_AUTOSIZE);
    imshow("input", src);

    Mat dst;
    bilateralFilter(src, dst, 0, 100, 10, 4);
    imshow("result", dst);

    waitKey(0);
    return 0;
}
4 运行结果
略
5 扩展及注意事项
none
6*目前只做大概了解,知道有这一算法,后续具体使用再做具体分析
以上是关于图像处理:双边滤波算法的主要内容,如果未能解决你的问题,请参考以下文章
[Python图像处理] 四十一.Python图像平滑万字详解(均值滤波方框滤波高斯滤波中值滤波双边滤波)
图像增强基于matlab双边滤波retinex算法暗光图像增强含Matlab源码 2305期