Sharding-JDBC 实现水平分库以及分表
Posted 爱上口袋的天空
tags:
篇首语:本文由小常识网(cha138.com)小编为大家整理,主要介绍了Sharding-JDBC 实现水平分库以及分表相关的知识,希望对你有一定的参考价值。
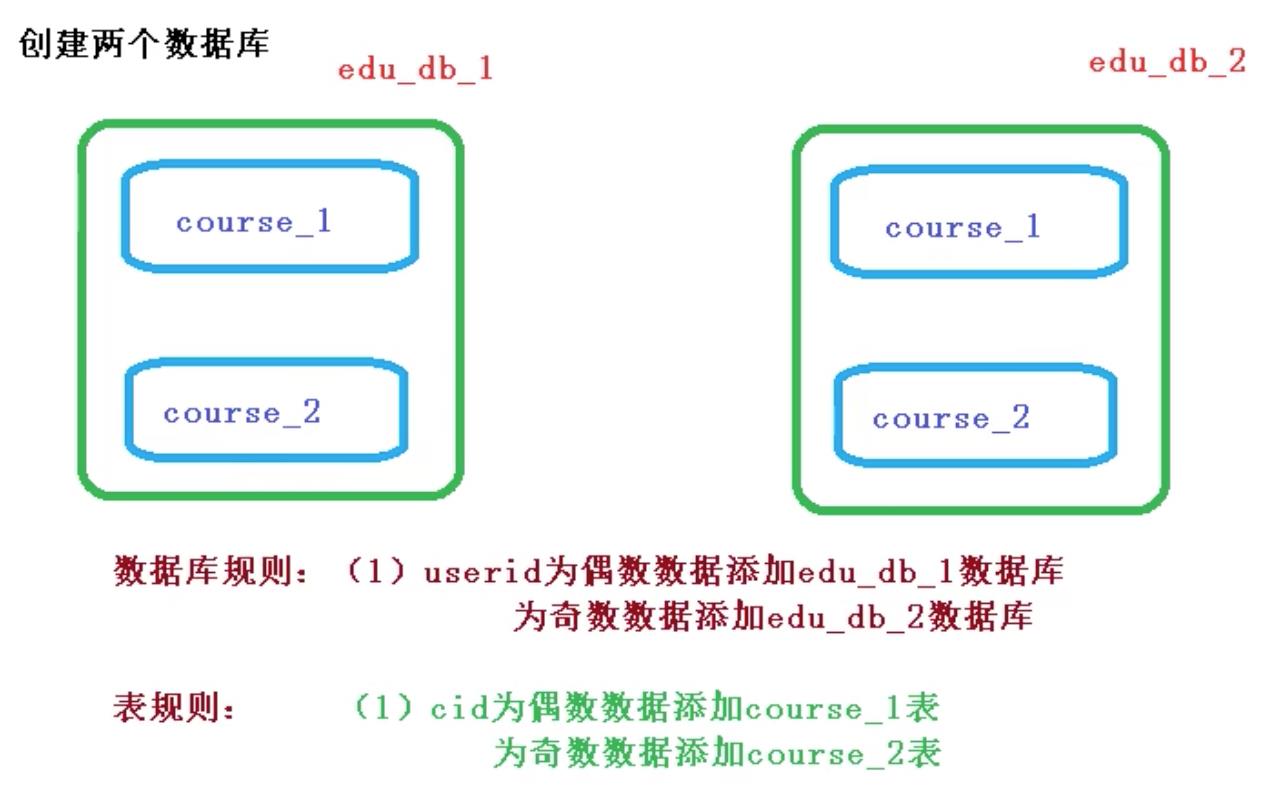
一、需求分析
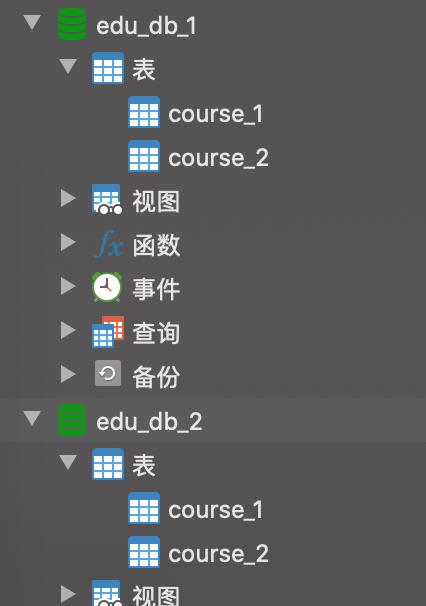
二、创建数据库,数据表
create database edu_db_1;
create database edu_db_2;

use edu_db_1;

create table course_1 (
	`cid` bigint(20) primary key,
	`cname` varchar(50) not null,
	`user_id` bigint(20) not null,
	`cstatus` varchar(10) not null
);

create table course_2 (
	`cid` bigint(20) primary key,
	`cname` varchar(50) not null,
	`user_id` bigint(20) not null,
	`cstatus` varchar(10) not null
);

use edu_db_2;

create table course_1 (
	`cid` bigint(20) primary key,
	`cname` varchar(50) not null,
	`user_id` bigint(20) not null,
	`cstatus` varchar(10) not null
);

create table course_2 (
	`cid` bigint(20) primary key,
	`cname` varchar(50) not null,
	`user_id` bigint(20) not null,
	`cstatus` varchar(10) not null
);
三、配置水平分库分表策略
spring:
  shardingsphere:
    # 数据源配置
    datasource:
      # 数据源名称,多数据源以逗号分隔,名称可以随意起名
      names: db1,db2
      db1: #配置第一个数据源
        driver-class-name: com.mysql.cj.jdbc.Driver
        type: com.alibaba.druid.pool.DruidDataSource
        password: xxxxxx
        username: root
        url: jdbc:mysql://192.168.56.20:3306/edu_db_1?allowPublicKeyRetrieval=true&useUnicode=true&characterEncoding=utf-8&useSSL=false&serverTimezone=Asia/Shanghai
      db2: #配置第一个数据源
        driver-class-name: com.mysql.cj.jdbc.Driver
        type: com.alibaba.druid.pool.DruidDataSource
        password: xxxxxx
        username: root
        url: jdbc:mysql://192.168.56.20:3306/edu_db_2?allowPublicKeyRetrieval=true&useUnicode=true&characterEncoding=utf-8&useSSL=false&serverTimezone=Asia/Shanghai
    # 规则配置
    rules:
      sharding:
        # 分片算法配置
        sharding-algorithms:
          course-table-inline: # 分表的策略
            type: INLINE # 分片算法类型
            props:
              # 分片算法的行表达式
              algorithm-expression: course_$->cid % 2 + 1
          course-database-inline: # 分库的策略
            type: INLINE
            props:
              algorithm-expression: db$->user_id % 2 + 1
        # 分布式序列算法配置
        key-generators:
          course-snowflake:
            type: snowflake #分布式序列算法类型,雪花算法:SNOWFLAKE; UUID:UUID)
            column: cid #分布式主键列
        tables:
          # 逻辑表名称
          course:
            # 行表达式标识符可以使用 $... 或 $->...,但前者与 Spring 本身的属性文件占位符冲突,因此在 Spring 环境中使用行表达式标识符建议使用 $->...
            actual-data-nodes: db$->1..2.course_$->1..2
            # 分表策略
            table-strategy:
              standard:
                # 分片列名称
                sharding-column: cid
                # 分片算法名称
                sharding-algorithm-name: course-table-inline
            key-generate-strategy:
              column: cid #分布式序列列名称
              key-generator-name: course-snowflake #分布式序列算法名称
            database-strategy: # 定义分库策略
              standard:
                sharding-column: user_id
                sharding-algorithm-name: course-database-inline
    # 属性配置
    props:
      # 展示修改以后的sql语句
      sql-show: true
四、编写测试代码
package com.sharding.demo.web;

import com.baomidou.mybatisplus.core.conditions.query.QueryWrapper;
import com.sharding.demo.model.Course;
import com.sharding.demo.service.CourseService;
import org.apache.commons.lang.StringUtils;
import org.springframework.web.bind.annotation.RequestMapping;
import org.springframework.web.bind.annotation.RestController;

import javax.annotation.Resource;
import java.util.List;

@RestController
@RequestMapping(value = "course")
public class CourseController

    @Resource
    private CourseService courseService;

    @RequestMapping(value = "addCourse")
    public void addCourse()
        for (int i = 0; i < 10; i++)
            Course course = new Course();
//            course.setCid(100L+i);
            //cid由我们设置的策略,雪花算法进行生成(至少70年内生成的id不会重复)
            course.setCname("java"+i);
            course.setUserId(Long.valueOf(i));
            course.setCstatus(i%2==0?String.valueOf(1):String.valueOf(0));
            courseService.addCourse(course);


    @RequestMapping(value = "updateCourseByParam")
    public String updateCourseByParam(Course course)
        return courseService.updateCourseByParam(course);


    @RequestMapping(value = "delCourseByParam")
    public String delCourseByParam(Course course)
        return courseService.delCourseByParam(course);


    @RequestMapping(value = "queryCourseByParams")
    public List<Course> queryCourseByParams(Course course)
        QueryWrapper<Course> wrapper = new QueryWrapper<>();
        if (StringUtils.isNotBlank(course.getCname()))
            wrapper.eq("cname", course.getCname());

        if (StringUtils.isNotBlank(course.getCstatus()))
            wrapper.eq("cstatus", course.getCstatus());

        if (null!=course.getCid())
            wrapper.eq("cid", course.getCid());

        if (null!=course.getUserId())
            wrapper.eq("user_id", course.getUserId());

        return courseService.findCourse(wrapper);
执行新增:
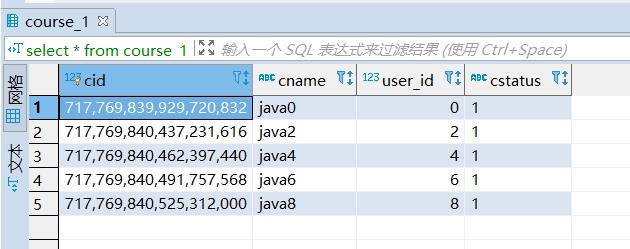
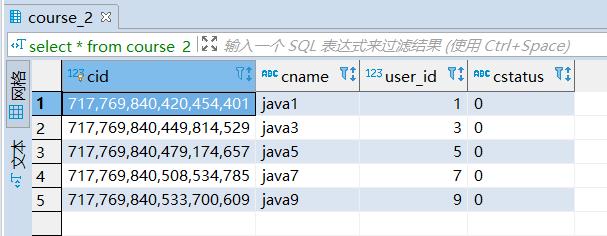
查看结果:
edu_db_1库:
course_1:
course_2:
edu_db_2库:
course_1:

course_2:
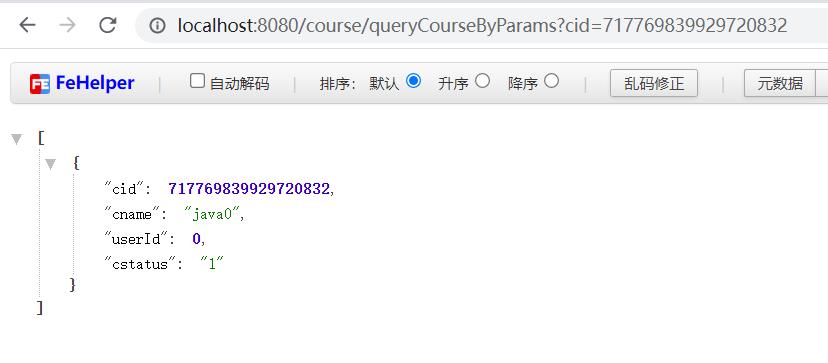
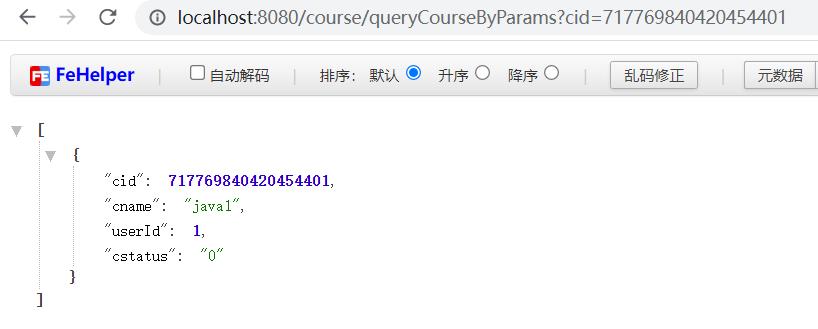
执行查询方法:
查询在edu_db_1库的数据:
查询在edu_db_2库的数据:
以上是关于Sharding-JDBC 实现水平分库以及分表的主要内容,如果未能解决你的问题,请参考以下文章
