python大数据作业六画一个蛋糕
Posted BreakAndCreate
tags:
篇首语:本文由小常识网(cha138.com)小编为大家整理,主要介绍了python大数据作业六画一个蛋糕相关的知识,希望对你有一定的参考价值。
简答题(共1题,100分)1. (简答题)使用matplotlib绘制如下图
第一步先画一个坐标系出来
import matplotlib.pyplot as plt
# 创建Figure画板对象
fig = plt.figure()
# //将整个Figure区域划分为Row * col的网格;
# //建立坐标轴
ax=fig.add_subplot()
# //设置x轴和y轴
ax.set(xlim=[0, 8], ylim=[0, 8], title='HAPPY BIRTHDAY',
       ylabel='Y-Axis', xlabel='X-Axis')
plt.show()
来看看效果
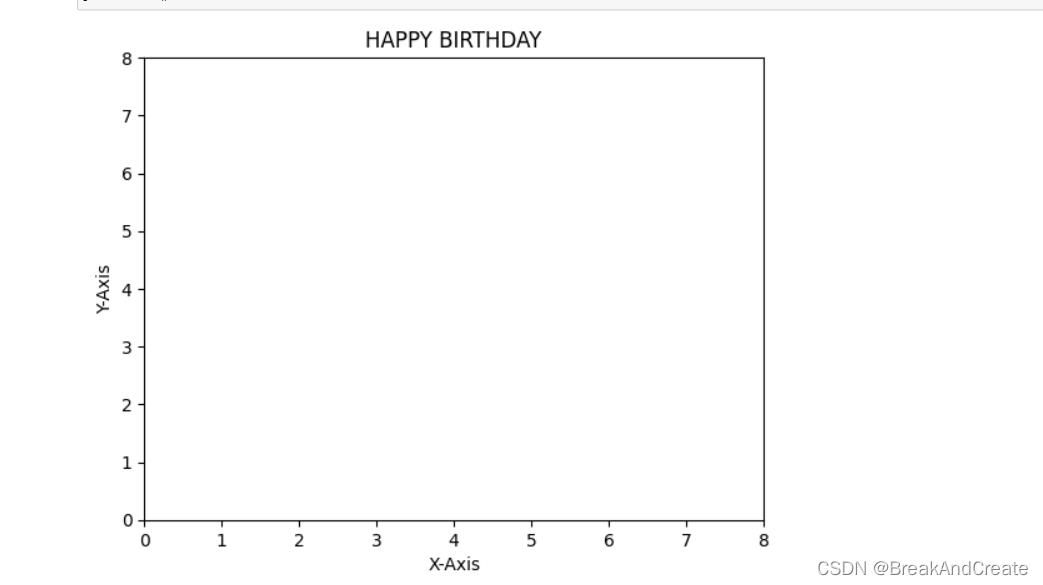
坐标系建立出来了
第二步 绘制网格
import matplotlib.pyplot as plt
# 创建Figure画板对象
fig = plt.figure()
# //将整个Figure区域划分为Row * col的网格;
# //建立坐标轴
ax=fig.add_subplot()
# //设置x轴和y轴
ax.set(xlim=[0, 8], ylim=[0, 8], title='HAPPY BIRTHDAY',
       ylabel='Y-Axis', xlabel='X-Axis')
#显示表格
plt.tight_layout()
plt.show()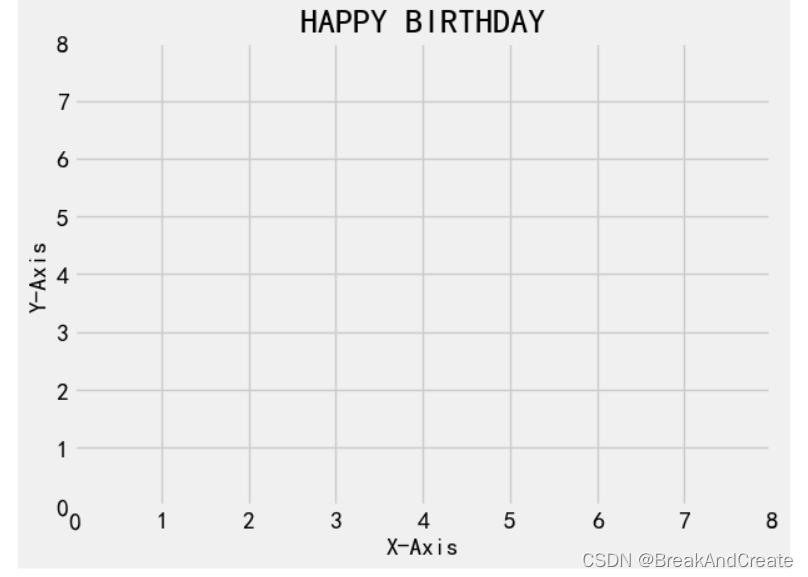
第三步画出基本图形
import matplotlib.pyplot as plt
import numpy as np
# 创建Figure画板对象
fig = plt.figure()
# //将整个Figure区域划分为Row * col的网格;
# //建立坐标轴
ax=fig.add_subplot()
# //设置x轴和y轴
ax.set(xlim=[-6, 10], ylim=[-6, 10], title="HAPPY BIRTHDAY",
       ylabel='Y-Axis', xlabel='X-Axis')
#第一个参数(2,1)表示起始坐标,第二个参数4为长度,第三个参数为高度2 alpha为透明度
# rect = plt.Rectangle((2,1),4,2,color='r',alpha=0.3)
# 设置 legend 图例与图形
x = [-2,-3]
data = [5,5]
#第一层
ax.barh(x,width=data,height=1,color="r",label="第一层蛋糕",alpha=0.4)
x1 = [-1,0]
data1 = [4,4]
#第二层
ax.barh(x1,width=data1,left=0.5,height=1,color="b",label="第二层蛋糕",alpha=0.4)
#第三层蜡烛
x2 = [1,2,3,4]
y2 = [1.5,1.5,1.5,1.5]
plt.bar(x2,y2,width=0.2,align="center",color="g",label="蜡烛",alpha=0.5,bottom=0.4)
#第四层的引线
x2 = [1,2,3,4]
y2 = [2,2,2,2]
plt.bar(x2,y2,width=0.05,align="center",color=['r','b','y','m'],alpha=0.5,bottom=0.4)
#显示表格
plt.tight_layout()
plt.legend()
plt.show() 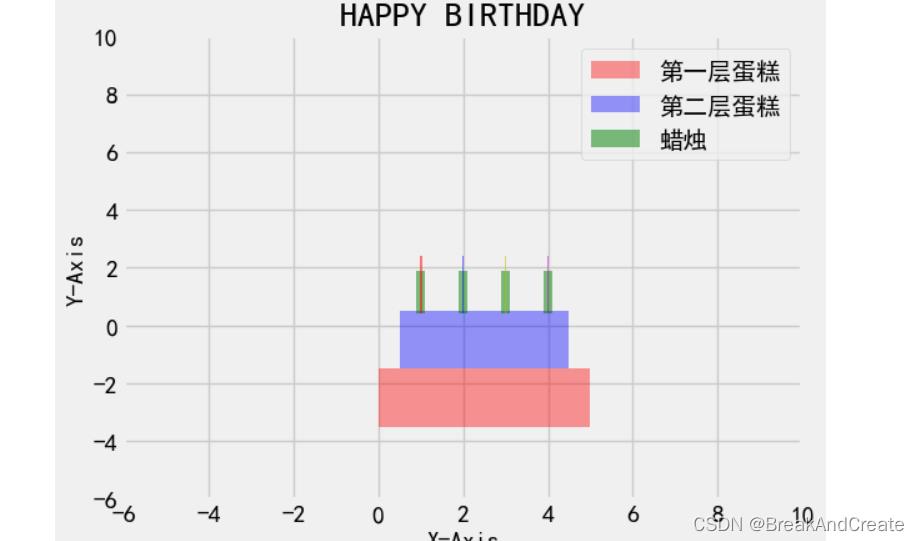
alpha为透明度 pit.bar为柱状图图 在pit.barw中bottom可以调整上位置也可以用来做堆叠图
pit.barn为水平柱状图 可以用left属性调节上下
第四步加入一点点细节
import matplotlib.pyplot as plt
import numpy as np
# 创建Figure画板对象
fig = plt.figure()
# //将整个Figure区域划分为Row * col的网格;
# //建立坐标轴
ax=fig.add_subplot()
# //设置x轴和y轴
ax.set(xlim=[-6, 10], ylim=[-6, 10], title="HAPPY BIRTHDAY",
       ylabel='Y-Axis', xlabel='X-Axis')
#第一个参数(2,1)表示起始坐标,第二个参数4为长度,第三个参数为高度2 alpha为透明度
# rect = plt.Rectangle((2,1),4,2,color='r',alpha=0.3)
# 设置 legend 图例与图形
x = [-2,-3]
data = [5,5]
#第一层
ax.barh(x,width=data,height=1,color="r",label="第一层蛋糕",alpha=0.4)
x1 = [-1,0]
data1 = [4,4]
#第二层
ax.barh(x1,width=data1,left=0.5,height=1,color="b",label="第二层蛋糕",alpha=0.4)
#第三层蜡烛
x2 = [1,2,3,4]
y2 = [1.5,1.5,1.5,1.5]
plt.bar(x2,y2,width=0.2,align="center",color="g",label="蜡烛",alpha=0.5,bottom=0.4)
#第四层的引线
x2 = [1,2,3,4]
y2 = [2,2,2,2]
plt.bar(x2,y2,width=0.05,align="center",color=['r','b','y','m'],alpha=0.5,bottom=0.4)
#加入一点点细节
#1加入横线
#x4(第一个横坐标点x41,第二个横坐标点x42)
#y4(第一个横坐标x41对应的y41,第二个横坐标x42对应的y42)
x4=[0,5]
y4=[-3,-3]
ax.plot(x4, y4)
#加入第二段横线
x5=[0,5]
y5=[-2.0,-2.0]
ax.plot(x5, y5,color='b')
#加入第三段虚线
x6=[0.5,4.5]
y6=[-1.0 ,-1.0]
ax.plot(x6, y6,linestyle='--',color='y')
#加入第四段虚线
x7=[0.5,4.5]
y7=[0,0]
ax.plot(x7, y7,linestyle='--',color='y')
#显示表格
plt.tight_layout()
plt.legend()
plt.show() 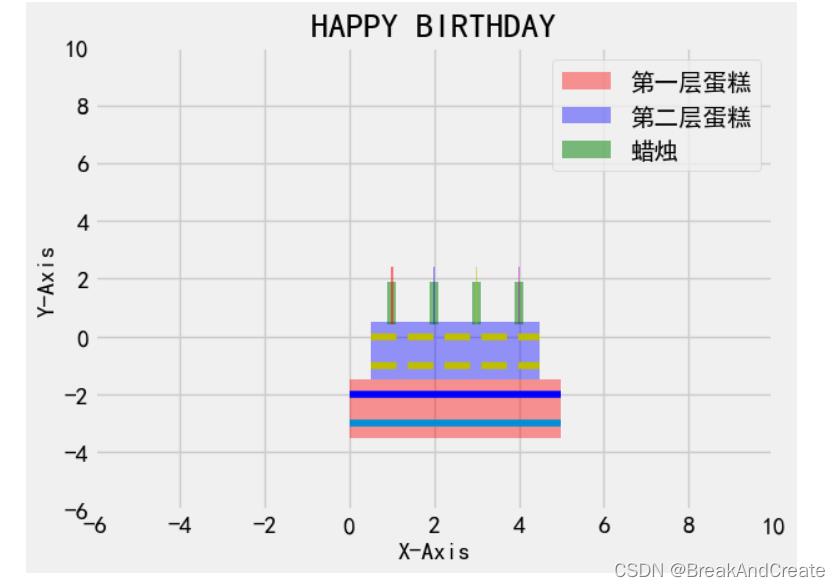
第五步加入背景气泡去掉横坐标
import matplotlib.pyplot as plt
import numpy as np
# 创建Figure画板对象
fig = plt.figure()
# //将整个Figure区域划分为Row * col的网格;
# //建立坐标轴
ax=fig.add_subplot()
# //设置x轴和y轴
ax.set(xlim=[-6, 10], ylim=[-6, 10], title="HAPPY BIRTHDAY",)
#第一个参数(2,1)表示起始坐标,第二个参数4为长度,第三个参数为高度2 alpha为透明度
# rect = plt.Rectangle((2,1),4,2,color='r',alpha=0.3)
# 设置 legend 图例与图形
x = [-2,-3]
data = [5,5]
#第一层
ax.barh(x,width=data,height=1,color="r",label="第一层蛋糕",alpha=0.4)
x1 = [-1,0]
data1 = [4,4]
#第二层
ax.barh(x1,width=data1,left=0.5,height=1,color="b",label="第二层蛋糕",alpha=0.4)
#第三层蜡烛
x2 = [1,2,3,4]
y2 = [1.5,1.5,1.5,1.5]
plt.bar(x2,y2,width=0.2,align="center",color="g",label="蜡烛",alpha=0.5,bottom=0.4)
#第四层的引线
x2 = [1,2,3,4]
y2 = [2,2,2,2]
plt.bar(x2,y2,width=0.05,align="center",color=['r','b','y','m'],alpha=0.5,bottom=0.4)
#加入一点点细节
#1加入横线
#x4(第一个横坐标点x41,第二个横坐标点x42)
#y4(第一个横坐标x41对应的y41,第二个横坐标x42对应的y42)
x4=[0,5]
y4=[-3,-3]
ax.plot(x4, y4)
#加入第二段横线
x5=[0,5]
y5=[-2.0,-2.0]
ax.plot(x5, y5,color='b')
#加入第三段虚线
x6=[0.5,4.5]
y6=[-1.0 ,-1.0]
ax.plot(x6, y6,linestyle='--',color='y')
#加入第四段虚线
x7=[0.5,4.5]
y7=[0,0]
ax.plot(x7, y7,linestyle='--',color='y')
#绘制汽包背景

#随机生成xs和ys
n = 1024    # data size
# 从标准正态分布曲线上随机取n个点,第二个参数越大越离散
xs = np.random.normal(0, 10, n) # 每一个点作为绘图的X坐标
ys = np.random.normal(0, 10, n) # 每一个点作为绘图的y坐标
# 根据坐标点生成一个数值作为颜色值
y3 = np.arctan2(ys,xs)
# s:绘制点的大小
# c:绘制点的颜色,可以是单一色值,也可以是列表,颜色会顺序对应给对应点的
# marker:点的样式,有‘o’圆点,'+'加号,还有很多,查看官方~matplotlib.markers.MarkerStyle,默认'o'
# linewidth:‘o’圆点模式下的边框宽度,设置成0,圆点没有边框
# alpha:透明度
plt.scatter(xs, ys, s=30, c=y3, alpha=0.5,marker='o',linewidths=0)
#显示表格
plt.tight_layout()
plt.legend()
# 把坐标轴上的标识更换为空(不显示坐标轴刻度)
plt.xticks(())
plt.yticks(())
plt.show() 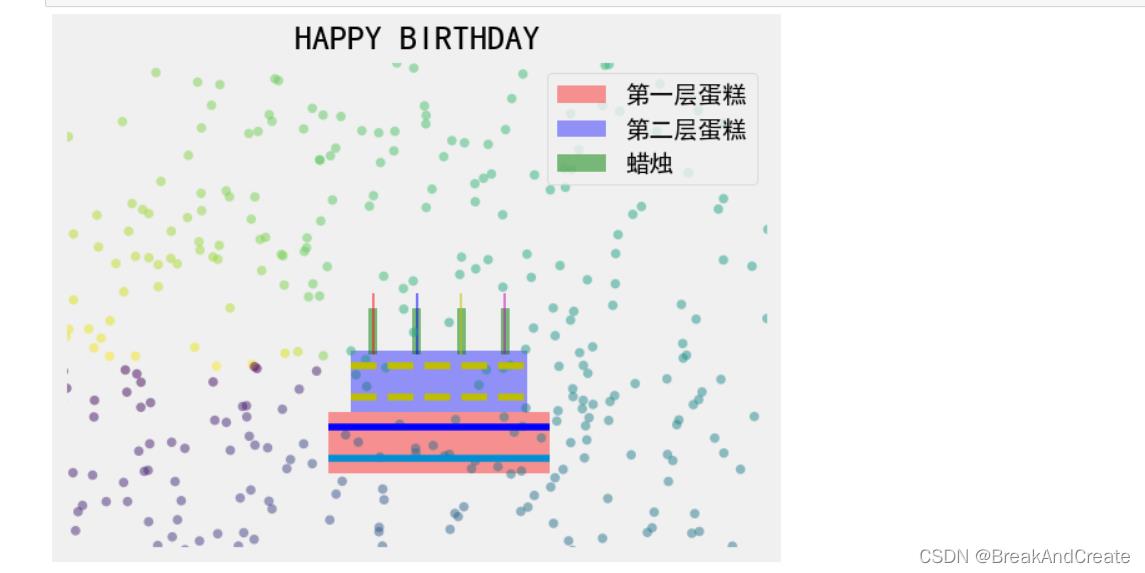
这样一个美味可口的蛋糕就做好了,还不快自己动手做一个
javaWeb期末作业——蛋糕订购系统
目录标题
视频展示
javaWeb大作业——蛋糕订购系统
1 实验的目的及要求
目的:学习JavaWeb的基础知识,掌握servlet和jsp的必要知识。培养搭建实战项目的能力。
2 需求分析
2.1 问题陈述
随着网络的普及与发展,网上购物逐渐成为一种主流消费的方式,它以方便, 足不出户, 款式多全面,低廉的价格、送货上门的便捷等等优点称为了人们购物的主要方式,在顺应互联网大势的情况下经过多方面的调查需求,现推出网上蛋糕订购系统来满足个体蛋糕店来打造自己品牌的需求。
2.2 功能需求分析
实现管理员对物品和用户的分类、删除、修改、信息编辑、物品搜索和主页面的热门推荐等。以及用户对自己信息的修改和物品的订购功能。再加上用户的登陆注册功能。
3 总体设计
3.1 功能结构图设计

3.2 模块简介
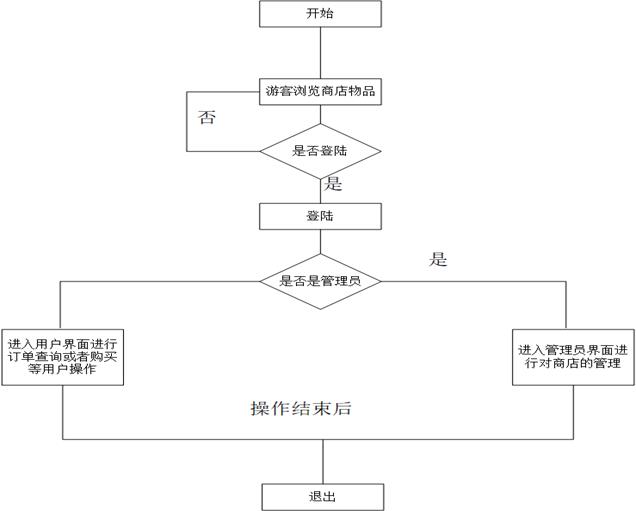
系统分为两个主模块用户和管理员。对于用户模块在进入网站主页时用户可以先浏览商店信息可以在商品分类里面进行商品分类查询或者在热销和新品里面进行浏览,然后把想要购买的商品加到购物车上然后在行订单查询里面进行支付。对于管理员模块除了可以进行和用户部分一样的功能以外还可以进入后台管理模块,进行订单管理和客户管理还有商品管理,类别管理以及退出。
4 详细设计
4.1 主模块详细设计
主模块主要包括两部分一个是用户的相关操作,一个是管理员的相关操作。对应着建立了七张数据表
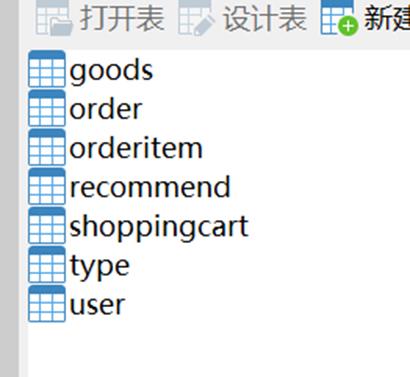
同时对orderitem和recommend、shoppingcart设置了相应的外键和索引来关联表之间的关系。


对于程序的界面设计方面我主要采用了bootstrap框架的导航栏对管理员和用户所需要的模块进行相应的添加。
界面设计在页面顶部设置导航栏便于操作:
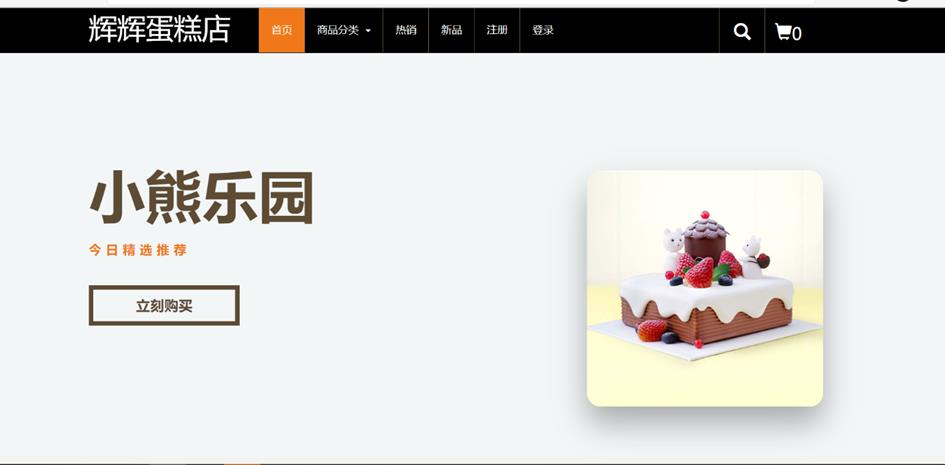
对与用户操作和管理员操作需要具体登陆后才能展现。
主程序流程图:
4.2 子模块详细设计
以管理员模块为例进行详细讲解:
数据存储设计:
在用户表里面设计一个元素isadmin来判断是不是管理员

对物品在主页面的推荐表设计为例进行介绍:


界面设计:
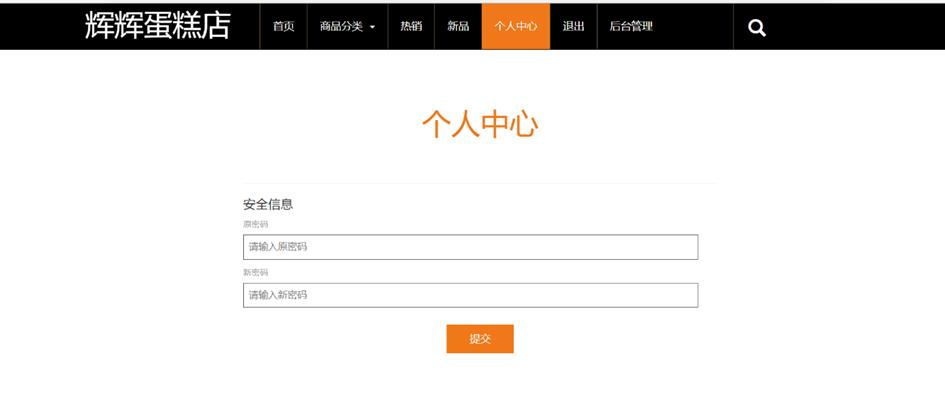
点击后台管理后:

程序流程图:
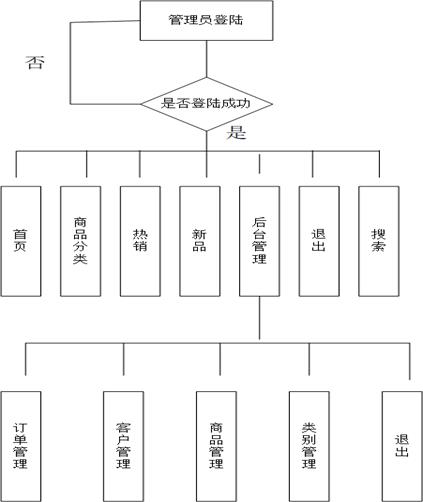
5 编码和测试
5.1 编码
使用C3P0连接池对数据库进行链接配置:
<c3p0-config>
<!-- 默认配置,只可以出现一次 -->
<default-config>
<property name="driverClass">com.mysql.jdbc.Driver</property>
<property name="jdbcUrl">jdbc:mysql://localhost:3306/cakes?useUnicode=true&characterEncoding=utf-8&useSSL=false</property>
<property name="user">root</property>
<property name="password">root</property>
<property name="initialPoolSize">10</property>
<property name="maxIdleTime">3600</property>
<property name="maxPoolSize">20</property>
<property name="minPoolSize">10</property>
</default-config>
</c3p0-config>
对用户购买进行展示:
Servlet类;
@WebServlet(name = "goods_buy",urlPatterns = "/goods_buy")
public class GoodsBuyServlet extends HttpServlet
    private GoodsService gService = new GoodsService();
    protected void doPost(HttpServletRequest request, HttpServletResponse response) throws ServletException, IOException
        Order o = null;
        if(request.getSession().getAttribute("order") != null)
            o = (Order) request.getSession().getAttribute("order");
        else
            o = new Order();
            request.getSession().setAttribute("order", o);

        int goodsid = Integer.parseInt(request.getParameter("goodsid"));
        Goods goods = gService.getGoodsById(goodsid);
        if(goods.getStock()>0)
            o.addGoods(goods);
            response.getWriter().print("ok");
        else
            response.getWriter().print("fail");
订单确认部分:
@WebServlet(name = "order_confirm",urlPatterns = "/order_confirm")
public class OrderConfirmServlet extends HttpServlet
    private OrderService oService = new OrderService();
    protected void doPost(HttpServletRequest request, HttpServletResponse response) throws ServletException, IOException
        Order o = (Order) request.getSession().getAttribute("order");
        try
            BeanUtils.copyProperties(o, request.getParameterMap());
         catch (IllegalAccessException e)
            // TODO Auto-generated catch block
            e.printStackTrace();
         catch (InvocationTargetException e)
            // TODO Auto-generated catch block
            e.printStackTrace();

        o.setDatetime(new Date());
        o.setStatus(2);
        o.setUser((User) request.getSession().getAttribute("user"));
        oService.addOrder(o);
        request.getSession().removeAttribute("order");

        request.setAttribute("msg", "订单支付成功!");
        request.getRequestDispatcher("/order_success.jsp").forward(request, response);
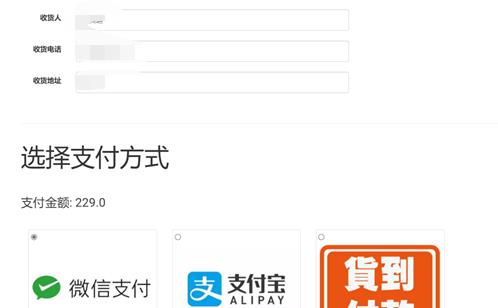
订单确认的jsp页面部分:
<div class="cart-items">
		<div class="container">
			<h2>确认收货信息</h2>
			<form class="form-horizontal" action="/order_confirm" method="post" id="payform">
				<div class="row">
					<label class="control-label col-md-1">收货人</label>
					<div class="col-md-6">
						<input type="text" class="form-control" name="name" value="$user.name " style="height:auto;padding:10px;" placeholder="输入收货人" required="required"><br>
					</div>
				</div>
				<div class="row">
					<label class="control-label col-md-1">收货电话</label>
					<div class="col-md-6">
						<input type="text" class="form-control" name="phone" value="$user.phone " style="height:auto;padding:10px;" placeholder="输入收货电话" required="required"><br>
					</div>
				</div>
				<div class="row">
					<label class="control-label col-md-1">收货地址</label>
					<div class="col-md-6">
						<input type="text" class="form-control" name="address" value="$user.address " style="height:auto;padding:10px;" placeholder="输入收货地址" required="required"><br>
					</div>
				</div>

				<br><hr><br>

				<h2>选择支付方式</h2>
				<h3>支付金额: $order.total </h3><br><br>


				<div class="col-sm-6 col-md-4 col-lg-3 ">
					<label>
						<div class="thumbnail">
							<input type="radio" name="paytype" value="1" checked="checked" />
							<img src="images/wechat.jpg" alt="微信支付">
						</div>
					</label>
				</div>
				<div class="col-sm-6 col-md-4 col-lg-3 ">
					<label>
						<div class="thumbnail">
							<input type="radio" name="paytype" value="2"  />
							<img src="images/alipay.jpg" alt="支付宝支付">
						</div>
					</label>
				</div>
				<div class="col-sm-6 col-md-4 col-lg-3 ">
					<label>
						<div class="thumbnail">
							<input type="radio" name="paytype" value="3"  />
							<img src="images/offline.jpg" alt="货到付款">
						</div>
					</label>
				</div>
				<div class="clearfix"> </div>
				<div class="register-but text-center">
					<input type="submit" value="确认订单">
					<div class="clearfix"> </div>
				</div>
			</form>
		</div>
	</div>
5.2 测试
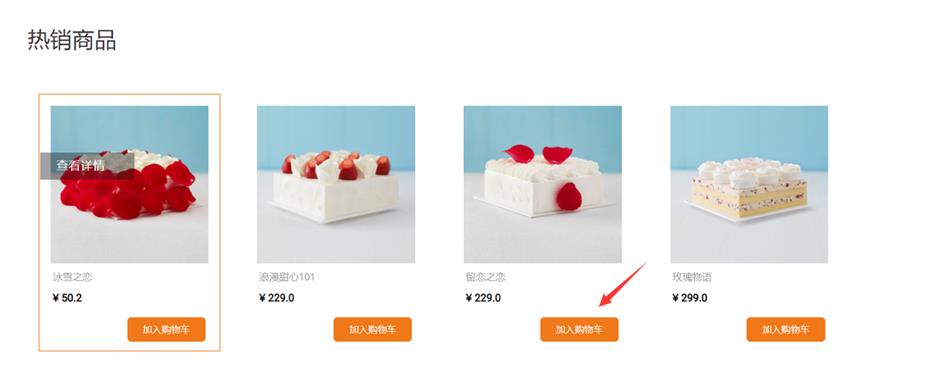
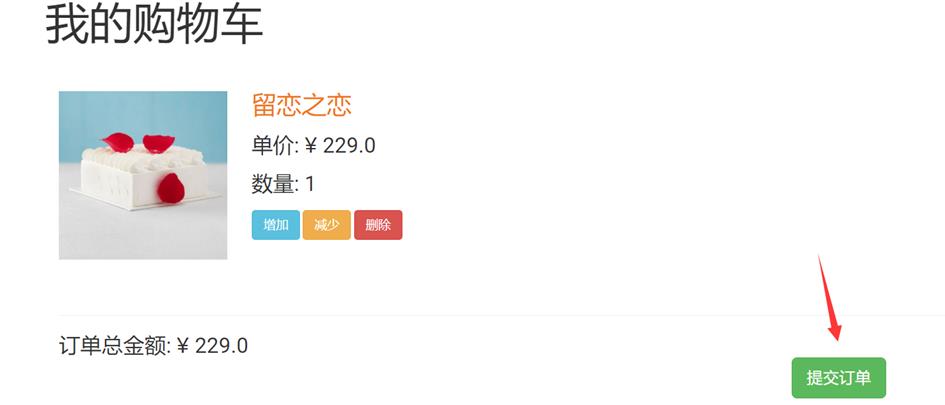
6 总结及建议
通过本次课程的学习让我掌握了一种可以用来就业的本领这无疑对我以后进入社会更好的生活提供了一份保障。本次实验作业也让我清楚的认识到想要独立的完成一个系统网站需要大量的知识积累不仅仅是简单的学习这一门课就行的,比如在网站的前端设计中对css样式和jquary的应用上就暴露出了自己的薄弱项,在这方面的编写中遇到了巨大的困难。而且不仅如此在后端也同样暴露出了很多问题。比如在设计模式的不成熟可能导致后面对项目维护不方便。认识到这些问题后我会积极补救,在后面的学习中积极完善自己的不足来提高编程能力。
点击直接资料领取
回复蛋糕订购即可获取
这里有python,Java学习资料还有有有趣好玩的编程项目,更有难寻的各种资源。反正看看也不亏。
以上是关于python大数据作业六画一个蛋糕的主要内容,如果未能解决你的问题,请参考以下文章