Swagger3的基本使用
Posted YXXYX
tags:
篇首语:本文由小常识网(cha138.com)小编为大家整理,主要介绍了Swagger3的基本使用相关的知识,希望对你有一定的参考价值。
Swagger3简介
swagger官网:传送门
swagger是一个Api框架,就是一个工具,就比如我们可以使用postman测试接口一样,swagger主要作用是生成RESTFUL接口的文档并且可以提供功能测试;
可以看一下官方文档简介:
What Is Swagger?
Swagger allows you to describe the structure of your APIs so that machines can read them. The ability of APIs to describe their own structure is the root of all awesomeness in Swagger. Why is it so great? Well, by reading your API’s structure, we can automatically build beautiful and interactive API documentation. We can also automatically generate client libraries for your API in many languages and explore other possibilities like automated testing. Swagger does this by asking your API to return a YAML or JSON that contains a detailed description of your entire API. This file is essentially a resource listing of your API which adheres to OpenAPI Specification. The specification asks you to include information like:
- What are all the operations that your API supports?
- What are your API’s parameters and what does it return?
- Does your API need some authorization?
- And even fun things like terms, contact information and license to use the API.
大致意思就是通过swagger可以获取项目的api结果,生成清晰的api文档,并可以进行一些自动化测试;
下面我使用一个项目简单示范一下如何使用swagger;
注:该文章介绍的是swagger3的操作,因为swagger3和swagger2有些地方有差异,所以部分操作对swagger2并不适用;
参考:狂神说、Swagger官方文档;
Swagger使用
首先创建一个springboot项目;
这里使用的maven项目管理工具(Gradle等一样),在pom.xml添加swagger3.0的依赖;
<dependency>
    <groupId>io.springfox</groupId>
    <artifactId>springfox-boot-starter</artifactId>
    <version>3.0.0</version>
</dependency>
导入依赖包后在启动类上加 @EnableWebMvc 注解,不然会报空指针异常;
@Slf4j
@SpringBootApplication
@EnableWebMvc
public class TakeoutProjectApplication

    public static void main(String[] args)
        SpringApplication.run(TakeoutProjectApplication.class, args);
        log.info("项目启动...");
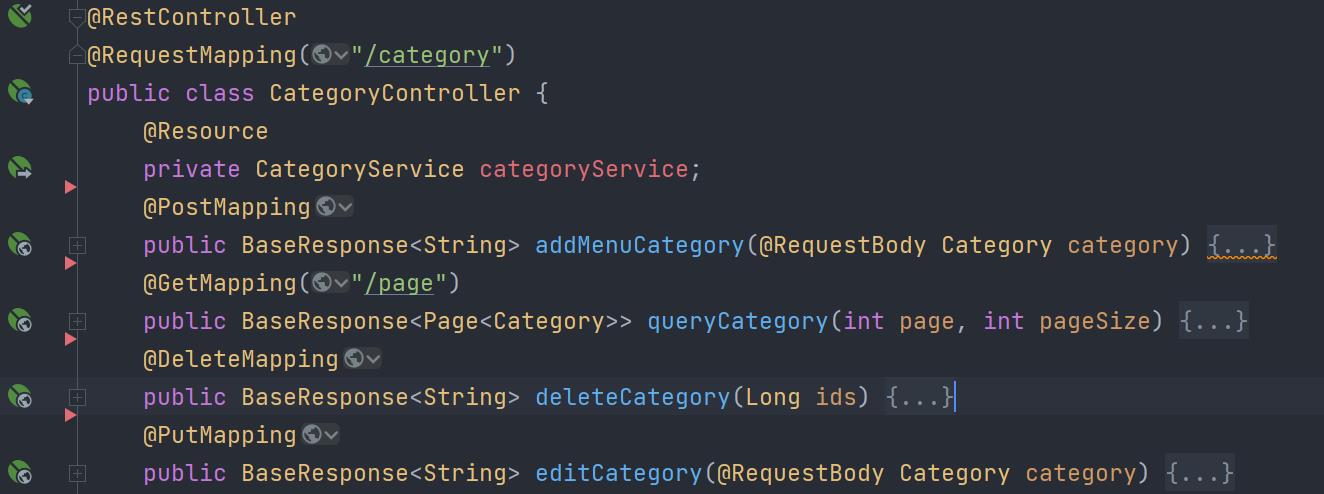
然后可以随便写个controller写几个接口(这里是随便用的一个项目演示):
写一个config配置类:
@Configuration
@EnableOpenApi
public class SwaggerConfig
加上 @EnableOpenApi 注解代表启用swagger;
走到这一步这时已经可以开启服务,访问路径:http://localhost:8080/swagger-ui/index.html (本地监听的是8080端口)
因为是Swagger3,所以路径访问和Swagger2不同,这一点一定要注意;可以看一下这个index.html在哪:

访问界面:
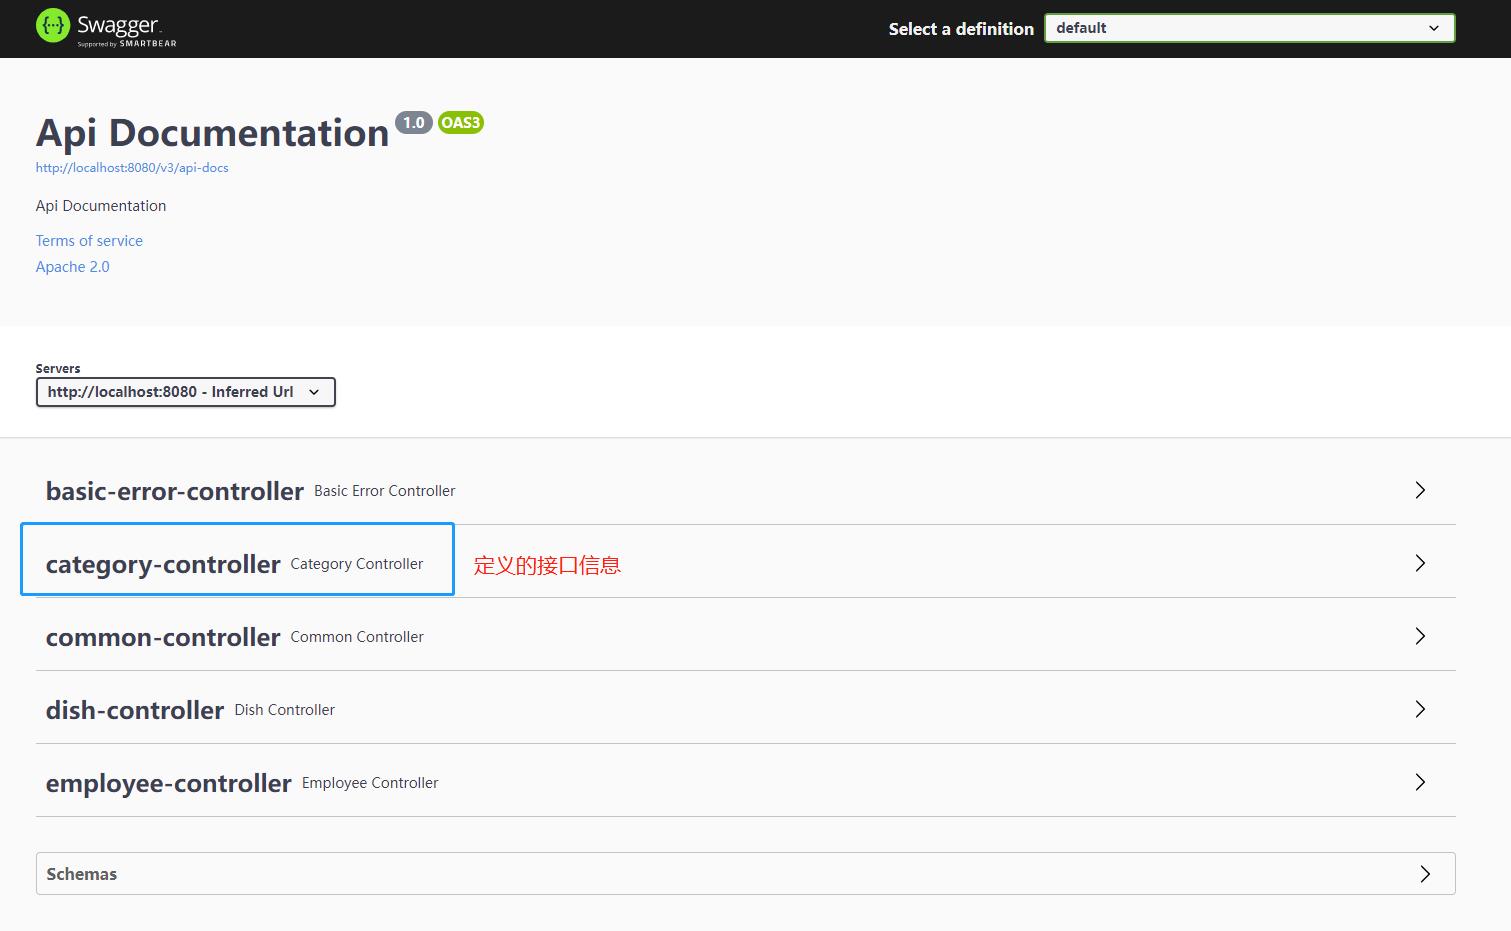
当然这里还有这个项目的一些其他controller,这里就用刚才展示的controller示范;
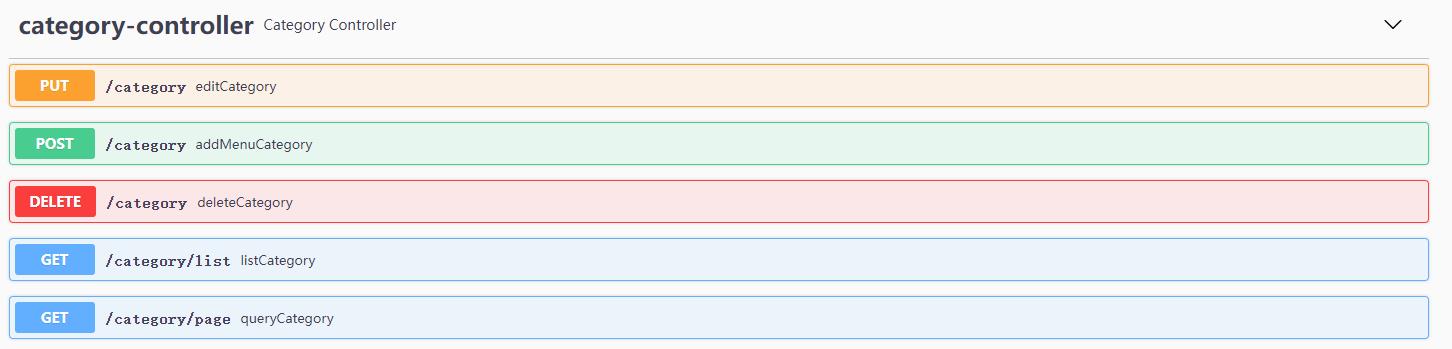
点开可以看到接口基本信息:
可以点开某个接口看看详细信息:
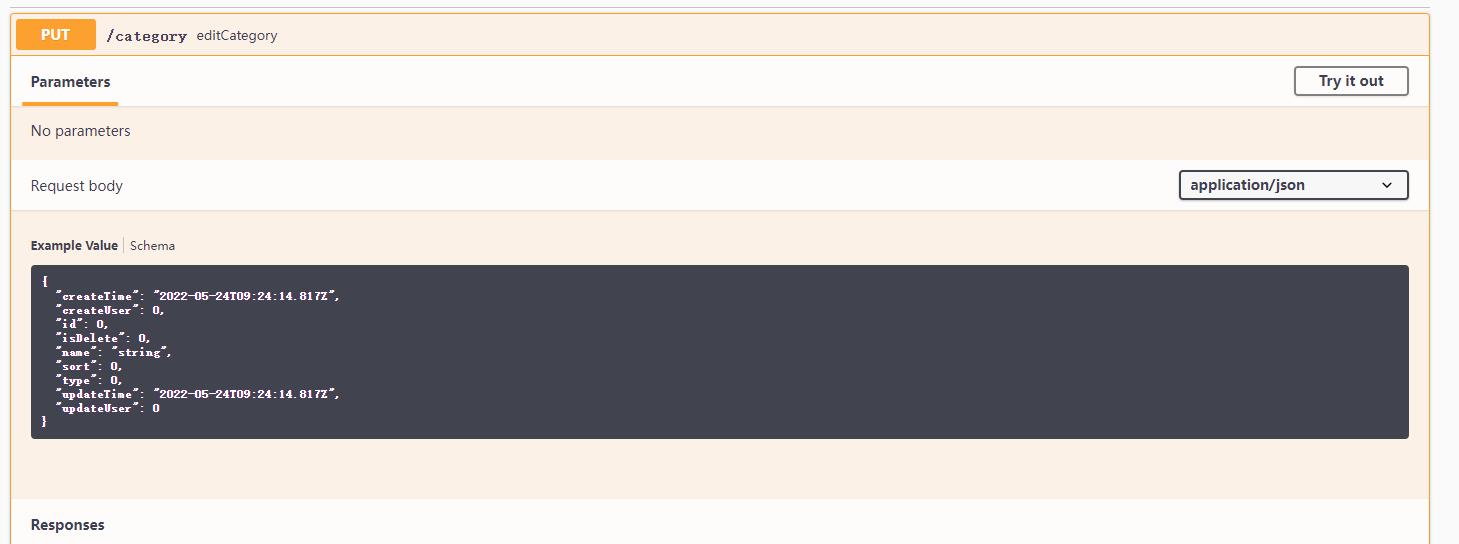
右上角Try it out 就可以发送请求,测试接口;
这就是Swagger的基本使用了,如果想要让文档描述更详细一些,可以在SwaggerConfig类中进行一些配置;
Swagger常用配置
以下是我接触到的一些配置,并不全面,可以参考;
Swagger的实例Bean是Docket对象,可以通过配置Docket实例来配置Swagger;
@Bean
public Docket docket()
	return new Docket(DocumentationType.OAS_30);
DocumentationType.OAS_30是Swagger实例的接口文档版本,因为使用的是Swagger3,所以选择用 OAS_30,其他的类型还有如下几种,分别对应着Swagger历史版本:

注意:下面的所有Docket配置都可以添加到一个docket方法中,只是分开介绍了;
文档基本信息配置
可以通过Docket的apiInfo属性来对文档进行基本信息的配置:
@Bean
public Docket docket()
	return new Docket(DocumentationType.OAS_30).apiInfo(apiInfo());
这里的Docket实例需要关联apiInfo属性,因为apiInfo属性可以配置文档的一些基本信息:

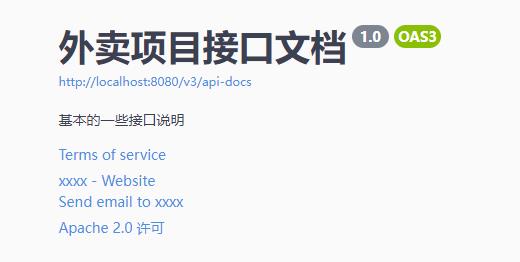
我在这里简单配置一下:
private ApiInfo apiInfo()
    return new ApiInfoBuilder()
            .title("外卖项目接口文档") // 文档标题
            .description("基本的一些接口说明") // 文档基本描述
            .contact(new Contact("xxxx", "https://blog.csdn.net", "xxxx@qq.com")) // 联系人信息
            .termsOfServiceUrl("http://terms.service.url/组织链接") // 组织链接
            .version("1.0") // 版本
            .license("Apache 2.0 许可") // 许可
            .licenseUrl("https://www.apache.org/licenses/LICENSE-2.0") // 许可链接
            .extensions(new ArrayList<>()) // 拓展
            .build();
可以看到展示效果:
扫描接口配置
@Bean
public Docket docket()
    return new Docket(DocumentationType.OAS_30)
            // 文档信息配置
            .apiInfo(apiInfo())
            // 配置扫描的接口
            .select()
            // 配置扫描哪里的接口
            .apis(RequestHandlerSelectors.basePackage("com.yang.takeout.backend.controller"))
            // 过滤请求,只扫描请求以/category开头的接口
            .paths(PathSelectors.ant("/category/**"))
            .build();
重启服务访问:
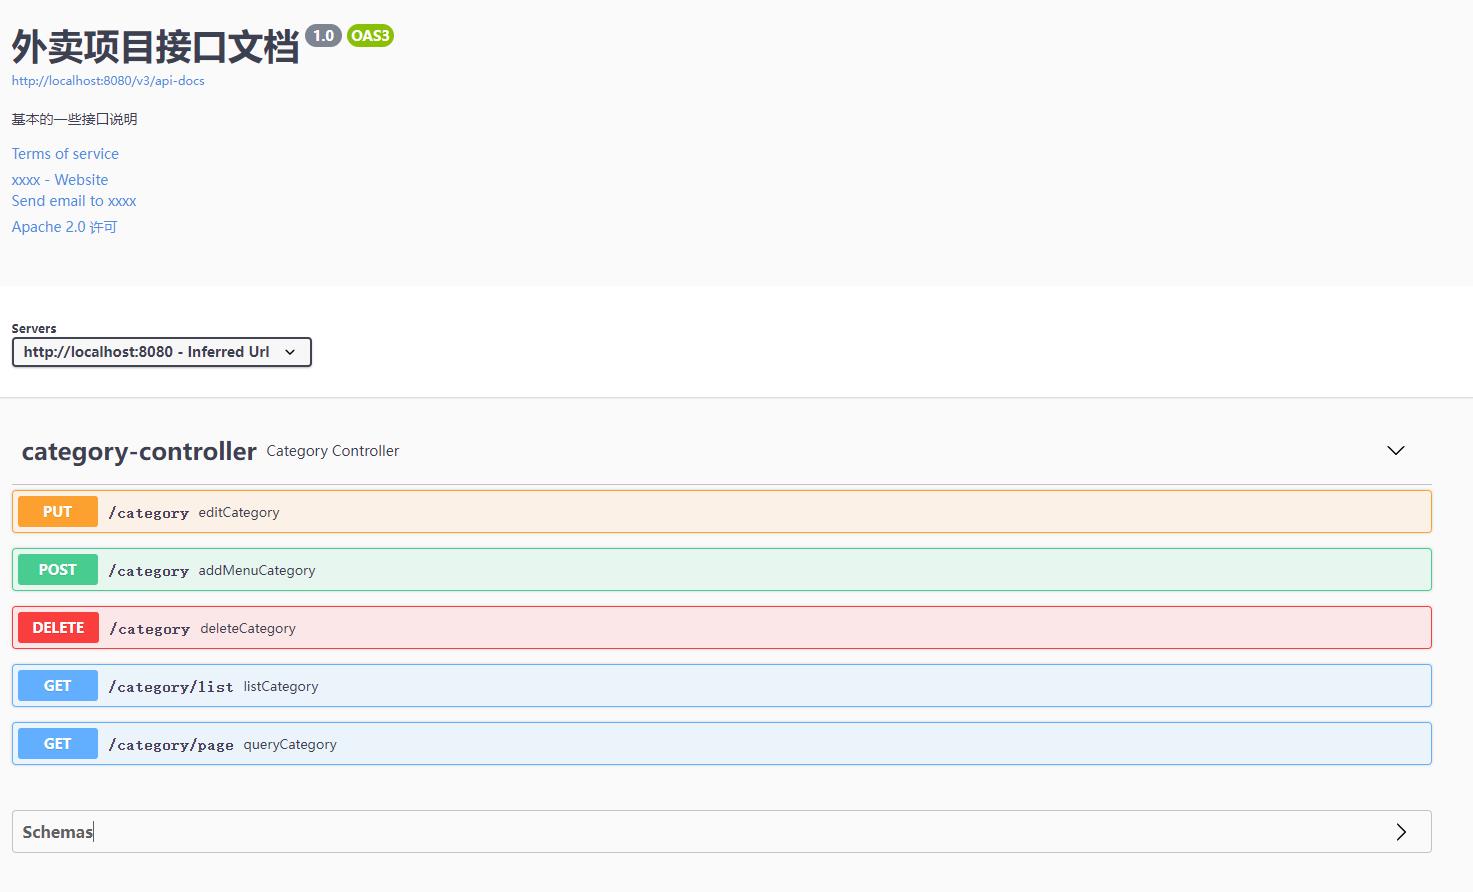
这时就只有一个controller显示了,所有请求也都是以/category开始的;
RequestHandlerSelectors配置扫描路径的一些方法
// 扫描所有,项目中的所有接口都会被扫描到
any()
// 不扫描接口
none()
// 通过方法上的注解扫描,如withMethodAnnotation(GetMapping.class)只扫描get请求
withMethodAnnotation(final Class<? extends Annotation> annotation)
// 通过类上的注解扫描,如.withClassAnnotation(Controller.class)只扫描有controller注解的类中的接口
withClassAnnotation(final Class<? extends Annotation> annotation)
// 根据包路径扫描接口
basePackage(final String basePackage)
PathSelectors配置扫描请求的一些方法
any() // 任何请求都扫描
none() // 任何请求都不扫描
regex(final String pathRegex) // 通过正则表达式扫描
ant(final String antPattern) // 通过ant()指定请求扫描
开启关闭Swagger配置
这个配置人就很简单了,简单演示一下:
@Bean
public Docket docket()
    return new Docket(DocumentationType.OAS_30)
           // 设置是否启动Swagger,默认为true(不写即可),关闭后Swagger就不生效了
        	.enable(true)
该配置再后面用得到;(下面的环境配置就用到了)
Swagger开发环境配置
在开发中有开发环境、测试环境、发布环境,Swagger文档不应该在有些环境中出现,就比如发布环境,不仅占内存,而且接口信息还容易泄露出去;这里就简单演示一下如何在不同的环境下配置Swagger;
application.yml环境配置:
开发环境:
spring:
  profiles:
    active: dev
测试环境:
spring:
  profiles:
    active: test
配置开发环境dev和测试环境test显示Swagger文档:
@Bean
public Docket docket(Environment environment)
    Profiles profiles = Profiles.of("dev", "test"); // 设置要显示swagger的环境
    boolean isOpen = environment.acceptsProfiles(profiles); // 判断当前是否处于该环境
    return new Docket(DocumentationType.OAS_30)
            // 设置是否启动Swagger,通过当前环境进行判断:isOpen
            .enable(isOpen);
可以自己测试一下,非dev和test环境是无法访问Swagger的,这里就不展示了;
API分组
Swagger默认是一个default分组:

可以通过分组来实现对不同API的分类,分组可以使用Docket的groupName属性区分不同分组,并可以在Swagger中创建多个Docket的Bean实例来定义不同分组;
配置多个分组:
@Bean
public Docket docketCategory()
    return new Docket(DocumentationType.OAS_30)
            .apiInfo(apiInfo())
            // 分组名称
            .groupName("Category")
            .enable(true)
            .select()
            .apis(RequestHandlerSelectors.basePackage("com.yang.takeout.backend.controller"))
            // 过滤请求,只扫描请求以/category开头的接口
            .paths(PathSelectors.ant("/category/**"))
            .build();


@Bean
public Docket docketEmployee()
    return new Docket(DocumentationType.OAS_30)
            .apiInfo(apiInfo())
            // 分组名称
            .groupName("Employee")
            .enable(true)
            .select()
            .apis(RequestHandlerSelectors.basePackage("com.yang.takeout.backend.controller"))
            // 过滤请求,只扫描请求以/employee开头的接口
            .paths(PathSelectors.ant("/employee/**"))
            .build();
这里我只配置了两个分组,可以多创建几个Docket实例实现多分组;
分组效果:

Category分组:

Employee分组:

Swagger常见注解
下面还有一些常见的Swagger注解,同样是对文档进行补充的:
| Swagger注解 | 简单说明 |
|---|---|
| @Api(tags = “xxx模块说明”) | 作用在模块类上 |
| @ApiOperation(“xxx接口说明”) | 作用在接口方法上 |
| @ApiModel(“xxxPOJO说明”) | 作用在模型类上:如VO、BTO |
| @ApiModelProperty(value = “xxx属性说明”,hidden = true) | 作用在类方法和属性上,hidden设置为true可以隐藏该属性 |
| @ApiParam(“xxx参数说明”) | 作用在参数、方法和字段上,类似@ApiModelProperty |
这些注解只是对文档的一些接口信息的补充,根据实际情况使用;
这里就不一一演示了;
总结
Swagger的出现让实际多人协作下的开发效率大大提升,这是工作中常用的工具,所以很有必要了解学习;希望大家都能有所收获;
swagger2的基本使用
这里主要讲解在spring boot中使用swagger2 生成接口文档
首先导入maven依赖
<dependency>
<groupId>io.springfox</groupId>
<artifactId>springfox-swagger2</artifactId>
<version>2.9.2</version>
</dependency>
<dependency>
<groupId>io.springfox</groupId>
<artifactId>springfox-swagger-ui</artifactId>
<version>2.9.2</version>
</dependency>
然后新建一个配置类 用于配置一些swagger2的文档基本信息和接口扫描路径
/**
 * Swagger2 配置类
 * 在与spring boot 集成时,放在与application.java 同级的目录下
 * 通过@Configuration注解,让spring来加载该配置
 */
@Configuration
public class Swagger2


    /**
     * 创建API应用
     * appinfo()增加API相关信息
     * 通过select()函数返回一个ApiSelectorBuilder实例,用来控制那些接口暴露给Swagger来展现
     * 本例采用置顶扫描的包路径来定义指定要建立API的目录
     *
     * @return
     */
    @Bean
    public Docket createRestApi()
        Docket docket = new Docket(DocumentationType.SWAGGER_2)
                .apiInfo(apiInfo())
                .select()
                .apis(RequestHandlerSelectors.basePackage("com.shuke.chat"))
                .paths(PathSelectors.any()).build();
        return docket;


    /**
     * 创建改API的基本信息(这些基本信息会展示在文档页面中)
     * 访问地址: http://项目实际地址/swagger-ui.html
     * @return
     */
    public ApiInfo apiInfo()
        return new ApiInfoBuilder()
                 // 设置页面标题
                .title("使用swagger2构建小程序后端api接口文档")
                // 设置联系人
                .contact(new Contact("IT人故事会", "http://idig8.com", "公众号:编程坑太多"))
                // 描述
                .description("欢迎访问接口文档")
                // 定义版本号
                .version("1.0").build();
然后在启动类上 加@EableSwagger2
默认swagger2的界面地址是:项目的根路径/swagger-ui.html
进入这个界面以后就会显示当前项目有哪些接口 点击接口以后就会显示当前接口有哪些方法 还可以在线测试 功能非常强大 可以替代postman了
具体操作非常简单 看到了就会
接下来将swagger2的核心 就是使用注解给接口 和每个方法加说明
- @Api:修饰整个类,描述Controller的作用
- @ApiOperation:描述一个类的一个方法,或者说一个接口
- @ApiParam:单个参数描述
- @ApiModel:用对象来接收参数
- @ApiProperty:用对象接收参数时,描述对象的一个字段
- @ApiResponse:HTTP响应其中1个描述
- @ApiResponses:HTTP响应整体描述
- @ApiIgnore:使用该注解忽略这个API
- @ApiError :发生错误返回的信息
- @ApiImplicitParam:一个请求参数
- @ApiImplicitParams:多个请求参数
以上是关于Swagger3的基本使用的主要内容,如果未能解决你的问题,请参考以下文章