Springboot自定义xml文件解析
Posted
tags:
篇首语:本文由小常识网(cha138.com)小编为大家整理,主要介绍了Springboot自定义xml文件解析相关的知识,希望对你有一定的参考价值。
参考技术A 有时候,要通过自定义XML配置文件来实现一些特定的功能。这里通过例子来说明。首先,看部分spring加载bean文件的源码:
spring-beans-5.0.6.RELEASE.jar!/org/springframework/beans/factory/xml/PluggableSchemaResolver.class :
spring-beans-5.0.6.RELEASE.jar!/org/springframework/beans/factory/xml/DefaultNamespaceHandlerResolver.class :
可以看出,spring在加载xml文件的时候,会默认读取配置文件 META-INF/spring.schemas 和 META-INF/spring.handlers 。这样,我们就可以在这两个文件添加我们自定义的xml文件格式和xml文件解析处理器。
新建一个Springboot工程,pom如下。
SelfDefineXmlTrial/pom.xml :
然后,新建一个用于测试controller。
com.lfqy.springboot.selfdefxml.controller.SelfDefXmlController :
最后,创建一个Springboot的启动类。
com.lfqy.springboot.selfdefxml.SelfDefXmlApplication :
运行启动之后,浏览器访问 http://localhost:8080/selfdefxml/hello 效果如下:
修改前面提到的配置文件 META-INF/spring.schemas 、 META-INF/spring.handlers ,添加xml格式说明。
META-INF/spring.schemas :
META-INF/spring.handlers :
添加xml格式说明配置文件。
META-INF/selfdef.xsd :
添加自定义xml格式处理器类。
com.lfqy.springboot.selfdefxml.selxmlparse.UserNamespaceHandler :
新增xml格式解析类。
com.lfqy.springboot.selfdefxml.selxmlparse.UserBeanDefinitionParser :
新增自定义xml对应的bean类。
com.lfqy.springboot.selfdefxml.beans.User :
添加自定义xml配置文件读取的相关逻辑。
com.lfqy.springboot.selfdefxml.SelfDefXmlApplication :
到这里,编码就完成了,工程的目录结构如下。
运行之后,控制台输出如下:
这里,通过实现一个启动时自动初始化的一个servlet来实现。
com.lfqy.springboot.selfdefxml.servlet.StartupServlet :
在启动时加载servlet,为了方便区分,这里新写一个启动类。
com.lfqy.springboot.selfdefxml.SelfDefXmlLoadOnStartupApplication
到这里,编码已经完成,工程的目录结构如下:
运行之后,控制台输出如下:
springboot2.0入门-- 自定义配置文件+xml配置文件引入
一、加载自定义配置文件:
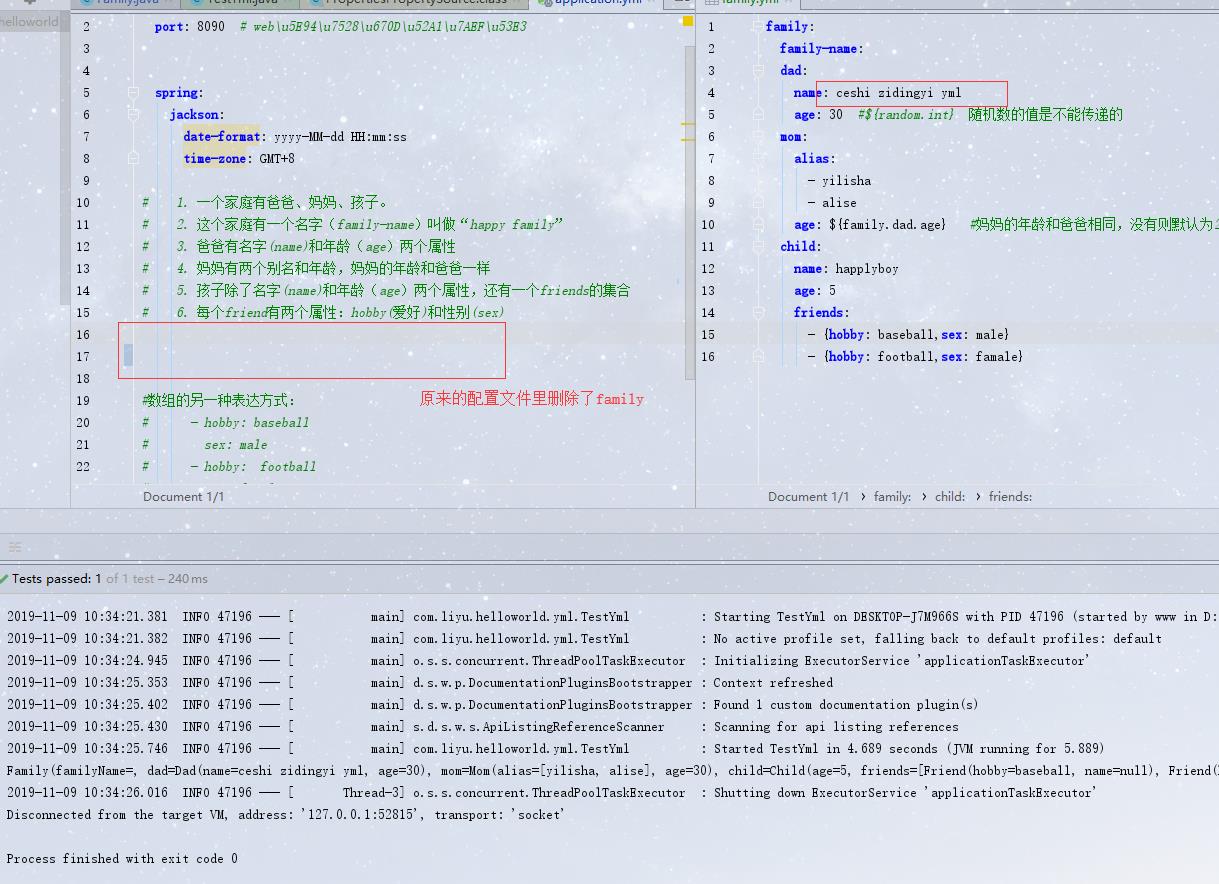
1、新建一个family.yam文件,将上application.yml对象复制进入family
family:
  family-name:
  dad:
    name: levi
    age: 30  #${random.int}  随机数的值是不能传递的
  mom:
    alias:
      - yilisha
      - alise
    age: ${family.dad.age}   #妈妈的年龄和爸爸相同,没有则默认为24岁
  child:
    name: happlyboy
    age: 5
    friends:
      - {hobby: baseball,sex: male}
      - {hobby: football,sex: famale}
2、自定义一个配置类:
package com.liyu.helloworld.config;

import org.springframework.beans.factory.config.YamlPropertiesFactoryBean;
import org.springframework.core.env.PropertiesPropertySource;
import org.springframework.core.env.PropertySource;
import org.springframework.core.io.support.DefaultPropertySourceFactory;
import org.springframework.core.io.support.EncodedResource;

import java.io.IOException;
import java.util.Properties;

public class MixPropertySourceFactory extends DefaultPropertySourceFactory {


    public PropertySource<?> createPropertySource(String name, EncodedResource resource) throws IOException {
        String sourceName = name != null ? name : resource.getResource().getFilename();
        if (!resource.getResource().exists()) {
            return new PropertiesPropertySource(sourceName, new Properties());
        } else if (sourceName.endsWith(".yml") || sourceName.endsWith(".yaml")) {
            Properties propertiesFromYaml = loadYml(resource);
            return new PropertiesPropertySource(sourceName, propertiesFromYaml);
        } else {
            return super.createPropertySource(name, resource);
        }
    }

    private Properties loadYml(EncodedResource resource) throws IOException {
        YamlPropertiesFactoryBean factory = new YamlPropertiesFactoryBean();
        factory.setResources(resource.getResource());
        factory.afterPropertiesSet();
        return factory.getObject();
    }
}
该配置了除了可以引入springboot默认的application.properties文件,还能引入自定义的yml文件
@PropertySource(value = {"classpath:family.yml"}, factory = MixPropertySourceFactory.class)
public class Family {
在family类上加入上述注解,如果是读取properties配置文件,只需要加@PropertySource(value = {"classpath:family.properties"})即可。不需要定义MixPropertySourceFactory。
application配置文件的优先级是比普通的yml配置文件优先级是要高的,相同属性的配置,只有字application中没有配置才能生效
二、老的文件配置引入(xml文件)
1、自定义一个xml配置文件
<?xml version="1.0" encoding="UTF-8"?>
<beans xmlns="http://www.springframework.org/schema/beans"
       xmlns:xsi="http://www.w3.org/2001/XMLSchema-instance"
       xsi:schemaLocation="http://www.springframework.org/schema/beans http://www.springframework.org/schema/beans/spring-beans.xsd">
    <bean id="testBeanService" class="com.liyu.helloworld.service.TestBeanService"></bean>
</beans>
2、在springboot启动时配置装载xml文件
@SpringBootApplication
@ImportResource(locations = {"classpath:beans.xml"})
public class Boot01HelloworldApplication {

    public static void main(String[] args) {
        SpringApplication.run(Boot01HelloworldApplication.class, args);
    }

}
3、新建一个测试类:
@RunWith(SpringRunner.class)
@SpringBootTest
public class TestBean {

        @Autowired
        private ConfigurableApplicationContext ioc;

        @Test
        public void testHelloService() {
            //测试Spring上下文环境中是否有testBeanService这样一个bean,有的话表示xml配置文件生效
            boolean testBeanService= ioc.containsBean("testBeanService");
            System.out.println(testBeanService);
        }
}
4、运行结果:
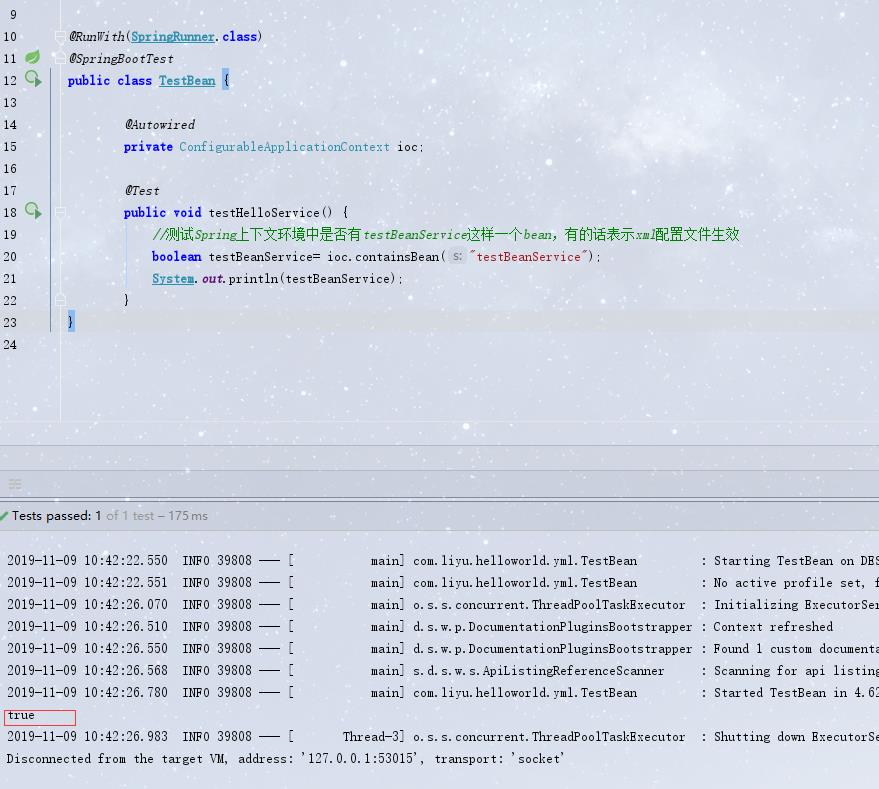
spring中注入了目标bean
以上是关于Springboot自定义xml文件解析的主要内容,如果未能解决你的问题,请参考以下文章