安装PHP7.1+apache2.4.23

Posted 种花家的大老师

tags:

篇首语:本文由小常识网(cha138.com)小编为大家整理,主要介绍了安装PHP7.1+apache2.4.23相关的知识,希望对你有一定的参考价值。

安装准备:
 
最新版的Apache源代码和安装包下载 - http://httpd.apache.org/download.cgi

http://archive.apache.org/dist/apr/apr-util-1.5.4.tar.gz 下载apr-util

注意事项:wget  vim   gcc gcc-c++   cmake  这几个也是安装 Apache 所需要的小环境 。  
yum -y install libjpeg libjpeg-devel libpng libpng-devel freetype freetype-devel libxml2 libxml2-devel mysql pcre-devel curl-devel  libxslt-devel 
yum install gcc-c++ gcc
 
首先安装apr
先解压(略)
./configure --prefix=/usr/local/apr/
make && make install
 
安装apr-util (PS:注意先后顺序)
先解压(略)
 ./configure --prefix=/usr/local/apr-util/ --with-apr=/usr/local/apr/  
make && make install
 
安装pcre
先解压(略)
  ./configure --prefix=/usr/local/pcre/  
make && make install
 
然后安装apache

先解压(略)

 ./configure --prefix=/usr/local/apache/ --with-apr=/usr/local/apr/ --with-apr-util=/usr/local/apr-util/ --with-pcre=/usr/local/pcre/  
make && make install
 
安装完成 测试apache
 cd /usr/local/apache/bin/ 
 ./apachectl start   启动apache
 
成功显示 It Works!就代表 服务器已成功!
添加Apache到Linux服务

cp /usr/local/apache/bin/apachectl  /etc/rc.d/init.d/

mv /etc/rc.d/init.d/apachectl /etc/rc.d/init.d/httpd

chkconfig --add httpd  #所有开机模式下自启动

chkconfig httpd on  #345开机模式下自启动


安装php7
先解压(略)
./configure --prefix=/usr/local/php --with-apxs2=/usr/local/apache/bin/apxs  --with-curl  --with-freetype-dir  --with-gd  --with-gettext  --with-iconv-dir  --with-kerberos  --with-libdir=lib64  --with-libxml-dir  --with-mysqli  --with-openssl  --with-pcre-regex  --with-pdo-mysql  --with-pdo-sqlite  --with-pear  --with-png-dir  --with-xmlrpc  --with-xsl  --with-zlib  --enable-fpm  --enable-bcmath  --enable-libxml  --enable-inline-optimization  --enable-gd-native-ttf  --enable-mbregex  --enable-mbstring  --enable-opcache  --enable-pcntl  --enable-shmop  --enable-soap  --enable-sockets  --enable-sysvsem  --enable-xml  --enable-zip
 

出现“/replace/with/path/to/perl/interpreter: bad interpreter: No such file or 

#vi  /usr/local/apache/bin/apxs

第一行的#!/replace/with/path/to/perl/interpreter -w,找到你perl的安装位置,如果不清楚,可以用which perl找到,一般在/usr/bin/perl ,于是将第一行改为:#!/usr/bin/perl -w. 再运行php的configure, 一切正常!

 make && make install 
 
安装完成后打开httpd.conf  查找php7

看是否搜索到:LoadModule php7_module modules/libphp7.so

如果没有搜索到(一般都是可以搜索到的),就将这段指令添加到httpd.conf配置文件中,使apache可以加载libphp7.so模块,并进行php文件的解析。

在httpd.conf配置文件中再添加一段指令:

<FilesMatch "\\.ph(p[2-6]?|tml)$">

    SetHandler application/x-httpd-php

</FilesMatch>

这段指令告诉apache,碰到文件名以

.php, .php2, .php3, .php4, .php5, .php6或phtml结尾的文件使用

libphp7.so模块进行解析

:wq

进行保存退出。


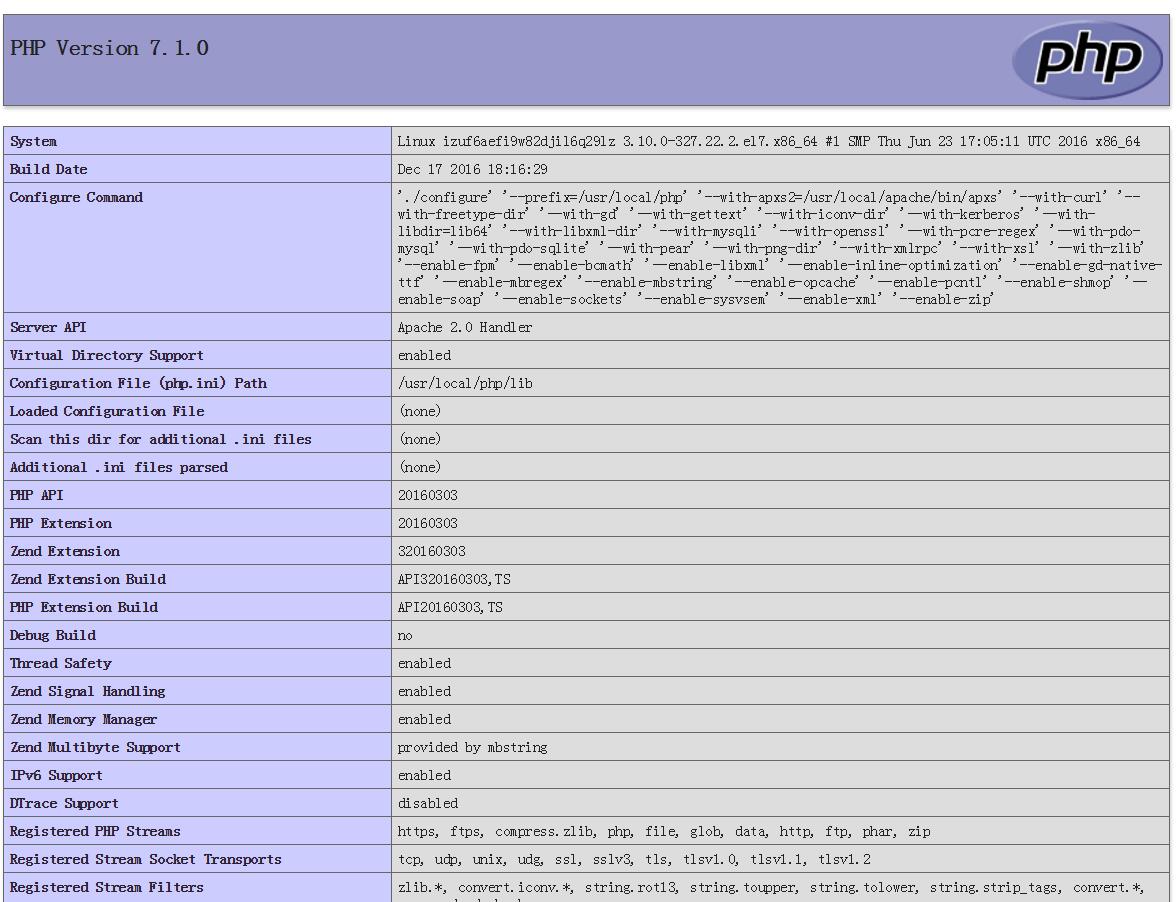
cd  /usr/local/apache/htdocs

按 i 键进入编辑模式,添加:

<?php

     phpinfo();

?>

按Esc键回到命令模式,保存退出:

:wq
 

以上是关于安装PHP7.1+apache2.4.23的主要内容,如果未能解决你的问题,请参考以下文章

安装Apache2.4.23

环境搭建 之 Windows10 安装 Apache2.4.23

RedHat 6.5 离线安装 apache2.4.23

Linux之安装apache2.4.23

最详细win7下手动搭建PHP环境:apache2.4.23+php7.0.11

最详细win7下手动搭建PHP环境:apache2.4.23+php7.0.11