图像转灰度图Python实现
Posted 水枂
tags:
篇首语:本文由小常识网(cha138.com)小编为大家整理,主要介绍了图像转灰度图Python实现相关的知识,希望对你有一定的参考价值。
(一)原始图像

(二)转换原理
(三)python实现
python安装可以参考:python安装
1. 安装库
首先我们需要安装用到的库,按住win+r输入cmd打开dos窗口,输入下面的命令
pip install opencv-python
pip install numpy

2. python程序编写
"""
@author:zhixia

彩图转灰度图
"""

#import 导入模块,每次使用模块中的函数都要是定是哪个模块。
#from…import * 导入模块,每次使用模块中的函数,直接使用函数就可以了;注因为已经知道该函数是那个模块中的了
from skimage.color import rgb2gray #skimage图形处理库 color是颜色空间转换子模块 pip install scikit-image
import numpy as np
import matplotlib.pyplot as plt  #matlab的python库  pip install matplotlib
from PIL import Image # Python Imaging Library 图像处理库 pip install pillow
import cv2

#图像灰度化

#cv2的方式
img = cv2.imread("lenna.png")
h,w = img.shape[:2] #获取图片的high和wide
img_gray=np.zeros([h,w],img.dtype) #创建一张和当前图片大小一样的单通道图片
for i in range(h):
    for j in range(w):
        m = img[i,j]
        img_gray[i,j] =int(m[0]*0.11+m[1]*0.59+m[2]*0.3) #将BGR坐标转换为gray坐标
print(img_gray)
print("image show grap:%s"%img_gray)
cv2.imshow("imageshow gray", img_gray)

#plt方式
plt.subplot(221) #表示将整个图像窗口分为2行2列, 当前位置为1.
img = plt.imread("lenna.png")
plt.imshow(img)
print("----image lenna -----")
print(img)

#灰度化
img_gray = rgb2gray(img)
plt.subplot(222)
plt.imshow(img_gray,cmap="gray")
print("-----image gray-------")
print(img_gray)

#二值化
img_binary = np.where(img_gray >= 0.5, 1, 0)
print("-----imge_binary------")
print(img_binary)
print(img_binary.shape)

#plt方式
plt.subplot(223)
plt.imshow(img_binary, cmap='gray')
plt.show()
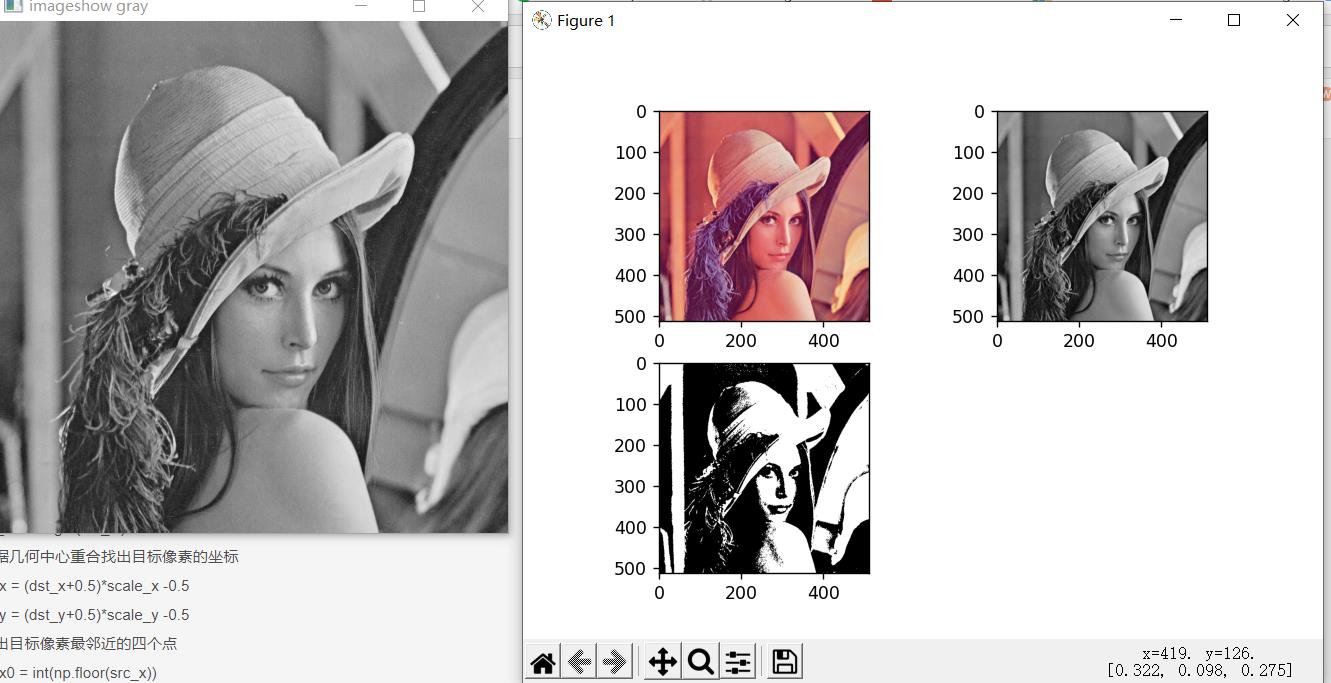
3. 效果

打印信息:
===== RESTART: E:\\ProgramDemo\\AI\\opencv\\opencv\\interpolation\\image_gray.py =====
[[162 162 162 ... 169 155 128]
 [162 162 162 ... 169 155 128]
 [162 162 162 ... 169 155 128]
 ...
 [ 42  42  49 ... 104 100  98]
 [ 43  43  54 ... 103 105 108]
 [ 43  43  54 ... 103 105 108]]
image show grap:[[162 162 162 ... 169 155 128]
 [162 162 162 ... 169 155 128]
 [162 162 162 ... 169 155 128]
 ...
 [ 42  42  49 ... 104 100  98]
 [ 43  43  54 ... 103 105 108]
 [ 43  43  54 ... 103 105 108]]
----image lenna -----
[[[0.8862745  0.5372549  0.49019608]
  [0.8862745  0.5372549  0.49019608]
  [0.8745098  0.5372549  0.52156866]
  ...
  [0.9019608  0.5803922  0.47843137]
  [0.8666667  0.50980395 0.43137255]
  [0.78431374 0.3882353  0.3529412 ]]

 [[0.8862745  0.5372549  0.49019608]
  [0.8862745  0.5372549  0.49019608]
  [0.8745098  0.5372549  0.52156866]
  ...
  [0.9019608  0.5803922  0.47843137]
  [0.8666667  0.50980395 0.43137255]
  [0.78431374 0.3882353  0.3529412 ]]

 [[0.8862745  0.5372549  0.49019608]
  [0.8862745  0.5372549  0.49019608]
  [0.8745098  0.5372549  0.52156866]
  ...
  [0.9019608  0.5803922  0.47843137]
  [0.8666667  0.50980395 0.43137255]
  [0.78431374 0.3882353  0.3529412 ]]

 ...

 [[0.32941177 0.07058824 0.23529412]
  [0.32941177 0.07058824 0.23529412]
  [0.36078432 0.10588235 0.22745098]
  ...
  [0.6784314  0.28627452 0.32941177]
  [0.6745098  0.26666668 0.29803923]
  [0.69411767 0.24313726 0.30980393]]

 [[0.32156864 0.08627451 0.22352941]
  [0.32156864 0.08627451 0.22352941]
  [0.3764706  0.1254902  0.24313726]
  ...
  [0.7019608  0.27450982 0.30980393]
  [0.70980394 0.2784314  0.31764707]
  [0.7254902  0.2901961  0.31764707]]

 [[0.32156864 0.08627451 0.22352941]
  [0.32156864 0.08627451 0.22352941]
  [0.3764706  0.1254902  0.24313726]
  ...
  [0.7019608  0.27450982 0.30980393]
  [0.70980394 0.2784314  0.31764707]
  [0.7254902  0.2901961  0.31764707]]]
-----image gray-------
[[0.60802865 0.60802865 0.60779065 ... 0.6413741  0.57998234 0.46985728]
 [0.60802865 0.60802865 0.60779065 ... 0.6413741  0.57998234 0.46985728]
 [0.60802865 0.60802865 0.60779065 ... 0.6413741  0.57998234 0.46985728]
 ...
 [0.13746354 0.13746354 0.16881412 ... 0.37271804 0.35559532 0.34377727]
 [0.14617059 0.14617059 0.1873059  ... 0.36788785 0.3729255  0.3846753 ]
 [0.14617059 0.14617059 0.1873059  ... 0.36788785 0.3729255  0.3846753 ]]
-----imge_binary------
[[1 1 1 ... 1 1 0]
 [1 1 1 ... 1 1 0]
 [1 1 1 ... 1 1 0]
 ...
 [0 0 0 ... 0 0 0]
 [0 0 0 ... 0 0 0]
 [0 0 0 ... 0 0 0]]
(512, 512)
4. 工程文件
以上是关于图像转灰度图Python实现的主要内容,如果未能解决你的问题,请参考以下文章