thinkphp5 二维码生成 composer
Posted 潇潇六月雨
tags:
篇首语:本文由小常识网(cha138.com)小编为大家整理,主要介绍了thinkphp5 二维码生成 composer相关的知识,希望对你有一定的参考价值。
进入extend文件夹
composer require endroid/qrcode
2.将二维码生成封装为服务

QrcodeServer.php代码如下:
<?php
/**
 * Created by PhpStorm.
 * User: cdjyj21
 * Date: 2018/9/4
 * Time: 11:57
 */

namespace app\\services;

//引入刚刚添加的composer安装的类  里面的自动加载类
use think\\facade\\App;
require_once App::getRootPath().\'/extend/vendor/autoload.php\';
use Endroid\\QrCode\\ErrorCorrectionLevel;
use Endroid\\QrCode\\LabelAlignment;
use Endroid\\QrCode\\QrCode;

class QrcodeServer
{
    protected $_qr;
    protected $_encoding        = \'UTF-8\';              // 编码类型
    protected $_size            = 300;                  // 二维码大小
    protected $_logo            = false;                // 是否需要带logo的二维码
    protected $_logo_url        = \'\';                   // logo图片路径
    protected $_logo_size       = 80;                   // logo大小
    protected $_title           = false;                // 是否需要二维码title
    protected $_title_content   = \'\';                   // title内容
    protected $_generate        = \'display\';            // display-直接显示  writefile-写入文件
    protected $_file_name       = \'./static/qrcode\';    // 写入文件路径
    const MARGIN           = 10;                        // 二维码内容相对于整张图片的外边距
    const WRITE_NAME       = \'png\';                     // 写入文件的后缀名
    const FOREGROUND_COLOR = [\'r\' => 0, \'g\' => 0, \'b\' => 0, \'a\' => 0];          // 前景色
    const BACKGROUND_COLOR = [\'r\' => 255, \'g\' => 255, \'b\' => 255, \'a\' => 0];    // 背景色

    public function __construct($config) {
        isset($config[\'generate\'])      &&  $this->_generate        = $config[\'generate\'];
        isset($config[\'encoding\'])      &&  $this->_encoding        = $config[\'encoding\'];
        isset($config[\'size\'])          &&  $this->_size            = $config[\'size\'];
        isset($config[\'logo\'])          &&  $this->_logo            = $config[\'logo\'];
        isset($config[\'logo_url\'])      &&  $this->_logo_url        = $config[\'logo_url\'];
        isset($config[\'logo_size\'])     &&  $this->_logo_size       = $config[\'logo_size\'];
        isset($config[\'title\'])         &&  $this->_title           = $config[\'title\'];
        isset($config[\'title_content\']) &&  $this->_title_content   = $config[\'title_content\'];
        isset($config[\'file_name\'])     &&  $this->_file_name       = $config[\'file_name\'];
    }

    /**
     * 生成二维码
     * @param $content //需要写入的内容
     * @return array | page input
     */
    public function createServer($content) {
        $this->_qr = new QrCode($content);
        $this->_qr->setSize($this->_size);
        $this->_qr->setWriterByName(self::WRITE_NAME);
        $this->_qr->setMargin(self::MARGIN);
        $this->_qr->setEncoding($this->_encoding);
        $this->_qr->setErrorCorrectionLevel(ErrorCorrectionLevel::HIGH);   // 容错率
        $this->_qr->setForegroundColor(self::FOREGROUND_COLOR);
        $this->_qr->setBackgroundColor(self::BACKGROUND_COLOR);
        // 是否需要title
        if ($this->_title) {
            $this->_qr->setLabel($this->_title_content, 16, null, LabelAlignment::CENTER);
        }
        // 是否需要logo
        if ($this->_logo) {
            $this->_qr->setLogoPath($this->_logo_url);
            $this->_qr->setLogoWidth($this->_logo_size);
        }

        $this->_qr->setValidateResult(false);

        if ($this->_generate == \'display\') {
            // 展示二维码
            // 前端调用 例:<img src="http://localhost/qr.php?url=base64_url_string">
            header(\'Content-Type: \' . $this->_qr->getContentType());
            return $this->_qr->writeString();
        } else if ($this->_generate == \'writefile\') {
            // 写入文件
            $file_name = $this->_file_name;
            return $this->generateImg($file_name);
        } else {
            return [\'success\' => false, \'message\' => \'the generate type not found\', \'data\' => \'\'];
        }
    }

    /**
     * 生成文件
     * @param $file_name //目录文件 例: /tmp
     * @return array
     */
    public function generateImg($file_name) {
        $file_path = $file_name . DIRECTORY_SEPARATOR . uniqid() . \'.\' . self::WRITE_NAME;

        if (!file_exists($file_name)) {
            mkdir($file_name, 0777, true);
        }

        try {
            $this->_qr->writeFile($file_path);
            $data = [
                \'url\' => $file_path,
                \'ext\' => self::WRITE_NAME,
            ];
            return [\'success\' => true, \'message\' => \'write qrimg success\', \'data\' => $data];
        } catch (\\Exception $e) {
            return [\'success\' => false, \'message\' => $e->getMessage(), \'data\' => \'\'];
        }
    }

}
3.调用
例:
<?php
/**
 * Created by PhpStorm.
 * User: cdjyj21
 * Date: 2018/9/4
 * Time: 11:57
 */

namespace app\\test\\controller;

use app\\services\\QrcodeServer;

class Qrcode
{
    /**
     * 直接输出二维码 + 生成二维码图片文件
     */
    public function create(){
        // 自定义二维码配置
        $config = [
            \'title\'         => true,
            \'title_content\' => \'test\',
            \'logo\'          => true,
            \'logo_url\'      => \'./logo.png\',
            \'logo_size\'     => 80,
        ];

        // 直接输出
        $qr_url = \'http://www.baidu.com?id=\' . rand(1000, 9999);

        $qr_code = new QrcodeServer($config);
        $qr_img = $qr_code->createServer($qr_url);
        echo $qr_img;

        // 写入文件
        $qr_url = \'这是个测试二维码\';
        $file_name = \'./static/qrcode\';  // 定义保存目录

        $config[\'file_name\'] = $file_name;
        $config[\'generate\']  = \'writefile\';

        $qr_code = new QrcodeServer($config);
        $rs = $qr_code->createServer($qr_url);
        print_r($rs);

        exit;
    }
}
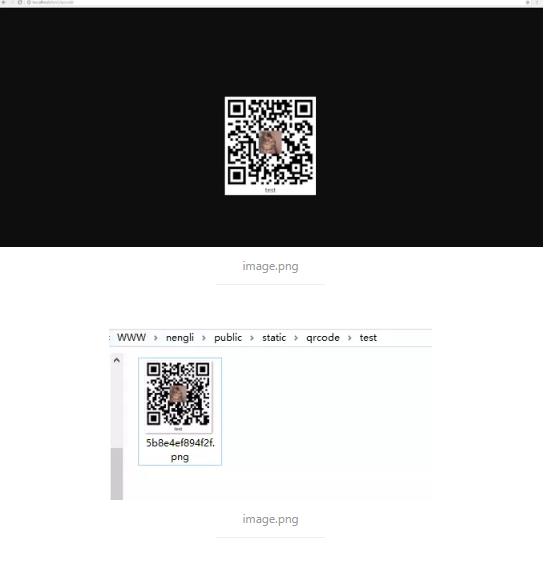
在浏览器中直接访问create()方法,会直接输出二维码,同时会在自定义保存目录下生成一张二维码图片。效果如下:
那这种直接输出的二维码怎么应用于项目中呢,一般都是直接写在html 中的 <img> 标签中,例如:
<img src="http://localhost:8080/projecttest/qrtest?id=1234" alt="这是一个二维码" />
这里罗列下我看懂的几个参数,也算给自己做个笔记吧。
| 参数名 | 描述 | 示例 |
|---|---|---|
| setText | 设置文本 | https://www.baidu.com |
| setSize | 设置二维码的大小,这里二维码应该是正方形的,所以相当于长宽 | 400 |
| setMargin | 设置二维码边距 | 10 |
| setForegroundColor | 设置前景色,RGB颜色 | array(\'r\' => 0, \'g\' => 0, \'b\' => 0, \'a\' => 0) |
| setBackgroundColor | 设置背景色,RGB颜色 | array(\'r\' => 0, \'g\' => 0, \'b\' => 0, \'a\' => 0) |
| setEncoding | 设置编码 | utf8 |
| setErrorCorrectionLevel | 设置错误级别(low / medium / quartile / high) | high |
| setLogoPath | 设置logo路径 | logo.png |
| setLogoWidth | 设置logo大小 | 50 |
| setLabel | 设置标签 | test |
| setLabelFontSize | 设置标签字体大小 | 16 |
| setLabelFontPath | 设置标签字体路径 | null |
| setLabelAlignment | 设置标签对齐方式(left / center / right) | center |
| setLabelMargin | 设置标签边距 | array(\'t\' => 10,\'r\' => 20,\'b\' => 10,\'l\' => 30) |
| setWriterRegistry | ||
| setWriter | ||
| setWriterByName | 写入文件的后缀名 | png |
| setWriterByPath | ||
| setWriterByExtension | ||
| setValidateResult | ||
| writeString | ||
| writeDataUri | ||
| writeFile | 写入文件 | test.png |
参考原文:https://www.jianshu.com/p/9b933907acd6
以上是关于thinkphp5 二维码生成 composer的主要内容,如果未能解决你的问题,请参考以下文章