简述
php + JQuery实现
前台:将图片进行base64编码,使用ajax实现上传
后台:将base64进行解码,存储至文件夹,将文件名称入库
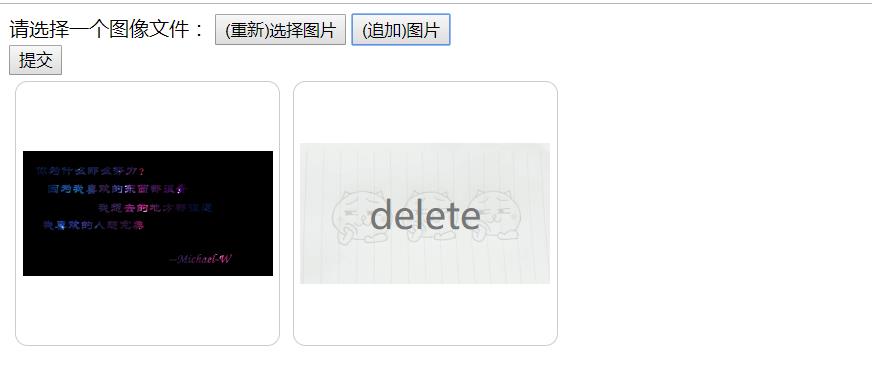
效果图

功能实现
html
<!DOCTYPE html>
<html>
<head>
    <meta charset="UTF-8">
    <title>showImages</title>
    <style type="text/css">
        .float{
            float:left;
            width : 200px;
            height: 200px;
            overflow: hidden;
            border: 1px solid #CCCCCC;
            border-radius: 10px;
            padding: 5px;
            margin: 5px;
        }
        img{
            position: relative;
        }
        .result{
            width: 200px;
            height: 200px;
            text-align: center;
            box-sizing: border-box;
        }
        #file_input{
            display: none;
        }
        .delete{
            width: 200px;
            height:200px;
            position: absolute;
            text-align: center;
            line-height: 200px;
            z-index: 10;
            font-size: 30px;
            background-color: rgba(255,255,255,0.8);
            color: #777;
            opacity: 0;
            transition-duration: :0.7s;
            -webkit-transition-duration: 0.7s;
        }
        .delete:hover{
            cursor: pointer;
            opacity: 1;
        }
    </style>
    <script src="http://libs.baidu.com/jquery/2.0.0/jquery.min.js"></script>
    <script type="text/javascript">
        window.onload = function(){
            var input = document.getElementById("file_input");
            var result;
            var dataArr = []; // 储存所选图片的结果(文件名和base64数据)
            var fd;  //FormData方式发送请求
            var oSelect = document.getElementById("select");
            var oAdd = document.getElementById("add");
            var oSubmit = document.getElementById("submit");
            var oInput = document.getElementById("file_input");

            if(typeof FileReader===\'undefined\'){
                alert("抱歉,你的浏览器不支持 FileReader");
                input.setAttribute(\'disabled\',\'disabled\');
            }else{
                input.addEventListener(\'change\',readFile,false);
            }     //handler

            function readFile(){
                fd = new FormData();
                var iLen = this.files.length;
                var index = 0;
                for(var i=0;i<iLen;i++){
                    if (!input[\'value\'].match(/.jpg|.gif|.png|.jpeg|.bmp/i)){  //判断上传文件格式
                        return alert("上传的图片格式不正确,请重新选择");
                    }
                    var reader = new FileReader();
                    reader.index = i;
                    fd.append(i,this.files[i]);
                    reader.readAsDataURL(this.files[i]);  //转成base64
                    reader.fileName = this.files[i].name;

                    reader.onload = function(e){
                        var imgMsg = {
                            name : this.fileName,//获取文件名
                            base64 : this.result   //reader.readAsDataURL方法执行完后,base64数据储存在reader.result里
                        }
                        dataArr.push(imgMsg);
                        result = \'<div class="delete">delete</div><div class="result"><img src="\'+this.result+\'" alt=""/></div>\';
                        var div = document.createElement(\'div\');
                        div.innerHTML = result;
                        div[\'className\'] = \'float\';
                        div[\'index\'] = index;
                        document.getElementsByTagName(\'body\')[0].appendChild(div);    //插入dom树
                        var img = div.getElementsByTagName(\'img\')[0];
                        img.onload = function(){
                            var nowHeight = ReSizePic(this); //设置图片大小
                            this.parentNode.style.display = \'block\';
                            var oParent = this.parentNode;
                            if(nowHeight){
                                oParent.style.paddingTop = (oParent.offsetHeight - nowHeight)/2 + \'px\';
                            }
                        }

                        div.onclick = function(){
                            this.remove();                  // 在页面中删除该图片元素
                            delete dataArr[this.index];  // 删除dataArr对应的数据

                        }
                        index++;
                    }
                }
            }


            function send(){
                var submitArr = [];
                for (var i = 0; i < dataArr.length; i++) {
                    if (dataArr[i]) {
                        submitArr.push(dataArr[i]);
                    }
                }
                // console.log(\'提交的数据:\'+JSON.stringify(submitArr));
                $.ajax({
                    url : \'发送请求地址\',
                    type : \'post\',
                    data : {
                        \'img\':JSON.stringify(submitArr),
                    },
                    dataType: \'json\',
                    //processData: false,   用FormData传fd时需有这两项
                    //contentType: false,
                    success : function(data){
                        console.log(\'返回的数据:\'+JSON.stringify(data));
                    }

                })
            }

            oSelect.onclick=function(){
                oInput.value = "";   // 先将oInput值清空,否则选择图片与上次相同时change事件不会触发
                //清空已选图片
                $(\'.float\').remove();
                dataArr = [];
                index = 0;
                oInput.click();
            }

            oAdd.onclick=function(){
                oInput.value = "";   // 先将oInput值清空,否则选择图片与上次相同时change事件不会触发
                oInput.click();
            }

            oSubmit.onclick=function(){
                if(!dataArr.length){
                    return alert(\'请先选择文件\');
                }
                send();
            }
        }
        /*
         用ajax发送fd参数时要告诉jQuery不要去处理发送的数据,
         不要去设置Content-Type请求头才可以发送成功,否则会报“Illegal invocation”的错误,
         也就是非法调用,所以要加上“processData: false,contentType: false,”
         * */
        function ReSizePic(ThisPic) {
            var RePicWidth = 200; //这里修改为您想显示的宽度值
            var TrueWidth = ThisPic.width; //图片实际宽度
            var TrueHeight = ThisPic.height; //图片实际高度
            if(TrueWidth>TrueHeight){
                //宽大于高
                var reWidth = RePicWidth;
                ThisPic.width = reWidth;
                //垂直居中
                var nowHeight = TrueHeight * (reWidth/TrueWidth);
                return nowHeight;  //将图片修改后的高度返回,供垂直居中用
            }else{
                //宽小于高
                var reHeight = RePicWidth;
                ThisPic.height = reHeight;
            }
        }
    </script>
</head>
<body>
<div class="container">
    <label>请选择一个图像文件:</label>
    <button id="select">(重新)选择图片</button>
    <button id="add">(追加)图片</button>

    <input type="file" id="file_input" name="image[]" multiple/>
    <!--用input标签并选择type=file,记得带上multiple,不然就只能单选图片了-->
    <button id="submit">提交</button>

</div>
</body>
</html>
PHP主要功能代码
<?php
    $img = request()->post(\'img\');  //接收图片信息        为防止部分特殊字符被转义,可使用 htmlspecialchars_decode() 函数对接收到的内容进行处理
    $arr = json_decode($img,true); //转成数组
    $ImgUrl = [];
    for($i=0;$i<count($arr);$i++)
    {
        $suffix = substr(strrchr($arr[$i][\'name\'], \'.\'), 1);//获取文件后缀名
        $image = $arr[$i][\'base64\'];
        //这里的图片名称就是你存入数据库时的图片名称
        $imageName = date("His",time())."_".rand(1111,9999).\'.\'.$suffix;
           // 判断是否有逗号 如果有就截取后半部分
        if (strstr($image,",")){
            $image = explode(\',\',$image);
            $image = $image[1];
        }
        //图片保存路径,可根据使用框架目录的不同自定义目录
        $path = ROOT_PATH . \'public\' . DS .\'static\'. DS . \'img\' . DS .date("Ymd",time());
        // 判断目录是否存在 不存在就创建 并赋予777权限
        if (!is_dir($path)){ //判断目录是否存在 不存在就创建
            mkdir($path,0777,true);
        }
        $imageSrc=  $path."/". $imageName;
        // 生成图片 返回的是字节数
        $result = file_put_contents($imageSrc, base64_decode($image));
        if (!$result) {
            $ImgUrl[$i] = "===图片生成失败===";
        }else{
            $ImgUrl[$i] = $imageName;
        }
    }
    //$ImgUrl 即为上传之后的图片名称,是逗号隔开的字符串
    $ImgUrl = implode(\',\',$ImgUrl);
    //可以根据自己的需求进行入库操作
    //入库操作结束后一定要记得给ajax返回处理结果