基于pytorch框架实现手写图片的分类
Posted 记录机器学习,深度学习的小菜鸡
tags:
篇首语:本文由小常识网(cha138.com)小编为大家整理,主要介绍了基于pytorch框架实现手写图片的分类相关的知识,希望对你有一定的参考价值。
提示:文章写完后,目录可以自动生成,如何生成可参考右边的帮助文档
文章目录
前言
基于pytorch框架实现手写图片的分类
🍨 本文为🔗365天深度学习训练营 中的学习记录博客
🍦 参考文章:Pytorch实战 | 第P4周:猴痘病识别
🍖 原作者:K同学啊|接辅导、项目定制

1,device
import torch
import torch.nn as nn
import matplotlib.pyplot as plt
import torchvision

device = torch.device("cuda" if torch.cuda.is_available() else "cpu")

device
简介: torchvision包是服务于pytorch深度学习框架的,用来生成图片,视频数据集,和一些流行的模型类和预训练模型.
torchvision由以下四个部分组成:
torchvision.datasets : Data loaders for popular vision datasets
torchvision.models : Definitions for popular model architectures, such as AlexNet, VGG, and ResNet and pre-trained models.
torchvision.transforms : Common image transformations such as random crop, rotations etc.
torchvision.utils : Useful stuff such as saving tensor (3 x H x W) as image to disk, given a mini-batch creating a grid of images, etc.
2.读入数据
代码如下(示例):
'''torchvision.datasets.MNIST('root',
                               train=True训练集,
                               transform=torchvision.transforms.ToTensor(), # Change the data type to tensor
                               download=True,训练集,false测试集)'''
train_ds = torchvision.datasets.MNIST('data',
                                      train=True,
                                      transform=torchvision.transforms.ToTensor(), # Change the data type to tensor
                                      download=True)
test_ds  = torchvision.datasets.MNIST('data',
                                      train=False,
                                      transform=torchvision.transforms.ToTensor(), # Change the data type to tensor
                                      download=True)
batch_size = 32
'''torch.utils.data.DataLoader(dataset,
                                       batch_size每批取样数量
                                       shuffle=True是否洗牌)'''
train_dl = torch.utils.data.DataLoader(train_ds,
                                       batch_size=batch_size,
                                       shuffle=True)
test_dl = torch.utils.data.DataLoader(test_ds,
                                      batch_size=batch_size)

imgs, labels = next(iter(train_dl))
print(imgs.shape)
torch.Size([32, 1, 28, 28]) — [batch_size, channel, height, weight]
iter() 函数
用来生成迭代器。
以下是 iter() 方法的语法:
iter(object[, sentinel])
参数
object -- 支持迭代的集合对象。
sentinel -- 如果传递了第二个参数,则参数 object 必须是一个可调用的对象(如,函数),此时,iter 创建了一个迭代器对象,每次调用这个迭代器对象的__next__()方法时,都会调用 object。
数据可视化
import numpy as np
plt.figure(figsize=(20, 5))
for i, imgs in enumerate(imgs[:20]):
    # squeeze the dimention
    npimg = np.squeeze(imgs.numpy())
    # plot the images
    plt.subplot(2, 10, i+1)
    plt.imshow(npimg, cmap=plt.cm.binary)
    plt.axis("off")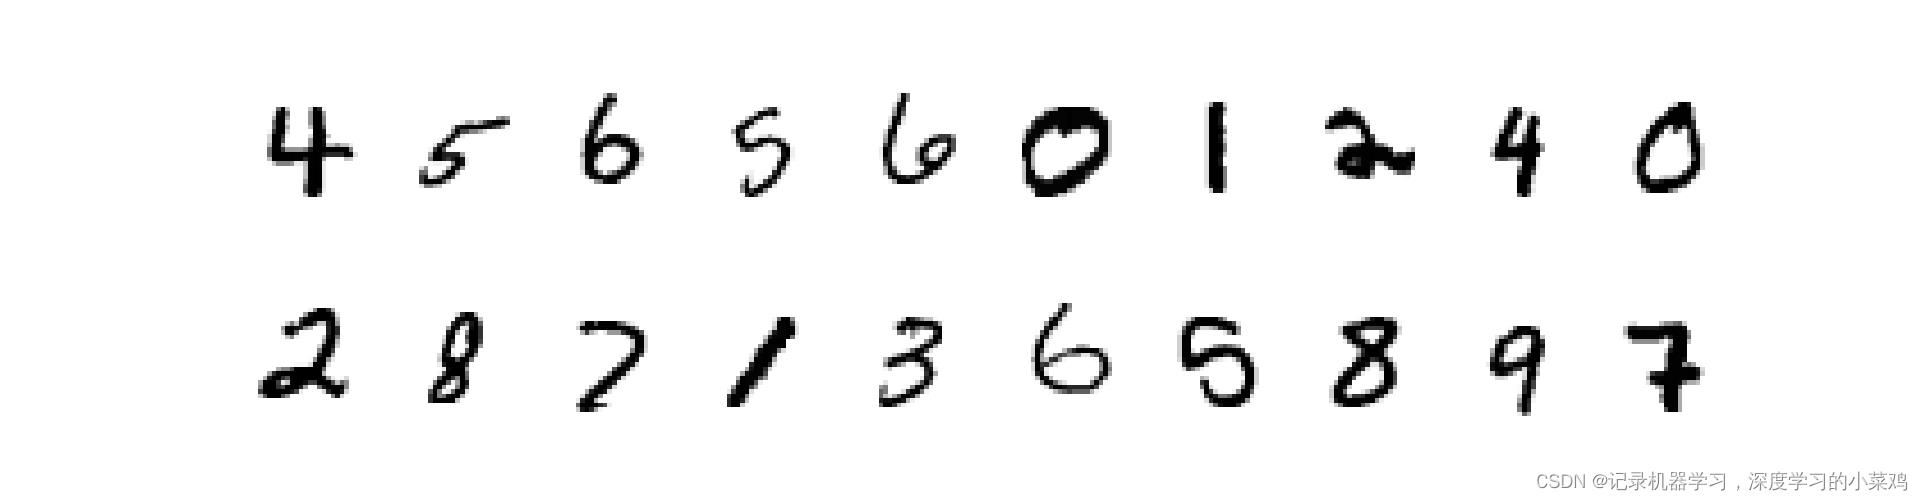
3,构建cnn模型

import torch.nn.functional as F

num_classes = 10


class Model(nn.Module):
    def __init__(self):
        super().__init__()
        # Feature Extraction Network
        self.conv1 = nn.Conv2d(1, 32, kernel_size=3)  # (input_channel, output_channel, kernel_size)
        self.pool1 = nn.MaxPool2d(2)  # Max Pooling Layer
        self.conv2 = nn.Conv2d(32, 64, kernel_size=3)
        self.pool2 = nn.MaxPool2d(2)

        # Classification Network
        self.fc1 = nn.Linear(1600, 64)
        self.fc2 = nn.Linear(64, num_classes)

    def forward(self, x):
        x = self.pool1(F.relu(self.conv1(x)))
        x = self.pool2(F.relu(self.conv2(x)))

        x = torch.flatten(x, start_dim=1)

        x = F.relu(self.fc1(x))
        x = self.fc2(x)

        return x
我们首先通过继承nn.Module定义我们的CNN Class,然后在__init__里创建CNN的每个layer。神经网络所有运算通过forward函数实现。这个CNN例子中一共是两个2维卷积层和两个全连接线性层,通过一些激活函数(activation function)做连接,最后输出softmax分类结果。
这里笔者是把所有神经网络层放在___init___中,所有的激活函数都放在了forward里。当然也可以通过nn.Sequential()将这些激活函数和神经网络层一并按顺序放在__init__里。
torch.nn.Conv2d(in_channels, out_channels, kernel_size,
stride=1, padding=0, dilation=1, groups=1,
bias=True, padding_mode='zeros')
in_channels (int):输入图像通道数
out_channels (int):卷积产生的通道数
kernel_size (int or tuple):卷积核尺寸
stride (int, optional):卷积步长,默认为 1
加载打印模型
from torchinfo import summary
model = Model().to(device)
summary(model)
model = Model().to(device)将模型转移到GPU中,在gpu中运行
4,训练模型
4.1,设置超参数
loss_fn = nn.CrossEntropyLoss()设置损失函数
4.2,优化器 http://t.csdn.cn/fLZVElr表示学习率;momentum表示冲量因子;weight_decay表示权重衰减系数(将使用L2正则项);nesterov表示使用Nesterov冲量;
# Loss function
loss_fn = nn.CrossEntropyLoss()
learn_rate = 1e-2
# optimizer
opt = torch.optim.SGD(model.parameters(), lr=learn_rate)


def train(dataloader, model, loss_fn, optimizer):
    size = len(dataloader.dataset)  # 60000
    num_batches = len(dataloader)  # 60000 / 32 = 1875

    train_loss, train_acc = 0, 0
    for X, y in dataloader:
        X, y = X.to(device), y.to(device)

        # calculate the prediction error
        pred = model(X)  # output of the Network
        loss = loss_fn(pred, y)  # calculate the Loss based on the loss function

        # Backword
        optimizer.zero_grad()
        loss.backward()
        optimizer.step()

        # Record the acc and loss
        train_acc += (pred.argmax(1) == y).type(torch.float).sum().item()
        train_loss += loss.item()

    train_acc /= size
    train_loss /= num_batches

    return train_acc, train_loss


def test(dataloader, model, loss_fn):
    size = len(dataloader.dataset)  # 10000
    num_batches = len(dataloader)  # 10000 / 32 = 313

    test_loss, test_acc = 0, 0
    # Stop the gradient calculation
    with torch.no_grad():
        for imgs, target in dataloader:
            imgs, target = imgs.to(device), target.to(device)

            # Loss
            pred = model(imgs)
            loss = loss_fn(pred, target)

            test_loss += loss.item()
            test_acc += (pred.argmax(1) == target).type(torch.float).sum().item()

    test_acc /= size
    test_loss /= num_batches

    return test_acc, test_loss


epochs = 5
train_loss = []
train_acc = []
test_loss = []
test_acc = []

for epoch in range(epochs):
    model.train()
    epoch_train_acc, epoch_train_loss = train(train_dl, model, loss_fn, opt)

    model.eval()
    epoch_test_acc, epoch_test_loss = test(test_dl, model, loss_fn)

    train_acc.append(epoch_train_acc)
    train_loss.append(epoch_train_loss)
    test_acc.append(epoch_test_acc)
    test_loss.append(epoch_test_loss)

    template = ('Epoch::2d, Train_acc::.1f%, Train_loss::.3f, Test_acc::.1f%,Test_loss::.3f')
    print(template.format(epoch + 1, epoch_train_acc * 100, epoch_train_loss, epoch_test_acc * 100, epoch_test_loss))
print('Done')
5,结果评价
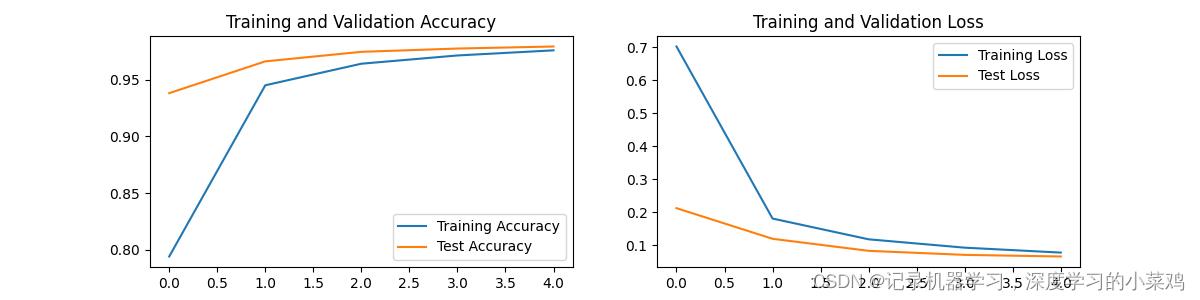
总结
以上就是今天要讲的内容,本文仅仅简单介绍了pytorch框架的使用
以上是关于基于pytorch框架实现手写图片的分类的主要内容,如果未能解决你的问题,请参考以下文章