通过ansible安装mysql,apache,php,并实现rsyslog日志记录于MySQL中
Posted
tags:
篇首语:本文由小常识网(cha138.com)小编为大家整理,主要介绍了通过ansible安装mysql,apache,php,并实现rsyslog日志记录于MySQL中相关的知识,希望对你有一定的参考价值。
环境:
192.168.205.7: as ansible host
192.168.205.37: as mariadb server
192.168.205.27: as web server and rsyslog client
版本:
OS: centos 7 1810 with mini install
ansible: 2.8.1
mariadb-10.2.25-linux-x86_64.tar.gz
apr-1.7.0.tar.bz2
apr-util-1.6.1.tar.bz2
httpd-2.4.39.tar.bz2
php-7.3.7.tar.xz
loganalyzer-4.1.7.tar.gz
目地:
编译安装apache2.4.39, 编译安装php7.37, 二进制安装mariadb server10.2.25, 将192.168.205.27的日志记录发送到mariadb server中,并同时使用192.168.205.27做为LAMP server使用loganalyzer显示和分析日志
步骤:
1. 通过ansible安装mariadb
2. 编译安装apache2.4.39
3. 通过ansible安装apache
4. 编译安装php
5. 通过ansible安装php
6. 在要把日志存到sql中的服务器安装rsyslog相关文件
7. 初始化数据库并安装rsyslog的数据库脚本
8. 修改改http.conf支持php-fpm
9. 安装loganalyzer
10. 测试 在192.168.205.7使用ansible安装mysql Server
- ansible安装在此省略,安装完成后修改如下文件
[root@centos7 ansible]#vi /etc/ansible/hosts [servers] 192.168.205.27 192.168.205.37 192.168.205.17 - 使用roles方式创建文件夹
mkdir -p /data/ansible/roles/{apache,mysql,php}/{files,tasks} - 下载mariadb10.2.25二进制版本到ansible服务器中的/data/ansible/roles/mysql/files中
[root@centos7 files]#pwd /data/ansible/roles/mysql/files [root@centos7 files]#ls mariadb-10.2.25-linux-x86_64.tar.gz my.cnf - 创建yaml文件
[root@centos7 tasks]#pwd /data/ansible/roles/mysql/tasks [root@centos7 tasks]#cat main.yml - include: install.yml [root@centos7 tasks]#cat install.yml - name: adduser 在目标机器上创建用户mysql user: name=mysql system=yes home=/data/mysql create_home=no shell=/sbin/nologin - name: unarchive 解压缩mysql的二进制文件到目标计算机上 unarchive: src=mariadb-10.2.25-linux-x86_64.tar.gz dest=/usr/local/ owner=mysql group=mysql - name: link 建立软链接文件 file: src=/usr/local/mariadb-10.2.25-linux-x86_64 dest=/usr/local/mysql state=link - name: datadir 建立数据文件路径,并设置权限 file: path=/data/mysql state=directory owner=mysql group=mysql - name: database 初始化安装脚本,生成系统数据库 shell: chdir=/usr/local/mysql/ scripts/mysql_install_db --datadir=/data/mysql --user=mysql - name: path vars 将安装路径加入到PATH变量中 copy: content=‘PATH=/usr/local/mysql/bin:$PATH‘ dest=/etc/profile.d/mysql.sh - name: config 复制配置文件模板到目标中 copy: src=my.cnf dest=/etc/my.cnf - name: mycnf 修改配置文件的数据文件目录为/data/mysql shell: sed -i ‘/[mysqld]/a datadir=/data/mysql‘ /etc/my.cnf - name: service 复制启动脚本到启动目录中 shell: cp /usr/local/mysql/support-files/mysql.server /etc/init.d/mysqld - name: start service 启动服务 shell: /etc/init.d/mysqld start [root@centos7 ansible]#pwd /data/ansible [root@centos7 ansible]#cat mysql_role.yml - hosts: 192.168.205.37 roles: - mysql - 安装mysql 到192.168.205.37中
ansible-playbook mysql_role.yml
在192.168.205.7中编译并使用ansible安装apache
- 安装相关的包
yum install gcc prce-devel openssl-devel expat-devel -y 下载相关包到目录/data/tmp中 apr-1.7.0.tar.bz2 apr-util-1.6.1.tar.bz2 httpd-2.4.39.tar.bz2 - 编译安装
for p in *.bz2 ;do tar xvf $p;done mv apr-1.7.0 httpd-2.4.39/srclib/apr mv apr-util-1.6.1 httpd-2.4.39/srclib/apr-util cd httpd-2.4.39/ ./configure --prefix=/app/httpd24 --enable-so --enable-ssl --enable-cgi --enable-rewrite --with-zlib --with-pcre --with-included-apr --enable-modules=most --enable-mpms-shared=all --with-mpm=prefork make -j 4 && make install - 打包httpd2.4
tar -Jcvf /data/ansible/roles/apache/files/http2.4.39.tar.xz /app/httpd - 在/data/ansible/roles/apache/tasks中建立如下yml文件
[root@centos7 tasks]#pwd /data/ansible/roles/apache/tasks [root@centos7 tasks]#cat main.yml - include: unarchive.yml - include: vars.yml - include: service.yml [root@centos7 tasks]#cat unarchive.yml - name: unarchive htppd unarchive: src=httpd-bin-2.4.39.tar.xz dest=/ [root@centos7 tasks]#cat vars.yml - name: vars copy: content=‘PATH=/app/httpd24/bin:$PATH‘ dest=/etc/profile.d/httpd.sh [root@centos7 tasks]#cat service.yml - name: add user user: name: apache system: yes shell: /sbin/nologin - name: modify conf shell: sed -ri ‘s/^(.*) daemon$/1 apache/‘ /app/httpd24/conf/httpd.conf - name: service shell: echo ‘/app/httpd24/bin/apachectl start‘ >> /etc/rc.d/rc.local - name: execute right file: path: /etc/rc.d/rc.local mode: u+x,g+x,o+x - name: start service shell: apachectl start [root@centos7 ansible]#cat apache2.4.39-bin-install.yml - hosts: 192.168.205.27 roles: - apache - 执行安装:
ansible-playbook apache2.4.39-bin-install.yml
在192.168.205.7中编译php并使用ansible安装php
- 实现编译安装php,注意使用--with-gd, 否测loganalyzer无法正常显示图形
yum install libxml2-devel bzip2-devel libmcrypt-devel tar xvf php-7.3.7.tar.xz cd php-7.3.7/ ./configure --prefix=/app/php --enable-mysqlnd --with-mysqli=mysqlnd --with-pdo-mysql=mysqlnd --with-openssl --with-freetype-dir --with-jpeg-dir --with-png-dir --with-zlib --with-libxml-dir=/usr --with-config-file-path=/etc --with-config-file-scan-dir=/etc/php.d --enable-mbstring --enable-xml --enable-sockets --enable-fpm --enable-maintainer-zts --disable-fileinfo --with-gd make && make install - 创建基于ansible roles的yaml安装文件
tar -Jcvf /data/ansible/roles/php/files/php-bin.7.3.7.tar.xz /app/php/ cp php.ini-production /data/ansible/roles/php/roles/php/files cp sapi/fpm/init.d.php-fpm /data/ansible/roles/php/roles/php/files [root@centos7 files]#pwd /data/ansible/roles/php/files [root@centos7 files]#ls init.d.php-fpm php-bin.7.3.7.tar.xz php.ini-production [root@centos7 tasks]#pwd /data/ansible/roles/php/tasks [root@centos7 tasks]#ls install.yml main.yml [root@centos7 tasks]#cat main.yml - include: install.yml [root@centos7 tasks]#cat install.yml - name: unarchive unarchive: src: php-bin.7.3.7.tar.xz dest: / - name: copy php.ini copy: src: php.ini-production dest: /etc/php.ini - name: copy php-fpm service copy: src: init.d.php-fpm dest: /etc/init.d/php-fpm mode: u+x,g+x,o+x - name: add hph-fpm service shell: chkconfig --add php-fpm - name: copy php-fpm.conf copy: src: /app/php/etc/php-fpm.conf.default dest: /app/php/etc/php-fpm.conf remote_src: yes - name: copy www.conf copy: src: /app/php/etc/php-fpm.d/www.conf.default dest: /app/php/etc/php-fpm.d/www.conf remote_src: yes - name: modify config shell: sed -ri ‘s@(^.*) = nobody@1 = apache@‘ /app/php/etc/php-fpm.d/www.conf - name: start service shell: service php-fpm start [root@centos7 ansible]#pwd /data/ansible [root@centos7 ansible]#cat php-bin.7.3.7.yml --- - hosts: 192.168.205.27 remote_user: root roles: - php - 安装装php
ansible-playbook php-bin.7.3.7.yml
在将要把日志存在数据库中的服务器中安装rsyslog相关文件此列为192.168.205.27
- 安装mysql模块相关的程序包
yum install rsyslog-mysql - 可以看到只安装了两个文件,mysql-createDB.sql为创建数据库用
[root@centos7 etc]#rpm -ql rsyslog-mysql /usr/lib64/rsyslog/ommysql.so /usr/share/doc/rsyslog-8.24.0/mysql-createDB.sql - 将mysql-createDB.sql拷贝到mariadb服务器中
scp /usr/share/doc/rsyslog-8.24.0/mysql-createDB.sql 192.168.205.37:data - 配置rsyslog将日志保存到mysql中
vi /etc/rsyslog.conf
$ModLoad ommysql
*.info;mail.none;authpriv.none;cron.none                :ommysql:192.168.205.37,Syslog,rsyslog,centos
在192.168.205.37中初始化数据库
- 安全初始化
/user/local/mysql/bin/mysql_secure_installation - 在mysql server上授权rsyslog能连接至当前服务器
grant all on rsyslog.* to rsyslog@‘192.168.205.%‘ identified by ‘centos‘; - 在mariadbserver中为rsyslog创建数据库及表;
mysql < /data/mysql-createDB.sql 此文件来自于第17步
修改apache配置文件使其支持php
- 修改192.168.205.27中的httpd.conf配置文件
vi /app/http2.4/conf/httpd.conf
user apache
group apache
<IfModule dir_module>
DirectoryIndex index.php index.html
</IfModule>
AddType application/x-httpd-php .php
AddType application/x-httpd-php-source .phps
ProxyRequests Off
ProxyPassMatch "^/.*.php(/.*)?$" "fcgi://localhost:9000/app/httpd24/htdocs/"
安装和配置loganalyzer
- 安装LogAnalyzer
tar xf loganalyzer-4.1.5.tar.gz cp -a loganalyzer-4.1.5/src /app/http24/htdoc/loganalyzer cd /app/http24/htdoc/loganalyzer touch config.php chmod 666 config.php - 配置loganalyzer
systemctl restart httpd.service
测试
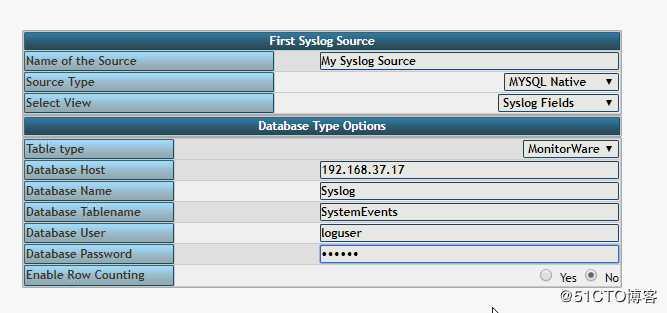
- 直接访问http://192.168.205.27/loganalyzer,此进要进行数据库连接,并初始化config.php,

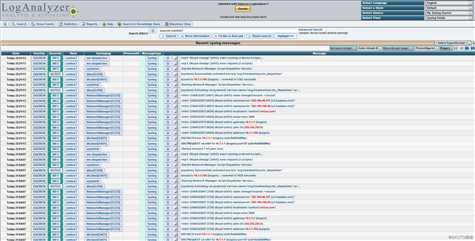
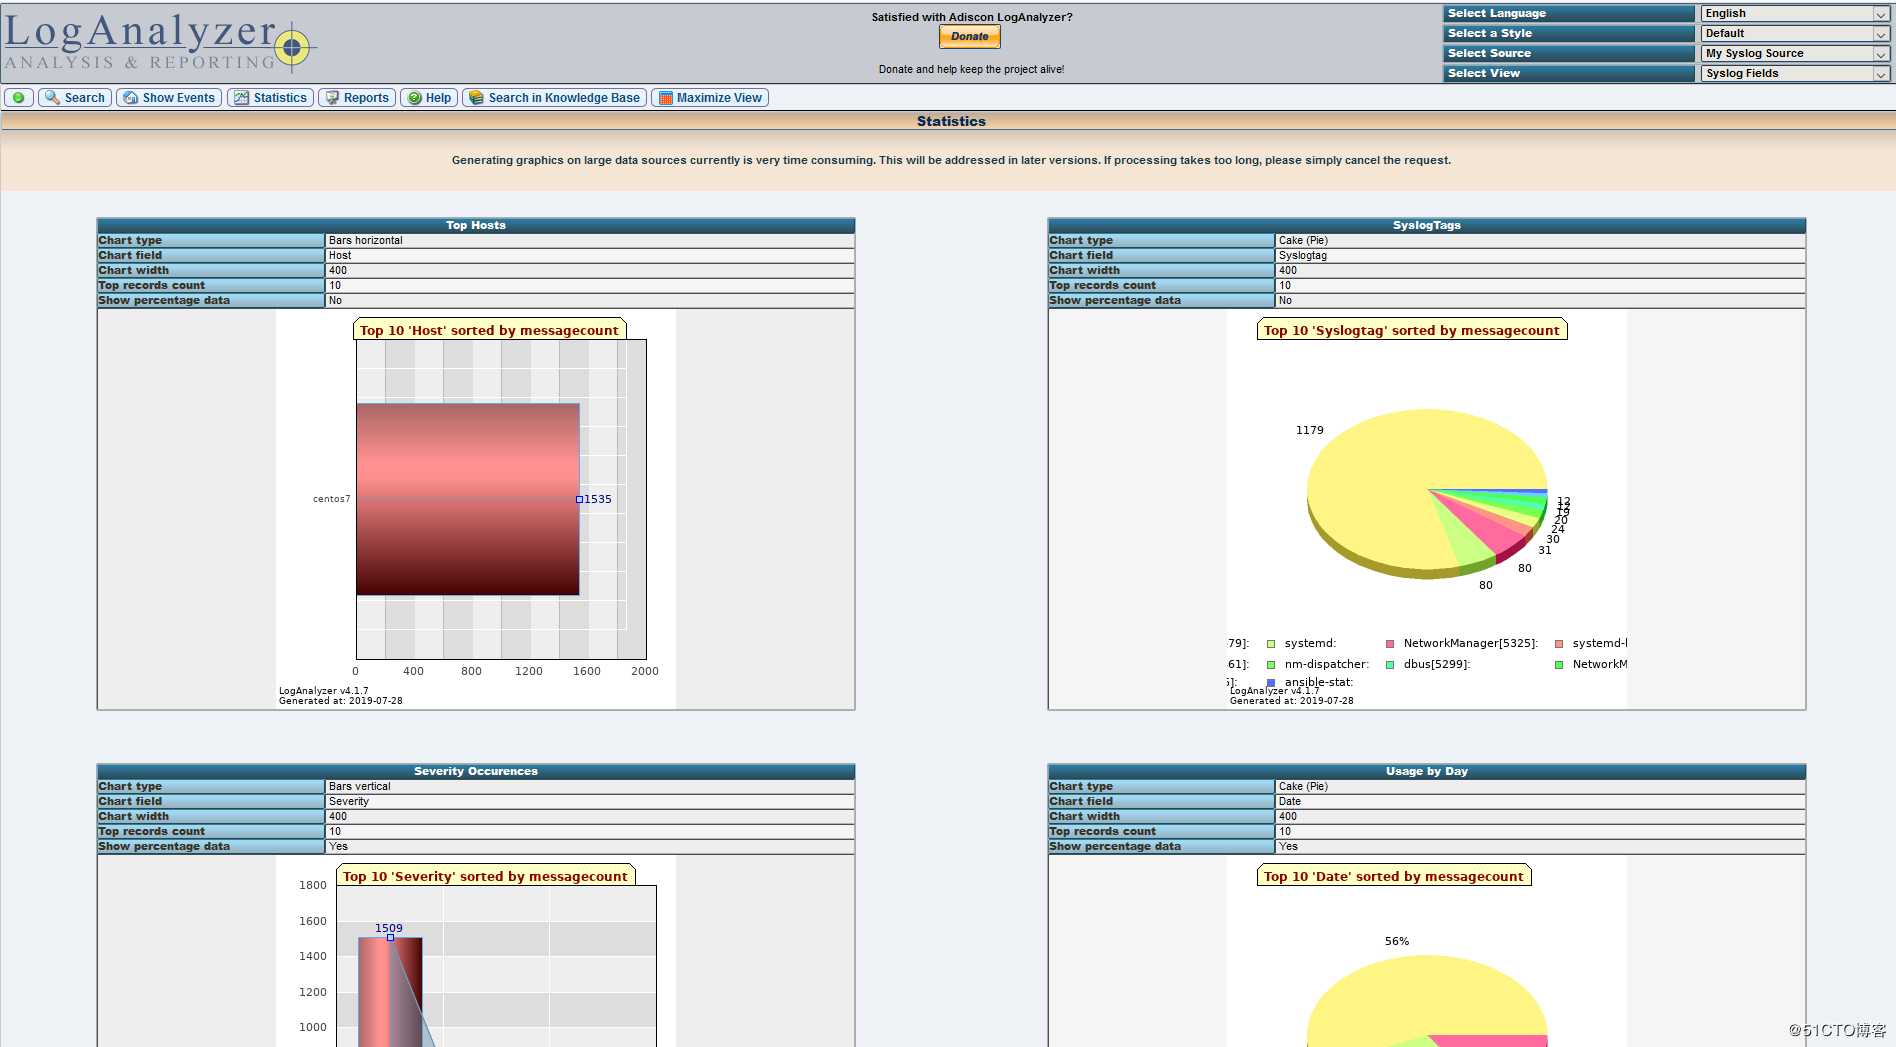
- 完成后可以正常显示如下:


- 初始化完成后,将config.php文件进行安全加强
cd /var/www/html/loganalyzer
chmod 644 config.php
以上是关于通过ansible安装mysql,apache,php,并实现rsyslog日志记录于MySQL中的主要内容,如果未能解决你的问题,请参考以下文章