Docker部署tomcat
Posted 码农的自我修养
tags:
篇首语:本文由小常识网(cha138.com)小编为大家整理,主要介绍了Docker部署tomcat相关的知识,希望对你有一定的参考价值。
部署tomcat
1.1 下载tomcat docker pull tomcat:7-jre8
1.2 部署容器 docker run -di --name=tomcat -p 8080:8080 -v /app:/usr/local/tomcat/webapps --privileged=true tomcat:7-jre8
(我们这里是自启动tomcat,并且把宿主机的app文件夹直接映射到容器的webapps文件夹,如果不映射,我们则需要把项目从宿主机中复制到webapps目录下)
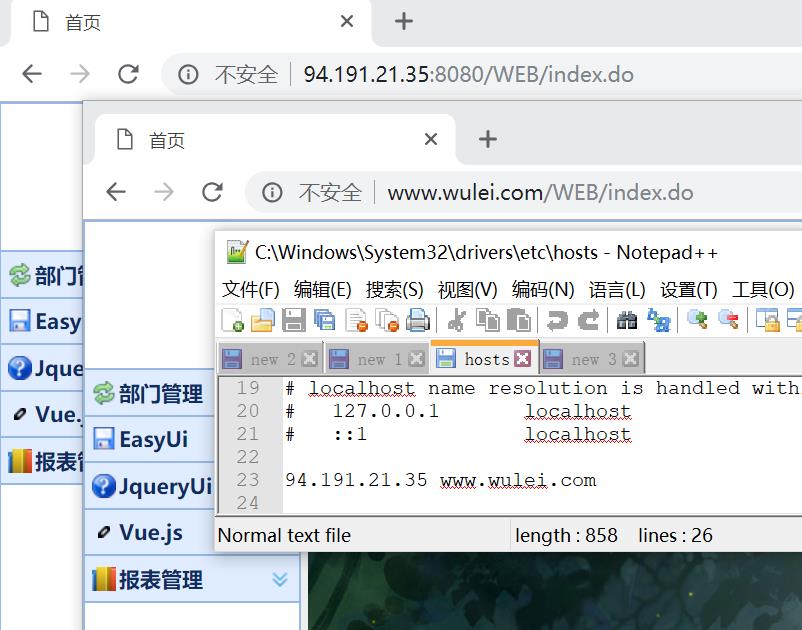
1.3 因为容器默认是启动的,它会自动解压war包,所以我们可以直接通过 宿主机ip:宿主机映射端口/url 来访问!

部署nginx
2.1 下载nginx docker pull nginx
2.2 部署容器 docker run -di --name=nginx -p 80:80 nginx:latest (这里我们没有和部署tomcat一样映射文件,所以做任何操作都必须到容器里面的文件夹操作才行)

2.3 配置负载均衡
2.3.1 nginx容器的配置文件在/etc/nginx/nginx.conf文件里,我们先把它copy到宿主机上。
docker cp nginx:/etc/nginx/nginx.conf /nginx.conf
2.3.2 查看tomcat容器的IP地址。 docker inspect tomcat ===》 "IPAddress": "172.17.0.2",
2.3.3 在宿主机修改配置文件 vim /nginx.conf
user  nginx;
worker_processes  1;

error_log  /var/log/nginx/error.log warn;
pid        /var/run/nginx.pid;


events {
    worker_connections  1024;
}


http {
    include       /etc/nginx/mime.types;
    default_type  application/octet-stream;

    log_format  main  \'$remote_addr - $remote_user [$time_local] "$request" \'
                      \'$status $body_bytes_sent "$http_referer" \'
                      \'"$http_user_agent" "$http_x_forwarded_for"\';

    access_log  /var/log/nginx/access.log  main;

    sendfile        on;
    #tcp_nopush     on;

    keepalive_timeout  65;

    #gzip  on;

    include /etc/nginx/conf.d/*.conf;

    #======================      上面都是默认配置      =====================
    #我们这里自定义一个反向代理
    server {
        # 监听80端口
        listen       80;
        server_name  www.wulei.com;
        location / {#相当于项目的WEB-INF目录
            proxy_pass  http://172.17.0.2:8080;#监测的是tomcat容器的ip和地址
        }
    }
}
2.3.4 把改好的配置文件传到容器原来的地方; docker cp /nginx.conf nginx:/etc/nginx/nginx.conf
2.3.5 重启容器, 测试。

部署redis
1.下载容器 docker pull redis
2.创建启动 docker run -id --name=myredis -p 6399:6379 redis:latest

搭建docker私库
下载仓库镜像
[root@localhost ~]# docker pull registry
[root@localhost ~]# docker images
REPOSITORY          TAG                 IMAGE ID            CREATED             SIZE
centos              7                   67fa590cfc1c        2 months ago        202MB
registry            latest              f32a97de94e1        7 months ago        25.8MB
[root@localhost ~]# docker images
REPOSITORY          TAG                 IMAGE ID            CREATED             SIZE
centos              7                   67fa590cfc1c        2 months ago        202MB
registry            latest              f32a97de94e1        7 months ago        25.8MB
制作容器
[root@localhost ~]# docker run -di --name=myregistry -p 5000:5000 registry
1f23f98bb7da3caab2c185ad7a72a5faa7a1b87862b2e6e8117f61e107a237d9
[root@localhost ~]#
此时浏览器就能访问了,此时由于仓库没有镜像,所以是空数组:http://127.0.0.1:5000/v2/_catalog

私库镜像上传及下载
修改配置文件,是docker信任远程仓库(添加   {"insecure-registries":["192.168.21.101:5000"]}   )
[root@localhost ~]# vim /etc/docker/daemon.json
{
   "registry-mirrors": ["http://4e70ba5d.m.daocloud.io"] ,
  "insecure-registries":["192.168.21.101:5000"]
}
重启
[root@localhost ~]# systemctl restart docker
[root@localhost file]# docker images
REPOSITORY          TAG                 IMAGE ID            CREATED             SIZE
jdk1.8              latest              b591f5c69edd        40 minutes ago      584MB
centos              7                   67fa590cfc1c        2 months ago        202MB
registry            latest              f32a97de94e1        7 months ago        25.8MB
给镜像打标签
[root@localhost ~]# docker tag jdk1.8 192.168.21.101:5000/jdk1.8
[root@localhost ~]# docker images
REPOSITORY                   TAG                 IMAGE ID            CREATED             SIZE
192.168.21.101:5000/jdk1.8   latest              b591f5c69edd        44 minutes ago      584MB
jdk1.8                       latest              b591f5c69edd        44 minutes ago      584MB
centos                       7                   67fa590cfc1c        2 months ago        202MB
registry                     latest              f32a97de94e1        7 months ago        25.8MB
上传镜像
[root@localhost ~]# docker push 192.168.21.101:5000/jdk1.8
The push refers to repository [192.168.21.101:5000/jdk1.8]
aab02c8aa0ce: Pushing  125.4MB/381.7MB
bd90af6019ef: Pushed
877b494a9f30: Pushing  48.89MB/201.9MB
下载镜像
docker pull 192.168.21.101:5000/jdk1.8

部署mysql
部署启动 指定容器名称为mysql 存储地址挂载到宿主机 端口映射为3306 指定ROOT账户的密码为root
docker run --name mysql -v /opt/data/mysql:/var/lib/mysql -p3306:3306 -e MYSQL_ROOT_PASSWORD=root -d mysql:5.7.4
部署rabbitmq
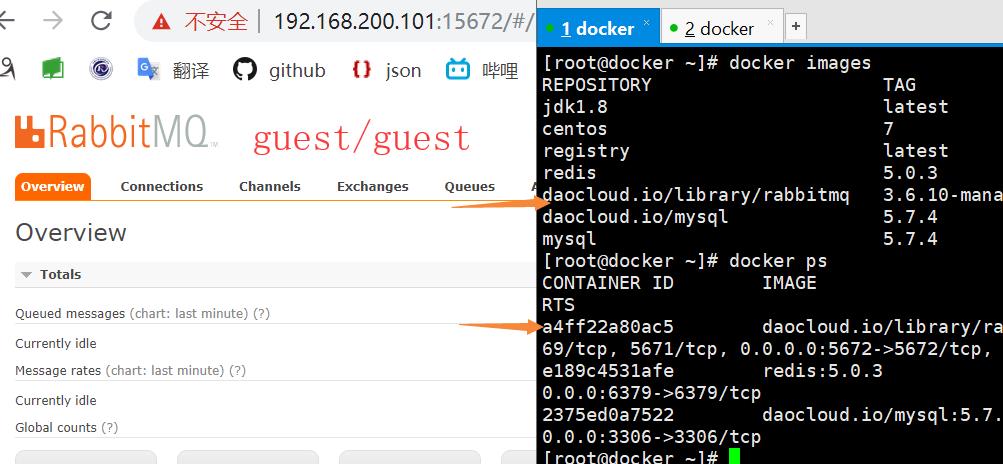
这里直接用run命令,如果本地没有这个镜像的话,docker会先去下载
docker run -d --hostname my-rabbit --name rabbit -p 15672:15672 -p5672:5672 daocloud.io/library/rabbitmq:3.6.10-management

部署zookeeper
[root@docker ~]# docker run --name zookeeper -v /opt/data/zksingle:/data -p 2181:2181 -e ZOO_LOG4J_PROP="INFO,ROLLINGFILE"  -d zookeeper:3.4.13
Unable to find image \'zookeeper:3.4.13\' locally
3.4.13: Pulling from library/zookeeper
8e402f1a9c57: Pull complete
4866c822999c: Pull complete
cf419f3f41ff: Pull complete
88430b15d43f: Pull complete
d5a9723280f1: Pull complete
c43110341cd8: Pull complete
9ec9c92edf13: Pull complete
cdf8329cd90a: Pull complete
Digest: sha256:8832a49f7ee6399c608e9a666e294adeaef0e4b1bc540c60ac75b8ec4b41f572
Status: Downloaded newer image for zookeeper:3.4.13
34c73b01afc7dd8a2e04aa8e5f91d8f9ee5add1e353f3f65df05bf33290c8a04
[root@docker ~]# docker ps | grep zookeeper
34c73b01afc7        zookeeper:3.4.13                                 "/docker-entrypoint.…"   2 minutes ago       Up 2 minutes        2888/tcp, 0.0.0.0:2181->2181/tcp, 3888/tcp                                                   zookeeper
[root@docker ~]#
以上是关于Docker部署tomcat的主要内容,如果未能解决你的问题,请参考以下文章