vuereact等单页面项目部署到服务器的方法及vue和react的区别
Posted aillabig
tags:
篇首语:本文由小常识网(cha138.com)小编为大家整理,主要介绍了vuereact等单页面项目部署到服务器的方法及vue和react的区别相关的知识,希望对你有一定的参考价值。
最近好多伙伴说,我用vue做的项目本地是可以的,但部署到服务器遇到好多问题:资源找不到,直接访问index.html页面空白,刷新当前路由404。。。用react做的项目也同样遇到类似问题。现在我们一起讨论下单页面如何部署到服务器?
由于前端路由缘故,单页面应用应该放到nginx或者apache、tomcat等web代理服务器中,千万不要直接访问index.html,同时要根据自己服务器的项目路径更改react或vue的路由地址。
如果说项目是直接跟在域名后面的,比如:http://www.sosout.com ,根路由就是 ‘/‘。
如果说项目是直接跟在域名后面的一个子目录中的,比如: http://www.sosout.com/children ,根路由就是 ‘/children ‘,不能直接访问index.html。
以配置Nginx为例,配置过程大致如下:(假设:
1、项目文件目录: /mnt/html/spa(spa目录下的文件就是执行了npm run dist 后生成的dist目录下的文件)
2、访问域名:spa.sosout.com)
进入nginx.conf新增如下配置:
|
1
2
3
4
5
6
7
8
9
10
11
12
13
14
15
16
17
18
|
server { listen 80; server_name spa.sosout.com; root /mnt/html/spa; index index.html; location ~ ^/favicon.ico$ { root /mnt/html/spa; } location / { try_files $uri $uri/ /index.html; proxy_set_header Host $host; proxy_set_header X-Real-IP $remote_addr; proxy_set_header X-Forwarded-For $proxy_add_x_forwarded_for; proxy_set_header X-Forwarded-Proto $scheme; } access_log /mnt/logs/nginx/access.log main;} |
注意事项:
1、配置域名的话,需要80端口,成功后,只要访问域名即可访问的项目
2、如果你使用了react-router的 browserHistory 模式或 vue-router的 history 模式,在nginx配置还需要重写路由:
|
1
2
3
4
5
6
7
8
9
10
11
12
13
14
15
16
17
18
19
20
21
22
|
server { listen 80; server_name spa.sosout.com; root /mnt/html/spa; index index.html; location ~ ^/favicon.ico$ { root /mnt/html/spa; } location / { try_files $uri $uri/ @fallback; index index.html; proxy_set_header Host $host; proxy_set_header X-Real-IP $remote_addr; proxy_set_header X-Forwarded-For $proxy_add_x_forwarded_for; proxy_set_header X-Forwarded-Proto $scheme; } location @fallback { rewrite ^.*$ /index.html break; } access_log /mnt/logs/nginx/access.log main;} |
为什么要重写路由?因为我们的项目只有一个根入口,当输入类似/home的url时,如果找不到对应的页面,nginx会尝试加载index.html,这是通过react-router或vue-router就能正确的匹配我们输入的/home路由,从而显示正确的home页面,如果browserHistory模式或history模式的项目没有配置上述内容,会出现404的情况。
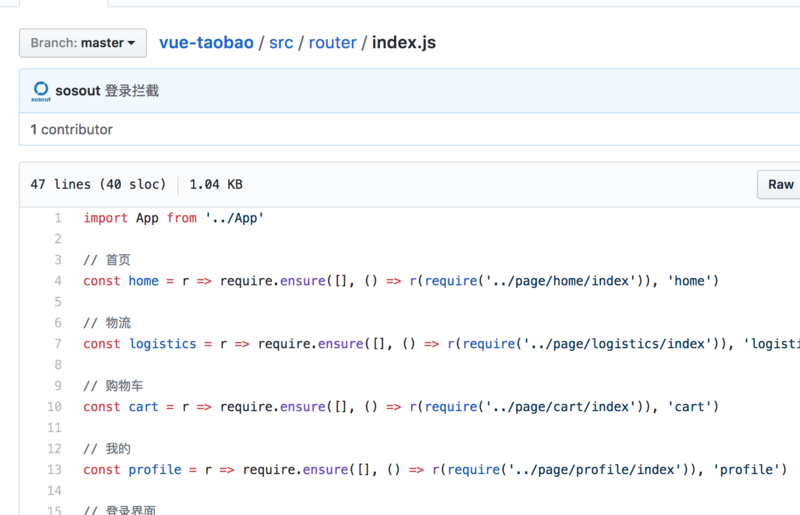
简单举两个例子,一个vue项目一个react项目:
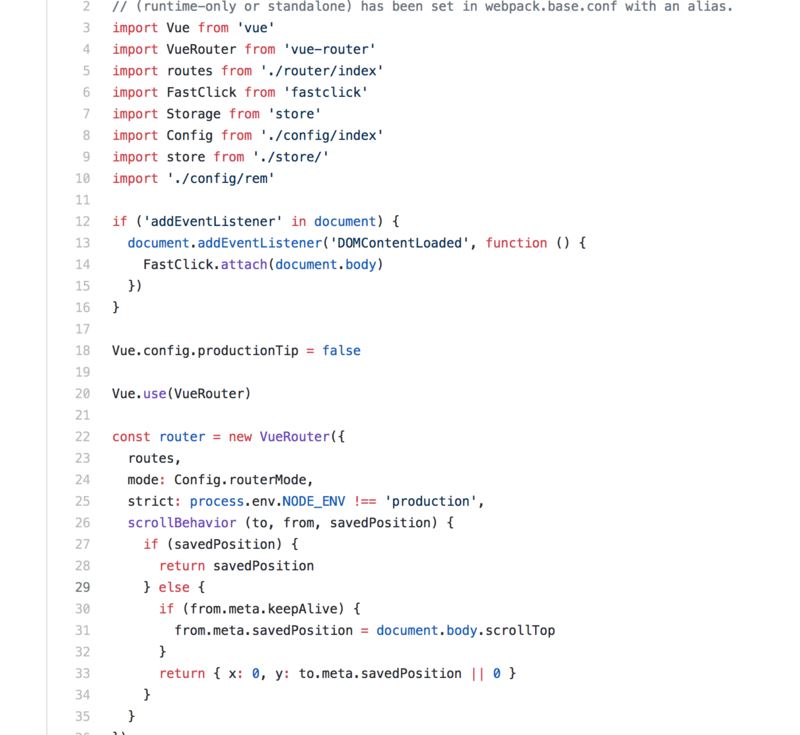
vue项目:
|
1
2
3
4
5
6
7
8
9
10
11
12
13
14
15
16
17
18
19
20
21
22
23
24
25
26
27
28
29
30
31
32
33
34
|
############# 其他配置############http { ############ # 其他配置 ############ server { listen 80; server_name tb.sosout.com; root /mnt/html/tb; index index.html; location ~ ^/favicon.ico$ { root /mnt/html/tb; } location / { try_files $uri $uri/ @fallback; index index.html; proxy_set_header Host $host; proxy_set_header X-Real-IP $remote_addr; proxy_set_header X-Forwarded-For $proxy_add_x_forwarded_for; proxy_set_header X-Forwarded-Proto $scheme; } location @fallback { rewrite ^.*$ /index.html break; } access_log /mnt/logs/nginx/access.log main; } ############ # 其他配置 ############ } |
|
1
2
3
4
5
6
7
8
9
10
11
12
13
14
15
16
17
18
19
20
21
22
23
24
25
26
27
28
29
30
31
32
33
34
35
36
37
38
39
40
41
42
43
44
45
46
|
import App from ‘../App‘// 首页const home = r => require.ensure([], () => r(require(‘../page/home/index‘)), ‘home‘)// 物流const logistics = r => require.ensure([], () => r(require(‘../page/logistics/index‘)), ‘logistics‘)// 购物车const cart = r => require.ensure([], () => r(require(‘../page/cart/index‘)), ‘cart‘)// 我的const profile = r => require.ensure([], () => r(require(‘../page/profile/index‘)), ‘profile‘)// 登录界面const login = r => require.ensure([], () => r(require(‘../page/user/login‘)), ‘login‘)export default [{ path: ‘/‘, component: App, // 顶层路由,对应index.html children: [{ path: ‘/home‘, // 首页 component: home }, { path: ‘/logistics‘, // 物流 component: logistics, meta: { login: true } }, { path: ‘/cart‘, // 购物车 component: cart, meta: { login: true } }, { path: ‘/profile‘, // 我的 component: profile }, { path: ‘/login‘, // 登录界面 component: login }, { path: ‘*‘, redirect: ‘/home‘ }]}] |
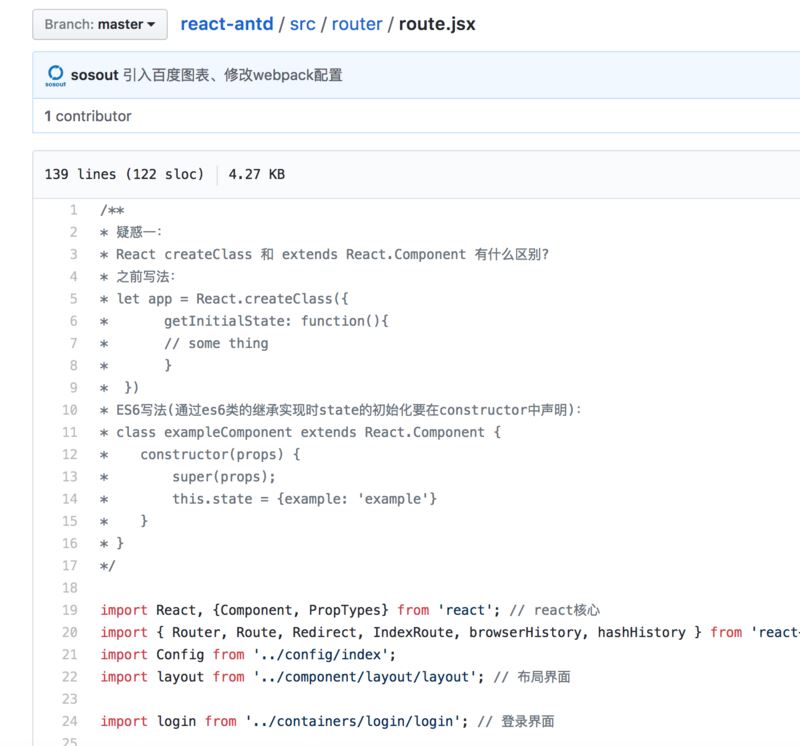
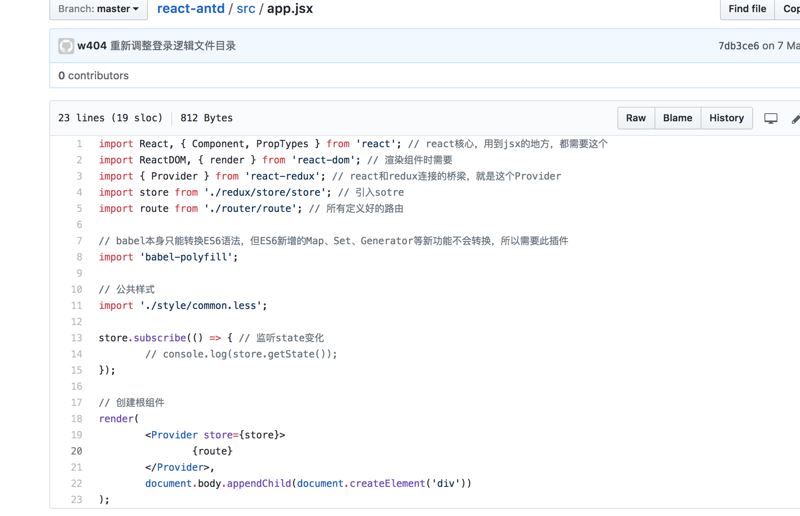
react项目:
|
1
2
3
4
5
6
7
8
9
10
11
12
13
14
15
16
17
18
19
20
21
22
23
24
25
26
27
28
29
30
31
32
33
34
35
36
37
38
39
40
41
42
43
44
45
46
47
48
49
50
51
52
53
54
55
56
57
58
59
60
61
62
63
64
65
66
67
68
69
70
71
72
73
74
75
76
77
78
79
80
81
82
83
84
85
86
87
88
89
90
91
92
93
94
95
96
97
98
99
100
101
102
103
104
105
106
107
108
109
110
111
112
113
114
115
116
117
118
119
120
121
122
123
124
125
126
127
128
129
130
131
132
133
134
135
136
137
138
|
/*** 疑惑一:* React createClass 和 extends React.Component 有什么区别?* 之前写法:* let app = React.createClass({* getInitialState: function(){* // some thing* }* })* ES6写法(通过es6类的继承实现时state的初始化要在constructor中声明):* class exampleComponent extends React.Component {* constructor(props) {* super(props);* this.state = {example: ‘example‘}* }* }*/import React, {Component, PropTypes} from ‘react‘; // react核心import { Router, Route, Redirect, IndexRoute, browserHistory, hashHistory } from ‘react-router‘; // 创建route所需import Config from ‘../config/index‘;import layout from ‘../component/layout/layout‘; // 布局界面import login from ‘../containers/login/login‘; // 登录界面/** * (路由根目录组件,显示当前符合条件的组件) * * @class Roots * @extends {Component} */class Roots extends Component { render() { // 这个组件是一个包裹组件,所有的路由跳转的页面都会以this.props.children的形式加载到本组件下 return ( <div>{this.props.children}</div> ); }}// const history = process.env.NODE_ENV !== ‘production‘ ? browserHistory : hashHistory;// 快速入门const home = (location, cb) => { require.ensure([], require => { cb(null, require(‘../containers/home/homeIndex‘).default) }, ‘home‘);}// 百度图表-折线图const chartLine = (location, cb) => { require.ensure([], require => { cb(null, require(‘../containers/charts/lines‘).default) }, ‘chartLine‘);}// 基础组件-按钮const button = (location, cb) => { require.ensure([], require => { cb(null, require(‘../containers/general/buttonIndex‘).default) }, ‘button‘);}// 基础组件-图标const icon = (location, cb) => { require.ensure([], require => { cb(null, require(‘../containers/general/iconIndex‘).default) }, ‘icon‘);}// 用户管理const user = (location, cb) => { require.ensure([], require => { cb(null, require(‘../containers/user/userIndex‘).default) }, ‘user‘);}// 系统设置const setting = (location, cb) => { require.ensure([], require => { cb(null, require(‘../containers/setting/settingIndex‘).default) }, ‘setting‘);}// 广告管理const adver = (location, cb) => { require.ensure([], require => { cb(null, require(‘../containers/adver/adverIndex‘).default) }, ‘adver‘);}// 组件一const oneui = (location, cb) => { require.ensure([], require => { cb(null, require(‘../containers/ui/oneIndex‘).default) }, ‘oneui‘);}// 组件二const twoui = (location, cb) => { require.ensure([], require => { cb(null, require(‘../containers/ui/twoIndex‘).default) }, ‘twoui‘);}// 登录验证const requireAuth = (nextState, replace) => { let token = (new Date()).getTime() - Config.localItem(‘USER_AUTHORIZATION‘); if(token > 7200000) { // 模拟Token保存2个小时 replace({ pathname: ‘/login‘, state: { nextPathname: nextState.location.pathname } }); }}const RouteConfig = ( <Router history={browserHistory}> <Route path="/home" component={layout} onEnter={requireAuth}> <IndexRoute getComponent={home} onEnter={requireAuth} /> // 默认加载的组件,比如访问www.test.com,会自动跳转到www.test.com/home <Route path="/home" getComponent={home} onEnter={requireAuth} /> <Route path="/chart/line" getComponent={chartLine} onEnter={requireAuth} /> <Route path="/general/button" getComponent={button} onEnter={requireAuth} /> <Route path="/general/icon" getComponent={icon} onEnter={requireAuth} /> <Route path="/user" getComponent={user} onEnter={requireAuth} /> <Route path="/setting" getComponent={setting} onEnter={requireAuth} /> <Route path="/adver" getComponent={adver} onEnter={requireAuth} /> <Route path="/ui/oneui" getComponent={oneui} onEnter={requireAuth} /> <Route path="/ui/twoui" getComponent={twoui} onEnter={requireAuth} /> </Route> <Route path="/login" component={Roots}> // 所有的访问,都跳转到Roots <IndexRoute component={login} /> // 默认加载的组件,比如访问www.test.com,会自动跳转到www.test.com/home </Route> <Redirect from="*" to="/home" /> </Router>);export default RouteConfig; |
|
1
2
3
4
5
6
7
8
9
10
11
12
13
14
15
16
17
18
19
20
21
22
23
24
25
26
27
28
29
30
31
32
33
|
############# 其他配置############http { ############ # 其他配置 ############ server { listen 80; server_name antd.sosout.com; root /mnt/html/reactAntd; index index.html; location ~ ^/favicon.ico$ { root /mnt/html/reactAntd; } location / { try_files $uri $uri/ @router; index index.html; proxy_set_header Host $host; proxy_set_header X-Real-IP $remote_addr; proxy_set_header X-Forwarded-For $proxy_add_x_forwarded_for; proxy_set_header X-Forwarded-Proto $scheme; } location @router { rewrite ^.*$ /index.html break; } access_log /mnt/logs/nginx/access.log main; } ############ # 其他配置 ############ } |
下面看下vue和react区别
前端都知道3个主流框架,vue,react,anjular,当然目前最火的还是vue和react,那么vue 和react 的区别?
相同点:
1.都支持服务器端渲染
2.都有Virtual DOM,组件化开发,通过props参数进行父子组件数据的传递,都实现webComponent规范
3.数据驱动视图
4.都有支持native的方案,React的React native,Vue的weex
5.都有管理状态,React有redux,Vue有自己的Vuex(自适应vue,量身定做)
不同点:
1.React严格上只针对MVC的view层,Vue则是MVVM模式
2.virtual DOM不一样,vue会跟踪每一个组件的依赖关系,不需要重新渲染整个组件树.
而对于React而言,每当应用的状态被改变时,全部组件都会重新渲染,所以react中会需要shouldComponentUpdate这个生命周期函数方法来进行控制
3.组件写法不一样, React推荐的做法是 JSX + inline style, 也就是把HTML和CSS全都写进javascript了,即‘all in js‘;
Vue推荐的做法是webpack+vue-loader的单文件组件格式,即html,css,jd写在同一个文件;
4.数据绑定: vue实现了数据的双向绑定,react数据流动是单向的
5.state对象在react应用中不可变的,需要使用setState方法更新状态;
在vue中,state对象不是必须的,数据由data属性在vue对象中管理;
就对我而言吧,vue适合开发移动端项目,react适合开发pc端项目(个人观点),
当然我还是喜欢 React,毕竟后台大,哈哈,虽然现在升级到16版本了(不喜勿喷)
以上是关于vuereact等单页面项目部署到服务器的方法及vue和react的区别的主要内容,如果未能解决你的问题,请参考以下文章
VUEReact中虚拟DOM(virtual DOM)技术 VNode及diff算法介绍


