nginx源码编译以及源码编译过程中遇到的问题
Posted blackhumour2018
tags:
篇首语:本文由小常识网(cha138.com)小编为大家整理,主要介绍了nginx源码编译以及源码编译过程中遇到的问题相关的知识,希望对你有一定的参考价值。
原帖地址:https://www.cnblogs.com/operationhome/p/8964191.html
本文主要讲nginx安装以及安装过程中遇到的问题。
谈到nginx 必须聊聊它的起源和发展。
nginx是由俄罗斯工程师Igor Sysoev 用C语言开发的一个免费开源的Web服务器软件,于2004年发布,聚集轻量级、高并发、高性能、低消耗等一系列优点。目前Nginx是互联网上仅次于Apache的第二流行的Web服务器软件。
接下来我们开始安装nginx,我们下面是以centos7为基础环境进行搭建,我们的安装方法:一、yum安装 二、源码安装。
一、yum 安装
|
1
|
1 yum install nginx |
如果你没有yum 源的话你需要配置下yum源:
1 vim /etc/yum.repos.d/nginx.repo
nginx.repo里填入以下内容:
1 [nginx]
2 name=nginx repo
3 baseurl=http://nginx.org/packages/centos/7/x86_64/
4 gpgcheck=0
5 enabled=1
然后我们清除yum的缓存,进行安装
|
1
2
3
|
yum clean allyum makecaheyum install nginx |
这样我们就成功安装好了nginx接下来讲讲源码安装,源码安装是可以个性化定制的。
二、源码安装
首先我们需要去下载源码包:
源码包下载地址:http://nginx.org/en/download.html,我们选择稳定版的包进行下载

然后我们进行解压和安装:
|
1
2
|
wget http://nginx.org/download/nginx-1.14.0.tar.gztar -xzvf nginx-1.14.0.tar.gz<br>cd nginx-1.14.0 |
创建nginx用户和用户组
|
1
|
useradd -M -s /sbin/nologin nginx |
在进行安装之前我们需要的一些通用配置选项:(官网源码编译配置文档路径:http://nginx.org/en/docs/configure.html )
|
1
2
3
4
5
6
7
8
|
--prefix=<path> nginx 的安装的根路径,所有其他的安装路径都要依赖于该选项--sbin-path=<path> 指定nginx二进制文件的路径。如果没有指定,那么这个路径会依赖于--prefix选项--conf-path=<path> 如果在命令行没有指定配置文件,那么将会通过这里指定的路径,nginx将会去那里查找它的配置文件,这里的路径要精确到文件.--error-log-path=<path> 指定错误日志文件的路径,要精确到文件。--pid-path=<path>指定pid文件的路径,通常在/var/run/下--lock-path=<path>互斥锁文件的路径--user=<user> worker进程运行的用户--group=<group> worker进程运行的组 |
以上是自定义安装的一些配置选项:
源码的安装一般由3个步骤组成:配置(configure)、编译(make)、安装(make install)。接下来我们开始进行编译安装,我会把安装过程中的遇到的问题贴出来。
mkdir /opt/nginx &&chown nginx:nginx /opt/nginx/
./configure  --prefix=/opt/nginx/ --sbin-path=/usr/bin/ --conf-path=/etc/nginx/nginx.conf --user=nginx --group=nginx
#--prefix=/opt/nginx/ 指定nginx的安装目录是/opt/nginx
#--sbin-path=/usr/bin/ 指定nginx二进制文件的路径是/usr/bin
#--conf-path=/etc/nginx/nginx.conf  指定配置文件的路径
#--user=nginx 指定进程运行的用户
#--group=nginx 指定进程运行的用户
在编译的过程中我遇到了以下的错误,这里做个记录:
第一个错误 :./configure: error: C compiler cc is not found缺少gcc编译器。
解决方法:安装gcc编译器
|
1
|
yum -y install gcc-c++ autoconf automake |
第二个错误:/configure: error: the HTTP rewrite module requires the PCRE library.确少PCRE库.
解决方法:安装PCRE
|
1
|
yum -y install pcre pcre-devel |
第三个错误:./configure: error: the HTTP cache module requires md5 functions from OpenSSL library. You can either disable the module by using --without-http-cache option, or install the OpenSSL library into the system, or build the OpenSSL library statically from the source with nginx by using --with-http_ssl_module --with-openssl=<path> options. 缺少ssl错误。
解决方法:安装openssl
|
1
|
yum -y install openssl openssl-devel |
第四个错误:./configure: error: the HTTP gzip module requires the zlib library. 缺少zlib库
解决办法:安装zlib库
|
1
|
yum install -y zlib-devel |
还有些错误是我没有遇到的,但是我在这边做下记录,以后可能会有帮助。
错误信息:./configure: error: the HTTP XSLT module requires the libxml2/libxslt 缺少libxml2
解决办法:yum -y install libxml2 libxml2-dev && yum -y install libxslt-devel
错误信息:./configure: error: the HTTP image filter module requires the GD library. You can either do not enable the module or install the libraries.
解决方法:http_image_filter_module是nginx提供的集成图片处理模块,需要gd-devel的支持 yum -y install gd-devel
错误信息:./configure: error: perl module ExtUtils::Embed is required 缺少ExtUtils
解决方法:yum -y install perl-devel perl-ExtUtils-Embed
错误信息:./configure: error: the GeoIP module requires the GeoIP library. You can either do not enable the module or install the library. 缺少GeoIP
解决方法:yum -y install GeoIP GeoIP-devel GeoIP-data
以上是配置过程中可能遇到的错误,接下来我们进行编译。
|
1
|
make -j 4 |
-j 参数的意义是并行编译,在多核的情况下可以提升编译速度
安装:
|
1
|
make install |
然后我们需要更改一下目录的所有者和所属组,避免nginx运行时的权限问题
|
1
2
|
chown -R nginx:nginx /opt/nginx/chown -R nginx:nginx /etc/nginx/ |
查看nginx的版本:
|
1
2
|
[[email protected] etc]# /usr/bin/nginx -vnginx version: nginx/1.14.0 |
运行nginx
|
1
2
3
4
5
|
[[email protected] etc]# /usr/bin/nginx[[email protected] etc]# ps -ef |grep nginxroot 8984 1 0 10:56 ? 00:00:00 nginx: master process /usr/bin/nginxnginx 8985 8984 0 10:56 ? 00:00:00 nginx: worker processroot 8987 3060 0 10:56 pts/2 00:00:00 grep --color=auto nginx |
然后我们就可以直接访问我们的ip的80端口(端口需要开放的)
如果开了防火墙可以关闭也可以开放80端口。
关闭防火墙:
|
1
|
systemctl stop firewalld |
开放80端口:
|
1
2
|
firewall-cmd --add-port=80/tcp --permanentfirewall-cmd --reload |
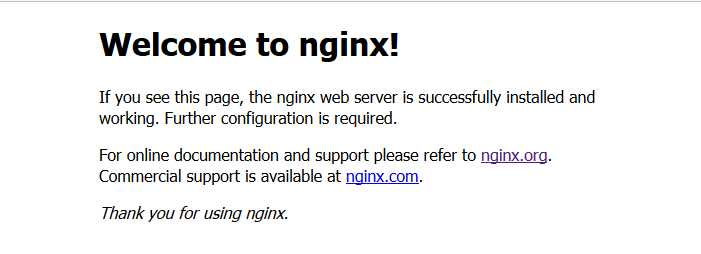
当我们看到这个界面就意味安装成功了:

最后我们再讲讲几个nginx的命令:
|
1
2
3
4
5
|
启动:/usr/bin/nginx查看配置文件是否正确:/usr/bin/nginx -t重载配置文件:/usr/bin/nginx -s reload重启:/usr/bin/nginx -s reopen停止:/usr/bin/nginx -s stop |
以上就是安装nginx的一个笔记。
以上是关于nginx源码编译以及源码编译过程中遇到的问题的主要内容,如果未能解决你的问题,请参考以下文章
