Linux(centos)离线安装OnlyOffice
Posted oxye
tags:
篇首语:本文由小常识网(cha138.com)小编为大家整理,主要介绍了Linux(centos)离线安装OnlyOffice相关的知识,希望对你有一定的参考价值。
看安装过程的直接跳过下面环节
赛前bb环节
上次使用docker安装了onlyoffice,但是某项目因为要求不适应虚拟化技术,并且不连外网,所以只能采用原始的方式一步步来安装
不安不知道,一安吓一跳,一个onlyoffice需要很多软件的支持,包括但不限于以下几种:
nginx
PostgreSQL
Redis
RabbitMQ
上面这几个,除了Nginx要注意一下配置,没什么难点,坑大的地方在
1.各种配置和生效条件
2.各种依赖包和依赖版本
一开始我在已经允许了其他服务的环境上安装,冲突更多,比如
1.机器上已存在postgresql等服务,配置已经不是原始配置,
2.已经存在的软件,不敢轻易改动,
3.新老版本的软件混在一起,有兼容问题,
4.晚上说onlyoffice在ubantu上安装合适,centos缺乏一些包(待考证),
等等问题
想到docker几行命令就搞定,甚是想念

下面把自己总结和致敬的安装流程写一下,希望能帮到有需要的同行

正文
本文主要参考了官方给的英文安装文档:OnlyOffice官方安装文档
如果要安装一套onlyoffice,建议必须搞一台干干净净的机器,有网最好,更新拉满,
如果是离线/无外网的,在有网的环境上下好rpm包,再带到离线环境安装(环境最好和有网的一样,如果不是就自己解决一下依赖问题)
下面分为 下载 检查 配置&安装 结果查看 多个阶段
下载阶段
下了包都放在/opt/temp下面
JDK
$ sudo yum install java-1.8.0-openjdk.x86_64 --downloadonly --downloaddir /opt/temp/java
Nginx
$ sudo yum install nginx --downloadonly --downloaddir /opt/temp/nginx
EPEL
$ sudo yum install epel-release --downloadonly --downloaddir /opt/temp/epel-release
PostgreSQL
$ sudo yum install postgresql postgresql-server --downloadonly --downloaddir /opt/temp/postgresql
Redis
$ sudo yum install redis --downloadonly --downloaddir /opt/temp/redis
RabbitMQ
$ sudo yum install rabbitmq-server --downloadonly --downloaddir /opt/temp/rabbit
OnlyOffice DocumentServer 存储库
$ cd /opt/temp

$ mkdir onlyoffice-repo
在外部浏览器,根据以下网址,下载包放到 /opt/temp/onlyoffice-repo
https://download.onlyoffice.com/repo/centos/main/noarch/onlyoffice-repo.noarch.rpm
OnlyOffice DocumentServer
这个是最大的,300mb+吧
$ sudo yum install onlyoffice-documentserver --downloadonly --downloaddir /opt/temp/onlyoffice-documentserver
下载好了,把上面这些安装包拷到u盘/光盘等中介硬件上,放到离线环境/opt/temp下
检查阶段
这个阶段,要把环境上的工具做个摸底,看哪些有哪些没有,前几个一般都有,如果没有,自己再去下个包安装一下
rpm -qa|grep [名称],如果已安装会显示一到多行软件信息,否则不显示
检查rpm
$ yum
检查rpm
$ rpm
检查gcc
$ gcc
检查libcurl
$ rpm -qa|grep libcurl
检查JDK
$ rpm -qa|grep java
或
$ which java
显示
/usr/bin/java
检查Nginx
$ rpm -qa|grep nginx
检查EPEL
$ rpm -qa|grep epel
检查PostgreSQL
$ rpm -qa|grep postgresql
检查Redis
$ rpm -qa|grep redis
检查RabbitMQ
$ rpm -qa|grep rabbitmq
检查OnlyOffice
$ rpm -qa|grep onlyoffice
配置&安装阶段
环境变量和SELinux配置和重启
可以先配置,也可能最后做,但是很关键
环境变量
/etc/profile文件,添加 export DS_PORT=9001并保存
网上说的直接输入export DS_PORT=9001 命令,只在当次会话有效,重启了就没了
用export查看
$ export
SELinux
/etc/selinux/config使用文本编辑器打开文件,将SELINUX=enforcing或替换SELINUX=permissive为SELINUX=disabled一个,然后保存更改。
重启生效
$ reboot
安装JDK
$ cd /opt/temp/java
$ rpm -ivh *.rpm --force --nodeps
yum存储库配置
为RHEL / CentOS设置yum存储库,创建/etc/yum.repos.d/nginx.repo包含以下内容的文件:
$ cd /etc/yum.repos.d

$ touch nginx.repo
使用xftp或类似可视化传输工具,写入以下内容(或者vi/vim)
[nginx-stable]
name=nginx stable repo
baseurl=http://nginx.org/packages/centos/$releasever/$basearch/
gpgcheck=1
enabled=1
gpgkey=https://nginx.org/keys/nginx_signing.key

[nginx-mainline]
name=nginx mainline repo
baseurl=http://nginx.org/packages/mainline/centos/$releasever/$basearch/
gpgcheck=1
enabled=0
gpgkey=https://nginx.org/keys/nginx_signing.key
Nginx安装和配置
$ cd /opt/temp/nginx
$ rpm -ivh *.rpm --force --nodeps
编辑/etc/nginx/nginx.conf NGINX配置文件,如下所示(我下下来的配置和下面一致):
user                  nginx;
worker_processes      1;
error_log             /var/log/nginx/error.log warn;
pid                   /var/run/nginx.pid;
events {
  worker_connections  1024;
}
http {
  include             /etc/nginx/mime.types;
  default_type        application/octet-stream;
  log_format          main  ‘$remote_addr - $remote_user [$time_local] "$request" ‘
                            ‘$status $body_bytes_sent "$http_referer" ‘
                            ‘"$http_user_agent" "$http_x_forwarded_for"‘;
  access_log          /var/log/nginx/access.log  main;
  sendfile            on;
  #tcp_nopush         on;
  keepalive_timeout   65;
  #gzip               on;
  include             /etc/nginx/conf.d/*.conf;
}
EPEL安装
$ cd /opt/temp/epel-release
$ rpm -ivh *.rpm --force --nodeps
PostgreSQL安装和配置
安装
$ cd /opt/temp/postgresql
$ rpm -ivh *.rpm --force --nodeps
启动
$ sudo service postgresql initdb
$ sudo chkconfig postgresql on
打开IPv4和IPv6本地主机的“信任”身份验证方法
/var/lib/pgsql/data/pg_hba.conf
找到该host all all 127.0.0.1/32 ident字符串并将其替换为以下字符串:
host all all 127.0.0.1/32 trust
然后找到该host all all ::1/128 ident字符串并将其替换为以下字符串:
host all all ::1/128 trust
重新启动PostgreSQL服务
$ sudo service postgresql restart
创建PostgreSQL数据库和用户:
创建的数据库必须只有用户和密码****ONLYOFFICE。
首先运行命令
$ cd /tmp
防止could not change directory to "/root"从根目录运行时发出警告。
然后,必须创建数据库和用户:
sudo -u postgres psql -c "CREATE DATABASE onlyoffice;"
sudo -u postgres psql -c "CREATE USER onlyoffice WITH password ‘onlyoffice‘;"
sudo -u postgres psql -c "GRANT ALL privileges ON DATABASE onlyoffice TO onlyoffice;"
Redis安装
安装
$ cd /opt/temp/redis
$ rpm -ivh *.rpm --force --nodeps
启动并设置开机启动
$ sudo service redis start
$ sudo systemctl enable redis
RabbitMQ安装
安装
$ cd /opt/temp/rabbitmq
$ rpm -ivh *.rpm --force --nodeps
启动并设置开机启动
$ sudo service rabbitmq-server start
$ sudo systemctl enable rabbitmq-server
OnlyOffice安装
添加文档服务器存储库
安装
$ cd /opt/temp/onlyoffice-repo
$ rpm -ivh *.rpm --force --nodeps
安装文件服务器
安装
$ cd /opt/temp/onlyoffice-documentserver
$ rpm -ivh *.rpm --force --nodeps
启动并设置开机启动
$ sudo service supervisord start
$ sudo systemctl enable supervisord
$ sudo service nginx start
$ sudo systemctl enable nginx
之后,Document Server将作为一个进程运行
运行配置脚本
运行documentserver-configure.sh脚本:
找脚本位置
$ find / -name "documentserver-configure.sh"
出现
/usr/bin/documentserver-configure.sh
运行
$ bash /usr/bin/documentserver-configure.sh
系统将要求您指定PostgreSQL,Redis和RabbitMQ连接参数。使用以下数据:
对于**PostgreSQL**:

- **主机**:localhost
- **数据库**:onlyoffice
- **用户**:onlyoffice
- **密码**:onlyoffice

对于**Redis**:

- **主机**:本地主机

对于**RabbitMQ**:

- **主机**:本地主机
- **用户**:访客
- **密码**:访客
添加防火墙例外
$ sudo firewall-cmd --zone=public --add-port=80/tcp --permanent
$ sudo firewall-cmd --reload
结果查看
输入 ip:9001,会发现跳转到ip:9001/welcome
出现下图页面

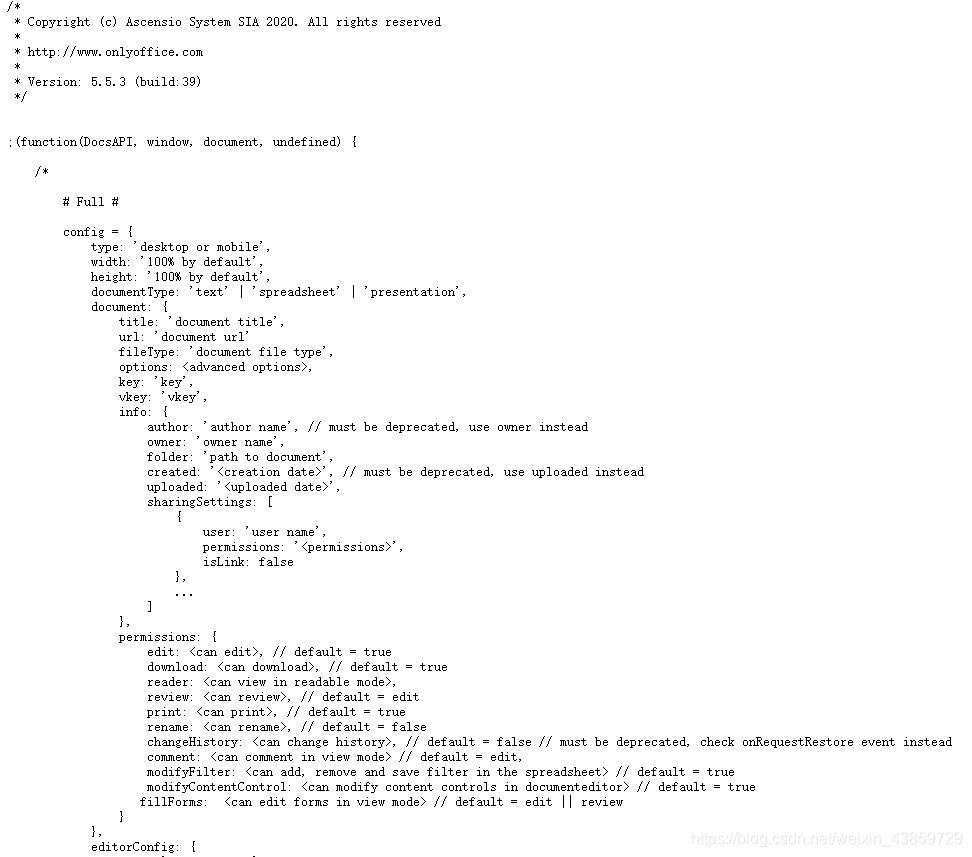
查看api页面
注意,只输入172.23.26.151:9001/web-apps/apps/api/documents/api.js 我浏览器自动使用了https,将s去掉即可
输入 http://172.23.26.151:9001/web-apps/apps/api/documents/api.js

问题
01 端口错误
执行sh脚本报错
Restarting services... Job for nginx.service failed because the control process exited with error code. See "systemctl status nginx.service" and "journalctl -xe" for details.
$ systemctl status nginx.service
localhost.nodesktop nginx[1533]: nginx: [emerg] bind() to 0.0.0.0:9001 failed (13: Permission denied)
localhost.nodesktop systemd[1]: nginx.service: control process exited, code=exited status=1
localhost.nodesktop systemd[1]: Failed to start nginx - high performance web server.
localhost.nodesktop systemd[1]: Unit nginx.service entered failed state.
localhost.nodesktop systemd[1]: nginx.service failed.
解决:
$ /usr/sbin/sestatus
显示
SELinux status: enabled
SELinuxfs mount: /sys/fs/selinux
SELinux root directory: /etc/selinux
Loaded policy name: targeted
Current mode: enforcing
Mode from config file: disabled
Policy MLS status: enabled
Policy deny_unknown status: allowed
Max kernel policy version: 31
其实 /etc/selinux/config 已经改了SELINUX=disabled,但是没重启,所以没生效
02 wasm数据类型
问题:
wasm streaming compile failed: TypeError: Failed to execute ‘compile‘ on ‘WebAssembly‘: Incorrect response MIME type .Expected ‘application/wasm‘
falling back to ArrayBuffer instantiation
解决:
$ find / -name "mime.types"
/etc/nginx/mime.types
与docker版对比,缺少wasm类型(下图左边为非docker安装,右边为docker安装版配置文件)
[外链图片转存失败,源站可能有防盗链机制,建议将图片保存下来直接上传(img-uyl6JTwA-1593284371926)(C:UsersThunisoftAppDataRoamingTypora ypora-user-imagesimage-20200626112402817.png)]
修改配置文件,添加wasm类型
application/wasm wasm;
03 这份文件无法保存,请检查连接设置或联系您的管理员,当你点击OK按钮,系统将提示您下载
[外链图片转存失败,源站可能有防盗链机制,建议将图片保存下来直接上传(img-GwDj8JvN-1593284371939)(C:UsersThunisoftAppDataRoamingTypora ypora-user-imagesimage-20200626124639219.png)]
更多知识:
https://www.jianshu.com/search?q=onlyoffice中文指南&page=1&type=note
04 自动保存
default.json
autoAssembly 的enable改为true
https://blog.csdn.net/xm393392625/article/details/86484163
以上是关于Linux(centos)离线安装OnlyOffice的主要内容,如果未能解决你的问题,请参考以下文章