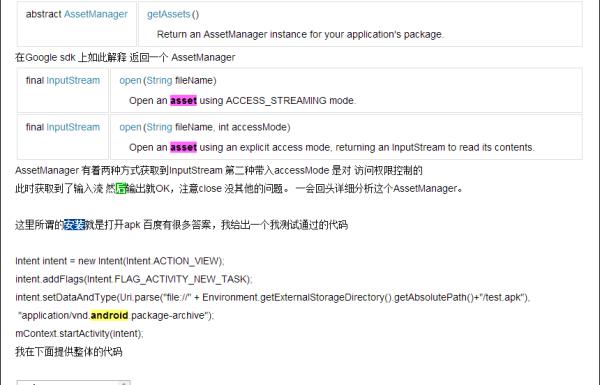
写这篇文章之前可以成功运行,文章后就各种找不到文件.所以并没有采用此种方式,后期完善.详见下篇解决方案.
配置文件读取很容易,修改需要注意权限,比如assets目录下就不允许修改.
配置文件的创建:
New --- File
命名后选择properties方式打开
配置文件设置
contrastIP = 192.166.1.65:8011
assets目录创建
在main目录下,与java res 目录同级创建.
New --- Folder --- Assets Folder
assets目录详解: http://blog.csdn.net/chuntiandejiaobu10/article/details/52352128
权限配置
在 AndroidManifest.xml 中添加:
<uses-permission android:name="android.permission.WRITE_EXTERNAL_STORAGE"/>
<uses-permission android:name="android.permission.MOUNT_UNMOUNT_FILESYSTEMS"/>
其实我去掉后测试也可以成功运行.还是加上.预防万一.
先读配置:
方法一 读取assets目录下的配置
Properties props = new Properties();
props.load(context.getAssets().open(configName));
将configName文件从assets目录下放出来,放在main目录下:
方法二 会出现错误 open failed: ENOENT (No such file or directory) 然而并不知道目录路径该如何填
Properties props = new Properties();
props.load(new FileInputStream(configName));
方法三 这样就能成功运行
Properties props = new Properties();
props.load(context.openFileInput(configName));
修改配置:
Properties props = new Properties();
props.load(context.openFileInput(configPath));
props.setProperty(keyName, keyValue);

// 读取assets目录下的,但是根本无法修改
// FileOutputStream out = context.getAssets().openFd(configPath).createOutputStream();
// 提示 open failed: EROFS (Read-only file system)
// FileOutputStream out = new FileOutputStream(configPath);

// 这样就可以了
FileOutputStream out = context.openFileOutput(configPath,Context.MODE_PRIVATE);
参考Context.MODE_PRIVATE说明: http://www.cnblogs.com/yjpjy/p/5407251.html
完整代码
类
ProperTies 类
package com.lemon.demo.utils;import android.content.Context;
import android.util.Log;import java.io.FileInputStream;
import java.io.FileOutputStream;
import java.util.Properties;public class ProperTies {
//private static String configPath = getExternalStorageDirectory() + File.separator + "appConfig";
private static String configPath = "appConfig";</span><span style="color: #0000ff">public</span> <span style="color: #0000ff">static</span><span style="color: #000000"> Properties getProperties(Context context) { Log.e(</span>"configPath"<span style="color: #000000">, configPath); Properties urlProps; Properties props </span>= <span style="color: #0000ff">new</span><span style="color: #000000"> Properties(); </span><span style="color: #0000ff">try</span><span style="color: #000000"> { </span><span style="color: #008000">//</span><span style="color: #008000">方法一:通过activity中的context攻取setting.properties的FileInputStream </span><span style="color: #008000">//</span><span style="color: #008000">注意这地方的参数appConfig在eclipse中应该是appConfig.properties才对,但在studio中不用写后缀 </span><span style="color: #008000">//</span><span style="color: #008000">InputStream in = c.getAssets().open("appConfig.properties"); </span><span style="color: #008000">//</span><span style="color: #008000">props.load(context.getAssets().open(configName)); </span><span style="color: #008000">//</span><span style="color: #008000">方法二:通过class获取setting.properties的FileInputStream </span><span style="color: #008000">//</span><span style="color: #008000">InputStream in = PropertiesUtill.class.getResourceAsStream("/assets/ setting.properties ")); </span><span style="color: #008000">//</span><span style="color: #008000"> 方法三</span>props.load(context.openFileInput(configPath));
// props.load(new FileInputStream(configPath));
} catch (Exception e1) {
// TODO Auto-generated catch block
e1.printStackTrace();
}urlProps </span>=<span style="color: #000000"> props; </span><span style="color: #0000ff">return</span><span style="color: #000000"> urlProps; } </span><span style="color: #008000">//</span><span style="color: #008000">保存配置文件</span> <span style="color: #0000ff">public</span> <span style="color: #0000ff">static</span><span style="color: #000000"> String setProperties(Context context, String keyName, String keyValue) { Properties props </span>= <span style="color: #0000ff">new</span><span style="color: #000000"> Properties(); </span><span style="color: #0000ff">try</span><span style="color: #000000"> { props.load(context.openFileInput(configPath)); props.setProperty(keyName, keyValue); </span><span style="color: #008000">//</span><span style="color: #008000"> FileOutputStream out = context.getAssets().openFd(configPath).createOutputStream();</span> FileOutputStream out =<span style="color: #000000"> context.openFileOutput(configPath,Context.MODE_PRIVATE); </span><span style="color: #008000">//</span><span style="color: #008000"> FileOutputStream out = new FileOutputStream(configPath);</span> props.store(out, <span style="color: #0000ff">null</span><span style="color: #000000">); } </span><span style="color: #0000ff">catch</span><span style="color: #000000"> (Exception e) { e.printStackTrace(); Log.e(</span>"setPropertiesError"<span style="color: #000000">, e.toString()); </span><span style="color: #0000ff">return</span> "修改配置文件失败!"<span style="color: #000000">; } </span><span style="color: #0000ff">return</span> "设置成功"<span style="color: #000000">; }}
UrlString类:
package com.lemon.demo.json;import android.content.Context;
import com.lemon.demo.utils.ProperTies;import java.util.Properties;
/**
- 读写配置属性类
*/public class UrlString {
<span style="color: #0000ff">private</span> String contrastIPName = "contrastIP"<span style="color: #000000">; </span><span style="color: #008000">//</span><span style="color: #008000"> 上传路径</span> <span style="color: #0000ff">private</span><span style="color: #000000"> String ip; </span><span style="color: #0000ff">private</span><span style="color: #000000"> String ipAddress; </span><span style="color: #0000ff">public</span> <span style="color: #0000ff">void</span><span style="color: #000000"> setIPAddress(Context context) { Properties proper </span>=<span style="color: #000000"> ProperTies.getProperties(context); </span><span style="color: #0000ff">this</span>.ip = proper.getProperty(contrastIPName, ""<span style="color: #000000">); </span><span style="color: #0000ff">this</span>.ipAddress = "http://" + <span style="color: #0000ff">this</span>.ip + "/index.html"<span style="color: #000000">; } </span><span style="color: #0000ff">public</span><span style="color: #000000"> String setIPAddress(Context context, String keyValue) { String result </span>=<span style="color: #000000"> ProperTies.setProperties(context, contrastIPName, keyValue); </span><span style="color: #0000ff">this</span>.ip =<span style="color: #000000"> keyValue; </span><span style="color: #0000ff">this</span>.ipAddress = "http://" + <span style="color: #0000ff">this</span>.ip + "/index.html"<span style="color: #000000">; </span><span style="color: #0000ff">return</span><span style="color: #000000"> result; } </span><span style="color: #0000ff">public</span><span style="color: #000000"> String getIP() { </span><span style="color: #0000ff">return</span> <span style="color: #0000ff">this</span><span style="color: #000000">.ip; } </span><span style="color: #0000ff">public</span><span style="color: #000000"> String getIPAddress() { </span><span style="color: #0000ff">return</span> <span style="color: #0000ff">this</span><span style="color: #000000">.ipAddress; }}
在activity中使用:
加载配置文件:
private UrlString urlString = new UrlString();editText = (EditText) findViewById(R.id.et_ip);
// 加载配置的信息 --- IP地址
urlString.setIPAddress(this);
editText.setText(urlString.getIP());
// 获取完整地址
// urlString.getIPAddress()
修改配置文件:
String value = editText.getText().toString(); String result = urlString.setIPAddress(this,value);tools.customToast(result, ConfigActivity.this);

