小程序实践--动态切换button样式
Posted 逐梦
tags:
篇首语:本文由小常识网(cha138.com)小编为大家整理,主要介绍了小程序实践--动态切换button样式相关的知识,希望对你有一定的参考价值。
首先说一下为什么要单独写一个这个呢?在小程序中由于不能够直接对DOM元素进行操作,更没有像jquery那样addClass、removeClass这样简便方法对样式进行改变,个人觉得这个相对来说还是比较方便的,就拿出来在这里跟大家分享一下。如果你有更简单的不防写下来跟大家分享一下!
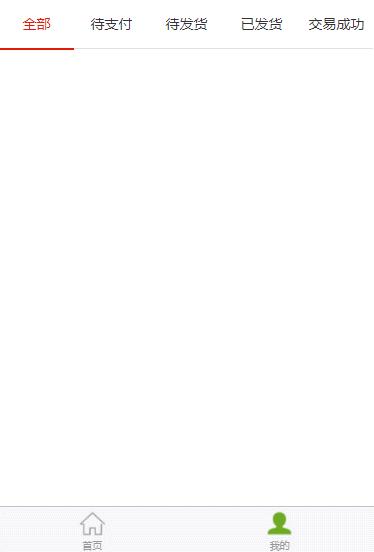
效果图:

接下来就看一下我们是如何实现的
1、布局排版,直接附上wxml代码:
<!-- 顶部办理状态 -->
<view class="topView" style="position:fixed;top:49px;left:0;z-index:200">
  <block wx:for="{{statusList}}" wx:key="id">
    <view id="{{item.id}}" class="{{item.id == isChecked ? \'active\':\'\'}} topChild" bindtap="choiceStatus">{{item.statusName}}</view>
</block>
</view>
2、按钮样式,wxss代码:
.topView{
  width:100%;
  height:48px;
  display:flex;
  background-color: #ffffff;
  border-bottom:1px solid #e2e1e1;
}
.topChild{
  width:20%;
  height:48px;
  text-align: center;
  line-height: 3.4;
  font-size:14px;
  color:#333333;
}
/*点击时按钮状态*/
.active{
  color:#E31904;
  border-bottom:2px solid #E31904;
}
3、最主要的来了,js代码:
/**
   * 页面的初始数据
   */
  data: {
    statusList: [{//顶部状态按钮
      "statusName": "全部",
      "id": "all"
    },
    {
      "statusName": "待支付",
      "id": "draft"
    },
    {
      "statusName": "待发货",
      "id": "waitSolve"
    },
    {
      "statusName": "已发货",
      "id": "doingSolve"
    },
    {
      "statusName": "交易成功",
      "id": "doneSolve"
    },
    ],
    isChecked: 0 //判断是否选中
  },
  //绑定顶部状态切换的点击事件
  choiceStatus: function (e) {
    var that = this;
    var code = e.currentTarget.id;
    that.setData({
      isChecked: code
    })
  },
是不是很简单啊!!希望看到的大神,能给出更好的实现方法!!!
老师说过:好东西要拿出来大家分享一下哦!!哈哈。。。。。。
以上是关于小程序实践--动态切换button样式的主要内容,如果未能解决你的问题,请参考以下文章