实战Nginx源码编译安装与配置
Posted
tags:
篇首语:本文由小常识网(cha138.com)小编为大家整理,主要介绍了实战Nginx源码编译安装与配置相关的知识,希望对你有一定的参考价值。
实验环境:RHEL7.0 server1.example.com 172.25.254.1
实验内容: 1.准备
2. 安装
3.配置
4.添加https
5.虚拟主机
6.<<nginx 监控小插件>>网站信息统计
7.网页重写(自动转换到HTTPS)
源码包:nginx-1.9.14.tar.gz
1.准备
[[email protected] ~]# yum remove httpd
[[email protected] ~]# yum install gcc
[[email protected] ~]# cd /mnt/
[[email protected] mnt]# ls
nginx-1.9.14.tar.gz ### 下载源码包(nginx-1.9.14.tar.gz)
[[email protected] mnt]# tar -zxf nginx-1.9.14.tar.gz #解压
[[email protected] mnt]# ls
nginx-1.9.14 nginx-1.9.14.tar.gz
[[email protected] mnt]# vim nginx-1.9.14/src/core/nginx.h
#define NGINX_VER "steven/" #(版本隐藏)
[[email protected] mnt]# vim nginx-1.9.14/auto/cc/gcc
# debug
#CFLAGS="$CFLAGS -g" #关闭debug(由于使用gcc编译器,所以关闭gcc编译时安装的debug功能)
[[email protected] mnt]# groupadd -g 666 nginx
[[email protected] mnt]# useradd -s /sbin/nologin -d /opt/lnmp/ nginx -u 666 -g 666 #新建用户身份
2. 安装
[[email protected] mnt]# yum install pcre-devel openssl-devel -y
[[email protected] mnt]# cd nginx-1.9.14/
[[email protected] nginx-1.9.14]# ./configure \
> --prefix=/opt/lnmp/nginx \
> --with-http_ssl_module \
> --with-http_sub_module \
> --with-http_stub_status_module
[[email protected] nginx-1.9.14]# make ##编译
[[email protected] nginx-1.9.14]# make install ##安装
[[email protected] nginx-1.9.14]# ls /opt/lnmp/nginx/ #安装完成查看
conf html logs sbin
3.配置
[[email protected] nginx-1.9.14]# cd /opt/lnmp/nginx/
[[email protected] nginx]# vim conf/nginx.conf
2 user nginx nginx;##用户和组,可以只写用户
3 worker_processes 2;##cpu个数,不能超过lscpu显示cpu个数
12 events {
13 use epoll; ##nginx epoll 采用异步非阻塞模式 apache --select 同步阻塞机制 io复用模型类型
14 worker_connections 4096;##连接数
15 }
[[email protected] nginx]# vim /etc/profile
export PATH=$PATH:/opt/lnmp/nginx/sbin #添加nginx执行路径
[[email protected] nginx]# source /etc/profile
[[email protected] nginx]# nginx -t #检查nginx有无错误
nginx: the configuration file /opt/lnmp/nginx/conf/nginx.conf syntax is ok
nginx: configuration file /opt/lnmp/nginx/conf/nginx.conf test is successful
[[email protected] nginx]# nginx #启动nginx
nginx -s reload #重起
ngnix -s stop #关闭
测试:
[[email protected] nginx]# curl -I localhost ##检测http协议提供程序
HTTP/1.1 200 OK
Server: willis/
Date: Sun, 11 Sep 2016 01:26:39 GMT
Content-Type: text/html
Content-Length: 612
Last-Modified: Sun, 11 Sep 2016 01:19:44 GMT
Connection: keep-alive
ETag: "57d4b130-264"
Accept-Ranges: bytes
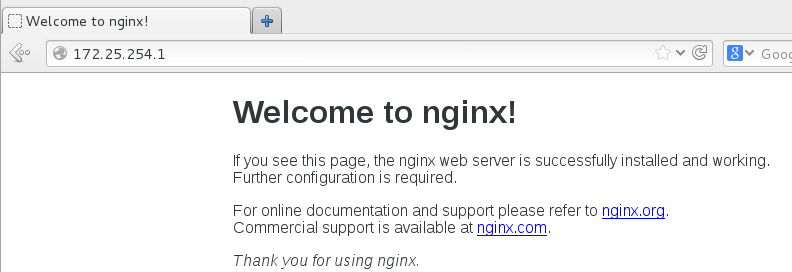
[[email protected] nginx]# curl localhost
<!DOCTYPE html>
<html>
<head>
<title>Welcome to nginx!</title>
<style>
body {
width: 35em;
margin: 0 auto;
font-family: Tahoma, Verdana, Arial, sans-serif;
}
</style>
</head>
<body>
<h1>Welcome to nginx!</h1>
<p>If you see this page, the nginx web server is successfully installed and
working. Further configuration is required.</p>
<p>For online documentation and support please refer to
<a href="http://nginx.org/">nginx.org</a>.<br/>
Commercial support is available at
<a href="http://nginx.com/">nginx.com</a>.</p>
<p><em>Thank you for using nginx.</em></p>
</body>
</html>
[[email protected] nginx]# cd html/ #默认发布目录
[[email protected] html]# ls
50x.html index.html
网页测试:
4.添加https
[[email protected] nginx]# pwd
/opt/lnmp/nginx
[[email protected] nginx]# vim conf/nginx.conf
# HTTPS server #开启HTTPS功能
server {
listen 443 ssl;
server_name localhost;
ssl_certificate cert.pem;
ssl_certificate_key cert.pem; #修改证书名
ssl_session_cache shared:SSL:1m;
ssl_session_timeout 5m;
ssl_ciphers HIGH:!aNULL:!MD5;
ssl_prefer_server_ciphers on;
location / {
root html;
index index.html index.htm;
}
}
}
[[email protected] nginx]# cd /etc/pki/tls/certs/
[[email protected] certs]# make cert.pem #新建证书
Country Name (2 letter code) [XX]:CN
State or Province Name (full name) []:shaanxi
Locality Name (eg, city) [Default City]:xi‘an
Organization Name (eg, company) [Default Company Ltd]:redhat
Organizational Unit Name (eg, section) []:Linux
Common Name (eg, your name or your server‘s hostname) []:localhost
Email Address []:[email protected]
[[email protected] certs]# cp cert.pem /opt/lnmp/nginx/conf/
[[email protected] certs]# nginx -t
nginx: the configuration file /opt/lnmp/nginx/conf/nginx.conf syntax is ok
nginx: configuration file /opt/lnmp/nginx/conf/nginx.conf test is successful
[[email protected] certs]# nginx -s reload
测试:
5.虚拟主机
[[email protected] nginx]# pwd
/opt/lnmp/nginx
[[email protected] nginx]# vim conf/nginx.conf
在http{}中添加
server {
listen 80;
server_name www.willis.com;
location / {
root /virtual/willis/html;
index index.html;
}
}
server {
listen 80;
server_name www.linux.com;
location / {
root /virtual/linux/html;
index index.html;
}
}
[[email protected] nginx]# mkdir -p /virtual/willis/html
[[email protected] nginx]# mkdir -p /virtual/linux/html
[[email protected] nginx]# echo www.willis.com>/virtual/willis/html/index.html
[[email protected] nginx]# echo www.linux.com>/virtual/linux/html/index.html
[[email protected] nginx]# vim /etc/hosts
172.25.254.1 www.willis.com
172.25.254.1 www.linux.com
[[email protected] nginx]# nginx -t
nginx: the configuration file /opt/lnmp/nginx/conf/nginx.conf syntax is ok
nginx: configuration file /opt/lnmp/nginx/conf/nginx.conf test is successful
[[email protected] nginx]# nginx -s reload
测试:
6.<<nginx 监控小插件>>网站信息统计
[[email protected] nginx]# pwd
/opt/lnmp/nginx
[[email protected] nginx]# vim conf/nginx.conf
server {
listen 80;
server_name localhost;
location / {
root html;
index index.html index.htm;
}
location /message { # 添加
stub_status on;
access_log off;
}
error_page 500 502 503 504 /50x.html;
location = /50x.html {
root html;
}
}
测试:
7.网页重写(自动转换到HTTPS)
[[email protected] nginx]# pwd
/opt/lnmp/nginx
[[email protected] nginx]# vim conf/nginx.conf
server {
listen 80;
server_name login.willis.com;
rewrite ^(.*)$ https://$host$1 permanent;
location / {
root /virtual/login/html;
index index.html;
}
}
[[email protected] nginx]# mkdir -p /virtual/login/html
[[email protected] nginx]# echo login.willis.com>/virtual/login/html/index.html
[[email protected] nginx]# vim /etc/hosts
login.willis.com
[[email protected] nginx]# nginx -t
nginx: the configuration file /opt/lnmp/nginx/conf/nginx.conf syntax is ok
nginx: configuration file /opt/lnmp/nginx/conf/nginx.conf test is successful
[[email protected] nginx]# nginx -s reload
测试:
本文出自 “技术人生,简单不简单” 博客,请务必保留此出处http://willis.blog.51cto.com/11907152/1851558
以上是关于实战Nginx源码编译安装与配置的主要内容,如果未能解决你的问题,请参考以下文章


