20155306 白皎 《网络攻防》 EXP8 Web基础
Posted 20155306
tags:
篇首语:本文由小常识网(cha138.com)小编为大家整理,主要介绍了20155306 白皎 《网络攻防》 EXP8 Web基础相关的知识,希望对你有一定的参考价值。
20155306 白皎 《网络攻防》 EXP8 Web基础
一、问题回答
- 什么是表单
表单:一般用来收集用户的信息和反馈意见

表单包括两个部分:一部分是html源代码用于描述表单(例如,域,标签和用户在页面上看见的按钮),另一部分是脚本或应用程序用于处理提交的信息(如CGI脚本)。不使用处理脚本就不能搜集表单数据。表单由文本域、复选框、单选框、菜单、文件地址域、按钮等表单对象组成,所有的部分都包含在一个由标识符标志起来的表单结构中。表单的种类有注册表、留言薄、站点导航条、搜索引擎等。
- 浏览器可以解析运行什么语言
超文本标记语言:HTML
可扩展标记语言:XML
脚本语言:ASP、php、Script、javascript、VBScript、Perl、Python、ColdFusion、Java、JSP等。
- WebServer支持哪些动态语言
JavaScript、ASP、PHP、Ruby等脚本语言,ASP基于IIS WEB SERVER,是微软的服务器端脚本技术,PHP基于APACHE WEB SERVER,与ASP有几分类似,都是一种在服务器端执行的嵌入HTML文档的脚本语言。
二、实验步骤
(1)Web前端HTML
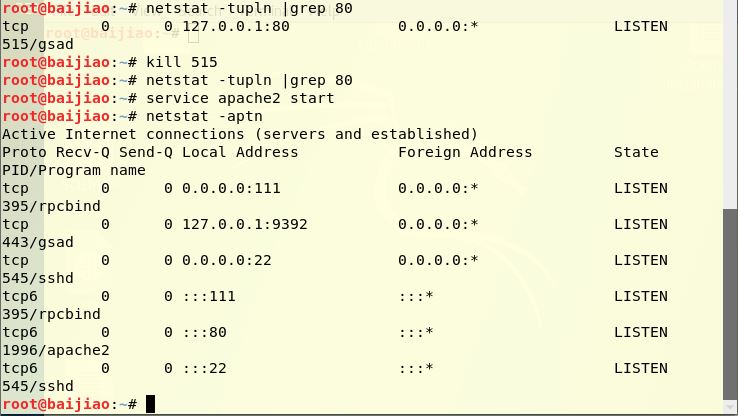
1.直接使用指令apachectl start打开Apache服务,使用netstat -aptn查看一下端口占用。用kill+进程ID杀死进程,Apache服务开启后,会打开了上次实验克隆的网页,说明我们Apache正常工作。
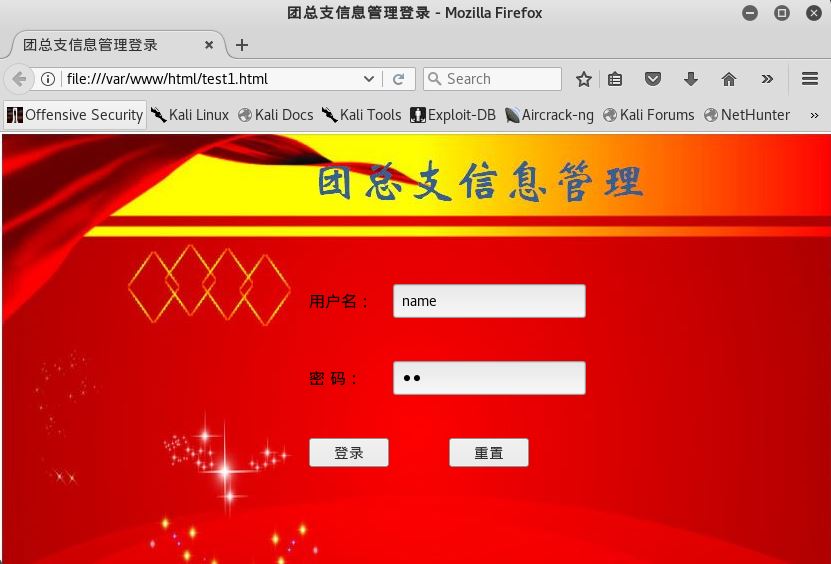
2.在/var/www/html目录下编辑test1.html:
<html>
<head>
<meta http-equiv="Content-Type" content="text/html; charset=utf-8">
<title>团总支信息管理登录</title>
</head>
<body style= "background: url(hong.JPG)">
	<div align="center" style="padding-top: 50px;">
		<form action="login" method="post" name="login" >
		<table  width="740" height="300"  >

		<tr height="30">
				<td colspan="2"></td>
			</tr>
			<tr height="1">
				<td width="40%"></td>
				<td width="5%">用户名:</td>
				<td><input type="text" value="name" name="userName" id="userName"/></td>
				<td width="30%"></td>
			</tr>
			<tr height="1">
				<td width="40%"></td>
				<td width="5%">密  码:</td>
				<td><input type="password" value="ps" name="password" id="password"/></td>
				<td width="30%"></td>
			</tr>
			<tr height="1">
				<td width="40%"></td>
				<td width="5%"><input type="submit" value="登录"/></td>
				<td align="center"><input type="button" value="重置" onclick="resetValue()"/></td>
				<td width="30%"></td>
			</tr>


		</table>
		</form>
	</div>
</body>
</html>
(2)Web前端javascip
JavaScript是一种属于网络的脚本语言,已经被广泛用于Web应用开发,常用来为网页添加各式各样的动态功能,为用户提供更流畅美观的浏览效果,通常JavaScript脚本是通过嵌入在HTML中来实现自身的功能的。
test2.html代码如下:
<html>
<head>
<meta http-equiv="Content-Type" content="text/html; charset=utf-8">
<title>团总支信息管理登录</title>
<script type="text/javascript">
	function resetValue(){
		document.getElementById("userName").value="";
		document.getElementById("password").value="";
	}
</script>

</head>
<body style= "background: url(hong.JPG)">
	<div align="center" style="padding-top: 50px;">
		<form action="test2login.php" method="post" name="login" >
		<table  width="740" height="300"  >

				<td colspan="2"></td>
			</tr>
			<tr height="1">
				<td width="40%"></td>
				<td width="5%">用户名:</td>
				<td><input type="text" value="name" name="userName" id="userName"/></td>
				<td width="30%"></td>
			</tr>
			<tr height="1">
				<td width="40%"></td>
				<td width="5%">密  码:</td>
				<td><input type="password" value="ps" name="password" id="password"/></td>
				<td width="30%"></td>
			</tr>
			<tr height="1">
				<td width="40%"></td>
				<td width="5%"><input type="submit" name="login" value="登录"onClick="return Login()" /></td>
				<td align="center"><input type="button" value="重置" onclick="resetValue()"/></td>
				<td width="30%"></td>
			</tr>


		</table>
		</form>
	</div>


	<script language="javascript">
    function Login(){
        var UName = document.login.userName.value ;
        var Pword = document.login.password.value ;
        if ((UName =="") || (Pword=="")){
            alert("用户名或密码为空!!!");
            return false ;
        }


    }
</script>
</body>
</html>
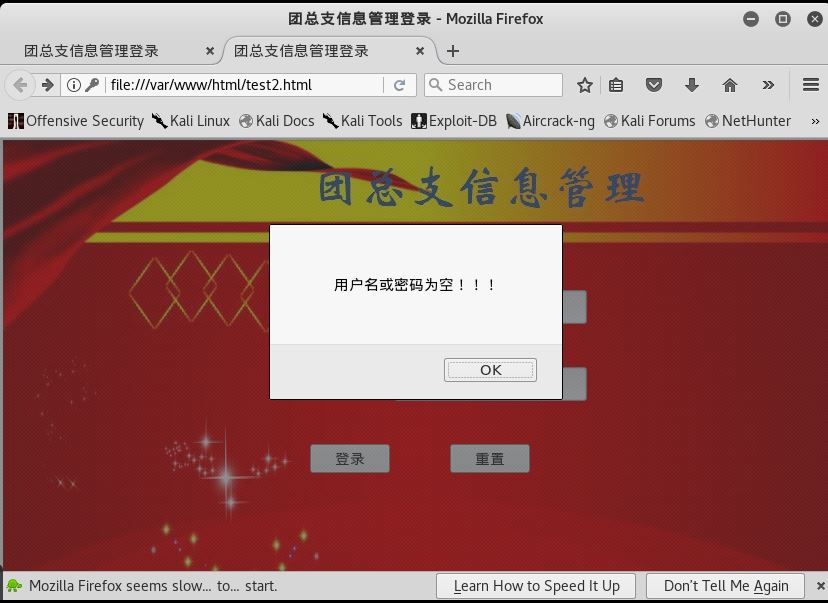
- 提示功能:若用户名或密码为空,则会出现下述警告。
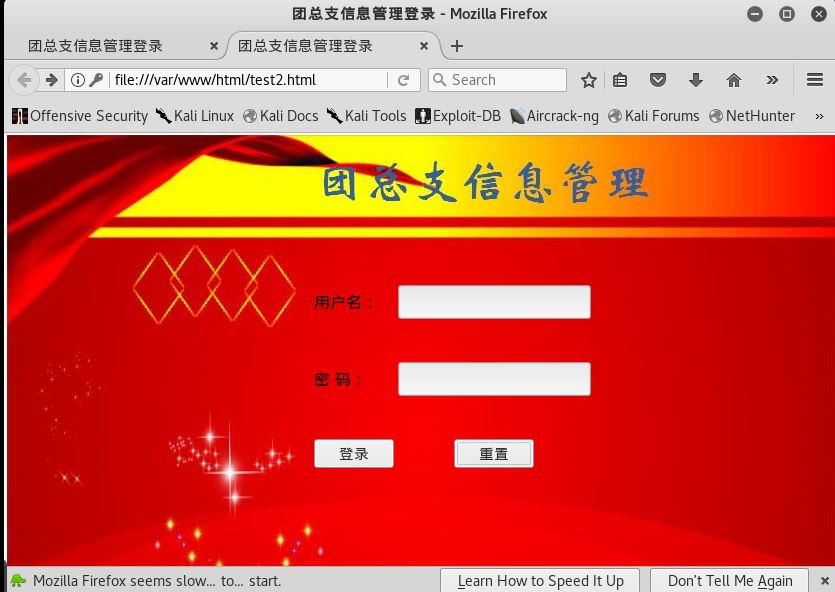
- 重置功能:直接按重置按钮,可以清空之前填入的用户名和密码。

可以看到,直接清空
(3)Web后端:mysql基础:正常安装、启动MySQL,建库、创建用户、修改密码、建表
- 开启sql服务/etc/init.d/mysql star
2.输入mysql -u root –p,并根据提示输入密码 ,默认密码为 p@ssw0rd ,进入MySQL。
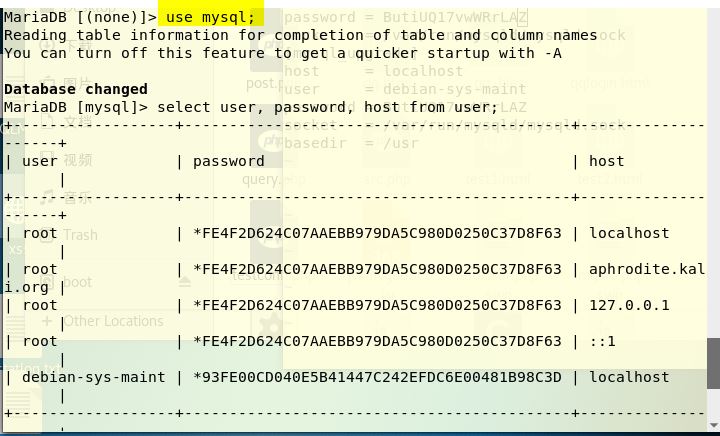
3.更改密码
- 输入use mysql;//选择mysql数据库
- 输入UPDATE user SET password=PASSWORD("新密码") WHERE user=\'root\';//更改密码
- 输入flush privileges;//更新权限
- 输入quit//退出
4.创建数据库
root@baijiao:/# mysql -u root -p//根据提示输入密码,默认密码为p@ssw0rd
Enter password:
Welcome to the MariaDB monitor.  Commands end with ; or \\g.
Your MariaDB connection id is 8
Server version: 10.1.26-MariaDB-1 Debian unstable

Copyright (c) 2000, 2017, Oracle, MariaDB Corporation Ab and others.

Type \'help;\' or \'\\h\' for help. Type \'\\c\' to clear the current input statement.


MariaDB [(none)]> use mysql;//选择mysql数据库
Reading table information for completion of table and column names
You can turn off this feature to get a quicker startup with -A

Database changed
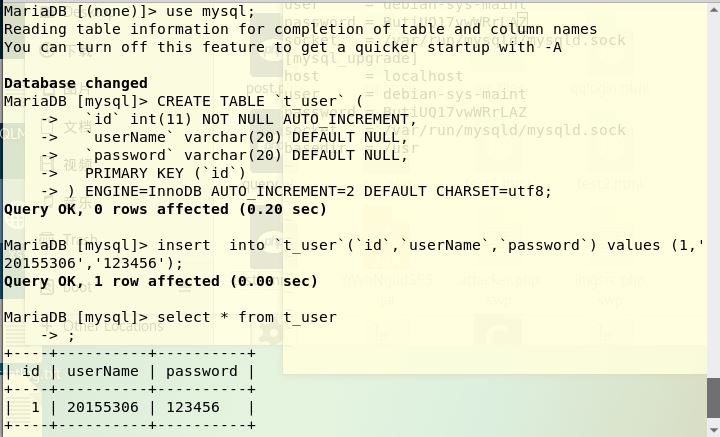
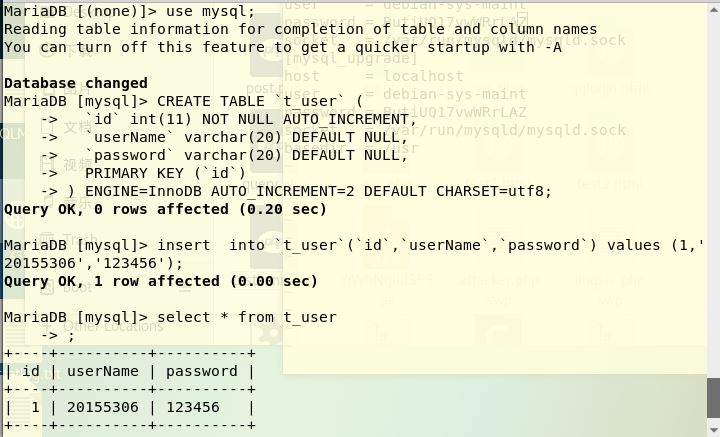
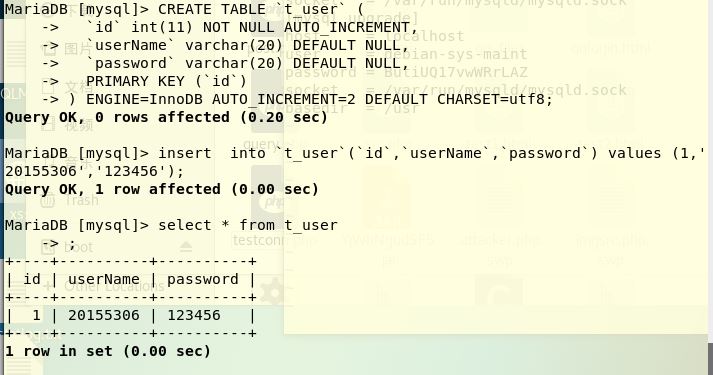
MariaDB [mysql]> CREATE TABLE `t_user` (
    ->   `id` int(11) NOT NULL AUTO_INCREMENT,
    ->   `userName` varchar(20) DEFAULT NULL,
    ->   `password` varchar(20) DEFAULT NULL,
    ->   PRIMARY KEY (`id`)
    -> ) ENGINE=InnoDB AUTO_INCREMENT=2 DEFAULT CHARSET=utf8;//create table 表名 (字段设定列表);建立数据表
Query OK, 0 rows affected (0.20 sec)

MariaDB [mysql]> insert  into `t_user`(`id`,`userName`,`password`) values (1,\'20155306\',\'123456\');//insert into 表名 values(\'值1\',\'值2\',\'值3\'...);插入数据
Query OK, 1 row affected (0.00 sec)

MariaDB [mysql]> select * from t_user
    -> ;//select * from 表名查询表中的数据
+----+----------+----------+
| id | userName | password |
+----+----------+----------+
|  1 | 20155306 | 123456   |
+----+----------+----------+
1 row in set (0.00 sec)

MariaDB [mysql]>
(4)Web后端:编写PHP网页,连接数据库,进行用户认证
PHP是一种通用开源脚本语言,语法吸收了C语言、Java和Perl的特点,主要适用于Web开发领域。它可以比CGI或者Perl更快速地执行动态网页。用PHP做出的动态页面与其他的编程语言相比,PHP是将程序嵌入到HTML文档中去执行,执行效率比完全生成HTML标记的CGI要高许多;PHP还可以执行编译后代码,编译可以达到加密和优化代码运行。
1.我们可以在/var/www/html目录下新建一个PHP测试文件。
<?php
  echo ($_GET["a"]);
  include($_GET["a"]);
  echo "i am 20155306!<br>";
?>
浏览器打开localhost:80/lxm_test.php?a=/etc/passwd可看到/etc/passwd文件的内容。
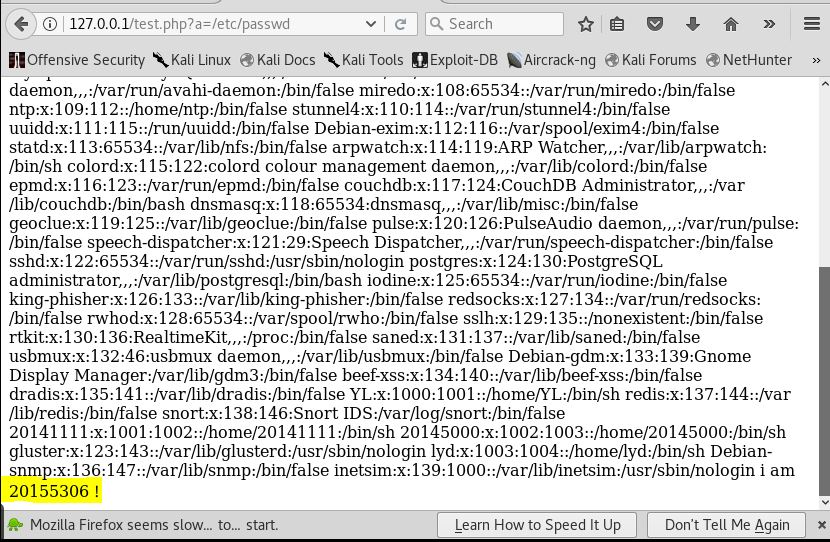
2.接下来,我们利用PHP和MySQL结合之前编的登录网页进行简单的用户身份认证。
test2login.php:
<?php

$uname=($_POST["userName"]);
$pwd=($_POST["password"]);

/* echo $uname; */

$query_str="SELECT * FROM t_user where userName=\'{$uname}\' and password=\'{$pwd}\';";

/* echo "<br> {$query_str} <br>";*/

$mysqli = new mysqli("127.0.0.1", "root", "20155306", "mysql");

/* check connection */
if ($mysqli->connect_errno) {
    printf("Connect failed: %s\\n", $mysqli->connect_error);
    exit();
}
echo "connection ok!";
/* Select queries return a resultset */
if ($result = $mysqli->multi_query($query_str)){
    if ($result->num_rows > 0 ){
        echo "<br> Wellcome login Mr/Mrs:{$uname} <br> ";

    } else {
        echo "<br> login failed!!!! <br> " ;
    }

    /* free result set */
    $result->close();
}


$mysqli->close();

?>
3.先将之前编的登录网页的test2.html代码中form的action属性改成test2login.php,再在火狐浏览器中输入localhost:8082/login_test.html访问自己的登录页面:[注:端口号根据自己情况不同来确定!]
4.用户名和密码写自己刚刚mysql数据库最后一步新增的那个用户名和密码,匹配成功则显示如下

5.若不匹配则显示如下

(5)最简单的SQL注入【永真式攻击、普通sql攻击】
SQL注入,就是通过把SQL命令插入到Web表单提交或输入域名或页面请求的查询字符串,最终达到欺骗服务器执行恶意的SQL命令。具体来说,它是利用现有应用程序,将(恶意的)SQL命令注入到后台数据库引擎执行的能力,它可以通过在Web表单中输入(恶意)SQL语句得到一个存在安全漏洞的网站上的数据库,而不是按照设计者意图去执行SQL语句。
1.永真式攻击
在用户名输入框中输入: \' or 1=1#,任意输入密码。

2.普通sql攻击
- 在用户名输入框中输入:
\';insert into users(id,userName,password) values(5,\'1553\',password("5306"));#
- 登录后,出现如下界面:
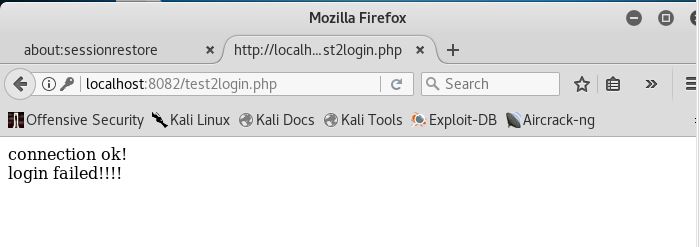
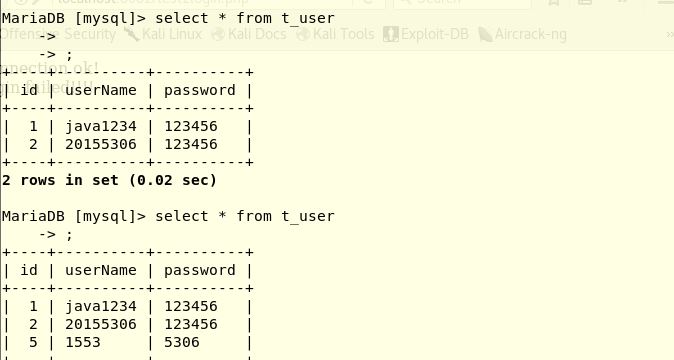
- 数据库中查询一下发现真的添加成功,如图所示对比说明插入成功:
- 使用刚才插入的用户名和密码进行登录,登录成功。

(6)XSS攻击
SS攻击:跨站脚本攻击(Cross Site Scripting),为不和层叠样式表(Cascading Style Sheets, CSS)的缩写混淆。故将跨站脚本攻击缩写为XSS。XSS是一种经常出现在web应用中的计算机安全漏洞,它允许恶意web用户将代码植入到提供给其它用户使用的页面中。比如这些代码包括HTML代码和客户端脚本。
xss类型一般分为三种:
第一种:反射型XSS

反射型XSS只是简单的把用户输入的数据“反射”给浏览器.也就是说需要诱使用户“点击”一个恶意链接,才能攻击成功。反射型XSS也叫作“非持久型XSS”

第二种:储存型XSS

储存型XSS会把用户输入的数据“储存”在服务器端。这种XSS具有很强的稳定性

第三种:DOM Based XSS
1.参考大家普遍的一个测试,在用户名输入框中输入 < img src="hong.png" />20155306 读取/var/www/html目录下的图片,但是总是出现下图界面,并没有出现图像。即使修改权限也没有用。
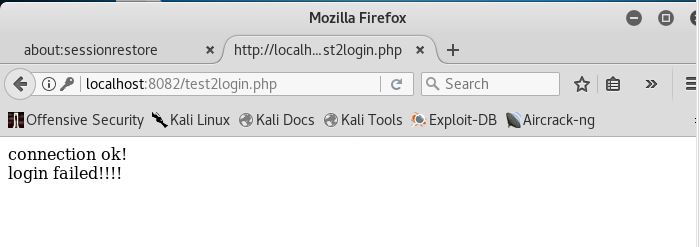
2.因此,我换了一个代码和方式去试一下XSS。在这里,我们使用反射型XSS,通过给别人发送有恶意脚本代码参数的URL,当URL地址被打开时,特有的恶意代码参数被HTML解析、执行。
- 假设一个页面把用户输入的参数直接输出到页面上。
<?php
    $input = $_GET["param"];
    echo "<div>".$input."</div>"
?>
- 正常情况下,用户提交数据会展示到页面中http://127.0.0.1/xss.php?param=This is a test!,得到下面结果:

在查看页面源代码,可以看到:<div>/This is a xss test!</div>
- 如果提交一段HTML代码:
http://127.0.0.1/xss.php?param=<script>alert(/This is a xss test!/)</script>,会发现,alert(/This is a xss test!/)在当前页面执行了。
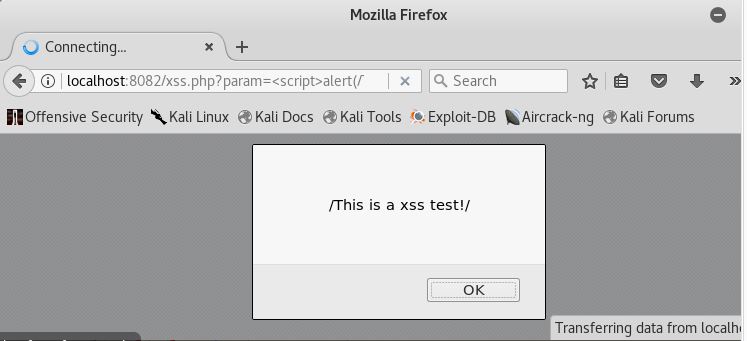
- 再查看源代码:
<div><script>alert(/This is a xss test!/)</script></div>
用户输入的的Script,脚本已经被写入页面中,这并不是开发者所希望看到的。这就是反射型XSS攻击的原理。
三、遇到的困难
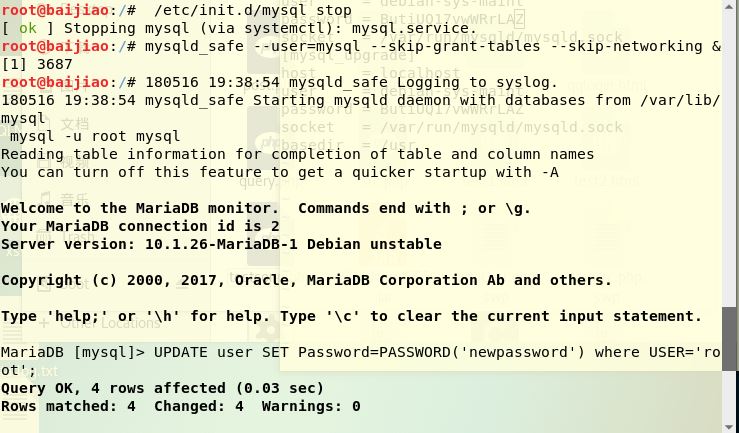
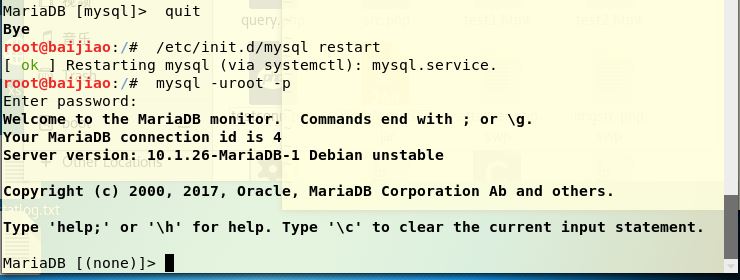
问题: Mysql中执行命令mysql -u root -p之后可能出现登录时提示ERROR 1045 (28000):的错误。

解决:通过百度,找到了解决办法如下,大家可以参考教程ERROR 1045 (28000)
root@baijiao:/#  /etc/init.d/mysql stop
[ ok ] Stopping mysql (via systemctl): mysql.service.
root@baijiao:/# mysqld_safe --user=mysql --skip-grant-tables --skip-networking &[1] 3687
root@baijiao:/# 180516 19:38:54 mysqld_safe Logging to syslog.
180516 19:38:54 mysqld_safe Starting mysqld daemon with databases from /var/lib/mysql
 mysql -u root mysql
Reading table information for completion of table and column names
You can turn off this feature to get a quicker startup with -A

Welcome to the MariaDB monitor.  Commands end with ; or \\g.
Your MariaDB connection id is 2
Server version: 10.1.26-MariaDB-1 Debian unstable

Copyright (c) 2000, 2017, Oracle, MariaDB Corporation Ab and others.

Type \'help;\' or \'\\h\' for help. Type \'\\c\' to clear the current input statement.

MariaDB [mysql]> UPDATE user SET Password=PASSWORD(\'newpassword\') where USER=\'root\';
Query OK, 4 rows affected (0.03 sec)
Rows matched: 4  Changed: 4  Warnings: 0

MariaDB [mysql]>  FLUSH PRIVILEGES;
Query OK, 0 rows affected (0.01 sec)

MariaDB [mysql]>  quit
Bye
root@baijiao:/#  /etc/init.d/mysql restart
[ ok ] Restarting mysql (via systemctl): mysql.service.
root@baijiao:/#  mysql -uroot -p
Enter password:
Welcome to the MariaDB monitor.  Commands end with ; or \\g.
Your MariaDB connection id is 4
Server version: 10.1.26-MariaDB-1 Debian unstable

Copyright (c) 2000, 2017, Oracle, MariaDB Corporation Ab and others.

Type \'help;\' or \'\\h\' for help. Type \'\\c\' to clear the current input statement.

MariaDB [(none)]>  select user, password, host from user;
ERROR 1046 (3D000): No database selected
MariaDB [(none)]>
MariaDB [(none)]> use mysql;
Reading table information for completion of table and column names
You can turn off this feature to get a quicker startup with -A

Database changed
MariaDB [mysql]> select user, password, host from user;
+------------------+-------------------------------------------+--------------------+
| user             | password                                  | host               |
+------------------+-------------------------------------------+--------------------+
| root             | *FE4F2D624C07AAEBB979DA5C980D0250C37D8F63 | localhost          |
| root             | *FE4F2D624C07AAEBB979DA5C980D0250C37D8F63 | aphrodite.kali.org |
| root             | *FE4F2D624C07AAEBB979DA5C980D0250C37D8F63 | 127.0.0.1          |
| root             | *FE4F2D624C07AAEBB979DA5C980D0250C37D8F63 | ::1                |
| debian-sys-maint | *93FE00CD040E5B41447C242EFDC6E00481B98C3D | localhost          |
+------------------+-------------------------------------------+--------------------+
5 rows in set (0.00 sec)

MariaDB [mysql]> UPDATE user SET password=PASSWORD("20155306") WHERE user=\'root\';
Query OK, 4 rows affected (0.00 sec)
Rows matched: 4  Changed: 4  Warnings: 0

MariaDB [mysql]> flush privileges;
Query OK, 0 rows affected (0.00 sec)
以上是关于20155306 白皎 《网络攻防》 EXP8 Web基础的主要内容,如果未能解决你的问题,请参考以下文章