Windows server 2008系统中的文件夹共享权限问题
Posted
tags:
篇首语:本文由小常识网(cha138.com)小编为大家整理,主要介绍了Windows server 2008系统中的文件夹共享权限问题相关的知识,希望对你有一定的参考价值。
急!明天就得解决~
前期工作:我已经在Windows server 2008系统中,除了原administrator用户,又添加了4个用户,分别是u1 u2 u3 u4;并在D盘建了1个总的共享文件夹AllFiles,里面有5个共享文件夹no1 no2 no3 no4 no5。(注:用户u1是老总的,对应老总的no1文件夹;用户u2 u3 u4属于员工的,分别对应员工no2 no3 no4文件夹;而no5文件夹属于公共文件夹,是所有用户都可以进去存与取的。)
现在要求是:1:用户administrator能全部访问所有共享文件夹
2:用户u1能像用户administrator一样访问所有共享文件夹
3:用户u2能访问no2文件夹以及no5公共文件夹,而不能访问其它文件夹。
用户u3能访问no3文件夹以及no5公共文件夹,而不能访问其它文件夹。
用户u4能访问no4文件夹以及no5公共文件夹,而不能访问其它文件夹。
4:各用户在对应的文件夹中要享有一切的控制。
5:在每个用户自己的机子桌面上如何建立一个快捷方式,进去后是要显示no1 no2 no3 no4 no5所有文件夹的。但只能进入自己相应的文件夹以及公共文件夹内,如果进其它用户文件夹,则应显示无权限或无法访问。
请问大虾们:我该怎么做?我希望帮助我的人不要嫌麻烦,把每一个步骤都写清楚,这样我可以明天去操作。
先谢谢了~我急等!如果我有哪里没说清楚的,可以提出来,我补充。非常感谢!如果明天在操作中遇到问题的话,我会上线补充。如果能全部解决的话,我会追加分的。
一楼的lking21th 你好,我不想用软件,就是想知道你说的第一种方法具体是如何设置的,然后去操作。
至于Serv-U这个软件,我会之后再去了解的。非常感谢!
1.把文件夹所在分区转换或格式化为NTFS格式,然后在各个文件夹的“共享和安全”属性里根据用户的不同分别设置;
2.还可以用FTP方式。在服务器上用Serv-U建一个FTP服务器,设置好相应的文件夹和用户名及目录访问规则,然后在客户端用FlashFXP等工具登录
我建议你用第二种方式,因为第一种需要从客户端直接打开服务器上的文件夹,访问时可能会遇到安全限制方面的问题,还有设置上比第二种难一点;FTP方式要容易的多,Serv-U这个软件是全中文的,很好理解,你不要着急,找个教程看懂的话,最多半个小时就搞定了
鉴于时间和精力的关系我不能说得太细,靠你自己了,祝顺利! 参考技术A 我来说一下,希望能帮到你,跟1楼一样你先得把所有分区转换为NTFS格式,以no1为例:找到该文件夹,右键属性,在安全选项卡里例出了所有用户和组对这个文件夹的权限,添加u1用户,给它相应的权限。在共享属性里也要给u1用户相应的权限,因为共享权限和NTFS权限在一起时取两者的交集。祝你成功 参考技术B 百度hi我。
Upgrade Windows Server 2016 to Windows Server 2019
Pre-Upgrade
Upgrade path:
Windows Server 2016 can be upgraded to Windows 2019 in a single upgrade process.
Support:
In-place Upgrade is supported for Windows Server 2016 on physicaL hardware, and in Virtual Machines. Public and private cloud companies also support In-place Upgrade on Windows Server 2016 Virtual Machines to upgrade to Windows Server 2019 – check with your cloud provider.
Alternative:
Migrate (re-deploy) applications and data on a clean install of Windows Server 2019.
Limitations:
- For the smoothest upgrade experience, if you‘ve deployed software-defined datacenter (SDDC) features like Software-Defined Networking (SDN) or Storage Spaces Direct, you are encouraged to wait for validated hardware from the Windows Server Software-Defined (WSSD) program to become available. The first wave of validated hardware is expected very soon; in mid-January 2019. Until then, please evaluate Windows Server 2019 using the Windows Insider edition, or call Microsoft support for recommendations on how to proceed.
- Windows Servers configured to “Boot from VHD” cannot be upgraded using In-place Upgrade.
Planning for In-place Upgrade
Before proceeding with In-place Upgrade, collect the following information:
-
Is there a target or goal timeframe for upgrading this server?
-
Is this a production-critical server?
-
Is there a maintenance window for upgrading this server?
-
Is there enough time for a test upgrade on an identical or similar non-production server?
-
Who uses this server? Internal users, external users, or both? Have they been informed of the upgrade or maintenance?
-
Is there an inventory of what is running on the server? Check the following:
-
Windows Server Roles and Features
-
Microsoft applications: SQL Server, SharePoint Server, Exchange Server, etc.
-
3rd-Party applications: SAP, Oracle, DB2, etc.
-
Is the server joined to an Active Directory domain?
-
Are any of the server disks BitLocker protected?
-
Is the server part of a Failover Cluster?
Note that Cluster OS Rolling Upgrade can be used to upgrade Windows Server 2016 Failover Clusters to Windows Server 2019.
-
-
How often is the server backed-up? Have backups ever been successfully restored (applied) to the server or applications?
-
What backup software is used?
-
If In-place Upgrade is not successful and the server needs to be rebuilt, are the Windows Server and application install media available?
Although it is rare, In-place Upgrade can fail and there should be a plan in-place for this possibility, to minimize server downtime and maintain SLAs.
-
Is the server fully patched? It is strongly recommended that the server is fully patched prior to In-place Upgrade.
-
Run systeminfo.exe and save the output:
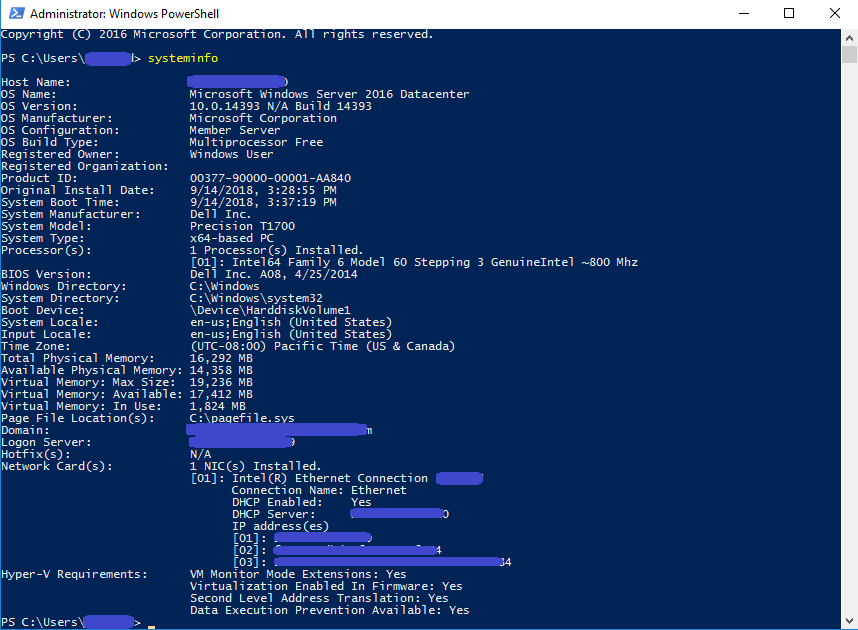
-
Run ipconfig /all and save the output:
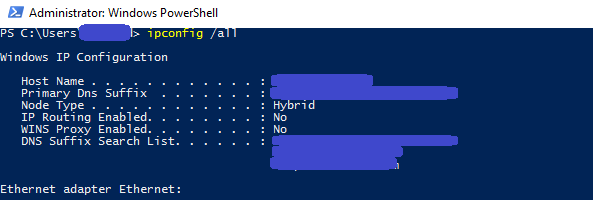
-
Run Get-WindowsFeature and save the output:
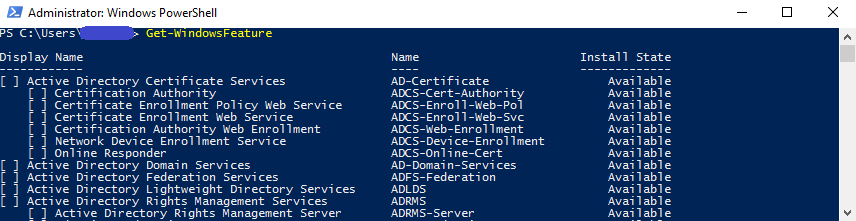
-
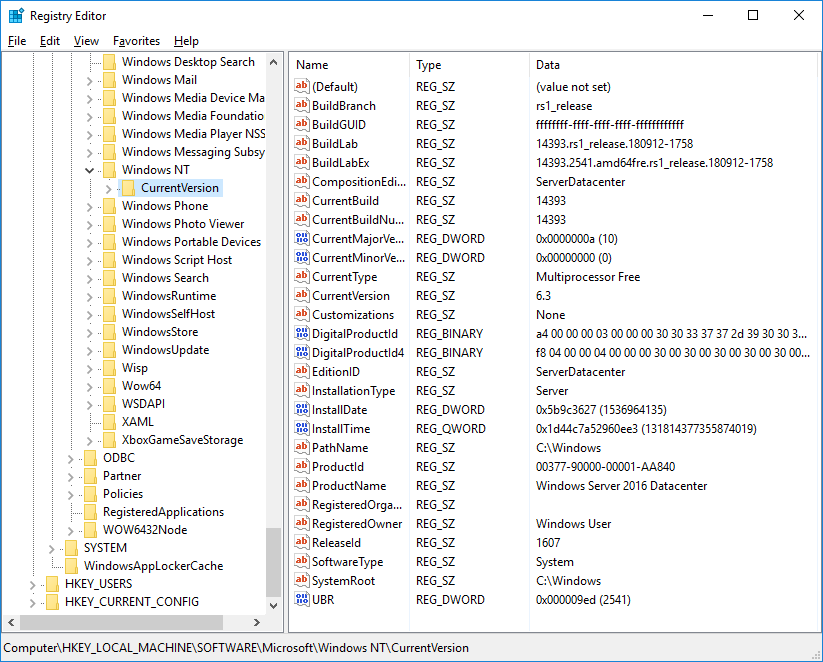
Run RegEdit and capture the value of the the HKEY_LOCAL_MACHINESOFTWAREMicrosoftWindowsNTCurrentVersion hive – this will show the exact version (BuildLabEx) and edition (EditionID) of Windows Server:
Before proceeding with the In-place Upgrade
-
Backup the Operating System, Applications, and Virtual Machines.
-
Shutdown, Quick Migrate, or Live Migrate all Virtual Machines running on the server - Virtual Machines cannot be running on the server during In-place Upgrade.
Upgrade
-
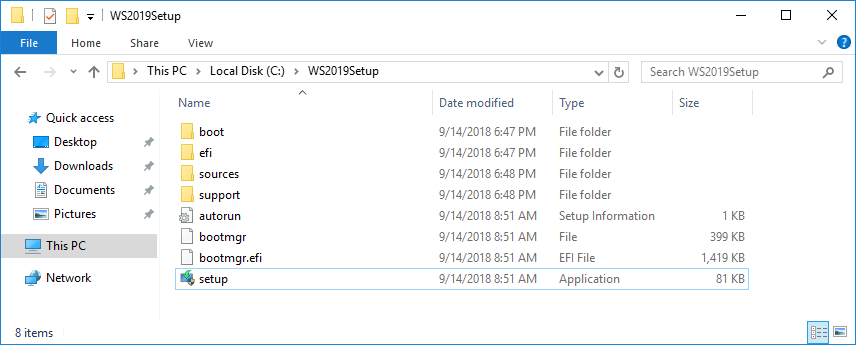
Locate the setup media for Windows Server 2019
-
Run setup.exe by double-clicking it:
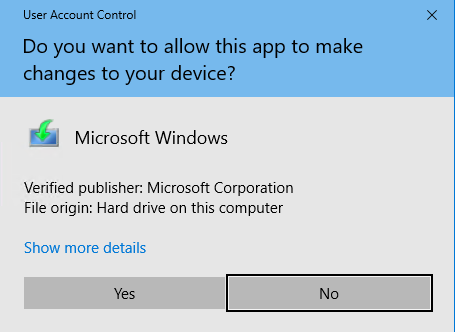
-
Click Yes to enable setup to proceed:
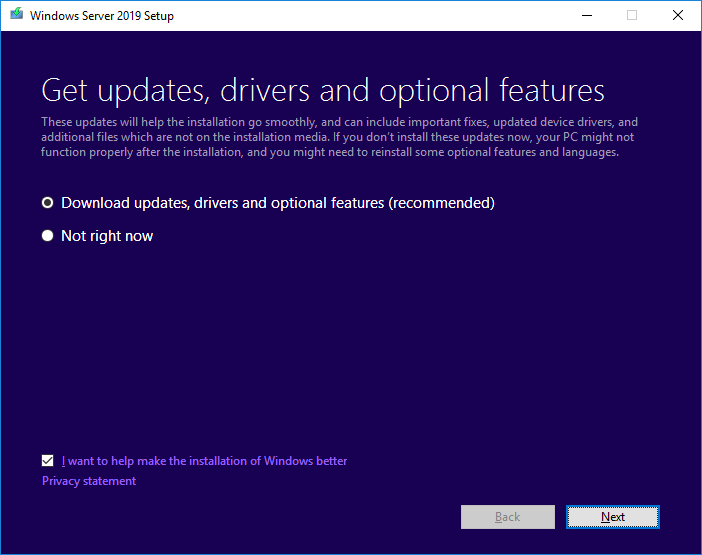
-
For internet-connected devices, we recommend the Download updates, drivers and optional features option. Click Next:
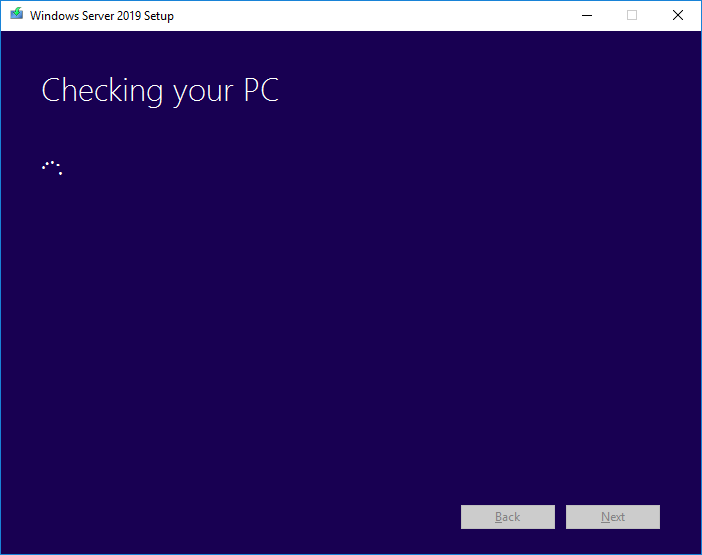
-
Setup will check the configuration of your computer – please wait:
-
Depending on the distribution channel that you received Windows Server media from (Retail, Volume License, OEM, ODM, etc.) and the license for the server, you may be prompted to enter a licensing key to proceed.
-
You will be prompted to select the image of the Edition to upgrade to. Then click Next:
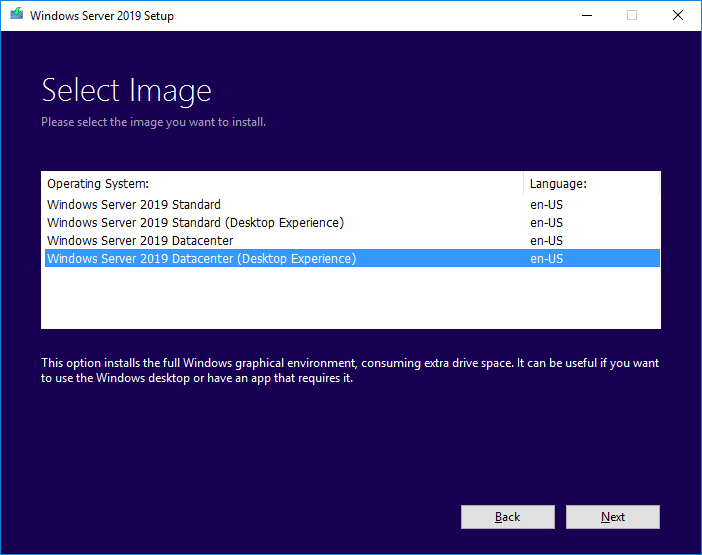
-
Depending on the distribution channel that you received Windows Server media from (Retail, Volume License, OEM, ODM, etc.) you may be presented with different license agreements. Click Accept:
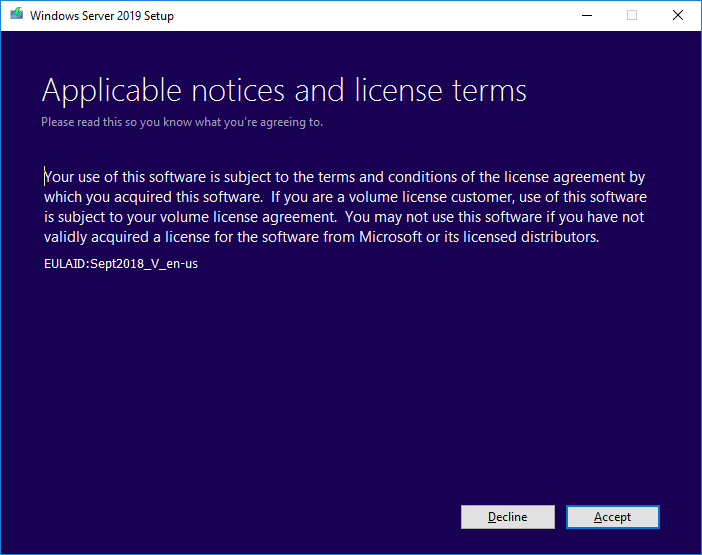
-
For In-place Upgrade, select Keep personal files and apps, and then click Next:
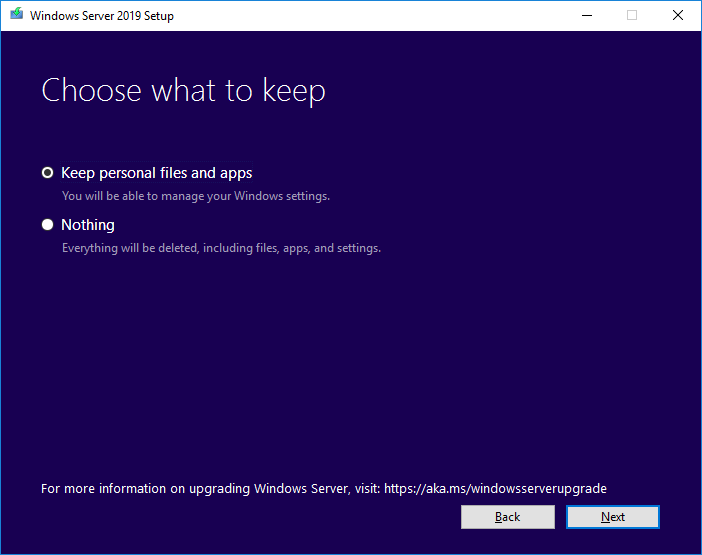
-
When the analysis phase is complete, setup will prompt you to click Back to change choices, or to proceed with the In-place Upgrade. Click Install:
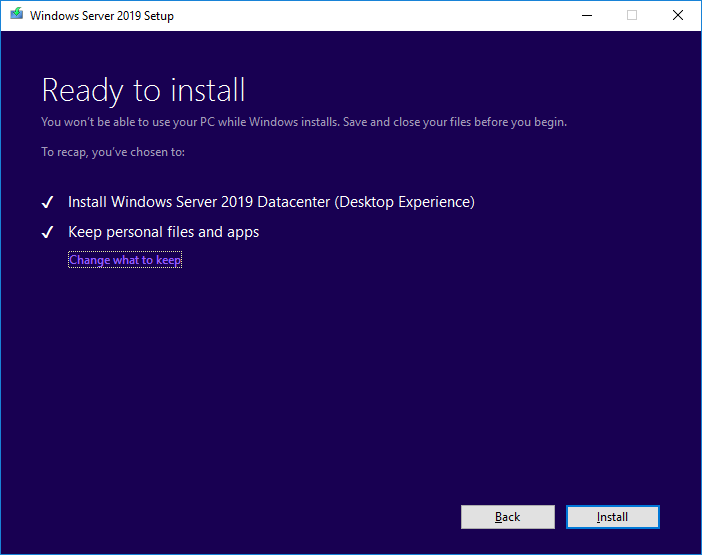
-
Setup will proceed with the In-place Upgrade, and then the server will reboot:
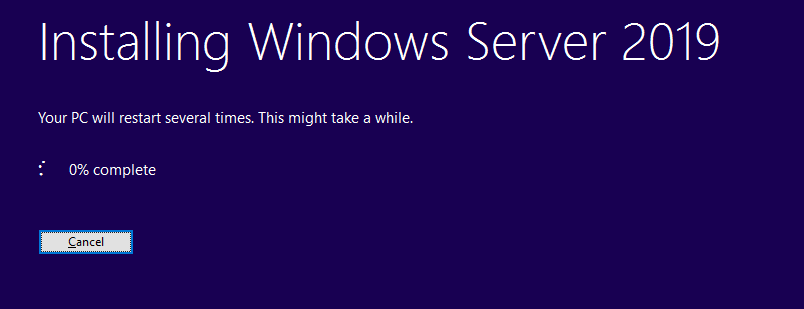
- Setup will complete and the server will reboot.
Post-upgrade
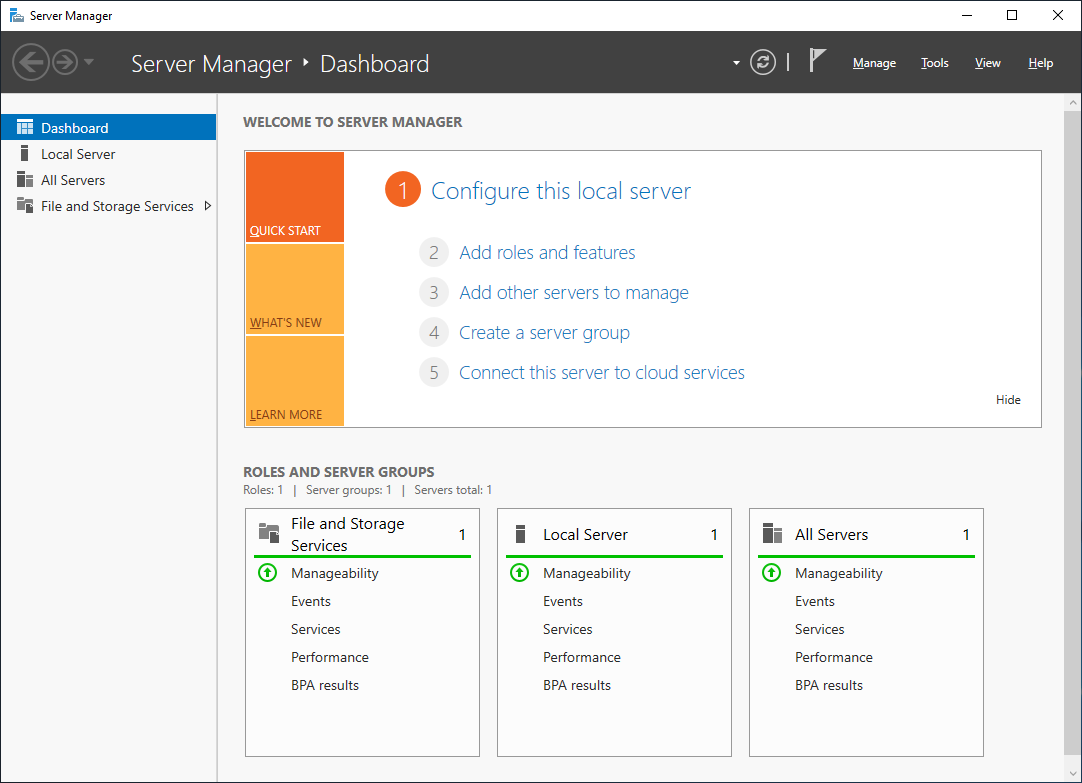
-
After Setup has completed installing and rebooted the sever, login to check that the server has been successfully upgraded. If you selected Windows Server 2019 Standard or Datacenter Desktop Edition, you should see the Server Manager window:
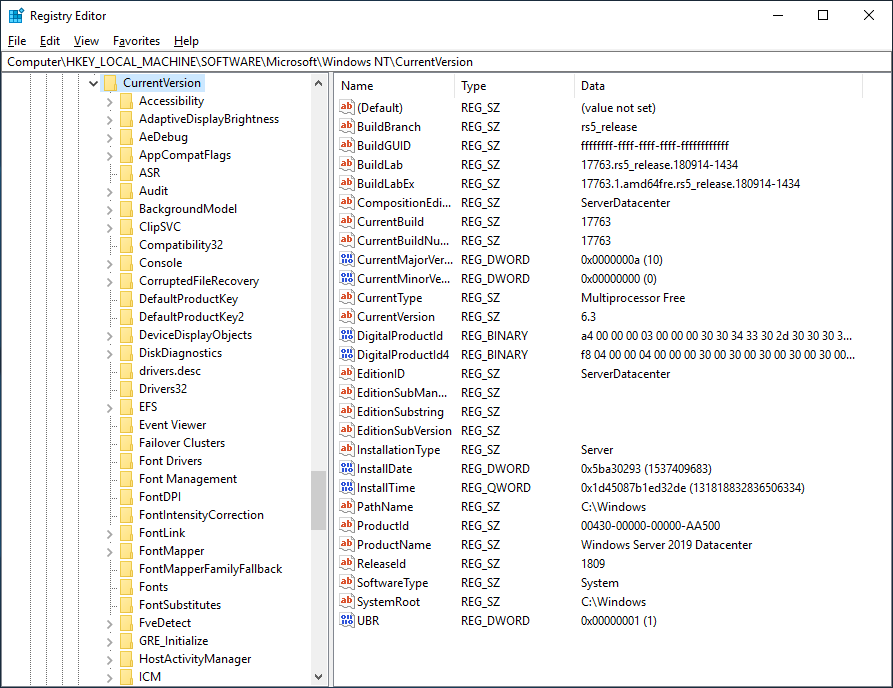
-
Run RegEdit and check the value of the HKEY_LOCAL_MACHINESOFTWAREMicrosoftWindowsNTCurrentVersion hive – the version should be successfully updated to Windows Server 2019.
-
Check that applications are running and that client connections to the applications succeed.
-
If you believe that there has been an issue upgrading you server, you should copy and Zip the %SystemRoot%Panther (usually C:WindowsPanther) directory and contact support.
以上是关于Windows server 2008系统中的文件夹共享权限问题的主要内容,如果未能解决你的问题,请参考以下文章