cobbler一键部署centos7.4(脚本)
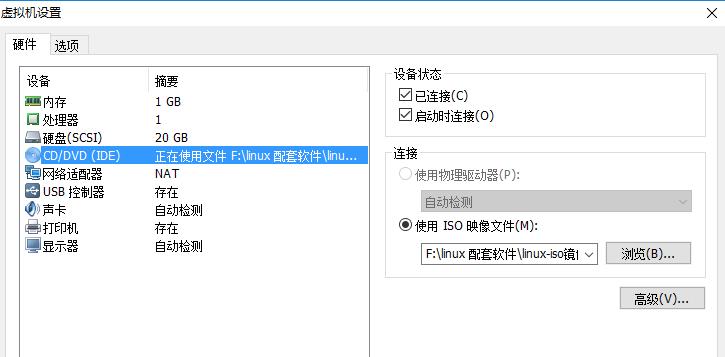
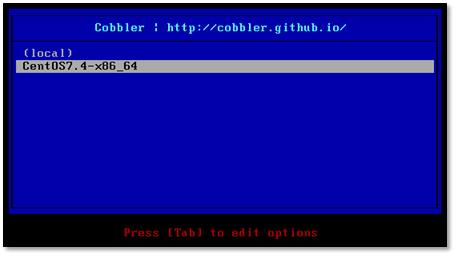
Posted 篇首语:本文由小常识网(cha138.com)小编为大家整理,主要介绍了cobbler一键部署centos7.4(脚本)相关的知识,希望对你有一定的参考价值。 执行脚本之前你需要做四件事 1. 关闭防火墙 2.关闭selinux 3.配置163或者阿里云的 yum源 4.上传centos7.4的镜像如下图 登陆 网页时 一定要以https方式访问 账号密码都是 cobbler 上传镜像 3个rsync的进程执行结束代表上传结束 慢慢等吧。 启动虚拟机 启动虚拟机即可发现会有cobbler的选择界面 选择CentOS7.4即可进行安装。 以上是关于cobbler一键部署centos7.4(脚本)的主要内容,如果未能解决你的问题,请参考以下文章
[root@cobbler ~]# cat auto_install_cobbler.sh  #将网段换成自己的网段即可
#!/bin/bash
subnet=10.0.0
ip=`hostname -I|awk \'{print $1}\'`
pwd=`openssl passwd -1 -salt \'benjamin\' \'redhat\'`

yum install cobbler cobbler-web dhcp tftp-server pykickstart httpd xinetd -y &>/dev/null
systemctl start xinetd.service ;systemctl enable xinetd.service
systemctl start httpd ;systemctl enable httpd
systemctl start cobblerd.service; systemctl enable cobblerd.service
sed \'s#yes#no#g\' /etc/xinetd.d/tftp -i
sed -i "s/server: 127.0.0.1/server: $ip/" /etc/cobbler/settings
sed -i "s/next_server: 127.0.0.1/next_server: $ip/" /etc/cobbler/settings
sed -i \'s/manage_dhcp: 0/manage_dhcp: 1/\' /etc/cobbler/settings
sed -i "s#$1$mF86/UHC$WvcIcX2t6crBz2onWxyac.#${pwd}#" /etc/cobbler/settings
systemctl start rsyncd.service ;systemctl enable rsyncd.service
cobbler get-loaders    &>/dev/null

systemctl restart cobblerd.service

count=`cobbler check|wc -l`
echo ${count}
if [ ${count} -eq 7 ];then
 echo "/etc/cobbler/settings this config have problem  please check it !"
 echo "if you think you are right,pls use command | cobbler check"
 exit 1
fi
cd /etc/cobbler/
ls
sed -i "s/192.168.1/${subnet}/g" /etc/cobbler/dhcp.template
cobbler sync

echo "before import you need upload your iso image!"
mount /dev/cdrom /mnt &>/dev/null
cobbler import --path=/mnt --name=CentOS-7.4 --arch=x86_64
ls /var/www/cobbler/ks_mirror
echo "cobbler is  deploy successful"
echo "login https://${ip}/cobbler_web to option"


