动态背景插件Backstretch
Posted 缘琪梦
tags:
篇首语:本文由小常识网(cha138.com)小编为大家整理,主要介绍了动态背景插件Backstretch相关的知识,希望对你有一定的参考价值。
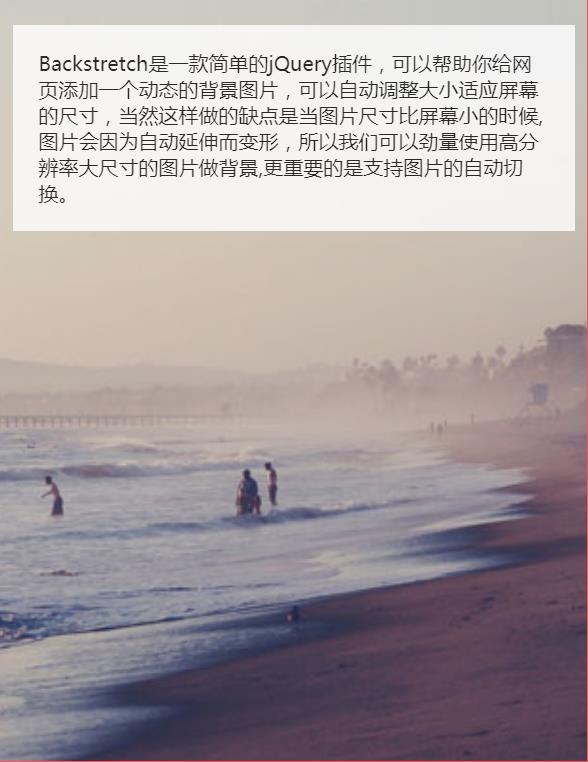
Backstretch是一款简单的jQuery插件,可以帮助你给网页添加一个动态的背景图片,可以自动调整大小适应屏幕的尺寸,当然这样做的缺点是当图片尺寸比屏幕小的时候,图片会因为自动延伸而变形,所以我们可以劲量使用高分辨率大尺寸的图片做背景,更重要的是支持图片的自动切换。
http://www.jquery-backstretch.com/
https://github.com/jquery-backstretch/jquery-backstretch
具体用法
<script type="text/javascript" src="/jquery.min.js"></script>
<script type="text/javascript" src="/jquery.backstretch.min.js"></script>
指定元素实现背景切换,设置切换的图片与图片切换的间隔时间duration,代码以下:
<script>
$(function () { $(".container").css({ opacity:0.8 });
//设置透明度
 $.backstretch([
          "Images/backgrounds/101_1.jpg",
          "Images/backgrounds/44_1.jpg"
          ], { duration: 3000, fade: 750 });
 });
</script>
完整代码
<html>
<head>
    <title>Backstretch</title>
    <style>
.container {
   width: 90%;
   margin: 20px auto;
   background-color: #FFF;
   padding: 20px;
 }
 </style>
<script src="https://code.jquery.com/jquery-3.2.1.min.js"></script>
<script type="text/javascript" src="jquery.backstretch.js"></script>
</head>
<body>
<div class="container">Backstretch是一款简单的jQuery插件,可以帮助你给网页添加一个动态的背景图片,可以自动调整大小适应屏幕的尺寸,当然这样做的缺点是当图片尺寸比屏幕小的时候,图片会因为自动延伸而变形,所以我们可以劲量使用高分辨率大尺寸的图片做背景,更重要的是支持图片的自动切换。

</div>
</body>
<script>
$(function(){$(".container").css({ opacity:0.8 });
//设置透明度
     $.backstretch([
     "Images/pic.jpg",
     "Images/pic2.jpg"
     ], { duration: 3000, fade: 750 });
});
</script>
</html>

<script src="//ajax.googleapis.com/ajax/libs/jquery/1.8.3/jquery.min.js"></script>
<script src="jquery.backstretch.min.js"></script>
<script>
  // Backstrech作为body元素的背景
  $.backstretch("path/to/image.jpg");

  //你也可以将它添加到块级元素
  $(".foo").backstretch("path/to/image.jpg");

  // 如果你的元素用CSS定义了一个背景图像,你可以完全省略参数
  $(".foo").backstretch();

  // 或者一系列的图片组
  $(".foo").backstretch([
    "path/to/image.jpg",
    "path/to/image2.jpg",
    "path/to/image3.jpg"
  ], {duration: 4000});

  // 或者,从可以接受分辨率并提供该分辨率的最佳图像的网址进行加载
  $(".foo").backstretch([
    "path/to/image.jpg?width={width}&height={height}"
  ]);

  // 或者,从一组分辨率中自动选择。
   //宽度是图像的宽度,并且算法选择最佳拟合.
  $(".foo").backstretch([
    [
      { width: 1080, url: "path/to/image1_1080.jpg" },
      { width: 720, url: "path/to/image1_720.jpg" },
      { width: 320, url: "path/to/image1_320.jpg" }
    ],
    [
      { width: 1080, url: "path/to/image2_1080.jpg" },
      { width: 720, url: "path/to/image2_720.jpg" },
      { width: 320, url: "path/to/image2_320.jpg" }
    ]
  ]);

  //如果我们想为不同的像素比率指定不同的图像:
  $(".foo").backstretch([
    [
      // Will only be chosed for a @2x device
      { width: 1080, url: "path/to/image1_1080@2x.jpg", pixelRatio: 2 },

      // Will only be chosed for a @1x device
      { width: 1080, url: "path/to/image1_1080.jpg", pixelRatio: 1 },

      { width: 720, url: "path/to/image1_720@2x.jpg", pixelRatio: 2 },
      { width: 720, url: "path/to/image1_720.jpg", pixelRatio: 1 },
      { width: 320, url: "path/to/image1_320@2x.jpg",  pixelRatio: 2 },
      { width: 320, url: "path/to/image1_320.jpg", pixelRatio: 1 }
    ]
  ]);

  //如果我们希望浏览器自动从一组分辨率中进行选择,
   //考虑设备的像素比例
  $(".foo").backstretch([
    [
      // Will be chosen for a 2160 device or a 1080*2 device
      { width: 2160, url: "path/to/image1_2160.jpg", pixelRatio: "auto" },

      // Will be chosen for a 1080 device or a 540*2 device
      { width: 1080, url: "path/to/image1_1080.jpg", pixelRatio: "auto" },

      // Will be chosen for a 1440 device or a 720*2 device
      { width: 1440, url: "path/to/image1_1440.jpg", pixelRatio: "auto" },
      { width: 720, url: "path/to/image1_720.jpg", pixelRatio: "auto" },
      { width: 640, url: "path/to/image1_640.jpg", pixelRatio: "auto" },
      { width: 320, url: "path/to/image1_320.jpg", pixelRatio: "auto" }
    ]
  ]);
</script>
以上是关于动态背景插件Backstretch的主要内容,如果未能解决你的问题,请参考以下文章